Jeff's (SRman) work bench and projects
Posted

Site staff
Regards
Alan
Born beside the mighty GWR.
Alan
Born beside the mighty GWR.

Posted

Full Member
Incidentally, I did try fitting the cab doors but they didn't like the curves on my layout so they were taken off again!
 Last edit: by SRman
Jeff Lynn,
Amateur layabout, Professional Lurker, Thread hijacker extraordinaire
Amateur layabout, Professional Lurker, Thread hijacker extraordinaire
Posted
Site staff
Regards
Alan
Born beside the mighty GWR.
Alan
Born beside the mighty GWR.
Posted
Full Member

I have now commenced fitting the 'wooden' brake shoes, adding them to the rigging already started last week. I have only done one side as this is extremely fiddly work and I was getting tired and clumsy as work progressed! The brake shoes are not yet fastened to the floor so look a little uneven in the photo. While the metal parts are being soldered together, the upper parts have been passed through holes drilled in the plastic floor and will be araldited into place when I am ready.


I intend adding a thickness of plastic inside the brake blocks.
After the brake gear is finished, the next thing will be fitting handrails and footboards, glazing, then finish the painting and add transfers. It shouldn't be too long before it is complete. :)
I noted that Bachmann's Collectors Club has announced a set of three SECR liveried open wagons, so have ordered a set online already! they will sit nicely in the existing train with the ex-LCDR brake van bringing up the rear.
Last edit: by SRman
Jeff Lynn,
Amateur layabout, Professional Lurker, Thread hijacker extraordinaire
Amateur layabout, Professional Lurker, Thread hijacker extraordinaire
Posted
Full Member
A quick check on the programming track, allocating the number 83 and it was off on the main lines. It went backwards so I swapped the orange and grey wires to the brushes, put the body back on, tweaked the inertia/momentum settings (CV3 = 20 and CV4 = 15) and off it went, very, very smoothly (it was already a good runner on DC power).
It's nice to get an instant result that works! :cool:
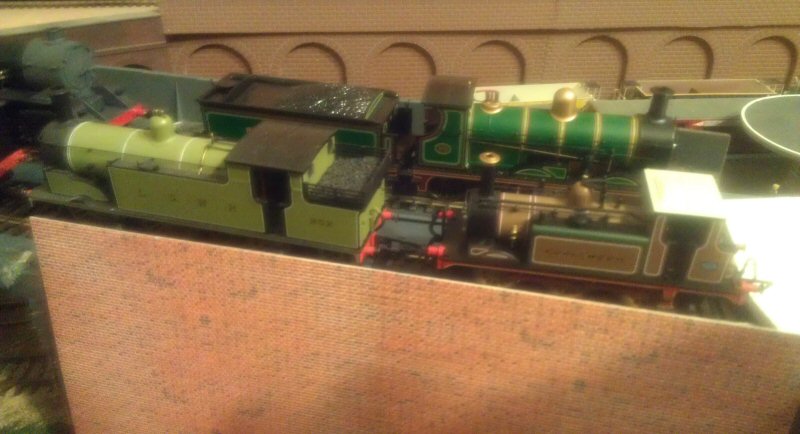
Photo taken before fitting the decoder.
Last edit: by SRman
Jeff Lynn,
Amateur layabout, Professional Lurker, Thread hijacker extraordinaire
Amateur layabout, Professional Lurker, Thread hijacker extraordinaire
Posted
Full Member


Last edit: by SRman
Jeff Lynn,
Amateur layabout, Professional Lurker, Thread hijacker extraordinaire
Amateur layabout, Professional Lurker, Thread hijacker extraordinaire
Posted
Full Member
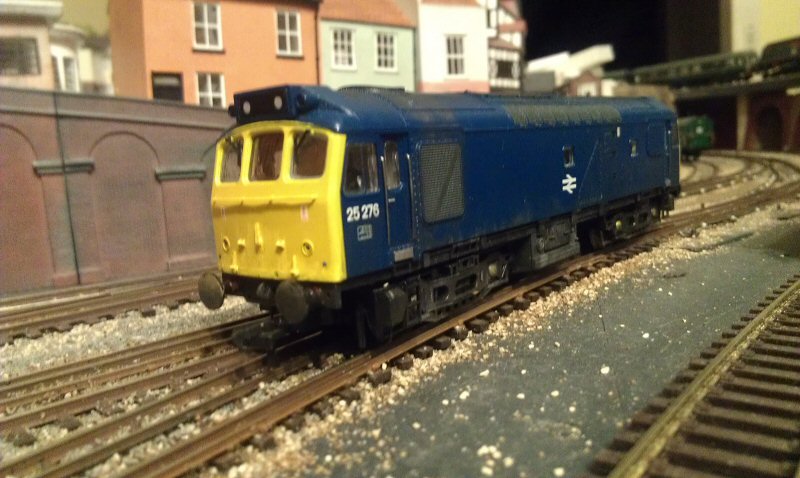
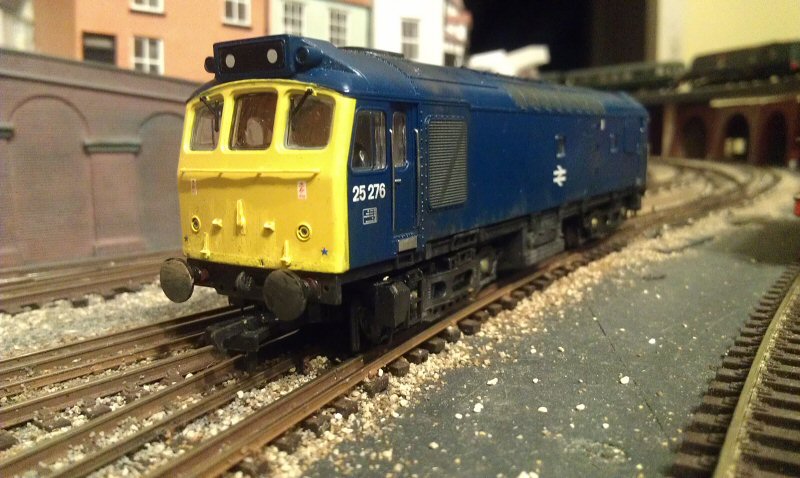
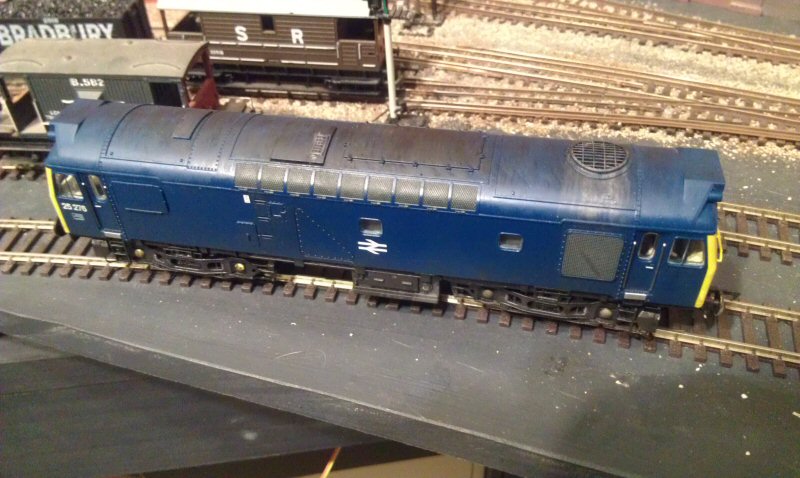
I performed a quickie weathering job on a Bachmann blue class 25, 25 276. This locomotive has lost its sound-fitted chassis to a green example. I have used the usual weathering mixes of Humbrol #62 leather, #85 coal black and metallic gunmetal, plus some matt varnish.
I have tried to be subtle on the sides, leaving some nearly pristine blue showing. As a visual displacement technique, I have carried the yellow of the front up over the centre part of the gutter to disguise the too-flat curve over the windscreens. While this is fairly obvious in the photos, it works reasonably well to the naked eye at normal viewing distances.
I may, at some stage, renumber this locomotive into the pre-TOPS style.

Jeff Lynn,
Amateur layabout, Professional Lurker, Thread hijacker extraordinaire
Amateur layabout, Professional Lurker, Thread hijacker extraordinaire
Posted
Full Member
I immediately started a cleanup of the flash and moulding pips. I then took the Stanier body off its chassis and removed the front pony truck. The rear tender coupling was removed and the wires snipped back near the decoder socket. The Socket circuit board was filed down as per the instructions and the inside of the body cleaned up with a milling tool in the Dremel.
I carefully drilled out the chimney, starting with a small pilot hole then progressively larger drills until I got to the right diameter.
The result is not quite sitting correctly yet, currently being about a milimetre (or less) high at the back. I'll sort that out before long. The wiring will be simplified as I eliminate the capacitor and remove the tails of the wires to the tender coupling.
Anyhow, here are a few photos of the start I have made.
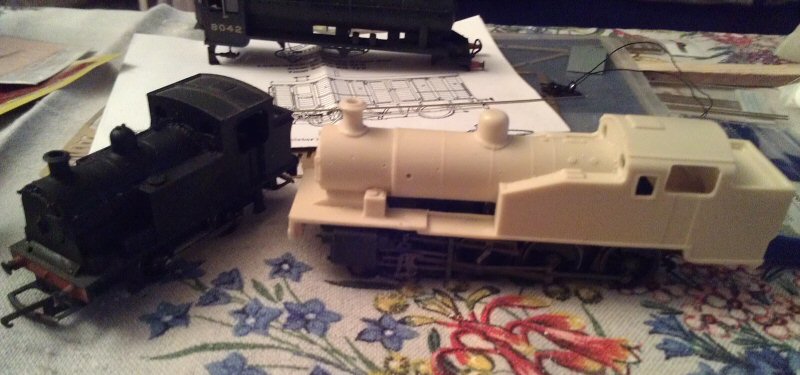
Note in the first two shots the Stanier 8F body can be seen in the background In the foreground is an old Triang 'Nellie' locomotive that I have decided to upgrade and detail a little as a 'quickie' project. It has gained Romford wheels and axles cascaded from my Craftsman 07 diesel shunter - that received new Markits wheels and axles. I also shaved off all the moulded handrails on the boiler and smokebox and replaced them with proper handrail knobs and wire. I had to make up a replacement baseplate from 40 thou plastic as the original disintegrated! Because I have used insulated wheels on both sides, I have to rig new and extra pickups then I may even stick a decoder into it as the chassis will no longer be live. I'll post pics of that in my when I have better light for photography - the black model with black details doesn't show up well at present. Maybe I should have taken a few pics before hitting it with the black paint!
Jeff Lynn,
Amateur layabout, Professional Lurker, Thread hijacker extraordinaire
Amateur layabout, Professional Lurker, Thread hijacker extraordinaire
Posted
Full Member


It is not runnable right now because I still have the blanking plug out of it - I will have to do the wiring mods mentioned before and maybe even shift the DCC socket board altogether for clearance reasons.
Jeff Lynn,
Amateur layabout, Professional Lurker, Thread hijacker extraordinaire
Amateur layabout, Professional Lurker, Thread hijacker extraordinaire
Posted
Full Member


Edited to substitute a clearer photograph for the second picture.
Last edit: by SRman
Jeff Lynn,
Amateur layabout, Professional Lurker, Thread hijacker extraordinaire
Amateur layabout, Professional Lurker, Thread hijacker extraordinaire
Posted
Full Member
There was also one more little wire handrail/handle on the smokebox door to do and that can also be seen in this latest photo.

The G16 has also had my crude Milliput clack valves added.
I also have a sheet of etched brass spectacle frames, the rear ones with coal bars on, from Mainy Trains and will use these on the Z. I have also used a set on the Triang 'Nellie' project which can be sen at the rear of the photo.
Jeff Lynn,
Amateur layabout, Professional Lurker, Thread hijacker extraordinaire
Amateur layabout, Professional Lurker, Thread hijacker extraordinaire
Posted
Full Member

I will try to carve a little more detail into the clack valves rather than leaving them as semi-shaped blobs!
Last edit: by SRman
Jeff Lynn,
Amateur layabout, Professional Lurker, Thread hijacker extraordinaire
Amateur layabout, Professional Lurker, Thread hijacker extraordinaire
Posted
Full Member
I temporarily installed a small Gaugemaster decoder, gave it the number 950 and took it to show off at PCM's BRMA meeting yesterday. It ran rather hesitantly because of the various disturbances to wiring and valve gear and a little resin dust in the pickups but after a quick lubrication job and dust off it is now (as I type) trundling around my layout.
I still need to add lamp irons and the smokebox number plate and then, I think, it will be ready for painting in plain BR black.


I have not, as yet, figured out how I am going to affix couplings!
Jeff Lynn,
Amateur layabout, Professional Lurker, Thread hijacker extraordinaire
Amateur layabout, Professional Lurker, Thread hijacker extraordinaire
Posted
Full Member
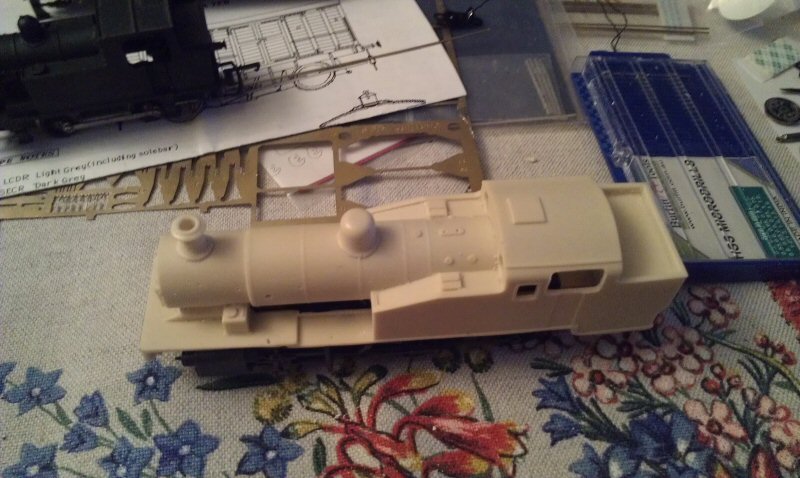
"At last I can apply the first coat of primer!" I thought. I duly dismantled the body from the chassis and sprayed it with a coat of grey primer (which is still drying as I type this) and I looked at the pictures again and then I spotted the two handrails on the footplate above the front steps! Ahhh well. They'll just have to be added afterwards.
Anyway, here are two more pics showing where I am at now, but just before the painting started.


Jeff Lynn,
Amateur layabout, Professional Lurker, Thread hijacker extraordinaire
Amateur layabout, Professional Lurker, Thread hijacker extraordinaire
Posted
Full Member


The black needs a light sanding down to eliminate a few lumps and blemishes before a second coat then some brush painting to pick out buffer beams (in red, of course!) and other details. There are still a couple of wire pipes to add around the whistle area, with the whistle and safety valves to be added last in unpainted brass.
Jeff Lynn,
Amateur layabout, Professional Lurker, Thread hijacker extraordinaire
Amateur layabout, Professional Lurker, Thread hijacker extraordinaire
Posted
Full Member
The GAP G16 4-8-0T can be seen in both photos as well.


Last edit: by SRman
Jeff Lynn,
Amateur layabout, Professional Lurker, Thread hijacker extraordinaire
Amateur layabout, Professional Lurker, Thread hijacker extraordinaire
Posted
Site staff
Regards
Alan
Born beside the mighty GWR.
Alan
Born beside the mighty GWR.
Posted
Full Member
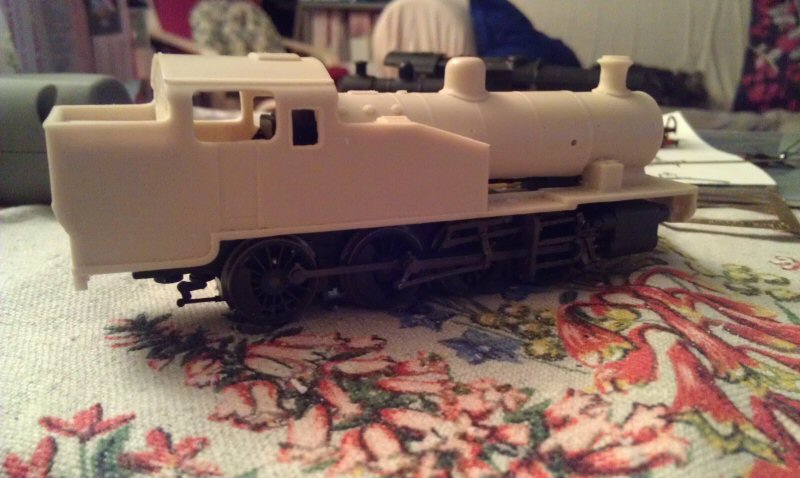
Last night I added the crests and numbers, then this morning I added glazing to the cab and ground away a couple of spots inside to allow the body to sit slightly lower on the chassis. It still looks a little high but is better than it was.


The main tasks left to do involve the whistle and attached pipework and the safety valves, plus a little painting of details and some weathering.
Last edit: by SRman
Jeff Lynn,
Amateur layabout, Professional Lurker, Thread hijacker extraordinaire
Amateur layabout, Professional Lurker, Thread hijacker extraordinaire
Posted
Full Member
I added a partition of plasticard inside the back of the cab to separate the lower bunker from the cab area - visible from some angles looking into the cab.
Coal has been added to the bunker (some of it is still loose in the photos as I haven't shaken it out again) - an underlayer of IKEA coal followed by a layer of real coal.


Jeff Lynn,
Amateur layabout, Professional Lurker, Thread hijacker extraordinaire
Amateur layabout, Professional Lurker, Thread hijacker extraordinaire
Posted
Inactive Member
Last edit: by bike2steam
1 guest and 0 members have just viewed this.