Bluebell Workbench,
Posted
Full Member
Kit Bashing, modifications, kit building.
It's been a fair while since I have posted any updates on this thread, as there has been no comments or interest so I don't post any big long updates. So only a very short update.Q-Class
Now complete and has been running for nearly 2 months, still looking to improve the chassis in terms of pickups, or a replacement RTR 4 Chassis which would run more reliably but nothing has been found at this time, so looking at options.
U-Class
Motor has been fitted, Gibson sprung pickups have been fitted to this kit to see if it improves the consistency of the power pickup from the wheels, chassis and wheels have been painted and motion is still being finished off. Awaiting delivery for new pony truck wheels for this U and the Finecast U.

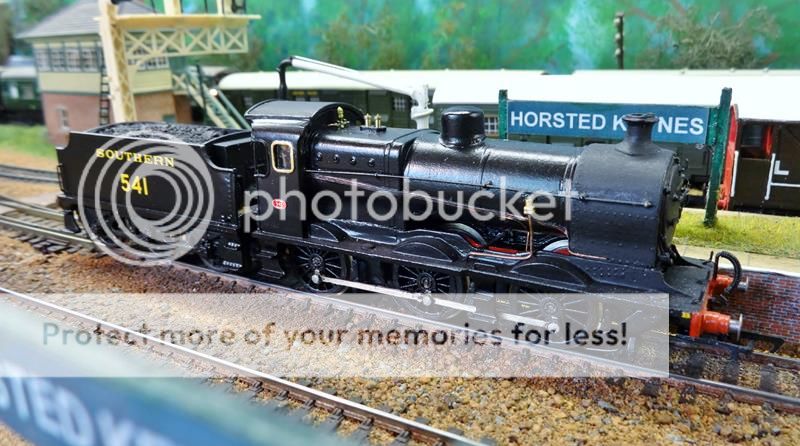
Hornby - DOG
I have had the detailing pack arrive in early June, and have also changed the bogie wheels, so my model is now fully detailed, I have also swapped and replaced the smoke deflectors for spare HD ones. I have also replaced the plastic for the reverser rod as it was rather bent so have changed it for brass.


Hornby - Coronation
I also purchased a Coronation to convert / rename to Duchess of Hamilton, and also detail the cab ect… this was quite a quick job and was complete in about a week.


Bachmann - Lord Nelson
Still being worked on and various details added, next will be the drain cocks which I had hoped to get a spare detail pack for an N15 but sadly Hornby no longer appear to be producing these so will have to make them from scratch. A new Markits chimney has been fitted which is a big improvement on the old.
Rolling stock:
As seen on the other threads, 3D printed coaches Met's and GN Saloon have been complete and will be on show tomorrow.. and hopefully running as a complete set.

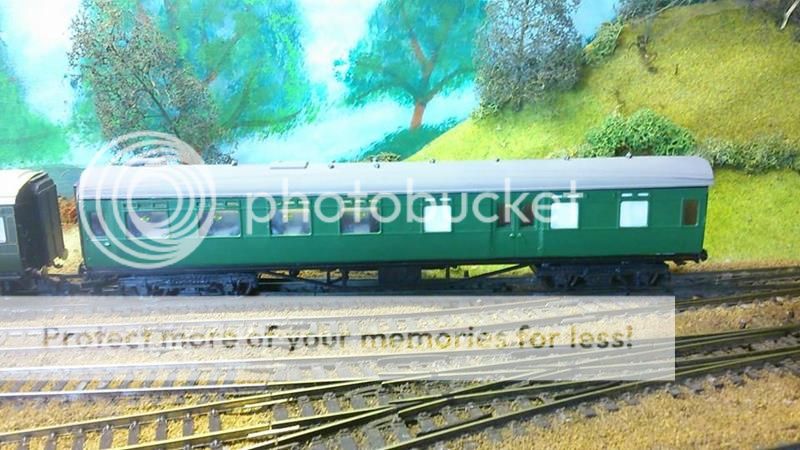
Latest arrival has been a Ian Kirk kit, Maunsell 1st Restaurant Car / Dining Saloon, kit had already been built but I had plans to take the sides and put them on a spare Hornby body and chassis, so it could work with the rest of the Maunsell coaches from Hornby. Coach has had some work done now and the sides are now on the spare body, and chassis, but still requires some bits and pieces to finish it, so on the look out for broken / damaged coaches.

Another kit, an EX-SECR Luggage (PMV / PLV) van by Parkside was constructed and complete in June, and is now complete apart from it's couplings which seem to be sold out so having to wait from Bachmann's delivery in August / September.


Posted
Full Member

This is only a small project but one of detail never the less. The 45xx tooling is quite an old tooling so some details are moulded on such as the smoke-box dart which has been some debate on recent Hornby models and how it looks.
I picked up a Prairie from the London Transport museum last month, as I wanted something to run my Metropolitan Coaches with, but before I did any work on it I did do a small YouTube review which is on YouTube.
The model differs slightly to the actual L.150 but it is a fictional livery as prairies were never on the underground network so who’s to say it’s right or wrong… but either way it’s not quite right to what it’s wearing today.
Also missing from the model is the westing house pump on the side of the smoke-box which was fitted before heading off to Poland a few years ago.
So first job removing the moulded smoke-box door handle which is quite easy and simple to do, using a knife and just following the curve of the smoke-box just cut off and file back any remains, and then drill a 2mm hole in the centre for the fitting of the turned Gibson Handles or smoke-box dart.


Front of the smoke-box was then sprayed Satin Black and once dry the smoke-box in its entirety would be painted matt black.
Next the westing house pump, again another Gibson product a brass casting was used for this and the bottom half was slightly modified with plastic strip to create the serrated casting on the outside. 2 mountings were made up of plasticard again to glue on to the side of the smoke-box
2 holes were drilled in the ends of the water tank as the pipe work runs behind the tank to the cab. The pipes were made from copper wire 0.5mm and were soldered in to the end of the brass westing house casting.
A small 0.5mm hole was drilled in the smoke-box for the exhaust pipe of the pump which goes in to the smoke-box just above the handrails.


Before the pump was fitted there was some light painting required on the model as when I was looking over the model for review I found some areas were very poorly painted, especially around the filled caps for the tank the firebox top and around the boiler band, as well as around the safety valve bonnet…. So this was fixed with some paint I mixed.
I removed the boiler lining, running plate lining, step lining, and also cylinder lining these were removed as L.150 doesn’t have any lining in these areas.
Once dry the pump was installed on the side of the smoke-box.
I did also (not that anyone would notice) I painted the back head as well, and added crew, and real coal a bit later to finish…

Posted
Full Member
In a slight change to my write ups this has been written up as a PDF as a Magazine was interested so I have left it in PDF format.
After this I have several other Cambrian kits to build, and hopefully next year I will start looking in to brass kits.
https://drive.google.com/file/d/0B_s5cq6YuU...0NYWVZkWXM/view
Posted

Full Member
Many years ago I built a white metal N gauge kit onto a Farish chassis, I really must pick up a 00 one to try.
Cheers
Andy
Andy
Posted
Full Member
Good thing is I still have plenty of kits to build just finishing off another Isle of Wight O2 tank at the moment, then on to more wagons and vans ect…
Thanks for reading.
Posted
Full Member
This compeitition only runs for 1 month….. so all in all it's quite a tight turn around to do all this project in 4 weeks.
Anyway enjoy.
February Forum competition 2015
For this competition I intend in using most skills I have used on this forum to date, so this may or may not work, but It’s been in development for nearly a year… so fingers crossed.
I had a choice of a few projects from plastic kits, Vans, wagons, to a brass coach kit which won’t be finished till at least March time due to paints ect…
Looking at everyone else's projects / entries I thought of opening up an old project something I have not worked on since January last year, which will use a bit of everything I have done, from 3D printing to scratch building, and some kit boding…
When doing some research in to most things Southern, and Bulleid locos I came across a design that was never made, or was changed to meet the Southern’s requests.

This was the original design from Bulleid for the Merchant Navy class loco, With Bulleid working under Gresley I think you can probably see what his design was based on? Bulleid's first suggestion was for an eight-coupled locomotive with a 4-8-2 wheel arrangement for the heavily loaded Golden Arrow and Night Ferry Continental express trains, although this was quickly modified to a 2-8-2 equipped with a Helmholtz "Bissel bogie" – a system already successfully applied on the Continent. However, both proposals for eight-coupled locomotives were resisted by the Southern Railway's Chief Civil Engineer, so a new 4-6-2 Pacific design was settled upon instead.
For this little competition, with a few small changes, I have decided to build the second design 2-8-2 design of the Merchant Navy.
Specs:
- 3D print Chassis block: Using parts from a spare Hornby chassis, with the same wheel spacing.
- Body: Using a spare Merchant Hornby Tender with scratch built parts, and Dapol’s kit for the main loco body modifications needed.
I have a finished design for the chassis which was generally finished from January 2014, and never got round to test printing it or testing it, so might as well dust it off and give it a go.
In the next edition of how not to build a Bulleid loco, I will go through the design of the chassis and the changes that were made from the original drawing.
Posted
Inactive Member
Best of luck with the competition.
Derek.
Posted
Full Member
Part2
3D printing – Chassis
The chassis is based on a Hornby un-rebuilt bullied chassis purchased from ebay for around £30, this was key as it gives me the motor, wheels, most of the motion, cylinders, slide bars, and all the measurements I need to start off.
As mentioned the idea to build this was taken in December 2013, the first chassis being completed in January 2014 which is where it stayed till now. I reopened the file in early Jan to understand what is needed, and what is still to be finished; it wasn’t far off being complete.
The chassis has been drawn using Google sketch up, and checked over for errors with Netfabb.


Changes:
The first 2 adjustments were wheel spacing, the gearbox also needed some work in terms of where the locations were for the 2 gear shafts, I also changed the location of the one of the two sprung axles, having a larger wheel base, I moved the front axle to which was designed to be sprung and moved it to the rear, so both rear axles would be sprung.


A test print has been ordered, so I can understand if anything else needs adjusting, as it has been designed with the idea of it working, or at least the hope of it working.
Posted
Inactive Member
What sort of 3-D printer would be needed for that kind of job.
Cheers,
Derek.
Posted

Full Member
There are so many hints and tips and how to's in this thread for loco scratchbuilders too. Bravo.
Looking forward to seeing the "not a Merchant Navy" come to life.
cheers
Marty
Posted
Full Member
Yes have done some 3D printing before, well quite a bit if i'm honest I just haven't posted any here I don't think.
The printers I use generally are UK based, called a 3D print Hub, which locates local printers in the UK, which are mainly PLA / ABS based, which I have used for this project. The one in the end I used Visijet PXL which is powder based, and fused together.
Feb 10th
A test print arrived, quality wasn’t great, but it gave me an idea of what was right and wrong… The print cost £6 so pretty cheap, printed in PLA by an Ultimaker 2.
The gear box surprisingly works… which was surprising!
The general design idea, works, but only works when someone measures it correctly, sadly I made an error on the positioning of the slide bar and cylinder recesses on the top of the chassis meaning another weeks delay.

I have now since changed the front end completely to copy the Hornby chassis, also the slidebar and cylinder mounting has moved forward, even though I am not entirely sure why these were out of position in the first place… anyway all has been changed so the next print should be ok.

The second more refined chassis, should arrive Friday / Saturday… so hopefully I can assemble it and then start on the body bodging :)
Posted
Full Member
So print number 2, arrived a bit later than expected as I hoped to be starting on the body this week, but It arrived today (Tuesday) Much happier with the print, and also happy that I actually measured it correctly in terms of cylinders and slide bar placement.
This was printed on a different printer quite similar to WSF but with out the flexible part, its also has a bit more weight to it which is good for traction.

The print, with the Sprung axles boxes, which will be positioned at the rear, plus the motor mount bracket.
I decided to put all the connection rods on also to check spacing and if the chassis would roll which it appears to do, wheel spacing was ok, I have a number of spare spacers and crankpins so putting this together was quite straight forward.


As you can see by size comparison with the U class in the back ground it's rather large…
I hope to try get all the electrics working by end of the day, the plastic Dapol kits should be here tomorrow for starting of the body work brought from a very good shop called New Railway Modellers… sure I have heard of that place somewhere before…
Posted
Full Member
cheers
Marty
Posted
Full Member
Body building?
The chassis was tested on a rolling road to check the gearbox ran ok and everything worked and ran ok. The rear sprung axle was bodged in to work until an addition spring has arrived which is now on order.
The chassis was taken apart cleaned and sprayed matt black.


With the chassis checked and working, although still awaiting some final parts to finish the underneath and the last axle, progress now can be switched to the body.
2 Dapol kits were ordered on Monday, and arrived on Wednesday, I needed 2 kits to make up the extended casing on this loco due to the additional wheel / length. C048 is the code for the 2 kits used Battle of Britain un-rebuilt Bulleid, costing about £8.50 each I think it was.

Work began on assessing which bits were what, and looking at how to do some modifications of course, me being me wasn’t just going to construct the kit… oh no, but improve, and add detailing parts to it, so removing some of the plastic moulded detail.
In the first night of construction I made the front half of the body, cutting the first 2 sides just about in half so the top would overhang so that the back end could be glued to something at least. The air scoop which I call it the slit above the smoke-box door was channelled out again just attention to detail.


As you can see from the above photo the smoke-box door, has had its door handle and smoke-box grab handle removed as well as the number plate putting it back in to SR state. Lubrication pipes also removed will be replaced with copper wire.
On to the back end of the casing, the second sides were cut 15mm behind the deflectors, and a small section cut out of the front of the cab, to adjust to a Merchant Navy type cab.


The replacement of a flat piece of casing from the remaining piece cut off from the front will be used to fill the gap. A piece of plasticard is used to join the 2body sides together also enables them to be level and straight.
With the spare piece of casing scarfed in all this are needs is some filled to create a nice sweeping curve up to the window.


The Same process was done for the other side, now on to the more tricky part, attaching the body to the chassis..
Using another part of the kit, the underside of the body I removed the ash pan off the rear to use it for a place for the chassis to hook in to.


I built out of plasticard a central pillar for the 2 prongs on the chassis to fit between, with another section across the top to stop the chassis / body dropping. As you can see still some parts need finishing off on the body which will be done once everything is dry.


That's all for now, further detailed changes on the body over the weekend.
Posted
Full Member
As you can see from last time there were some holes around the cab that needed filling up, I managed to patch up the holes with plasticard and fill the front with Humbrol filler, which turned out quite well, still some finishing off to do in this area.
After studying some photos to me the body flairs if you like which drop down at the front around the cylinders and around the cab didn’t look to be long enough to me, so using some plasticard I had to hand 1.5mm thick, I extended it by 3mm.


Once the glue was dry I filled in the gaps and let the filler harden over night. The ends of the flared section will curve round to meet the main body running over the wheels. On the front end, I started to add some plasticard to support the front buffer beam and also add a mounting point for the body at the front.


Now for the tricky part around the front end and the buffer beam, the air smoothed casing wraps itself around the cylinders then around the buffer beam.
A section of plasticard was cut 1.5mm thick and 25mm long 10mm high… this was then cut, and then one end slightly heated to create a curve on the end. The curved end was then glued in place and left over night so in the morning I could then glue the rest in place.


When completely dry then I could then continue the shaping of this plastic so it curves down and round from the body casing down to the buffer beam. The shaping was done with a sharp craft knife.


Next was the covers that go over the front of the cylinders, this was quite tricky to do as the cylinders were or are about the same width as the body, I managed to take a bit of material off the front of the cylinders and get rid of most of the rivet detail ect which gave me about 0.8mm to play with. Using some 0.5mm plasticard I manage to make some covers which aren’t greatly supported but because the cylinder is behind it, I think it should be ok… the section of plastic was 23mm long, with an angle cut just past the cylinder to create the curve to the main casing a little later on.


With the main plastic body bits now stuck on, the small detailed jobs can start, buffer beam holes for the buffers, couplings, and pipes to be done, the smoke box door needing a handle and a grab handle.
The sprung buffers sadly no idea where they came from no spares code on the bag but found them in my spares box so might as well use them! Smoke box dart I purchased from Eileen’s emporium for £2.50, I usually keep one or 2 in my spares box just in case I want to change any of the ugly moulded on versions.


Money spent so far:
Spare chassis: Free
Additional Wheel set: X8998 - £9
Additional connection rods : X8997 - £9
Plasticard: Already had available
Dapol body kit: £17
chassis bottom: X8999 - £6
3D prints: Prototype 1, £6.50, Prototype 2 £15
Posted
Inactive Member
Thanks for the demo.
Derek.
Posted
Full Member
February 24 - 26th
More detail, and a little bit of wiring.
Had a lot of interest in this model, including several requests for a 3D printed Chassis so people can build their own… Maybe they should of built this version?
Anyway I put in a small order with RT models for Merchant Navy detail parts, etched windows, drain cocks, casting for the drag-box, and lost wax castings for the pipes, all costing about £10.
I have added some lamps to the smoke deflectors, as well as some 0.45mm wire for wiring and also for the grab handle on the door.


Before I fit all the detailing bits which also need a little modification, but before that time to get this chassis wired up and running, I firstly fixed and modified the rear pony truck, as I had to move the mounting point for the electrical contacts for the tender, I used some plasticard and put a brass band around the outside of it to hold it all together… The wires run through the pony truck and trough a newly drilled hole between the 2 mounting prongs and up to the back of the motor.


The Merchant Navy drag box casting has replaced a rather dull looking plastic drag box from the plastic Dapol kit, it won’t be seen much due to a tender being connected to it.. but it’s detail that counts… as well as size? The plastic was removed with files and a dremel cutting disc… the casting needed a bit of filing to enable it to fit in to the space… but looks much better ïŠ As you can see it’s a little rough some more filler required.

Staying on the same sort of area, the cab windows, are technically wrong for a Merchant so these were also changed to a nice etched version again from RT models, although it was slightly bigger than I expected which meant I had to extend the cab backwards by 1.5mm and open up the window slot a bit bigger it all worked out in the end.


So the main loco body is now complete ready for finishing to begin, the Tender is the next item on the list but running out of time, luckily today I didn’t have much work on so got home early and set about the tender.
I wasn’t going to do much to the tender infact I didn’t do much at all, in total 4 pieces of plasticard to change the look, I have a spare 6000 gallon tender top which I picked up in a load of spares I got for nothing from an old work colleague which is a bonus, and it was in pretty good condition to.
Firstly I added some plasticard 1mm thick to the sides, I am doing the side extensions in 2 parts as the top part curves over and up to the top.
The bottom piece 4 mm tall with a cut of 2mm high to take the step of the tender on the side.
I filed a slight angle along the top of this to add the top curved section, this was made from 0.8mm plasticard which is a bit more flexible for these sorts of things, I cut a strip 7mm tall and gently curved it over by heating it slightly.


Once the glue had dried on these 2 pieces and was firmly attached, I filled all the joins / gaps, and waited till that had dried; I then cut carefully with a knife and dremel the curve up to the coal space you can see drawn in pencil on the above image.
Once all the filler had completely dried it was time to file it down and level everything off, I used files, and fine sand paper and wet and dry sand paper. I removed also all the lining and crest from the tender.


I managed tonight to get some primer on the loco body and tender, the tender needed a bit more work trying to fill the gaps and get the surface reasonable, I got there in the end, but hopefully it will have some paint on tomorrow… we can only hope.
Till Saturday, although probably won't be the final post I make on it as I do intend to finish it at some point.


Money spent so far:
Spare chassis: Free
Additional Wheel set: X8998 - £9
Additional connection rods : X8997 - £9
Plasticard: Already had available
Dapol body kit: £17
chassis bottom: X8999 - £6
3D prints: Prototype 1, £6.50, Prototype 2 £15
Detail parts: £10
Posted
Full Member
Last official competition update, as I have pretty much run out of time, still not bad for 3 weeks work an almost complete loco…
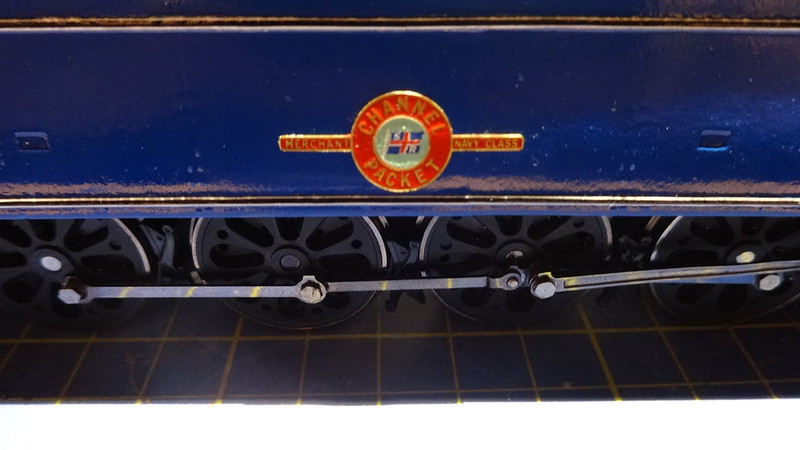
So as can be seen on the previous update / page, the loco was primed ready for painting, I have had quite a few questions about the livery, name, number ect… quite a few have mentioned BR blue, I was originally going to go with Malachite… but you know what BR blue actually looks good on these Merchant Navy’s so BR blue it is.
Whilst reading a question on what livery will it be in… I was stood in Halfords and thought ok you want BR blue, so I search on RMweb for the Halfords Loco colours in car paints, and found BR blue (Peugeot Royal Blue) luckily right in front of me at the time… must have been a sign?
Anyway, tender and loco body were done first with a number of light coats of paint, in total 5 were applied, and looks rather nice.

(Smoke deflector not actually glued in place yet just in place for picture purposes.
Anyway on to the final day, Saturday I have till mid night, a later finish on Saturday morning to prepare the mode for the next stage, Black paint, the BR livery on a Merchant navy has a black top.. and black along the bottom of the body, I did have spray paint to do this but decided to hand do it as time is short and prep work would of taken most of the day.
Using Satin Black 85 which I had available from my paint stocks, I went ahead and painted these areas…. at 2am this Saturday Morning… it looked to be progressing in the right direction, with just the base to be painted black on the tender…. I don’t expect it will be anywhere near finished tonight but I will be giving it a damn good go… might pop in another update later tonight.

Money spent so far:
Spare chassis: Free
Additional Wheel set: X8998 - £9
Additional connection rods : X8997 - £9
Plasticard: Already had available
Dapol body kit: £17
chassis bottom: X8999 - £6
3D prints: Prototype 1, £6.50, Prototype 2 £15
Detail parts: £10
Finishing costs:
Paints and primer: £16
Transfers: Already to hand.
Well the Forum clock seems to be out… I am posting this at 23:50 28/02/15
Lining out:
On the BR Blue Bulleid's the lining is white-black-white, I am using HMRS Pressfix transfers for all transfers on this final part, LNER loco lining sheet 5, I already had to hand due to my U-Class I am still in the process of finishing, BR loco and numbers will be from Sheet 14 BR Steam era loco and coach insignia.
These transfers I have used before on many other builds, they are basically water slides but with a sticky base so they stay in position once the backing film is removed.


It's close but I have got most of it done more info a little later:
Parts used and money spent:
Money spent so far:
Spare chassis: Free
Additional Wheel set: X8998 - £9
Additional connection rods : X8997 - £9
Plasticard: Already had available
Dapol body kit: £17
chassis bottom: X8999 - £6
3D prints: Prototype 1, £6.50, Prototype 2 £15
Detail parts: £10
Finishing costs:
Paints and primer: £16
Transfers: Already to hand.
All in all not bad for 3 weeks work may not be complete but, should be within the next week.
It was mainly a project to show what is possible from new technology 3D printing to using Hornby spares, and using good old kits and modifying them to get what you want… using all or most of the Kit building skills I know of, including a bit of brass soldering to :)


 Last edit: by BMR2011
Posted
Full Member
Needs some additional weight to balance it all out, but it's getting there, everything Is varnished plates due to arrive tomorrow, the rest is pipe work, details, adding bits here and there, finish the back of the cab… but whilst on the cab, I completed the backhead yesterday.

There is an early video of it's test runs, to look at any problems with running, weight distribution, or any other problems.
https://www.youtube.com/watch?v=UFcUvym9Y6g
The quest of detailing…
On a bit of mission at the moment hoping to give the model it’s first run on track tomorrow night… should be entertaining…
I’ve been making small tiny changes, speedo cable will go on soon, but I have been thinking about these lights that are in the tender and around the front, well I came up with an idea whilst waiting for the body to dry out from the varnish.
I brought some Rhinestones last year to repair some Springside lamps which have the stones in which occasionally fall out. I accidently ordered some to small or they sent the wrong ones I cannot remember I got 1.5mm clear rhinestones.

So a hand drill with a 1.5mm bit, and some super glue gel and time to get busy!
I filled a shallow hole to take up the pointed rear of the stone, a small amount of gel glue was put in the hole and the stone placed in… I was quite pleased with a cheap result better than grey paint.


Also recently arrived Fox name plates, I shall continue detailing tomorrow, adding the speedo, drain cocks, steps, pipe work ect… and finishing off the cab.

Last edit: by BMR2011
Posted
Full Member
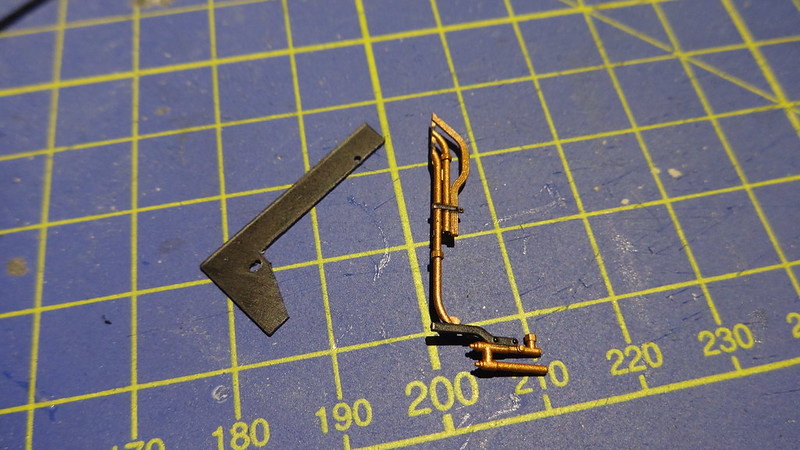
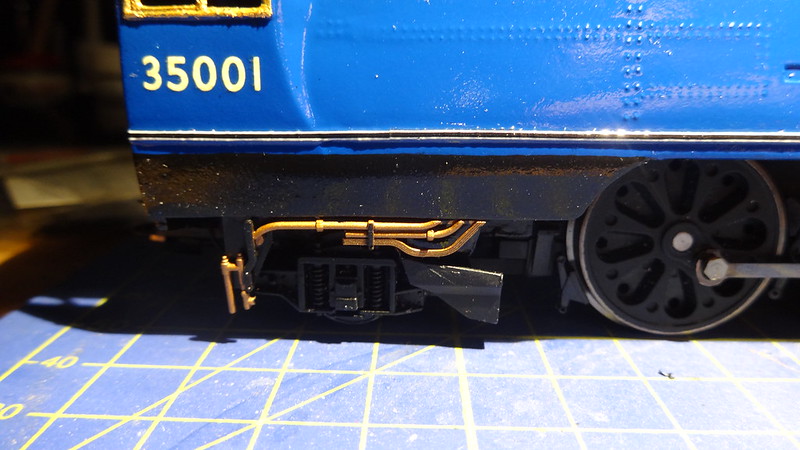
I mounted some Bulleid spares pipe work brought way back in January 2014, this detail needed a backing to be mounted to, luckily had some spare 1.5mm thick black plastic which was from packaging from something I ordered a while back. I drilled 2 mounting holes to take the pegs on the pipe work and made the plastic backing slightly higher in order to mount the plastic to the underside of the of the body casing.

Also fitted before the night of the test run was it's name plates ordered from fox transfers, costing around £9, small amounts of superglue gel were used to mount the plates to the body.
Last night I fitted all the detailing pack to the loco, steps, screw link coupling, ect…
This meant I could now fit the drain cocks… although a slight problem came to light…. the ones I had brought… were not long enough… slightly embarrassing…. but no problem I have a vast amount of copper wire I purchased some years ago to detail up locos and do pipe work ect.
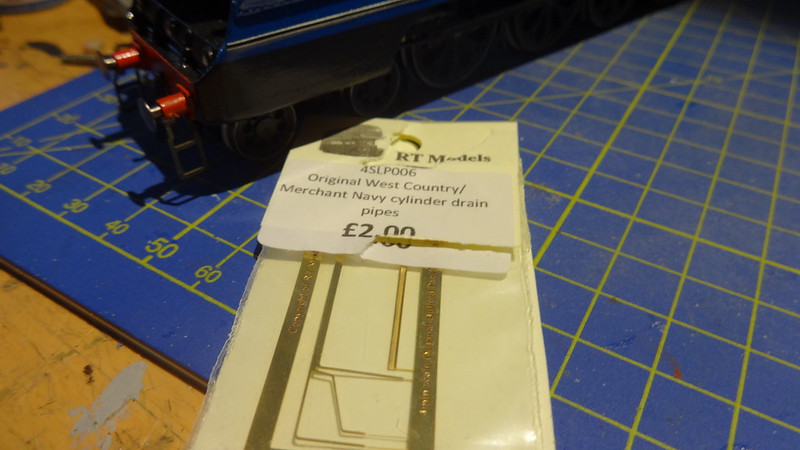
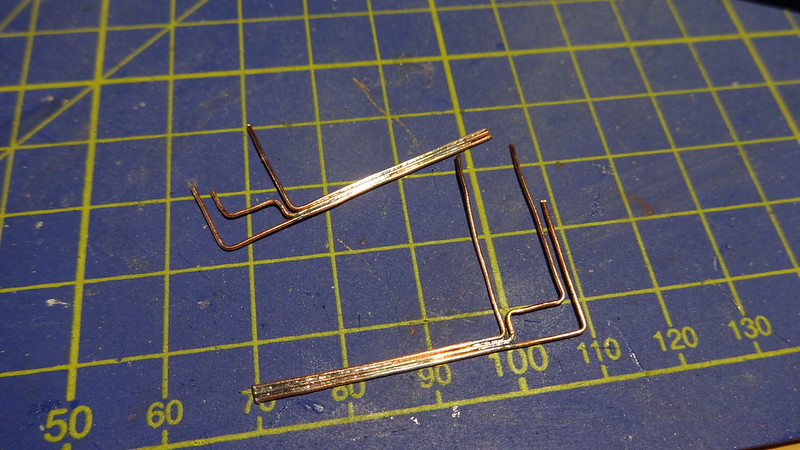
I used some 0.5mm brass wire I had left over, and basically copied the shape of the pipes from the etch and then soldered them together to form some of my own drain cocks… and I am quite pleased with the result… although spent £2 buying ones I couldn't use never mind!

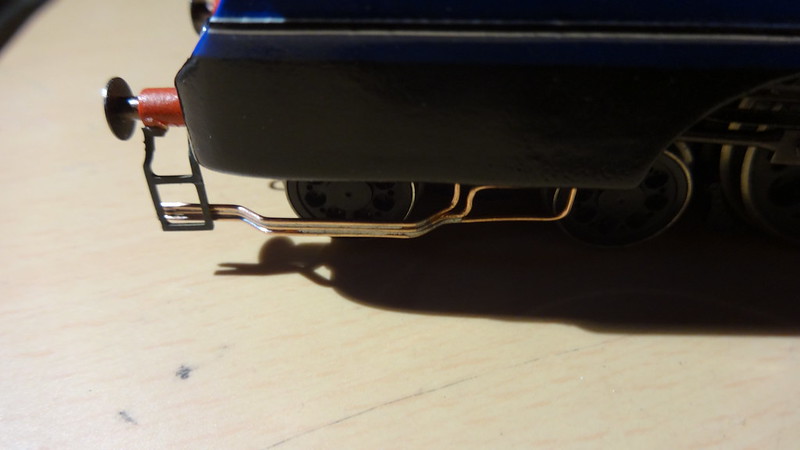
To fit them 3 small holes are required, 2 toward the back of the cylinder 1.5mm apart and then the 3rd right at the front of the cylinder, best to test fit them before gluing! I pre bent the drain cocks to allow the bogie to swing from side to side… which I think worked. With them glued in place with some super glue gel… there were about finished.
1 guest and 0 members have just viewed this.