dapol railbus
Posted
#168797
(In Topic #9591)
Full Member
motorising
can anyone help with information on park royal railbuses. i am converting the dapol model and i need drawings anddimensions, interior details and colour schemes. have searched the web with little success.
cobach47

Posted

Inactive Member
00 Gauge - Trevennan
http://yourmodelrailway.net/view_topic.php?id=11419&forum_id=21
 Last edit: by 60019Bittern
Posted
Inactive Member
Posted
Inactive Member
http://rmweb.co.uk/forum/viewtopic.php?f=7&t=38399
Posted

Full Member
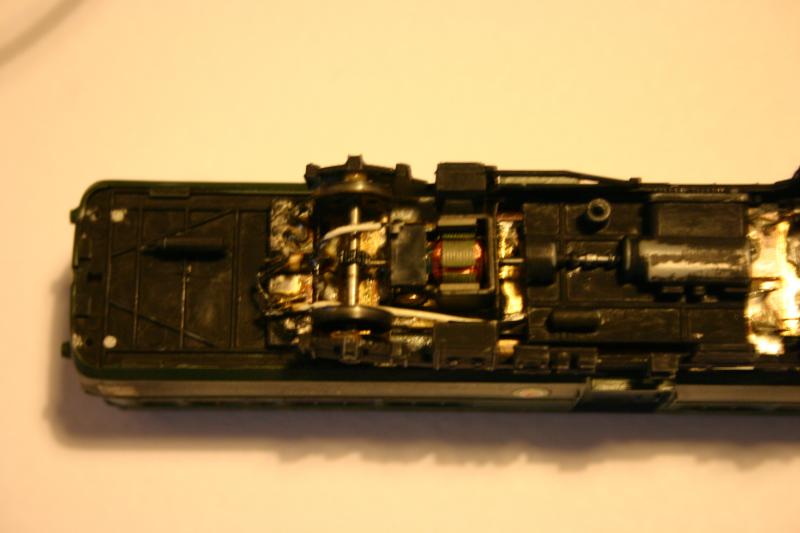
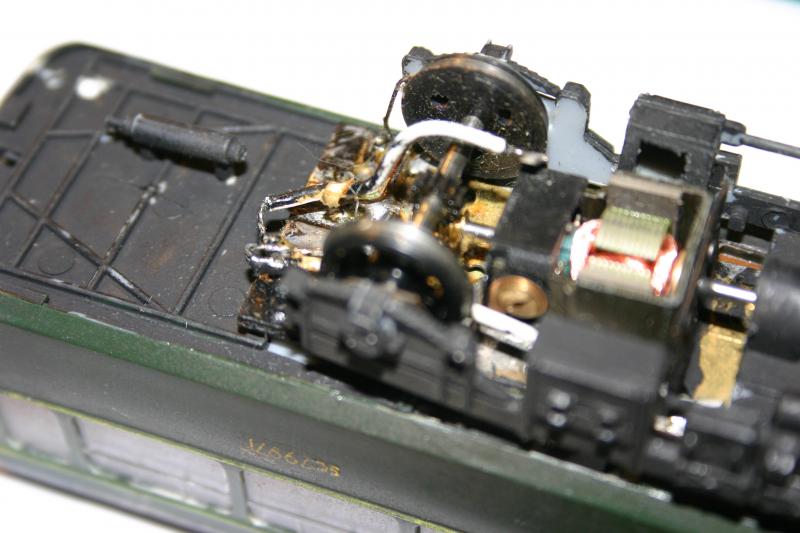
I had a go at motorising the Dapol Kit - make sure you put as much weight in it as you can.
Posted
Inactive Member
Posted
Full Member
Why not wait for the Heljan ready to run model? It will knock the spots off the old Airfix (now Dapol) model.can anyone help with information on park royal railbuses. i am converting the dapol model and i need drawings and
dimensions, interior details and colour schemes. have searched the web with little success.
cobach47
The exterior body dimensions were 42ft x 9ft 3ins. What exactly do you mean by interior details? And what do you mean by 'colour schemes'? Are you referring to exterior livery or the interior decoration?
This book has a chapter on the Park Royal railbuses, and others, with plenty of photos and a small line drawing of each type of vehicle:
http://www.amazon.co.uk/s/ref=nb_sb_noss?url=search-alias%3Dstripbooks&field-keywords=br%20first%20generation%20diesel%20railbuses
Terry
Last edit: by col.stephens
Posted

Full Member
In true BluePeter style here's one I made earlier - about 20 years earlier
Materials - as far as I can remember 25mm wide brass strip to form the chassis, pair of W irons for a wagon, cant remember where the worm gear was sourced from. Pickup on all wheels, and ran reasonably well, but its not been tried in 20 year.
Paul
Posted
Full Member
Runs quite sweetly now its heavier. of course heljan are bringing one out this year, pleased to say
mine has cost less than a tenner £6.70 for the kit £3.00 for the lima shunter ( for the chassis )
plus odd bits of plasticard, wire etc. Quite pleased with the result. it can be taken apart easily if more
info comes along so i can repaint details or if i need more passengers, anyone noticed the lack of
suitable seated passengers. as in the oscar speeches " i would like to thank everyone who has helped with this project"
there is very little info around for these railcars so artistic licence ad to be used. i learnt from my aircraft modelling days
you can't wait for all the info before you start if you do nothing will get built.


Here's some pics.
Posted
Inactive Member
http://yourmodelrailway.net/view_topic.php?id=11419&forum_id=21
Posted

Full Member
Bob
Posted
Full Member
Terry
Posted
Full Member
forward to fitting the corner windows which i removed from the windscreen mouldings, all going well except i didn't allow
for the thickness of the windows now i can't fit the interiors! too wide now, i have removed the seats and made the floor
narrower, just when i thought i was on the last lap! i have used P.V.A to fit the windows as i didn't want to mess them up.
will post more pics when it's finished. has been well worth the effort though. we never stop learning do we!
Posted
Guest user
I am currently motorizing one of these using a Pacer Traction Kit from High-level and a scratch build brass chassis. My big issue is getting the floor pan to lie flat!
Rob
Posted
Full Member
it was like looking through the bottom of a milk bottle, distorting everything inside and making the driver into a monster!
so after a good think on holiday i decided to bite the bullet and make new windows from clear plastikard.
i used the old windows which i had separated from the front windows as a pattern making sure i made them
slightly larger the piece of material should be approx 10.5 mm high x 10mm across, make a vertical cut from the bottom left
corner to the top making the width 8mm at the top
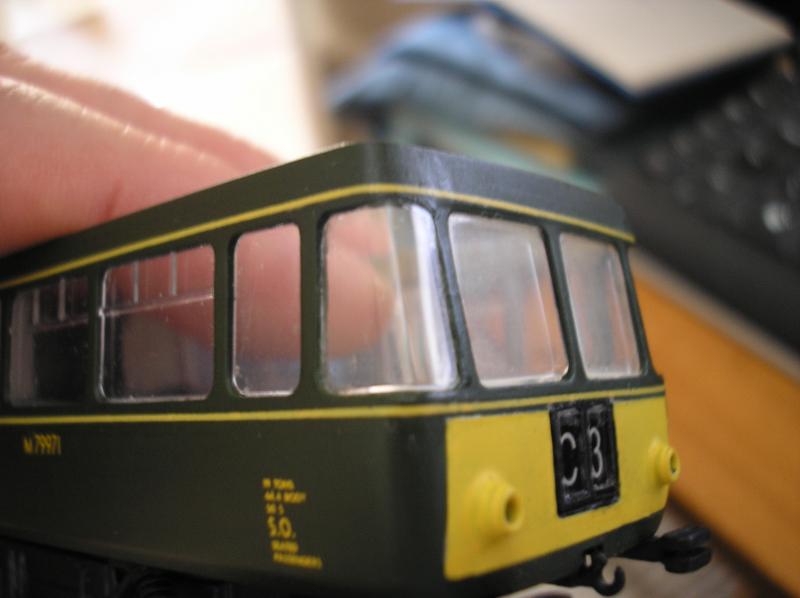
now round off the corners and bend the curve to match the corner
by bending along the slanting edge over a 3mm rod
roughly 4mm in you can make left and right windows.
make a few spares as it can be tricky to bend it in the right place then gently sand it to fit, fix in place with p.v.a.
Posted
Full Member
"bare metal" chrome foil for the window ventilators. then gave all the glazing a coat of Johnsons Kleer polish.
I will post the pics soon, thanks to everyone for their interest in this project which has cost around £10!
After this i will attempt to build my D.C.Kits class 129 parcels car, hoping to fit a Hornby HST motor bogie.
Ian
Posted
Full Member
Terry
Posted

Banned
Cheers, Gary.
Posted
Full Member
Posted
Full Member
1 guest and 0 members have just viewed this.