Converting Bachmann's Jinty to EM
Posted
Inactive Member
...and upgrading too
Wonderfull stuff there John.Those frames really look the business.
The axle apertures on the original may well be a compromise in production?
Thanks for the photo,s and work description.
Derek.
PS:All good practice for the G2!

Posted

Full Member
Yes, the G2 may just get the same treatment, I have the Comet chassis for that too. Only trouble is, Brassmasters are threatening to release their Easi Chas for it next year. :hmm
John
John
Posted
Inactive Member
That could be a tricky little beggar to convert depending on how Bachman handle the rear axle?
I too have a G2 comet chassis kit. spooky again!
Brassmaster,s are producing some good stuff. Of course I may think differently after trying to build those 2 kits of theirs?
2014 will tell a lot.
regards,
Derek.
Posted
Full Member
So much to do, it's very frustrating.
John
John
Posted
Inactive Member
Maybe having chosen the EM route one should forget the RTR market regarding loco,s.?
Although the no frills wheel swop is not to bad.Plus one does not have major hassle,s with the loco body.
Still with the broader gauge its nice to get nearer the prototype. Time will tell.
Derek.
Posted
Full Member
John
John
Posted

Full Member

Looking good so far, although I may have used the frames as templates for Plasticard frames.
After reading the earlier posts, I seemed to remember going down the replacement chassis route before - i've just returned to the hobby after a 20 year sabatacle - checked up in the loft and found a perserverence 3F/4f chassis kit, complete with 00, EM and P4 spacers. Also found a Hornby Jinty body in LMS (later version not the Triang version), and 2 perserverence 2-6-4T chassis kits, for the life of me I cant remember why I bought them, but looks like a search on the bay for a couple of bodies will be required.
Paul
Posted
Full Member
My first chassis replacement was a Perserverance for the Bachmann Pannier - must be getting on for 20 years ago now. Iain Rice's Etched Chassis Construction book was a revelation to me - I still read through it now and then. He actually does this model in the book so it was a matter of following his lead (including some of his homemade jigs). Mine came out right first time so that was a great confidence booster.
I later did the Dean Goods, 4F and two Hornby Jinty's. Remember the Crownline upgrade kits? I used one to make the 1F half cab out of one of the Hornby Jintys. I also have a Gibson Jinty kit that a friend GAVE me - that'll be interesting.
So, here we are, still learning.
Using Comet frames is perhaps the expensive approach, but I like the idea of being able to solidly attach (ie solder) the brake gear and the detail parts. I'm sure there are other equally effective methods.
Cheers, John
 Last edit: by Brossard
John
Posted
Full Member
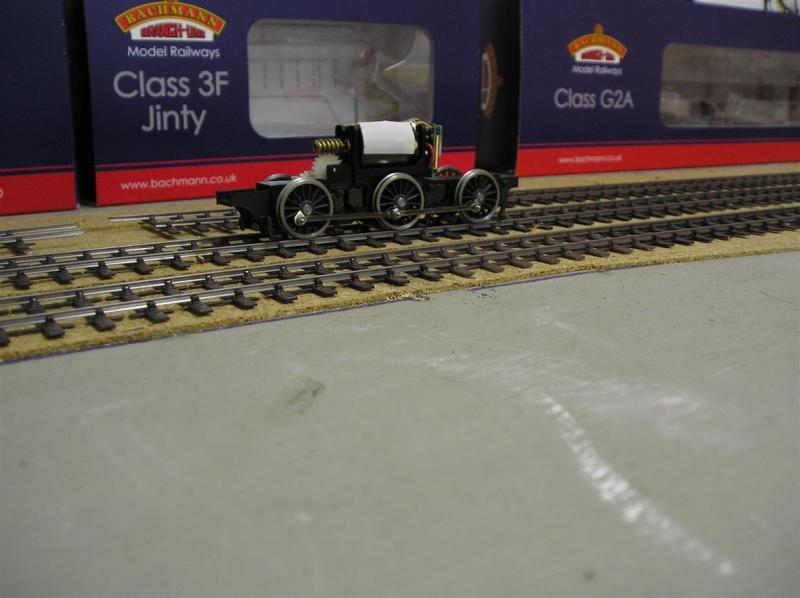
Today, I prepared washers for the wheelsets so that I have nearly no sideplay on the driven, 1mm on the center and about 0.5mm on the front (all fairly rough). The proof (which was never in the pudding by the way) is that I got the chassis to run the point smoothly.

John
John
Posted
Inactive Member
Are you useing the original pickup system?
Those PB strips will reach EM spaced wheels.
I have fitted a coupling rod to one side.
Filled the Bachman coupling rod holes with solder.
Then drilled them out for the Gibson crankpins.
Oh if you ever have to fit those tiny Gibson crankpin end nuts, Dab the end to be screwed on some sticky tape.
It holds the little beggar to the end of the crankpin threaded rod so its easier to screw home. Instead of running for the horizon.
Will post a photo when this Christmas lark is sorted.
regards,
Derek.
Posted

Inactive Member
The proof of the pudding, is in the eating.
I'm looking forward to that. :cheers
Max
Port Elderley
Port Elderley
Posted
Full Member
Derek, the frames cover the slots for the old pickups so no. I will put some busbars under the keeper and attach wipers to them (a la Shackleton). Haven't sussed the details yet.
I have 3 coupling rod sets to choose from, the originals, Comet and Brassmasters. That could be tomorrow's job.
I know which loco I want to do now, it is one of the few that were auto fitted. I have a notion to do a couple of Pull Push trains.
Right Max, I get very cranky when I hear people mangling that old chestnut.
John
John
Posted
Inactive Member
Plenty of possibilities ahead for us John.
I have a little work to do on that Bachman chassis centre axle slot.
That pivot sprung centre thing is a bit of a pain as it gives the axle a slight forward and backward sway.
Sorry difficult to explain but its not a straight back and forwards more like a waddle.
Time to get the lump hammer out.
Oh a photo of the Jinty chassis with wheels and coupling rods.
regards, Derek.
PS: Hello Paul.
Posted
Full Member
John
John
Posted
Inactive Member
I have put a smear of chemical metal padding on those centre axle slots.
When it sets it can be smoothed with some fine emery cloth and should allow the axle to rotate smoothly without waddling. As least thats the plan.
regards,
Derek.
Posted
Full Member
I turned my attention to the Brassmasters rods after that, these are a 3 ply affair - I'll post a picture. Very nice and designed for the Bachmann wheels having oversize/overscale bosses. The only potential hiccup is that the articulation is by a rivet. I have some but not sure how to crimp. I got one hole reamed and that seems to work OK. All that reaming left my fingers in agony (we do suffer for our art) - I'll continue today.
With the disadvantages of the Bachmann wheels and the time consuming workarounds I'm beginning to think that Markits might be a better bet next time.
John
John
Posted
Inactive Member
That chemical metal is supplied in tubes by the plastic padding crowd, You probably have it in your local hardware shops. Its helped a bit, Not perfect yet though.
Another thing I don't like this lack of axle bearings on the chassis, Wear would soon set in on the white metal.
I might just change that to either 1/8th ID brass tube or fit long 1/8th ID brass bearings. One will probabley have to flatten a bearing side for it to line up with the keeper plate.
Things tend to get complicated in this game.
Not sure on the rivet John, Maybe a tap with a hammer with some thin card over the coupling rod side to protect it?
goodluck,
Derek.
Posted
Full Member
The Bachmann chassis is mazak, if you've ever tried to drill or cut it it is dam**ed hard.
1/8th ID? So, what, you're going to machine the axle slots to take the tube? Now things are indeed getting complex - this was supposed to be a drop in conversion. :roll:
I repaired my Comet rods, ready for another job:
I soldered brass tube into the whacking great holes I'd made to suit that huge boss.
I also finished the Brassmasters rods:
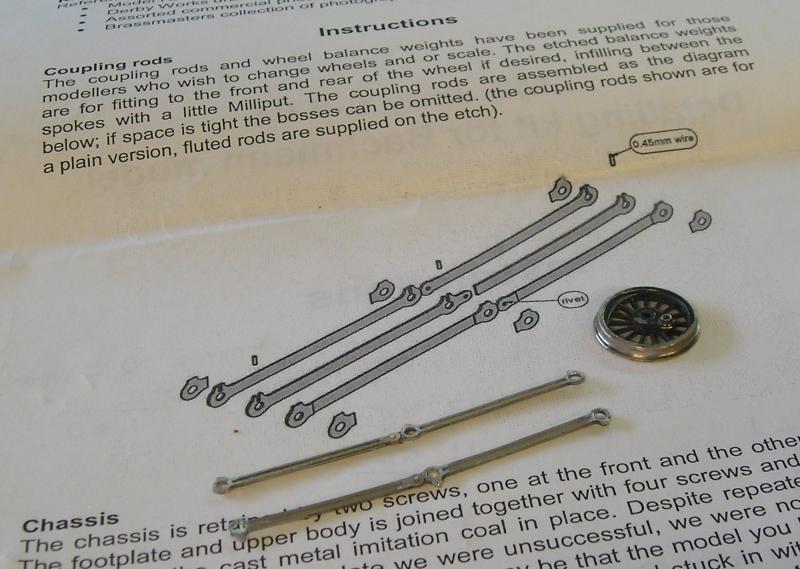
I simply smushed the rivet with some flat nosed pliers and then did some gentle filing, seems OK. I didn't bother with those boss things on the ends of the rods, the thickness already is the same as the wheel boss. I did solder in the lubrication pips with 0.45mm NS wire.
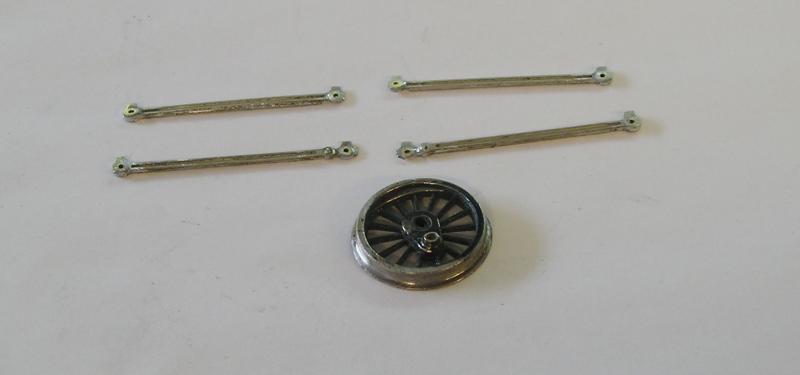
I'll just point out that my model came with plain rods and I really wanted fluted ones.
Since the Bachmann wheels already have decent balance weights, I won't bother adding those from the fret.
John
Last edit: by Brossard
John
Posted
Inactive Member
I have fitted 1/8 ID brass bearings to the centre axle.
Not fixed them yet. Used a taper reamer to open out the slots very carefully and finished with a round diamond file.
The slots need to be 3.97mm at maximum width.
The top of the bearing axle hole needs to line up just slightly below the metal chassis.
The plastic keeper plate will take a small curved slot to fit over the bearing top.
Okay its a fixed axle but does not waddle and stays in line nicely with a bit of side play.
Will see how it pans out.
Derek.
Posted
Full Member
I'll let you complete the surgery and we'll see how the patient gets on.
I just assembled the wheelsets, using Loctite Sleeve Retainer to secure them to the axles. I'll leave them for a while to cure (or whatever the stuff does). Hopefully get the chassis re assembled tomorrow and we'll have a look at how it works.
John
John
1 guest and 0 members have just viewed this.