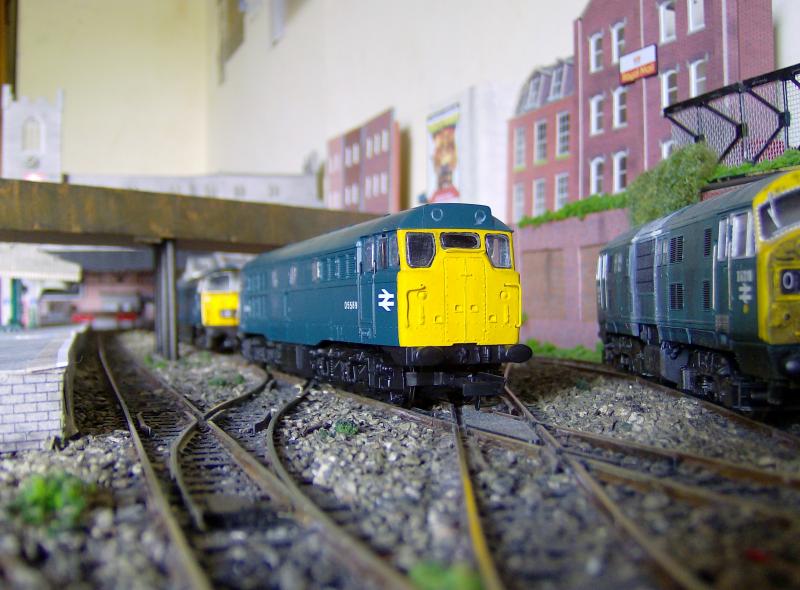
Hornby RailRoad Class 31
Posted

Full Member
Improving RTR Locomotive
[user=1505]toto[/user] wrote:Thanks for the support, I wouldn't say brave, But it is all a new experience to me, I looked at the price of a Hornby class 31 and it was £133, and I would still have to backdate the loco and add head codes, then I looked at the railroad class 31 and saw it was detailed enough to be a basis of a detailing project, and would work out alot cheaper.………You are also a brave man to tackle it in the first place……..

Posted
Full Member
Definitely will do, I can see the benefits of doing so to myself and others on this forum.……..Can I please suggest that when you get to the end of the project you give a list of everything you purchased and from where this would be very helpful to have it all in one space…..
Posted
Full Member


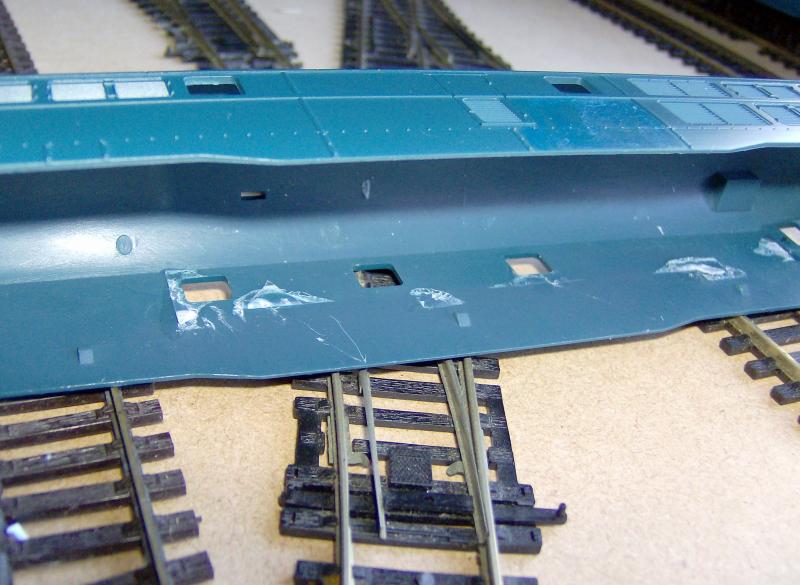
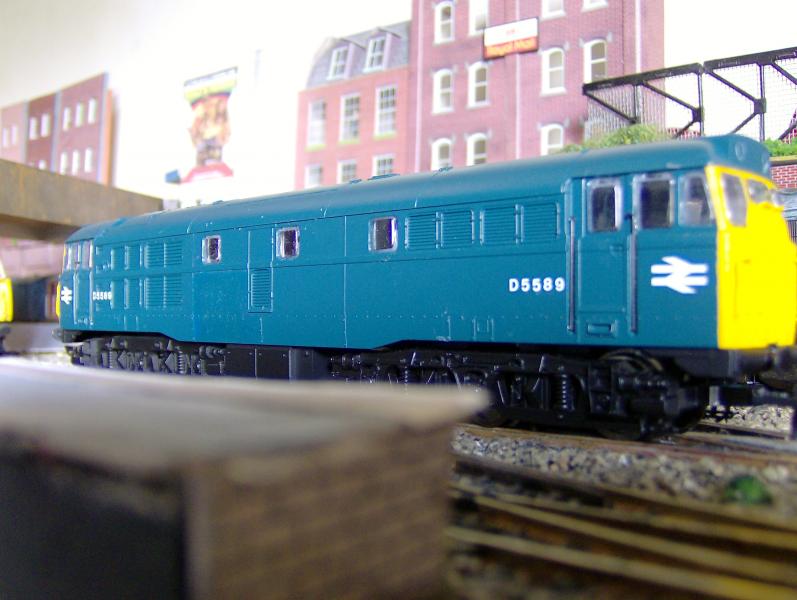
I have painted over the glossy area where the BR Logo once was, I painted the whole panel using the same technique as with the BR Yellow, with BR Blue paint (also from Phoenix's), the colour difference is barely noticeable, But I hope to hide it with some weathering.
 Last edit: by new04db
Posted

Full Member
Once you have added weathering as well it will look far more natural than the nice but too pristine finish of the Hornby model.
The ex-Lima body moulding is often acknowledged as being better in many ways than the newer, more expensive Hornby model.
Jeff Lynn,
Amateur layabout, Professional Lurker, Thread hijacker extraordinaire
Amateur layabout, Professional Lurker, Thread hijacker extraordinaire
Posted
Full Member
Tools and Equipment
- PVA Glue
- Black Paint
- Knife
- Paint Brush
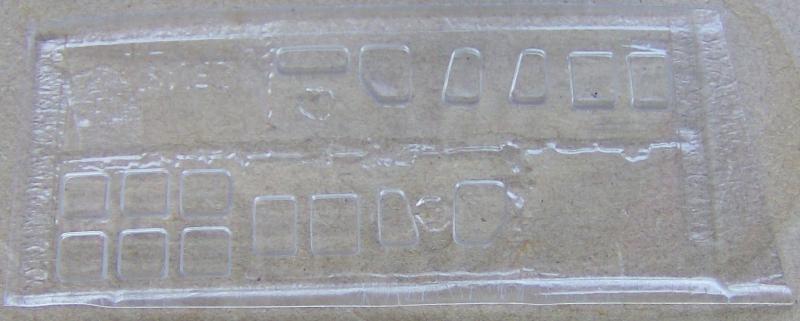
I was not too impressed with the glazing, But I went ahead anyway, Firstly I had to remove the Glazing from the the body windows, this was done by levering it away from the body with a Knife, as it was glued in position.

Once it has been removed, It should look like below
Next I painted the window frames black as Jeff (SRman) suggest

then the glazing was fitted, I used PVA glue, A trick I picked up when I use to build plastic kit aircraft, It dries clear and dose not dis-colour the glazing. Below are some pictures of the completed glazing, bare in mind that not all the glue has dried in the photos.
above, The side glazing is not a perfect fit, especially the body windows, some more filling will be needed around them.

above, the front glazing is a very good fit and looks most effective, still need to add the washers and wipers, waiting for them to arrive.
Below, an overall view
The glazing cost £3.49 from an ebay shop (http://www.ebay.co.uk/itm/121081857189?ssPageName=STRK:MEWNX:IT&_trksid=p3984.m1497.l2649) but the are also available from peters spares (http://www.petersspares.com/se18-hornby-class-31-diesel.ir?cName=flush-glaze-all-flushglaze-windows) , Bringing the cost of the project up to a total of £65.47
Last edit: by new04db
Posted
Full Member

Posted
Guest user
Looks better every time I see it, well done. Just the wipers and the head code to go, :thumbs
I've got a Lima Class 37 and a Lima Class 20 that will go under the knife at some point ( not in the near future as my layout beckons soon ). I'll need to have a look to see what add on's I can get for them and have a bash myself.
Looks really good on your layout, you must be pleased with the results so far.
Keep up the good work
Toto.
Posted
Full Member
I agree with everything Toto said - it is looking really good.
:cool:
Jeff Lynn,
Amateur layabout, Professional Lurker, Thread hijacker extraordinaire
Amateur layabout, Professional Lurker, Thread hijacker extraordinaire
Posted
Full Member
- Glue (I used super glue)
- Black Paint
- BR Yellow paint
- Brush
- Knife
- MJT wipers from Dart Castings

Cut them out with a knife, they are incredibly small and fiddly, I have lost two wipers so far, so Purchase spare, I brought 4 sets from Darts castings to meet the minimum £5 spend, so I have (had) enough to do 8 locos.

once cut out simply paint
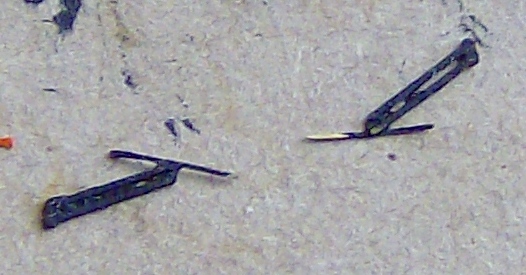
the ones above are in the process of being painted once paint simply fit to the loco, I found that the wipers arms had to be shortened to fit and look effective on the locos windows, For the washers I cut out some brass from the spur. you can see which bits
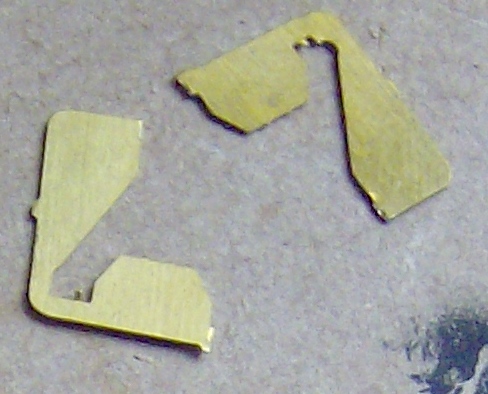
then bend and cut, then attach, finished look below

in the above photo I have also started preparing for headcodes and fitted a loco cab bulk head, I will fill you in on this during the next step.
the wipers cost £1.50 each from dart castings (I had to buy 4 pairs to meet the £5 minimum spend, http://www.dartcastings.co.uk/mjt/1104.php), so bringing the total cost to £73.47 including all items and postage and packaging
Last edit: by new04db
Posted

Site staff
Regards
Alan
Born beside the mighty GWR.
Alan
Born beside the mighty GWR.
Posted
Full Member

Posted
Full Member
Firstly I had to remove the head lights on the headcode box of the loco with a knife

Making it go from above to the picture below
Then I had to build the headcodes using a suitable font
For information on headcodes visit http://www.wsr.org.uk/headcodes.htm, for the loco I chose 2A60 and 2E99, as it is an suburban loco train between the eastern region and kingsmead london.
I then built the headcodes in word, printed and trimmed them, then glued them to the loco
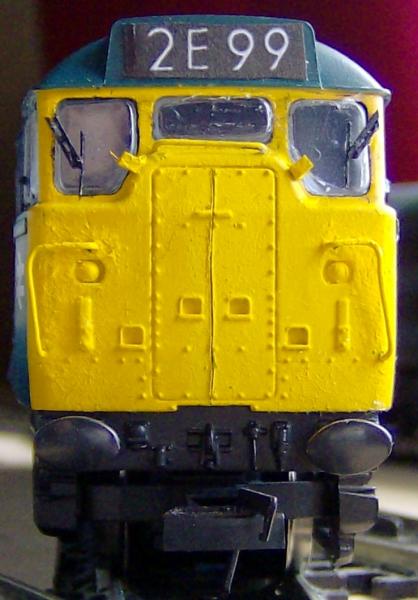
I also fitted bulk heads made from card, painted grey then glued inside the loco at the back of the cab.
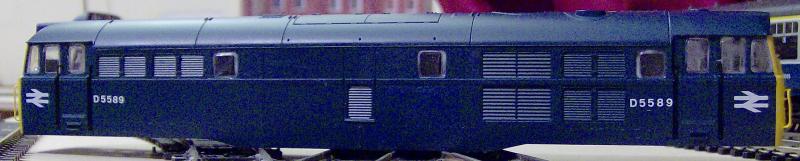
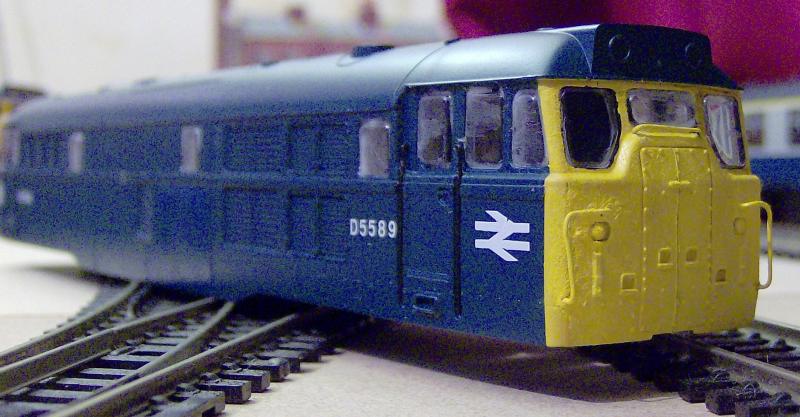
Below some images of the finished locomotive
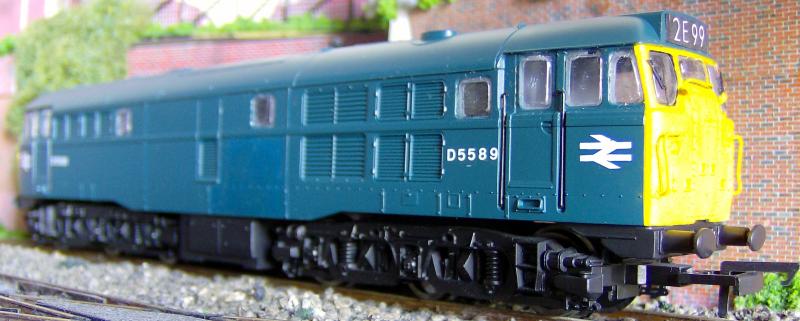
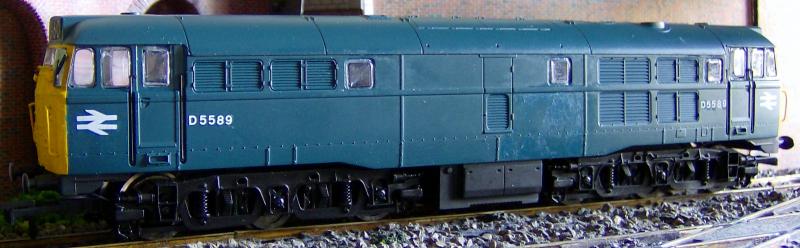

The loco still needs weathering but the conversion is complete, costing £73.47
Last edit: by new04db
Posted
Full Member
- Transfers
- SE Flush glazing
- 0.45mm Brass wire
- Loco
- Wipers
Posted

Full Member
Mike
Pig Hill Yard - a small Inglenook shunting layout for my boys, in 00.
Pig Hill Yard - a small Inglenook shunting layout for my boys, in 00.
Posted

Site staff
I estimate with the reduced cost of the original model you've now got a nicely detailed model for less than an extra £6.50. :cool wink
Just wish you blokes wouldn't keep getting me interested in diesels.
(Wonder how much a tin of green paint is :hmm)
Ed
Posted
Guest user
It's been an interesting journey and a fantastic result. I'll keep my eye open for your next project.
Now………..go run that loco.
Cheers for now
Toto
Posted

Full Member
great stuff….. What's next?
Stephen
Acording to a recent visit to a supermarket at check out time, I an not loosing my memory it has been downgraded which means i am not stupid afterall - Sorted! - What a relief
Posted
Full Member
Jeff Lynn,
Amateur layabout, Professional Lurker, Thread hijacker extraordinaire
Amateur layabout, Professional Lurker, Thread hijacker extraordinaire
Posted
Full Member
- Ed - You know you want to turn to the darkside and have a few dirty diesels about on your layout, Green paint should be easily picked up from somewhere.
- Toto - haven't had much time to run the loco yet, been doing other past times during my limited free time, but when I do I will get a video done for ya
- GreenBR - not sure what the next project is, But got lots to weather so guess that is the next thing on the horizon.
Posted
Guest user
I'll look forward to the video. I'll also look forward to your weathering projects. I have one or two items both rolling stock and buildings to do myself once I get the layout up and running so some good tips would not go wrong.
Cheers for now.
Toto
1 guest and 0 members have just viewed this.