Photoplus X3 Tutorial.
Posted
Full Member
Photoplus X3 Techniques By Simon Parkinson
Now we can use that cut out to do anything to the selection or the Inverse of the selection. To select the Inverse or opposite of what we have selected now choose Select – Invert (or use Shift+Ctrl+I keyboard shortcut).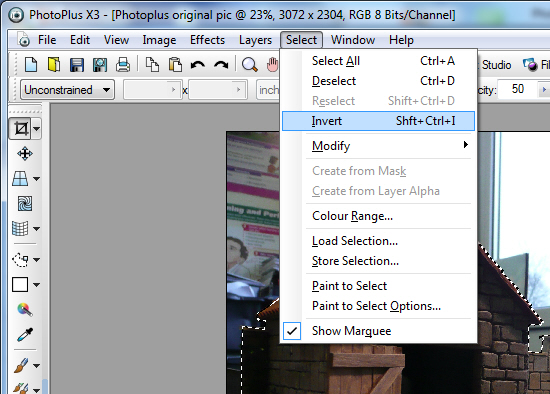
This will change where the ‘Marching Ants’ show up.
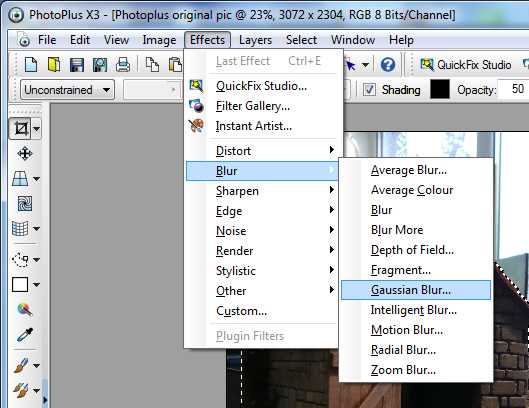
To make the background blurred we just choose Effects – Blur – Gaussian Blur… (this option allows more control than the other options)
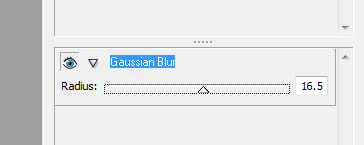
We can change the amount of blur that is applied by moving the sliders. The higher the number the more the blur.
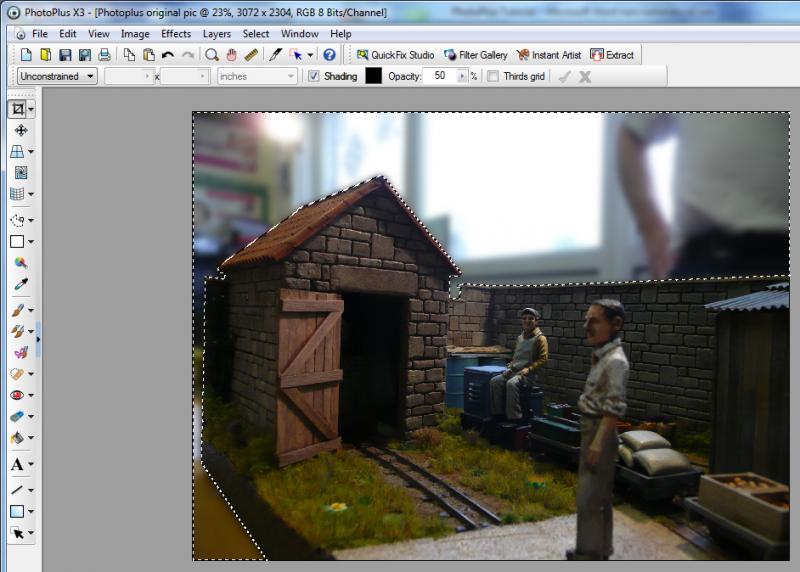
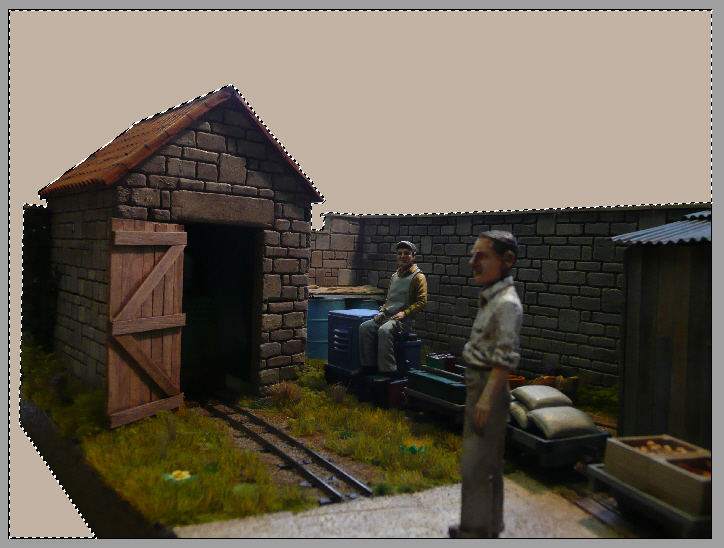
The result is a blurred background that now doesn’t detract from the layout that is the main ‘focus’ of the picture.
Next it will be changing the background colour.

Posted

Legacy Member
Posted
Full Member
Well I thought I was right handed until I smashed my left arm and realised that the only thing I did right handed was write and draw but that was only because I had been made to use my right hand for that. I can still write almost as well with my left hand - just as scruffy
 . Makes modelling a bit awkward, though I have a special set of clamps to hold things whilst I'm working on them. Strangely the worst thing is holding something and filing it, the vibration goes straight into my damaged elbow nerve endings:shock:. Whoever called it a funny bone had a very strange sense of humour.
Anyway more tutorial to follow.
Simon
Posted
Full Member
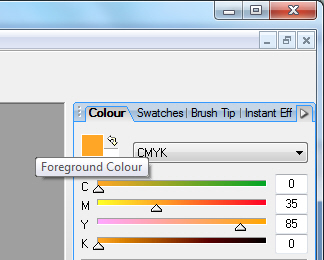
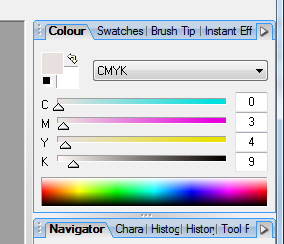
Before we can fill anything we need to choose a colour to use as the fill colour.
This menu is on the top right hand side of the screen.
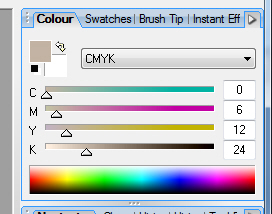
We can move the sliders to make a warm grey colour, here I have used C=0, M=6, Y=12, K(or black)=24.
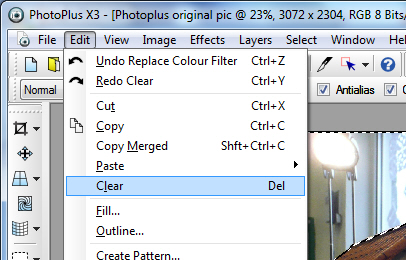
Now to change the colour on the actual picture.
Just click on Edit – Clear and the area selected will change to white.
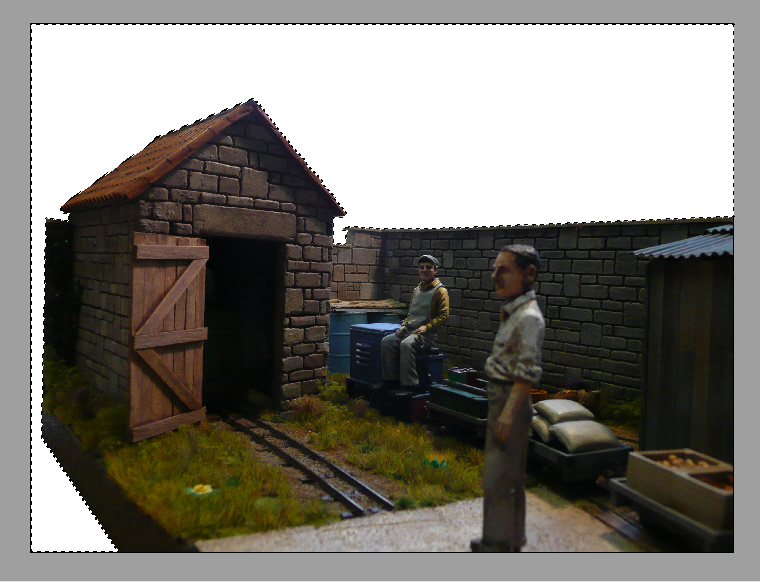
Which should look like this: (obviously with your chosen picture)
We can then select the Flood Fill tool from the left hand menu about three quarters of the way down.
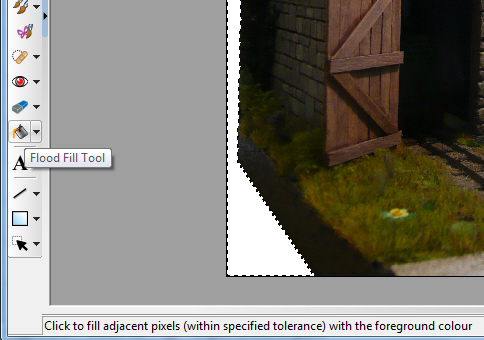
If you click on it you have two choices a solid fill (which we will use here) and a Gradient fill which we will cover later.
So for this time choose the left hand symbol that is supposed to look like a paint bucket being poured.
The pointer will now change to a little paint bucket with a + symbol just below it.
Move that pointer over part of the white area and click once. This will fill the area with the colour that is in your foreground colour choice, which we previously changed to a warm grey.
So we have now learnt how to cut something out and either blur the background or substitute a colour. This is the technique that Railway Modeller sometimes uses on their layout photographs.
Next time we will put another picture of sky and clouds into the background of a layout.
 Last edit: by Simonmcp
Posted

Full Member
Posted

Full Member
Good stuff so far, simple moves and easy to follow, I hope there are enough forum members anticipating ;-)
Phil
Last edit: by Phil.c
Phil
Posted
Legacy Member
Posted
Full Member
I have got Photoshop Extended CS4 so until I can wrestle my Nieces laptop off her I can't check if Elements is the same for these Actions as full photoshop (some hope prizing technology from the hands of a teenager:roll:, but I bought her Elements). I know Elements doesn't have Quick Mask which is the way I do it in full photoshop so it may be closer to the Photoplus method. It may also depend on your version of Elements:roll:.
Wouldn't it be easier if all the programs worked the same way.
N.B.
If anybody has been following the tutorial and has tried to save a photo they will have noticed that Photoplus saves it in a 'native' format and not in the more usual .jpg. You have to Export and then choose .jpg as the file type.
Last edit: by Simonmcp
Posted
Full Member
I have a very early Elements, the difference with that is, no layers, paths etc, again, it depends on the level that one wants to work at, ie. What Simon is showing is pretty basic stuff and will meet the needs of the majority here but if you want to go a step further then paths and layers are needed. This is a lot more time consuming to teach, so, I think it would only be worth it if there was enough members interested.
[user=434]John Dew[/user] wrote:
Excellent tutorial Simon:thumbs……………. I have Photoshop Elements so I should I try and adapt what you have posted so far or wait for your Photoshop edition?
Elements should work the same as most of the tools look like they are copied from PS, put in slightly different positions and the symbols colourized etc to change them somewhat.
Phil
Last edit: by Phil.c
Phil
Posted

Site staff
By pure coincidence I downloaded PhotoPlus starter edition a couple of weeks ago for a different purpose, so seeing you tutorial was great.
Problem is, I think it’s a different version (X5) and the menus are a bit different.

Trying to do the cut out and not sure which shape to pick, or am I in the wrong menu?
Ed
Posted
Legacy Member
Posted
Full Member
Phil
Posted
Full Member
Hi Simon
By pure coincidence I downloaded PhotoPlus starter edition a couple of weeks ago for a different purpose, so seeing you tutorial was great.
Problem is, I think it’s a different version (X5) and the menus are a bit different.
Trying to do the cut out and not sure which shape to pick, or am I in the wrong menu?
Ed
Hi Ed,
Not absolutely sure but it could be the tool below the one you have selected in the screenshot. Should say something like Rectangle selection tool, it won't work unless you have a photo actually loaded for it to work on.
The version I am using is the free download version as per the link near the top of this topic, and it may be possible to have both versions on your computer at the same time.
If you can, hover over the tool below the one you have in the screenshot and do another screenshot so that I can see what it says.
Cheers
Simon
Posted
Full Member
Phil
Posted
Site staff

I think the version I have is the current downloadable version, as the current full version in X6. Don't think it's possible to get X3.
Ed
Posted
Full Member
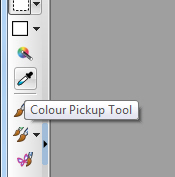
That's the tool you need and it is the Polygon Selection Tool - the middle one that you want.
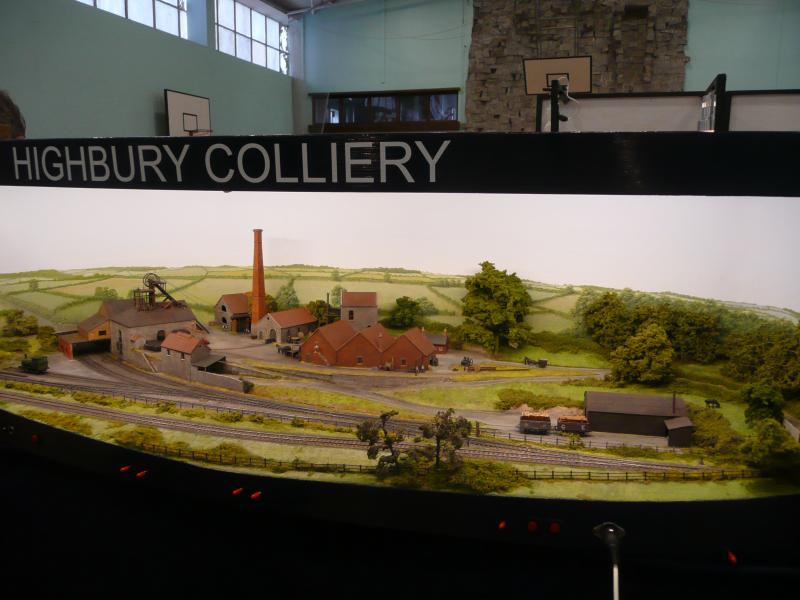
I have loaded a picture below that you are welcome to practice on and see if you can have a gradient in the sky - just for fun.
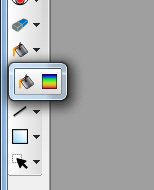
If you use the Polygon Selection Tool you can take out the layout name board and have the sky go to the top of the picture. To get the new colour the same as the backscene use the colour pickup tool -
That will give you a similar colour to that below:-
Then just do the steps for the replace colour and you will have something like below:-
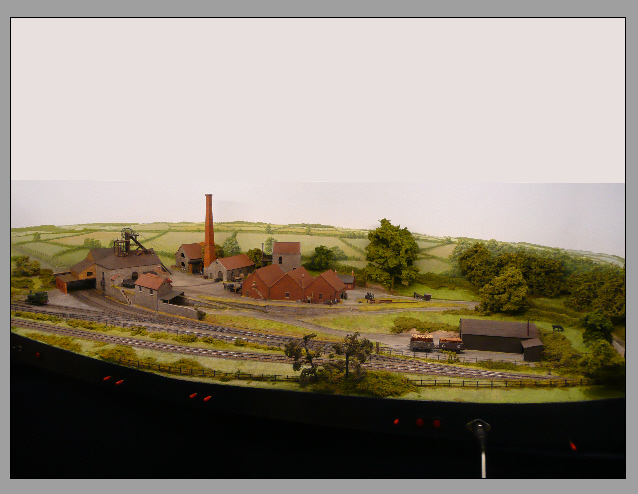
Not perfect as we can now see that the layout owner has a couple of spotlights to illuminate his layout and backscene which shows as different colour bands.
Cheers
Simon
Posted
Site staff
Ed
Posted
Full Member
Posted
Full Member
Phil
PS. If anyone is giving this a go along with Ed, please post the results, good or not-so-good. This is really easy to do and it would be good to see how members are getting on with it. Once your familiar with it, it's a lot of fun and you can make your pictures a lot more interesting ;-)
Last edit: by Phil.c
Phil
Posted
Site staff
I think I am getting the hang of this, but is there a way of cancelling the selection tool once you have started?
It seems to force you to complete the shape, even when you want to go pack and change/move the last click/point.
(Tried ESC and Backspace)
Ed
1 guest and 0 members have just viewed this.