Making trams from card or paper
Posted
Full Member
Really just to keep this from becoming a dead thread but a little progress to report.
I got some aluminium tube so I have started to install more span poles on Proven Mill.

New poles on the right. No finials yet and the North Face of high street has not been demolished yet.
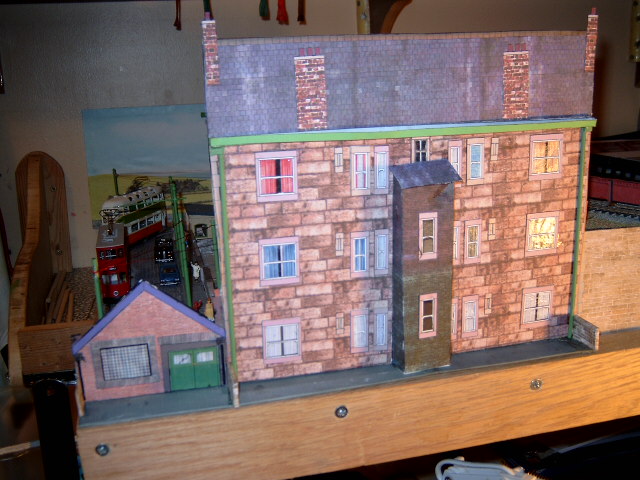
Looking West at the rear of High Street in the early morning sun.( Anglepoise lamp)
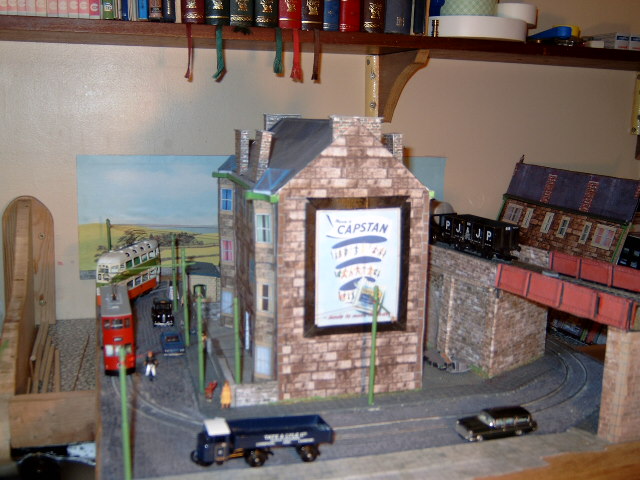
Looking West after the demolition.
The East side of high street can be seen behind the railway bridge. It's an ultra low profile 10mm thick section which can be removed for access to the track & overhead.
I have been spending a lot of time working on a set of etched brass fittings for my "Standard" trams but it is slow going and AutoCAD is driving me to distraction as I need to produce a negative of what I need. The programme works fine but it draws either white on black, like an original blueprint, and when you try to get it to print out you need to ensure that all the colour hatching's are correct or you confuse the printer. You can draw black on white but all this does is is register your line as a black line on the drawing but if you want a white line it draws that in black and reverses it when you print. Same as a white hatching. Hatching is AutoCAD for a colour fill but you can define several patterns.
Next attempt will be using Cyan background.
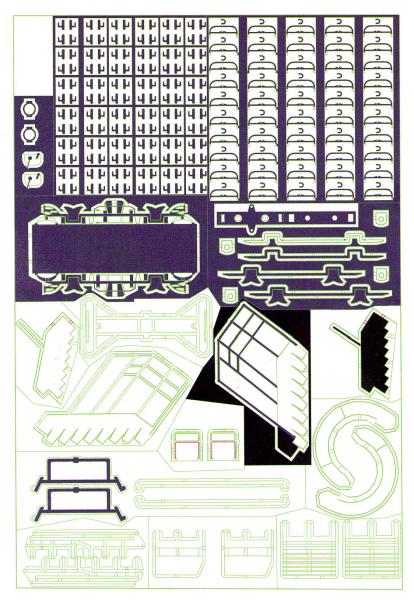
The sheet above shows up as black with white outlines round the individual components on screen but this is what I get on a printout. Normally I would dump something like this and start again but there is just too much work already in there.
Oh well if it doesn't keep you on your toes it can't be a proper hobby.
Jim
 Last edit: by The Bankie
Because, except in some unfortunate circumstances, trains did not run on town centre streets

Posted

Site staff
Regards
Alan
Born beside the mighty GWR.
Alan
Born beside the mighty GWR.
Posted

Full Member
Also, what's on that fret ?
'Petermac
Posted
Full Member
Spurno, I'm beginning to wonder if it's beyond me too:shock::shock::shock:
Peter,
It's only the outer cladding to give the appearance of a two or three diameter pole. The central insert which takes all the tension is steel rod.
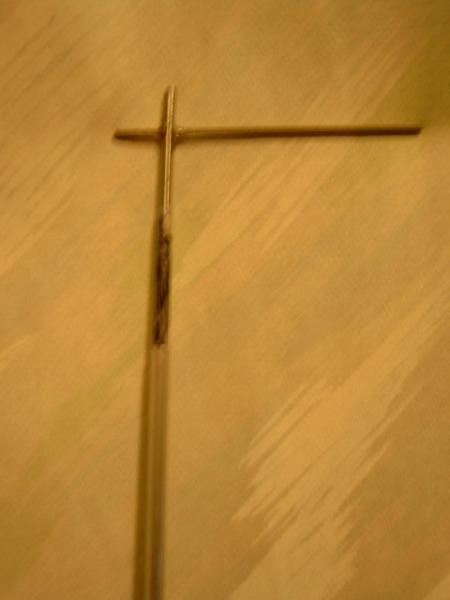
The span arm and the rod it fits into are both steel rod, the first silver bit is the steel rod, the black (ish) bit is the first tube and the silver (ish) below that is the next diameter tube.
Rubbish pic but when I make another pole I'll paint it multi colour and take a decent pic to show you.
The fret is, from top left:
Span wire hangers, traction wire ears,the long lump with holes is my version of the base for a bow (well I COULD pirate Mark Hughes version but that would be extremely unfair and not nice at all). To the right of that is the base layer of a chassis and truck sides for an 8ft Brill truck with the Glasgow magnetic brake fitments. On the left are the the remaining truck parts to build up to get a 3d effect on the chassis. Under the chassis base is the Glasgow bow itself. The next layers down are inner and outer stair sides and stairs, handrails and balcony handrails with the main platform handrails thrown in for good measure. The bottom row has the lifeguard, platform steps and side lifeguards. The bits I missed at the top right are headlamps and controller tops. When I get it right there is enough room for a couple of tram stop signs as well.
NO there are no plans to do an etched kit complete as that would mean I need to paint the damn thing. Mind you a Leeds pivotal or Middleton Bogie or Convert or ………NO! NO!
GET THEE BEHIND ME SATAN!
:shock::shock::shock::shock::shock::shock::shock::shock::shock::shock::shock::shock::shock::shock::shock::shock:
Jim
Last edit: by The Bankie
Because, except in some unfortunate circumstances, trains did not run on town centre streets
Posted
Full Member

Thanks Jim. :thumbs
I can't remember if you're planning prototypical overhead pick up ……:roll::roll: If so, will you feed to power up the pole ? Both steel and aluminium would make excellent conductors. Did you choose aluminium "sleeve" poles because of price ? I've experimented a bit with brass rod - in brass tube - in another brass tube but it gets pricey. I don't know why I didn't think of using a steel inner - much stronger and cheaper too. :oops::oops:
I'd be interested in hearing how you get on soldering the ears and hangers - or are you using glue ?……..:hmm I understand they can be a bit of a challenge to do without leaving a blob of solder at each join - just to de-wire the pole …….:???:
'Petermac
Posted
Full Member
'
Posted
Full Member
First up is
With a brush or spray ………….And how do you paint aluminium?
,
.
.
.
.
………………………………….using acrylic paint. The bits I am painting are not likely to be handled or abraded so I have not bothered with a mordant, that is a chemical to etch or clean the surface and provide a key for the paint to adhere to. For something likely to be handled I would use a light acid such as solder flux as a mordant and wash and dry before painting.
Peter,
Your questions will take a little longer to answer. Let's start with:
Yes. As they are only decorative I would have used plastic or paper (if there was no discernible joint) and I could find any.Did you choose aluminium "sleeve" poles because of price ?
Twin rail negative & common positive overhead as it's easiest to wire at a junction. NO. In full scale practice the current would be fed from a section isolator box (a box similar to the telephone junction boxes you see on the street) up a wire secured to the traction pole and out to the overhead power catenary. Since this is easy to re-create and easier to adjust this is how I plan to do it.I can't remember if you're planning prototypical overhead pick up. If so, will you feed to power up the pole ?
I've got hold of some "Bare" Electric PaintI'd be interested in hearing how you get on soldering the ears and hangers - or are you using glue ?……..:hmm I understand they can be a bit of a challenge to do without leaving a blob of solder at each join - just to de-wire the pole …….:???
Code
http://www.bareconductive.com/You need to look at the next picture to follow this, BUT:
In order to avoid copyright infringement I have to alter the design of the ears and hangers. However these things have a basic shape which is more or less needed to portray the original. SO: On the Mark Hughes version all the pieces which hang over a wire, pole or other etching are hooks with a 1mm gap and a 1mm radius centre. Mine are U shaped but laid on their side. His are the better design.
On the Hangers Mark has two small Spikes rising from the "Bowstring of the hanger with a 1MM gap between the spikes to drop the hook on the ear over. I use a triangular base with 1mm gap. Once again the Mark Hughes design is neater.
Looking at the drawings the black bits are the full thickness portions. They grey bits are half thickness to allow folding or twisting of the part, you need to turn the hook on a hanger through 90 degrees or so to get it to face the correct way to get the overhead to follow the track centreline. It also allows the main overhead to be gripped in the fold and no need to solder. The red bits are tags which hold the actual component in place on the fret and are only half thickness and get trimmed off of the components before assembly.
Where possible I put a junior hacksaw cut on the span arm to allow the hanger hook to drop in to as this provides stability and helps hide the hook.

Hope this clears things up.
Jim
Last edit: by The Bankie
Because, except in some unfortunate circumstances, trains did not run on town centre streets
Posted
Full Member
Been trying to get the fret of bits put up seven posts ago made up.
This particular fret is going off to the "professionals" (they're charging me money to do it) and I'm experimenting with some pcb making gear that claims to be able to reproduce circuits so it should cope with my stuff. So, when it's finished I can compare results and see if I can do my own etchings. Should improve the availability of hard to get bits. However nothing is ever that simple. The first batch of acid resist film I got from MAPLINS arrived damaged and has had to be returned.
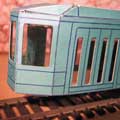
On a lighter note the pic shows two vintage BEC bogies with cardboard side frames from an Elro kit. These are the unpowered bogies as I do not want to risk the powered ones until I have tried this first. The side frames are for 4'6" bogies under the sett car or a mains test car but the bogies are 0nly 4' as they are for a Mk 1 Coronation tram and I wanted to see how bad it looks.

Regards
Jim
Because, except in some unfortunate circumstances, trains did not run on town centre streets
Posted
Full Member
Thanks for the link. I have been to the site but forgot to record the link, now corrected.Peter,Wahiba
This is the address if you want chapter and verse on automatic stop/start systemsCode
http://www.gordonstrams.net/index.htm
Great info
Jim
Summer has mainly been bathroom renovation with only a single card body made recently, 1/22.5 gauge 3! A bit rough but basically to cover a Meccano chassis.
Chassis here:http://www.youtube.com/v/h9y6AUVHI8o?version=3
Currently in Spain with laptop and internet connection. Plenty of time to design a few more card bodies.
David
freelance model railways and tramways
index02
index02
Posted
Full Member
Hope to be back to card trams on return from break in Spain.
Noticed a discussion I missed on suitable chassis. I acquired a few UE chassis with the twin bogies. OK but do not seem to fit with any known tram in 00 scale hence my own designs.
I have also acquired cheaply a few ex model rail chassis for diesel locos and railcars. With my enclosed bodies they are fine. I think if I try windows they will have to be 'dirty'.
Just wondering if anyone else has tried these ex model rail chassis. One is actually from a 3 axle diesel loco but no middle axle, phony wheel lumps. Has the potential for a reasonable lwb tram chassis. I think others are Triang and/or Hornby.
I also have some tank engine 4 wheel chassis and wondering if they could be used under a tram chassis that hides the wheels. As I have mentioned before I quite like creating my own designs.
Assuming however that I might feel affluent which of the currently available commercial chassis would anyone recommend. Black Beetle and Tenshodo are names that come to mind.
David
freelance model railways and tramways
index02
index02
Posted
Full Member
If you are truly feeling effluent have a look here:-
Code
http://www.hollywoodfoundry.com/Jim
Because, except in some unfortunate circumstances, trains did not run on town centre streets
Posted
Full Member
Yes - I have seen that site before. As I understand things at the moment life in Australia is currently quite expensive. Stories of being cheaper to buy mail order from M&S suggest this is probably true. However, on the basis of you get what you pay for then there will always be a market for better than average products.
Fortunately I tend to have a wide range of interests which take my limited funds. I also enjoy having a hobby on a budget, finding more enjoyment in fitting my own body to a £10 chassis rather than £100+ on a near rivet perfect model. Of course 00 gauge commercial models while being near rivet perfect are way out on gauge! That 00 gauge is actually in scale gauge to our now defunct local tramways was a interesting discovery. Consequently my freelance card models are 1/76 scale for 4' gauge track.
David
freelance model railways and tramways
index02
index02
Posted
Full Member
Yes I know what you mean about scale & gauge. This is why 00 is normally described as 00 Gauge or 4mm scale.
As far as hobby on a shoestring is concerned that's great and a good challenge. I tend to make things rather than buy rtr products and the more I end up doing myself the more satisfaction I get out of it.
You said that you were feeling affluent and as far as I can make out these guys are the best and you need a deep pocket for Rolls Royce quality.
I get a feeling that there will be some modellers out there who will feel that your stuff is only a toy. Well I have to say that despite being superb examples of miniature engineering and the painters art, so is theirs!
The whole point is that what you are doing is YOUR hobby and the reason for indulging in a hobby is to get fun and satisfaction from what you do. That is something which is abundantly clear from your posts that you do and just to spur you on with the Meccano idea there are published plans for a Meccano Glasgow Coronation tram. I saw someone buying a set when I was in Frizinghall Models & Railways the other week. Might be something to look into and perhaps convert into a Bradford or Keighley tram.
Keep up the good work.
Jim
Because, except in some unfortunate circumstances, trains did not run on town centre streets
Posted
Full Member
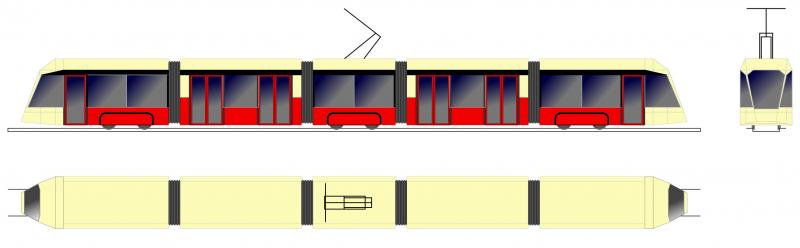
Using an outline drawing from a downloaded brochure I drew up this model to be made from card. The CAD drawing this has been taken from is drawn for 1/76 scale. I could not remember the tram it is based on until I saw a picture of a Nottingham tram which looked very similar so I think it was a Citadis. Nottingham trams do not have valances on the bogies so it probably is not exactly the same.
Next job is to produce the flat model image from these three views. Always tricky working out all the true lengths. However all faces are suitably flat so it should work.
Nottingham Trams have been on the TV recently in the series Truckers. Noticeable that most of the city scenes included a tram at one time or another.
I am not sure if any of my 4 wheeled powered bogies would be adaptable for this model. Hence my interest in commercial bogies. Not sure if my 'affluence' runs to fancy Australian bogies though. I will have to answer a lot more questions on YouGov before I could afford one. However, I think I might have answered enough to try a Tenshodo.
David
freelance model railways and tramways
index02
index02
Posted
Full Member
This is an old Nottingham tram publicity release.
Since it was meant for public release it's copyright free.

Nearer N Gauge than 00 but I never got dimensions to check it out.
Regards
Jim
Because, except in some unfortunate circumstances, trains did not run on town centre streets
Posted
Full Member
To continue the saga started in post 108 about Maplin and etching components.
I went back to the store last Sunday, 10/11/2013, as I had received a new batch of film by post but once again badly packaged and possibly damaged. Whoever is doing the packaging seems to think that one bubble wrap envelope and an extra sheet of bubble wrap are sufficient to protect an item susceptible to bending and sharp corner impacts from damage. It wont! So I took it unopened to the local store where I asked the manager to watch as I unwrapped it. It had gotten bent but not creased and not dented so that was fine. However there was no instruction sheet as asked for so I asked for this to be sent. The manager did this and I subsequently got an email from Mega UK who produced the film. Turns out that the film is a superior quality laser film for OHP etc use and not what I was looking for. However contrast the assistance and helpful tone of the reply with the lack of response from Maplin HQ. Mega sent me a link which contains an instructional video which is well worth a look at http://www.megauk.com/video.php and if you need any supplies for etching go direct. Just remember the minimum order charge.
Regards
Jim
Because, except in some unfortunate circumstances, trains did not run on town centre streets
Posted
Full Member
Anyhow with some rain in Spain forced indoors to the computer and knocked out some variations on my original tram. As yet to produce the cut out design for any.
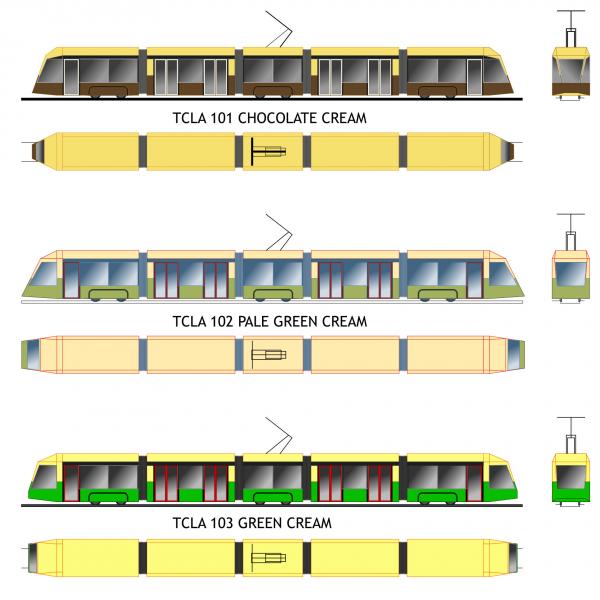
Always more fun trying out the different colour schemes. Left of lettering and fixtures such as lights on this lot.
David
freelance model railways and tramways
index02
index02
Posted
Full Member
Are you going for N, 00, or 0 gauge and I have to assume that it will be "bendy" like the real thing?
What about a Meccano version?
Jim
Because, except in some unfortunate circumstances, trains did not run on town centre streets
Posted
Full Member
00 gauge for bendy versions. Meccano is for practical ideas. At the moment my Meccano project is only a 4 wheeler but the idea of a model of a bendy chassis is something I am looking into.
David
Had a trip to Murcia Ikea not realising the following was on the road outside the trading estate.

freelance model railways and tramways
index02
index02
Posted
Full Member

Jim
Because, except in some unfortunate circumstances, trains did not run on town centre streets
1 guest and 0 members have just viewed this.