Shelf Layout
Posted

Site staff
Ron
NCE DCC ; 00 scale UK outline.
NCE DCC ; 00 scale UK outline.

Posted

Inactive Member
Note to self, "Check and Double Check."
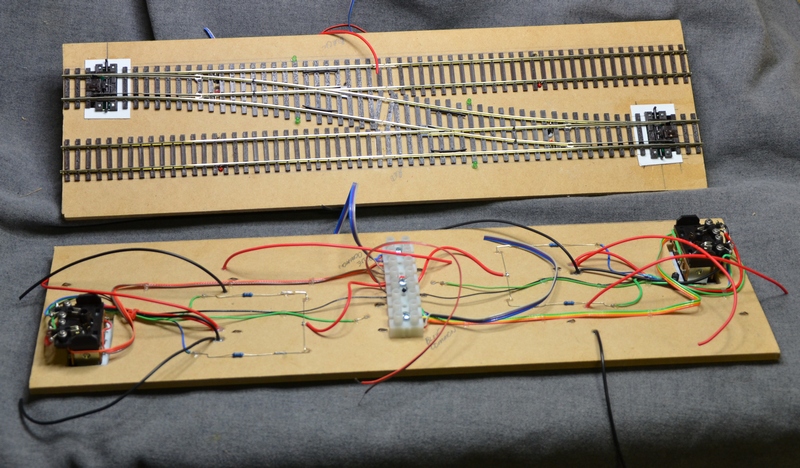
What it did show me was how easy it is to remove the turnouts by unsoldering the wires and snipping off the bent over and glued pins.
Max
Port Elderley
Port Elderley
Posted

Full Member
Posted
Inactive Member

Max
Port Elderley
Port Elderley
Posted
Full Member
Posted
Inactive Member
I've made a couple more modules.
The second of the double ones, and . . .
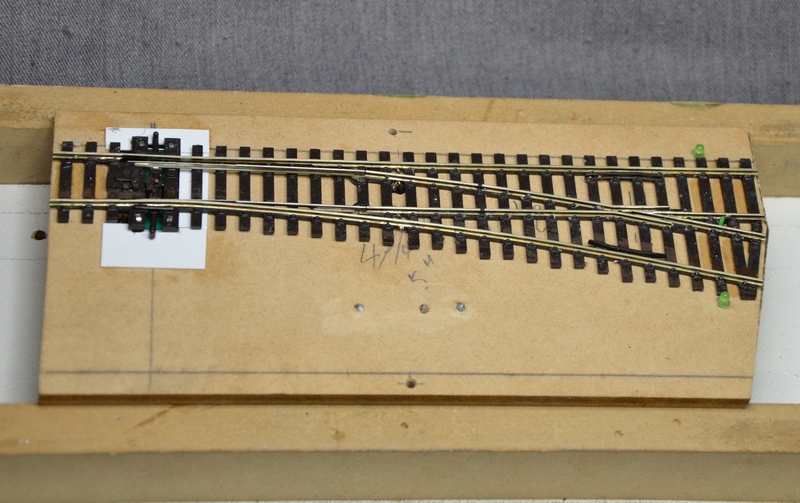
a single one. This is the only one that I was able to save from the first layout. Even then I had to solder the points of the frog together and put in an extra frog wire to get it to work.

I might make up one of Sol's CDU's so I can bench test the solenoids. Everything else works.
Max
Port Elderley
Port Elderley
Posted
Inactive Member
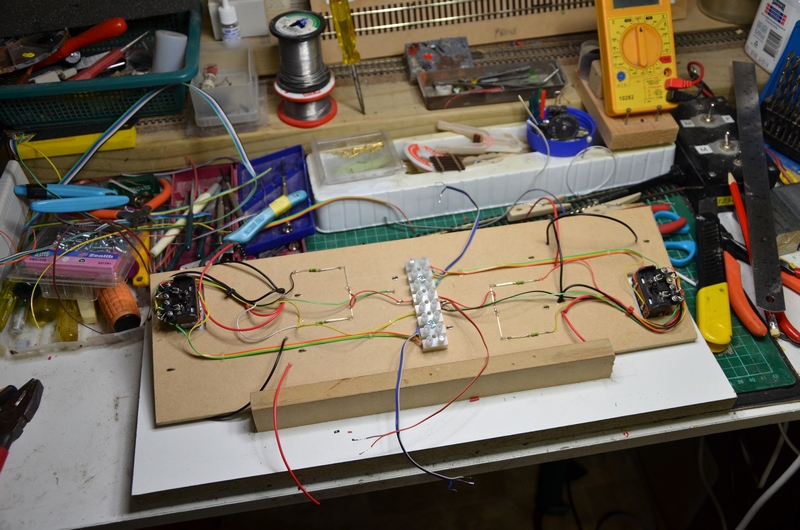
Now I can test each one before I move on to the next one.

I'm using the DPDT switch next to the red LED bezel. Terminals 1 2 and 3 have the three wires to the solenoid motor and terminals 7 and 8 are the 12 Volt DC power supply for the LEDs on the turnout.
Max
Port Elderley
Port Elderley
Posted
Full Member
I guess that some of us are organised and tidy and others, like me, are ….. erm….. not.
 Last edit: by Bod
Posted
Inactive Member

Max
Port Elderley
Port Elderley
Posted
Full Member
Posted
Inactive Member
Max
Port Elderley
Port Elderley
Posted
Inactive Member
Max
Port Elderley
Port Elderley
Posted

Full Member
 thumbs
Do you find it gets easier as you get more done Max ?
When I'm doing multiples of anything, I usually find a quicker/easier way to produce a better end result by about half way, so go back and re-do the earlier efforts …………..

'Petermac
Posted
Inactive Member
Each one still takes me between 4 and 5 hours.
Max
Port Elderley
Port Elderley
Posted

Full Member
Posted
Inactive Member
Max
Port Elderley
Port Elderley
Posted
Full Member
Posted
Full Member
My little work area is constantly like that! Mind you, I can nearly always find things. It is when I tidy up that I then can't remember where things are anymore!!
Sounds like you are nearly half way with your modules. When doing similar things, I usually get fed up around half way and then "invent" a different way of doing things to re-kindle my interest. I remember taking part in "Management Training" exercises where I was never categorised as a "completer/finisher". Trouble is, when modelling on my own, there is no team around to do the completing and finishing for me :sad:
Looking forward to seeing more candid photos of your progress.
Posted

Full Member
Great work though. :thumbs
Regards,
Trevor
Trevor
Posted
Inactive Member
I don't think I've ever seen anyone do it like this - maybe there's a reason why . . .
Max
Port Elderley
Port Elderley
1 guest and 0 members have just viewed this.