Members Monthly Project - November 2012
Posted
#145166
(In Topic #7926)

Legacy Member

Posted

Full Member
You are probably bored with my projects, however, if you have no other offers, I would be happy to share progress on a low relief warehouse I plan to construct over the coming weeks.
Bob
Posted

Full Member
Bow ties are cool - and yep, that's a Sonic Screwdriver.
Posted
Legacy Member
Posted
Full Member
Bow ties are cool - and yep, that's a Sonic Screwdriver.
Posted
Full Member
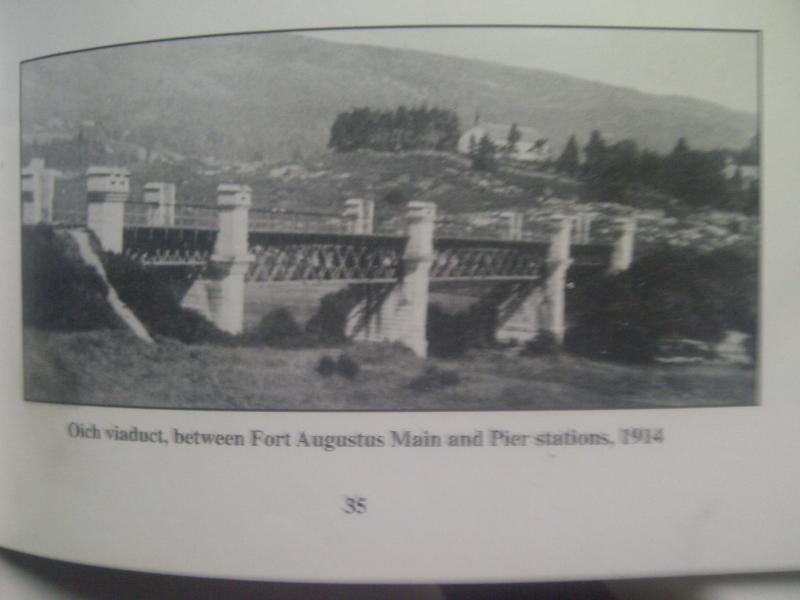
(sorry it's a bit blurry, the actual picture in the book is very clear!)
Elsewhere (a couple of pages along) the dimensions given are of 4 spans, 2 of 50ft, 2 of 100ft. By counting the 'diamonds' in the nearside span, I worked out that each span had ten. 50/10 = 5 ft. 5ft = 10mm at 2mm:1ft scale. That's that first bit figured, then I had to get my ruler and magnifying glass out to figure the height of each lattice, and that was a pain in the proverbials!
Eventually, counting the railing along the deck gave me 7 railing posts, which near enough gives me a distance of 7' (and a spare 6" either end to make it the full 50' (modellers license, so shhh)
Measure that against the height of the railings, then again against the height of the lattice gives me a height of, ooh, 6ft (12mm in scale).
So, 50x6ft = lattice 1 and 4, or in scale, 100mmx12mm with 10 'diamonds'.
"But how do I find the length of each lattice girder?" I hear you ask. Simple geometry, is the answer - a(squared) + b(squared) = c(squared), so 10(squared) + 12(squared) = 244. square root being (thank you calculator) roughly 16.5 (and a few more numbers after that, so 17mm and a trim, my ruler doesn't do 1/2mm)
I'm ready to build the first lattice now.
Bow ties are cool - and yep, that's a Sonic Screwdriver.
Posted
Legacy Member
Posted
Full Member
I was following that fine until you got to the geometry bit. :pedal
Oops - not only does my ruler not do 1/2mm, my keyboard doesn't do the superscript '2'….
Lets see if I can do some dodgy text drawing ;o)
(a x a) + (b x b) = (c x c) : square root of (c x c) = c. Then you have the length of the diagonal (or hypotenuse, to use mathspeak. Don't ask me to do the angles, that involves sine, cosine and tangent, and I don't have a slide rule or scientific calculator ;o) )
[edit] - it doesn't do the texty draw, forum formatting screwed it up here we go with ms paint:
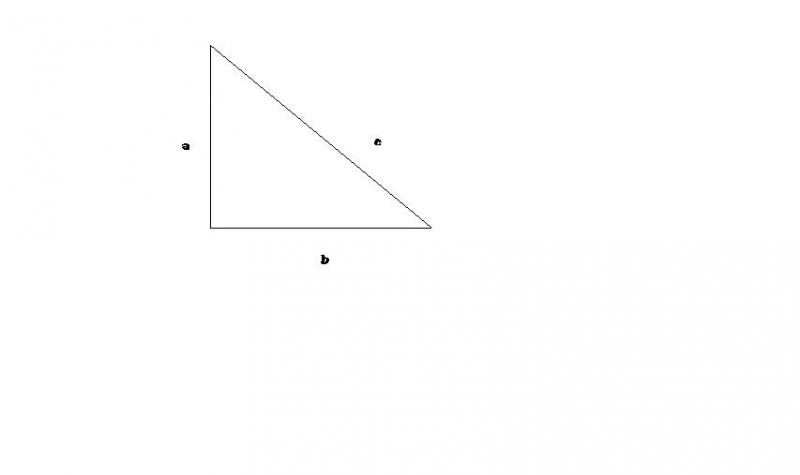
so, (a x a) + (b x b) = (c x c) - square root of (c x c) equals c - did that help?
 Last edit: by PaulB
Bow ties are cool - and yep, that's a Sonic Screwdriver.
Posted
Full Member
I hear you can buy 'T' shaped girders from your local model shops, but I couldn't so had to make my own as a basis to start from for the top and bottom of the lattice, see below:
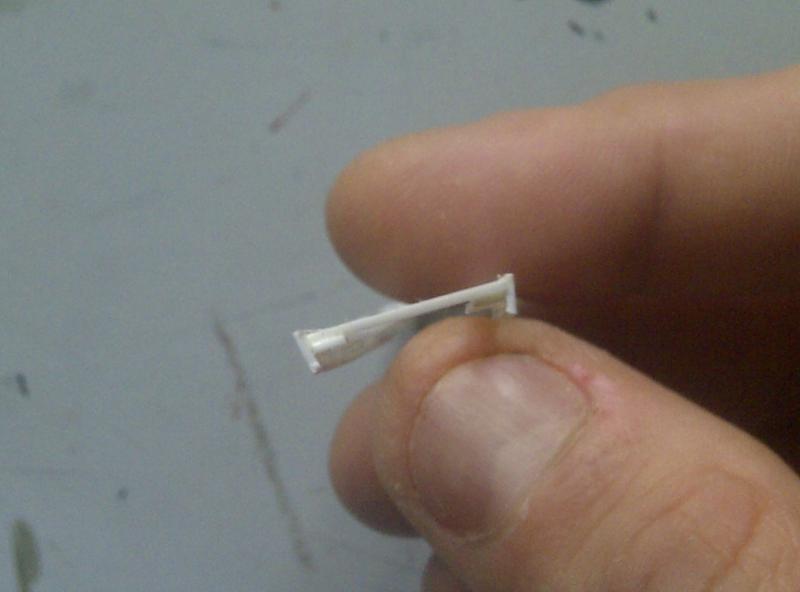
(that's the top and bottom joined with end strips to help with the build - not 100% straight I know….)
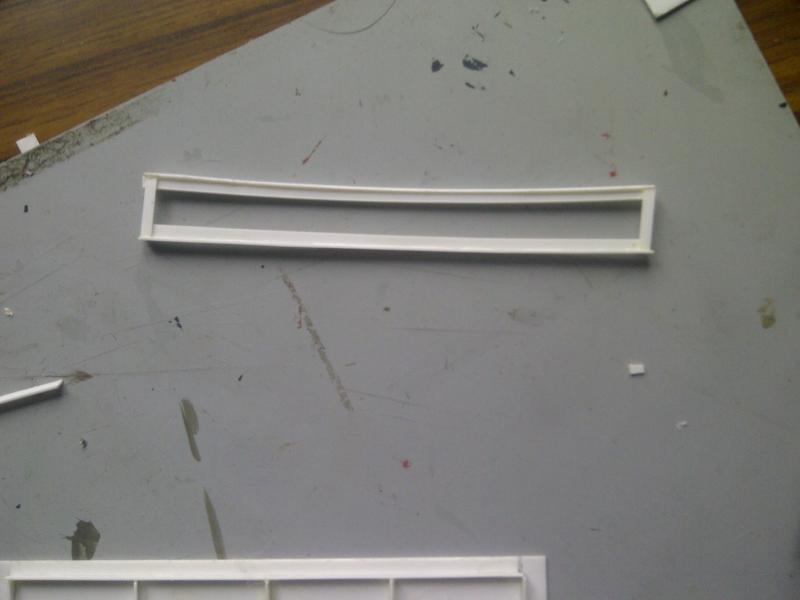
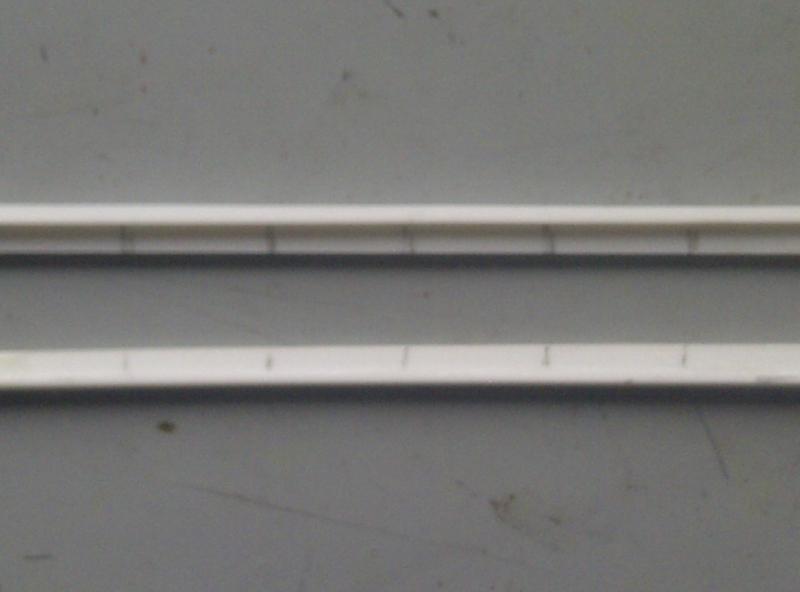
As many of you already know, sometimes when cutting 2mm strips from a sheet of plastic card, it'll curve slightly, but enough glue and bracing will sort it out (at the bottom of the photo is the trackbed, braced and ready for stuff to be glued to it)
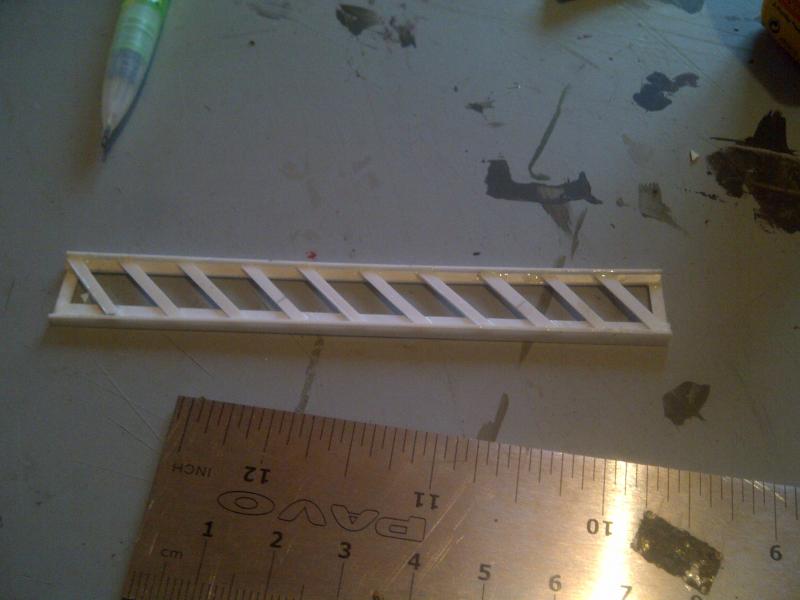
Then I marked out the 10mm spacings for the lattice work:
Already mentioned was the measurements for the diagonals (all that geometry stuff) and started cutting, trimming and gluing into place. I heartily recommend the use of tweezers for this bit, as it's REALLY fiddly. Unfortunately, I didn't have any, so it was the point of my craft knife to get them in place. It took me about an hour to get to this stage:
Now to flip it over and do the same. Then I spotted an issue:
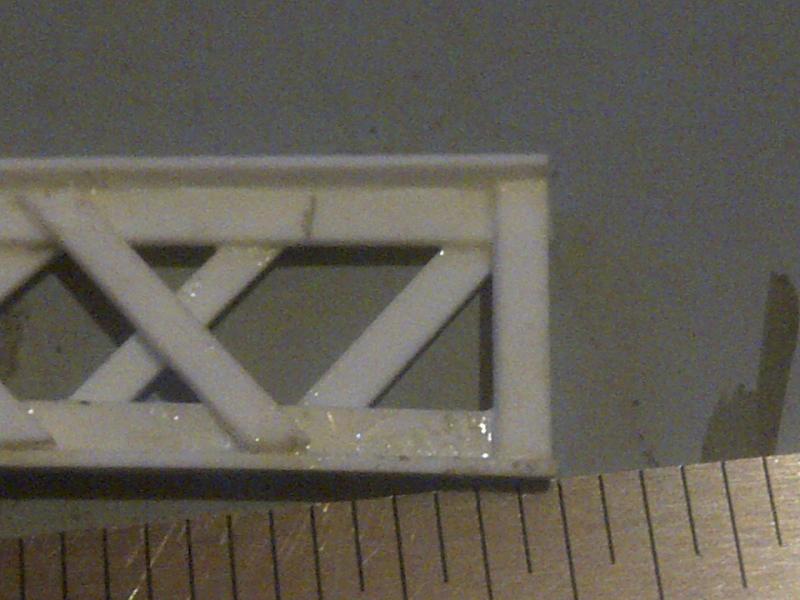
Can you spot the deliberate (not) mistake? Yep, the end pieces were in the way, so they had to come off before the final lattices could go on. After a bit of fiddling, I managed to remove them (apart from what turned out to be a useful piece in the top corner) and fitted the last pieces into place. Then, to tidy it all up, more strips were added along the edges:
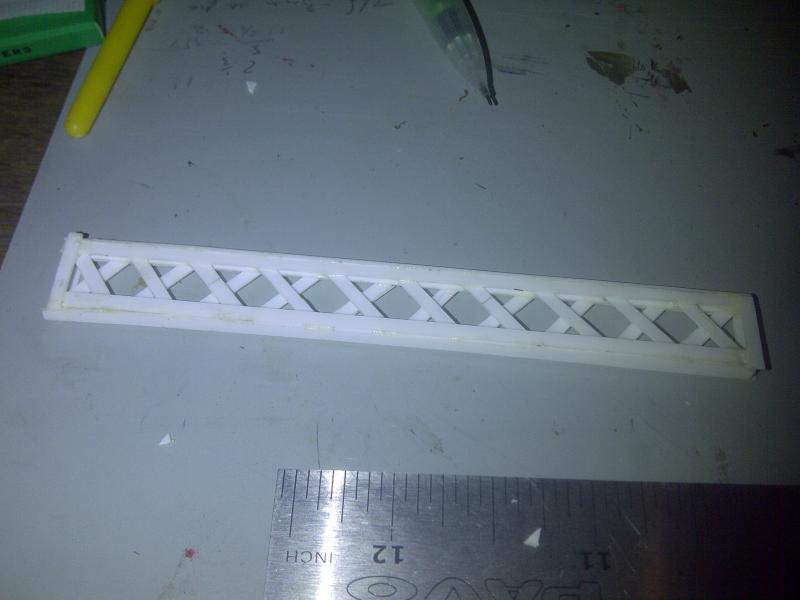
(that bit in the top left was trimmed off after the photo)
So, only another three of these ones, and the end sections are ready. Next time, the longer and wider spans.
Bow ties are cool - and yep, that's a Sonic Screwdriver.
Posted

Full Member
What scale are you using? OO? When I have tried things like this, I had issues with everything warping, probably from too much solvent, though I don't know for sure.
I am enjoying this, so keep it coming.
Wayne
Posted

Full Member
[user=1119]PaulB[/user] wrote:
Oops - not only does my ruler not do 1/2mm, my keyboard doesn't do the superscript '2'….
Lets see if I can do some dodgy text drawing ;o)
TIP :- If you have a full keyboard with a separate numeric pad you can use ASCII Code to generate the superscript 2 by holding down the ALT Key and typing 253 into the numeric pad to give you this ² You can also generate the cubed sign by using ALT 252 ³. My keyboard is a US one so I have to use ALT 156 to generate the £ sign. If you Google ASCII Table you can see all the different additional signs and symbols that can be generated.
Regards,
Trevor
Trevor
Posted
Full Member
Bow ties are cool - and yep, that's a Sonic Screwdriver.
Posted
Full Member
OK, Paul, I'm following you so far.
What scale are you using? OO? When I have tried things like this, I had issues with everything warping, probably from too much solvent, though I don't know for sure.
I am enjoying this, so keep it coming.
Wayne
Hi Wayne. I'm using N gauge, 2mm:1foot. The total length of the viaduct will end up being 60 - 70cm long, including the parapets.
I'm thinking that the warp is coming from cutting the strips on the first cut, instead of scoring it a few times 'til I'm through it. I've had to discard some pieces when they've curled while I'm cutting, and when I use lighter pressure they come out fine.
SO, TOP TIP! When cutting strips from your sheet of plastikard, use light pressure and score the card until you've cut through.
OR, buy plastic strip (which I might do)
Bow ties are cool - and yep, that's a Sonic Screwdriver.
Posted
Full Member
I use plastic strips quite a lot, and I can tell you this. I still have gotten some warping, that is why I said I think it comes from too much solvent.
I have followed Perry' advice and used a piece of window glass to make to bond on. It is VERY flat, plus it has the added benefit that the wet styrene does not stick to it. Hint: Let the joint cure for about 2 minutes before trying to move it.
I used a piece of glass that was 1/4" thick, that made it a much more sturdy work surface.
Every medium we work in has some sort of issue, I guess warping is ours. At least it can be controlled with a little learning.
Wayne
Posted
Full Member
I've never actually tried the strip, being a tightwad I whinge about paying nearly double for what looks like less, but with all the strips I need for this project, I'm going to try it :)
Bow ties are cool - and yep, that's a Sonic Screwdriver.
Posted

Banned
Cheers, Gary.
Posted
Legacy Member
Be careful with plain glass Paul as it can easily crack. I always use a car window from the scrap yard that I acquired many years ago.I'll try that Wayne, there's a knackered photo frame I can 'borrow' the glass from ;o)
I've never actually tried the strip, being a tightwad I whinge about paying nearly double for what looks like less, but with all the strips I need for this project, I'm going to try it :)
Posted
Full Member
Be careful with plain glass Paul as it can easily crack.
Very true! That is another reason why I use 1/4" thick glass. While mine is not tempered, it also is not very large. Something around 4" x 8" I believe. The smaller size makes it a lot stronger if you tend to push hard with the knife.
Just don't drop it on the floor! :shock:

Wayne
Posted
Full Member
On topic, I've now done the lattices for both the short spans - proper update when we get the house back to ourselves (visitors for the weekend)
Bow ties are cool - and yep, that's a Sonic Screwdriver.
Posted

Full Member
I have the same problem with a Revell needle applicator. I find it helps if you wipe the tip with a tissue before putting the cover on.
Regards
Rhiwderin_Ray
Rhiwderin_Ray
1 guest and 0 members have just viewed this.