Making A Styrofoam Mountain
Posted
#142695
(In Topic #7744)

Full Member
I have two black trash bags full of styrofoam scraps from the layout, and I thoughts I would just use them up. So here goes nothing!
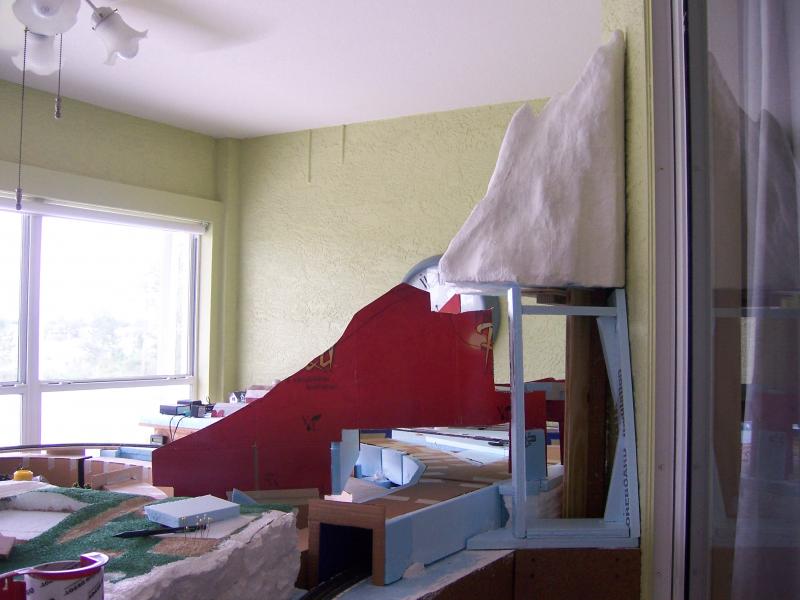
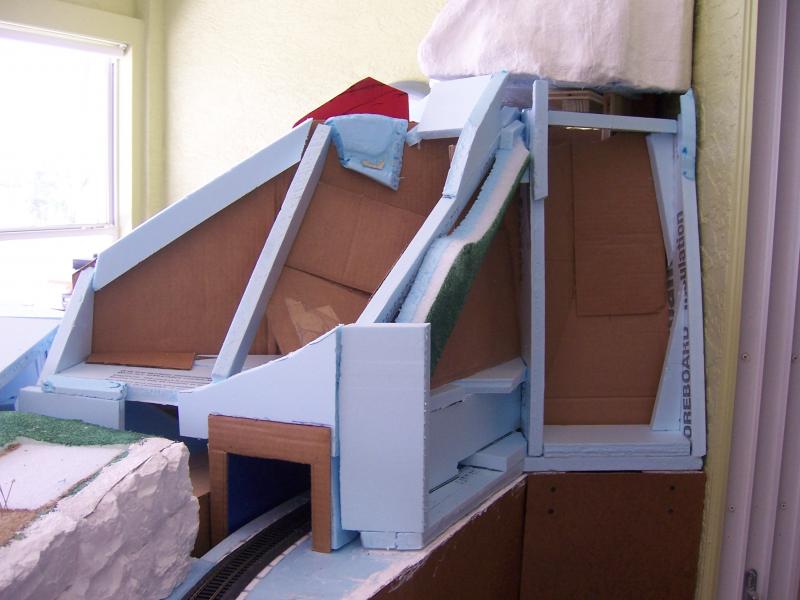
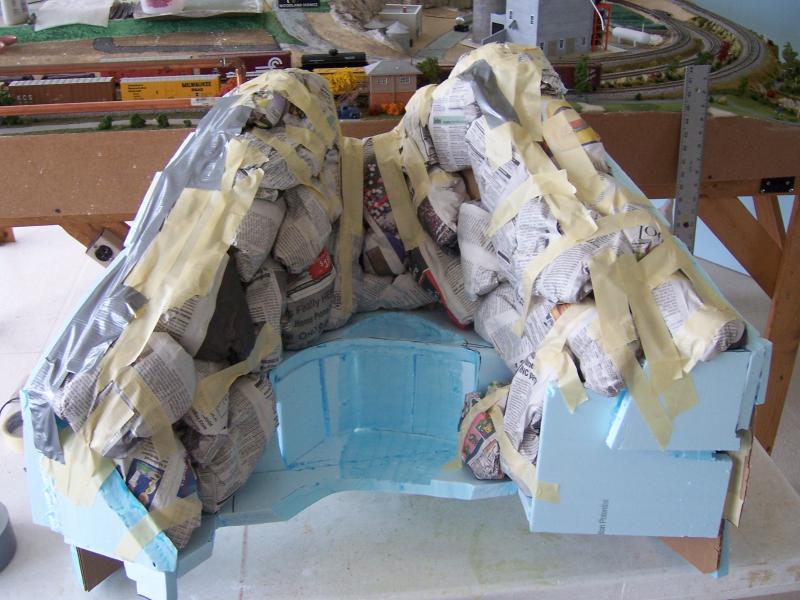
Here is the mountain top sitting in place. This was accomplished in one day, the platform and all. The mountain is quite high about 40 inches above the top of the layout. The tunnel below this is new also, needed for obvious reasons.
I need to make several sections removable in this mountain, for access to the track, and for the life of me I couldn't figure out how to do it by building the mountain from the bottom up, so I figured, why not? I'll build it from the top down. So I added the platform that holds up the mountain top and attached it to the layout.
The foam mountain top slides down over the plywood (hidden in this picture) and then locks in place. This way I can lift it off and work on it on a table top.

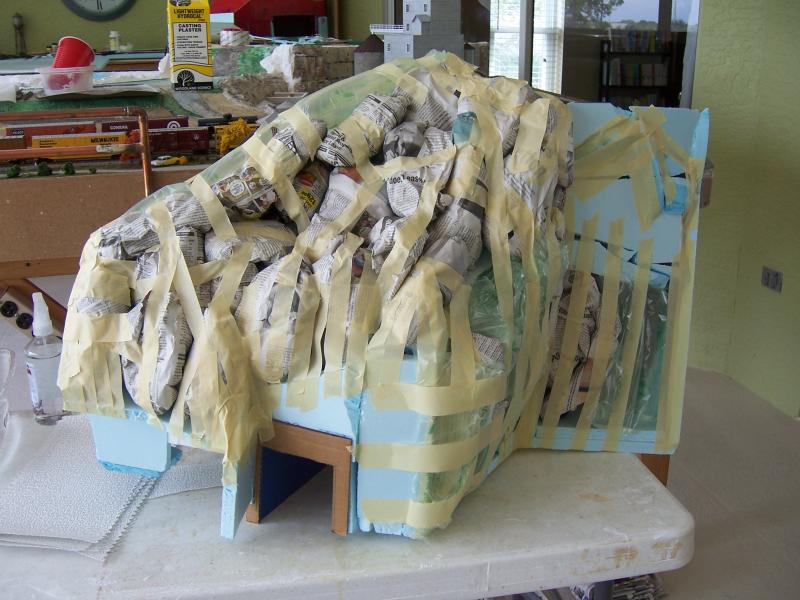
Look closely at this picture and the first one, you will notice I have added many more pieces of scrap foam. Once all the pieces of foam were in place I took my handy scraper and did some rounding off.

This photo is after I covered most of the mountain top with sculptamold. That stuff is real handy for filling in all the holes left from the scraps of foam.

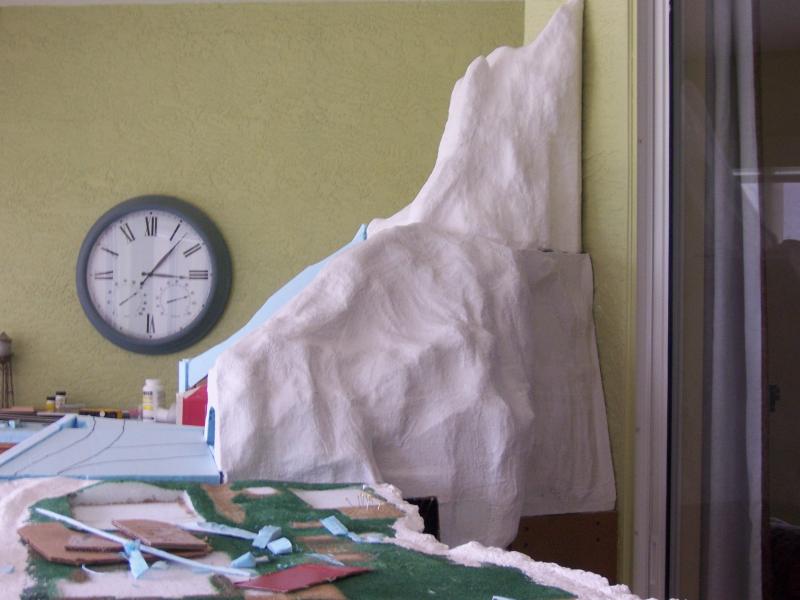
Today I just finished covering the mountain top with 3 layers of plaster cloth.
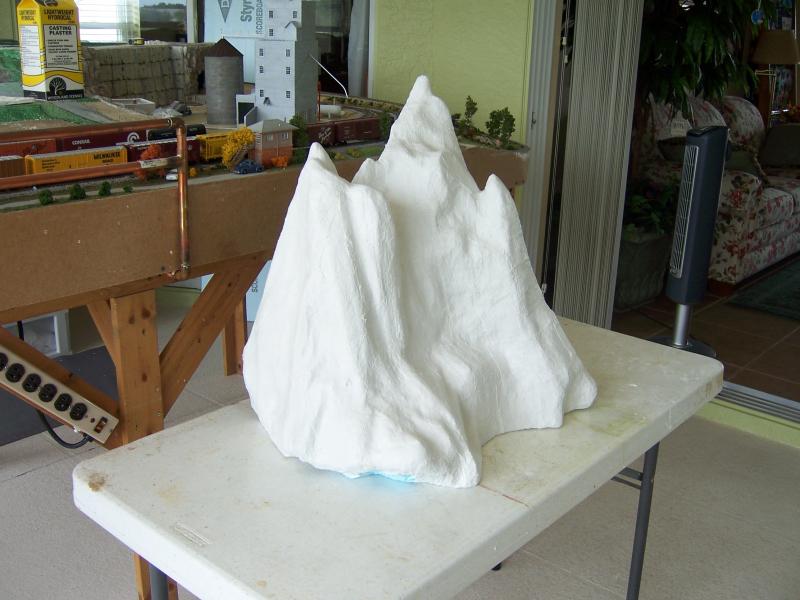
Once this is dry enough for me to lift up, I will return it to it's home on top of the platform, then I can begin making the sloping bottom part of this mountain.
Wayne

Posted

Inactive Member
Ken.
'It don't mean a thing if it ain't got that Swing'
Posted
Full Member
 I started years ago with several of the "foam" glues sold by various companies, none of which I was happy with. Each one had it's own issues, most would take way too long to bond, others would not bond foam to other materials.
So out came my hot melt glue gun and WOW, that worked great. The only waiting time I needed was to get the gun hot enough, after that it's just about as fast as you can grab a piece of foam.
One word of caution though, the gun can get too hot. When the glue comes out very quick and runny, it's time to unplug the gun for a couple of minutes. You don't have to stop working, just keep right on pulling the trigger, and when you begin to feel some resistance in the trigger, plug the gun back in and your good to go.
The problem with the glue being too hot is, it's so hot that it melts down into the foam so fast there is nothing on the edge left to bond to the next piece.
Wayne
Posted

Full Member
 thumbs
As Ken said, an ingenious way to use up waste foam. Also, I think we all too often ignore the possibilities offered by hot-melt glue guns. :roll:
Did you just use "ordinary" glue sticks or are they specially for styrene ? I've often found the bond, whilst quick, isn't very strong and tend to use mine more as a "tacking gun" to hold things in place until I do a "proper" fixing.
'Petermac
Posted
Full Member
Of course sculptamold over the face is the ultimate bond. When I am using sculptamold, any left over is always placed on the back side of something, usually in a corner, just in case.
More to come very soon.
Wayne
Posted
Full Member
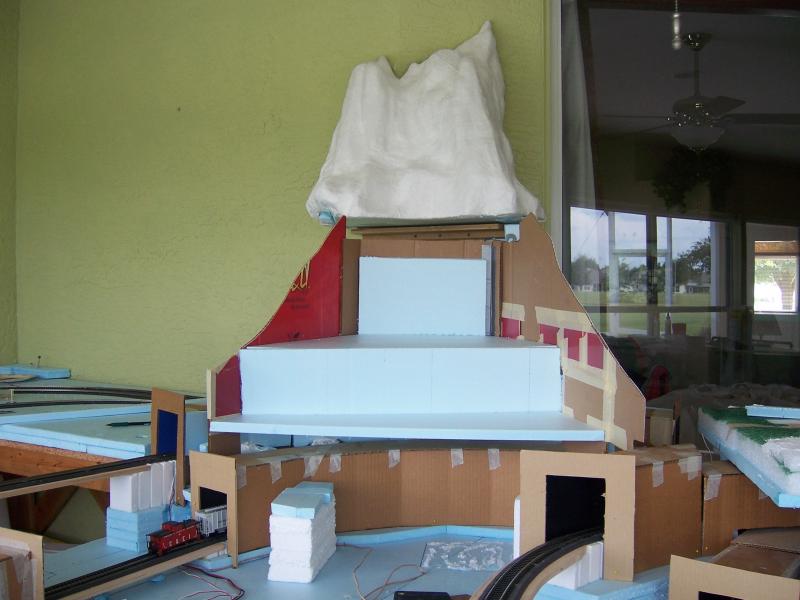
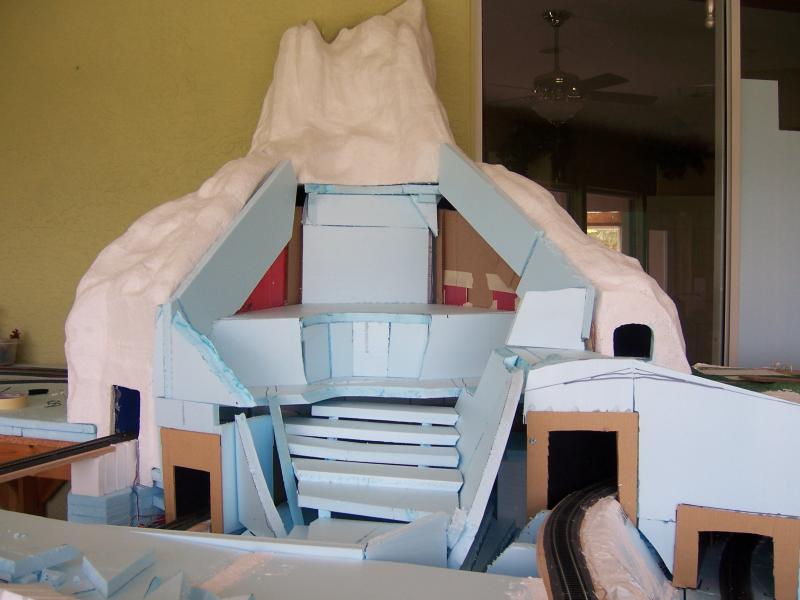
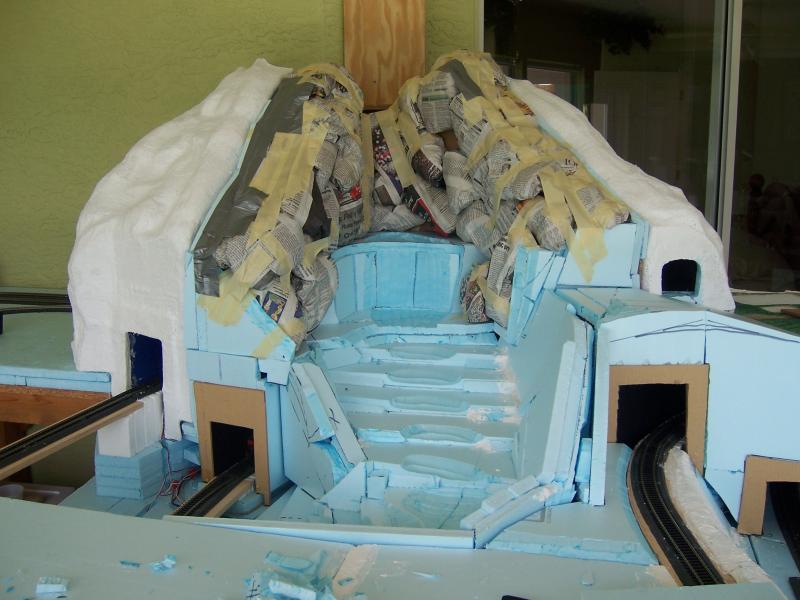
The cardboard is just an idea, as far as the silhouette is concerned, but it is in the ballpark. The tough part today was getting not only the silhouette but the underside had to be right too. The tunnels must be removable with the mountain in place. You can see the cut out above the tunnels in the first photo. The cardboard tunnel will lift straight up and come out towards the camera. This way I don't have to move an entire mountain (only a part) if a train derails in the tunnel.
The second photo is looking up the valley. I can envision a waterfall somewhere in there. Tomorrow is Friday so I should be able to get more done on this.
Wayne
Posted
Full Member
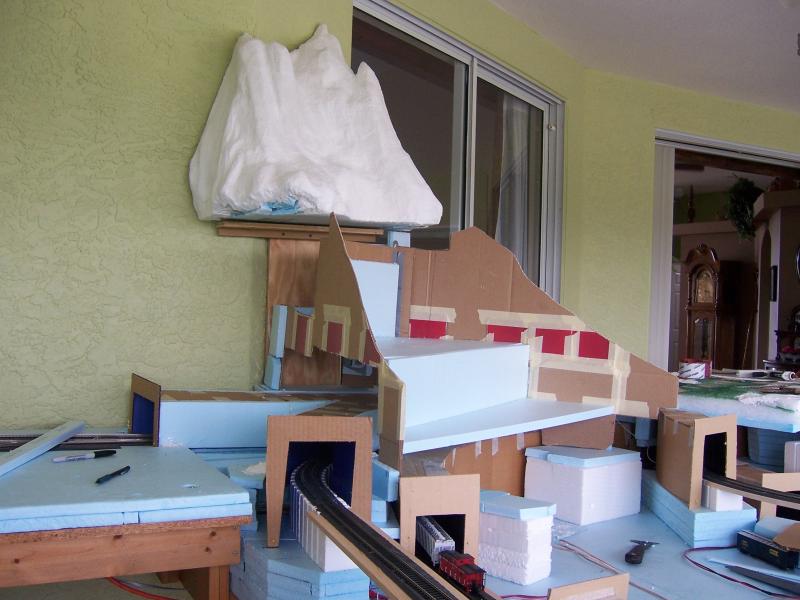
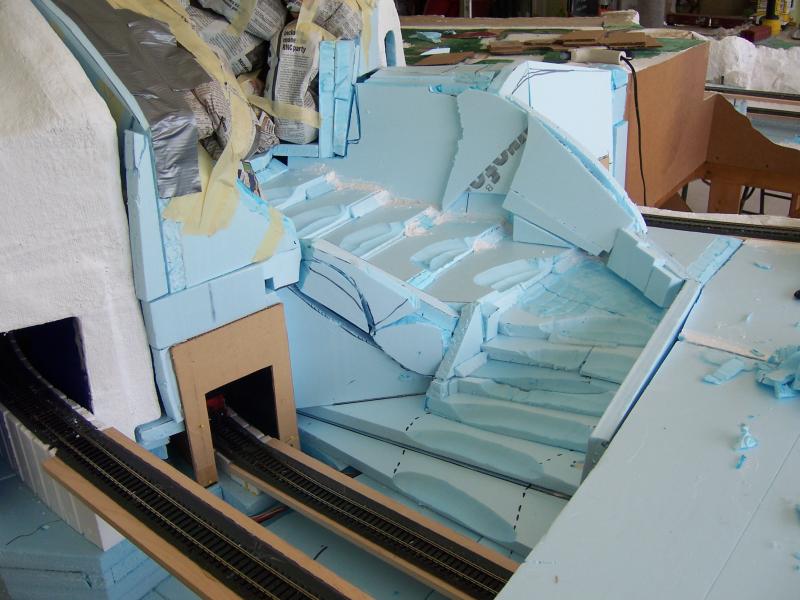
Having to make each module removable does slow down the work. I had to shift some of the inner tunnel from the outer module to the valley module because the outer one wouldn't come out. Not a big deal, just sends me in a different direction when I want to go forward.
Wayne

Posted
Full Member
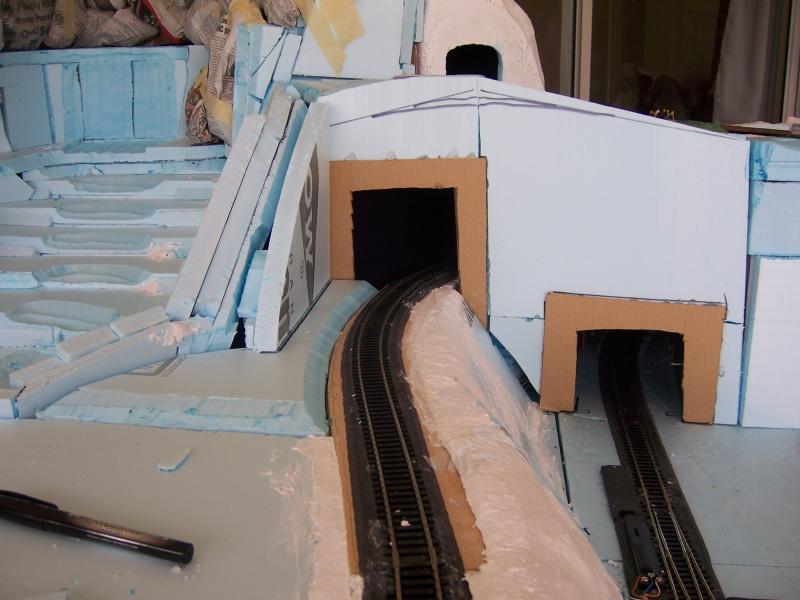
My tunnels got wet while doing this. I didn't quite realize that it was the cardboard tunnel that was contacting the table top. That is why I have it back in place on the layout, before it's dry, at least that forces the tunnel back into it's proper shape.
After all this is really dry, I can begin to blend in the gap at the top where it meets the top of the mountain. It doesn't look too bad here ,but you can see one fairly large dark gap in the second picture.
Look at the color difference, that I would assume is water, and will dry in a couple of days.
Wayne

Posted
Full Member
Does the whole of the bottom part come away for access or just sections of it ?
'Petermac
Posted
Full Member
Wayne
Posted
Full Member
Wayne

Posted
Full Member
There is a road bridge that will run in front of the waterfall. I envision large arches going over the rapids in the center and as it goes to the left in this photo, it will slope down hill and go over the lower inside track. I suppose it's hard to see right now, so just keep watching, though that may take some time.
Wayne
Posted
Full Member
It looks very impressive - what's the overall height of the mountain and what are you planning to use for the water ?
'Petermac
Posted

Full Member
Thanks for the reminder about the hot glue gun - I tend to forget that I've got one until it's too late, and I've compromised with other adhesives.
(and when I do use it, forget to unplug it…!)
Posted

Full Member
Posted
Full Member
Here is the center section of Mt. Wishedone. Just kidding, but I do wish it was done. You should have seen my hands after folding all those paper potatoes. Black as the ace of spades, and I washed them three times while doing this.
I have some fitting issues to still be worked out. This center section will not come out until the top piece is lifted up about three inches. I really don't want to have to do that, so there will be some hacking going on to make sure I don't have to move the top piece to get the center out.
In order to get the left and right edges to blend properly, along their length, I will probably have to put one layer of plaster cloth on and then stop and use some sculptamold along those edges, so they come up to the correct height, then I will apply the second layer of plaster cloth. It is tough to get paper potatoes to the shape you really want them.
Petermac,
The overall height of the mountain as measured from the top of the baseboards is about 43" tall. The water will be what is called "Magic Water". If you will remember I used "Realistic Water" on my last water project and I did not like the way it turned out. Too much shrinkage and bubbling. This Magic Water is supposed to solve all that. Time will tell!
Gastwo,
Well your not the only one to get up the next morning only to find the hot melt glue gun dripping glue all over the table top. Somebody needs to invent a plug with a bright light on it for these glue guns. That way at least when it gets dark outside I could see a light on that wasn't supposed to be there.
Posted

Full Member
Posted
Full Member
I'll look forward to seeing how you get on with the "magic water". Water is perhaps the most difficult thing to model well. The guys on the "sales" videos make it look easy but somehow, there's always a snag when you get it home ………….:roll::roll::roll:
'Petermac
Posted
Full Member
You don't have to replan the layout for a mountain. Mountains go OVER the layout.
Petermac,
Yes, it is a BIG mountain. I wanted it to be the focal point, and I think I am succeeding. :shock:
Today was spent on details, lots of small details that if not done would create more work later on. The mountain top has been removed and most likely will not go back on until the plaster cloth is on the center section.
I really had intentions of doing the plaster cloth today, but those details kept getting in the way. This morning I worked on the rapids, did some sealing of cracks and shaping of the river bed. Keep in mind this is a rapid running river and the "water" I will use is a liquid that is poured in place, and takes something like 24 hours to set up. A liquid will flow down to the lowest point and puddle there. The head waters of the river is about 8" above the lowest part. That should make it interesting when it comes to pouring the river. Anyway, I guess my original point was I needed to seal the leaks so it will stay contained within the river and not flow all over the layout. Still many more spots that need sealing. The plaster cloth should help a lot, but even that has holes in it.
The second picture shows the raging river from a different view. I am just beginning to get the actual shape I'm looking for. The last photo is where I worked this afternoon. I had to fill in the area in front of the middle tunnel portal. That particular area is permanent so I didn't have to worry about how it went in. I will have to build a retaining wall later on, adjacent to the track to brace up the mountain and protect the track.
The center section and the river sections are now keyed so they cannot move around. That was one of those details I needed to get done. Now that they go back in, in exactly the same position I can get serious with all the edges where they meet adjacent modules.
Wayne
Posted
Full Member
'Petermac
1 guest and 0 members have just viewed this.