John's Workbench
Posted

Full Member
Some recent projects
Yes, I believe Phoenix are using a courier service now.
Regards,
Trevor
Trevor

Posted

Full Member
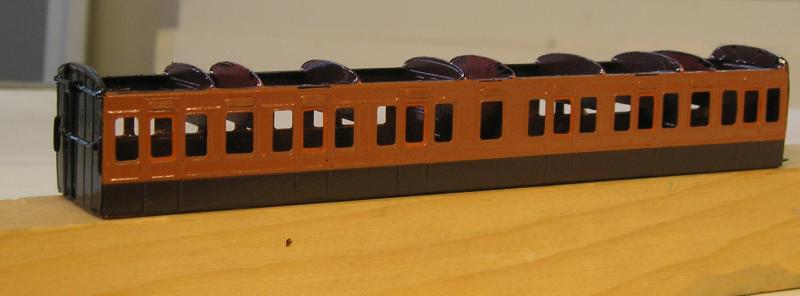
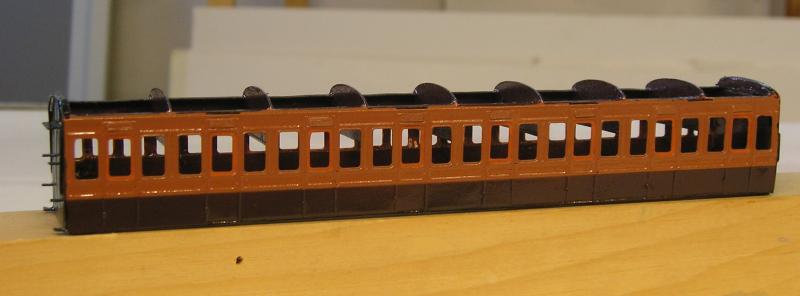
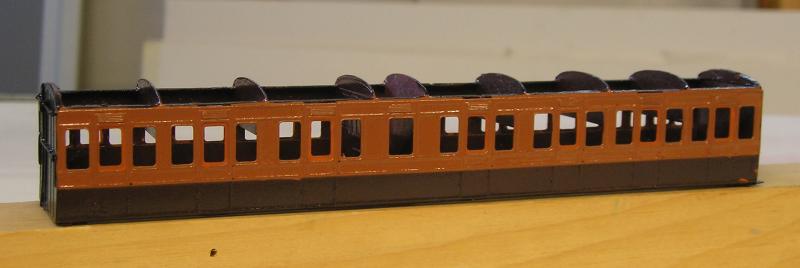
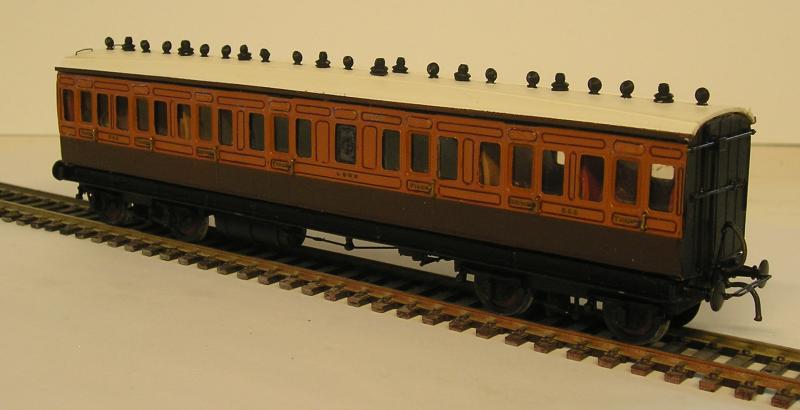
The salmon was a challenge. Even though I had the “recipe†from Carter (see post above), the job turned out to one of seemingly never ending trial and error. Finally though, I think the colour is credible. The lower panel colour was less of a problem but achieved the same way – trial and error.
I used a gloss varnish at this stage to make the transfers adhere better. I will finish with a satin varnish.
I noticed (just now as I took the pictures) that there are one or two areas in need of touch up.


John
John
Posted
Inactive Member
That colour sceme reminds me of the old L&Y livery.
Have fun with the lining out transfer,s.
regards,
Derek
Posted
Full Member
John
John
Posted
Full Member

All 3rd
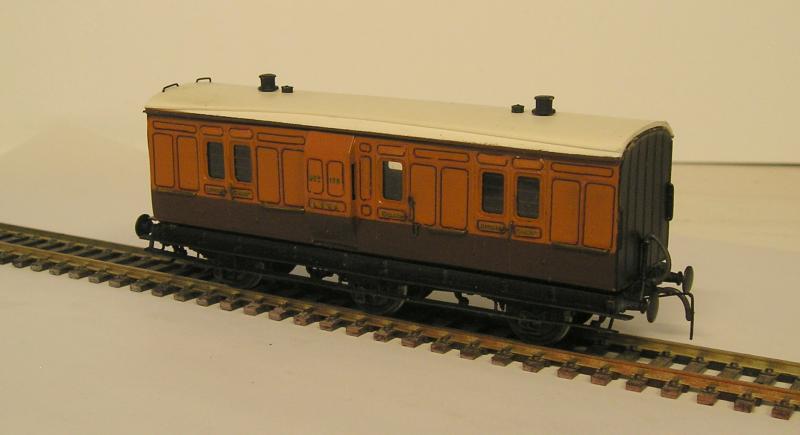
Brake van

6 lav Tri Composite

3rd Brake
2 lav Tri Composite
For the lining, I tried something new - for me anyway. I created the panel shapes using PowerPoint. Yes, the lining is black with an outer red band so that was a bit tricky (no way was I even going to try to use a lining pen). I then had to arm wrassle my laser printer to print onto Microscale clear transfer sheets. I discovered that it is essential to varnish the sheet after printing otherwise the toner will rub off. I used Krylon Matte but found that Testors have a decal sheet varnish as well.
I spent pretty much a whole week putting the lining on and it took 4 sheets.
Lettering is from HMRS Pressfix and is their usual superb quality. I did need two sheets but only because there weren't enough "LSWR" brands on one sheet for 5 coaches. Now I have the best part of the sheets left over.
After completing the transfers I sprayed first with Dullcote and then with a coat of Semi-Gloss/Satin.
For the lav windows, I scanned the line drawings that came with the kit and printed onto acetate. I then sprayed the back of the acetate with Krylon Matte to get a frosted effect.
Seats are Ratio with some mods to represent 2nd and 1st class (armrests).
Let me know if you need to know anything else.
John
John
Posted
Full Member
They must be unique and you should be very proud of them.
Regards,
Trevor
Trevor
Posted
Full Member
John
John
Posted

Site staff
Ron
NCE DCC ; 00 scale UK outline.
NCE DCC ; 00 scale UK outline.
Posted

Full Member
Bravo.
Marty
Posted

Site staff
Regards
Alan
Born beside the mighty GWR.
Alan
Born beside the mighty GWR.
Posted

Full Member
Etched Pixels / Ultima Model Engineering Catalogue 2021
Some vehicles are etched brass, some of the more recent a mix of 3D print and etches, also plenty of detailing items.
Very simple construction for most of the etched items, sides and ends fold up from the floor and just need joining at the corners.
*Fruit brakes, most of the time ran as either luggage, parcels or passenger brake vans, but could be adapted to take trays/boxes of fresh picked strawberries, raspberries, black currants in season from growers in Hampshire and other market garden areas.
Cheers MIKE
I'm like my avatar - a local ruin!
I'm like my avatar - a local ruin!
Posted
Inactive Member
There will be no stopping you now, Any railway era can be tackled with confidence.
Tell me what is power point?
Lining and lettering can be a real deal breaker when it comes to tackling kits and restricts many of us in our railway choice of era,s and models.
Thanks for shareing these great builds,
Derek.
Posted

Full Member
Always try to look on the bright side of life!
Barney
Barney
Posted
Full Member
I definitely agree that the decoration of any model can make or break it. I was on tenterhooks the whole time I was doing it. However, the result is quite good and I can't see how anyone could get a bow pen into some of those really tiny panels. I can imagine using the method again for loco and other coach lining. I have a lot of boxes ticked off in this hobby, but using a bow pen is unticked.
Derek, Powerpoint is a Microsoft Office program designed for producing presentation slide shows. It has a decent drawing facility. The Office package is quite expensive to buy (I got a deal from where I used to work) but Google do a free version version called Open Office which is very close.
John
John
Posted
Inactive Member
I have found bow pens and lining pens very difficult to use.
Well useing them is not difficult.
Getting straight and curved lines is the killer.
I shall take a look at the Google open office software.
regards,
Derek.
Posted
Inactive Member
I have just read through the thread and I'm impressed by your work, I have quite a few brass kits to build (a long way off yet) and enjoyed seeing how yours turned out especially on one of those early liveries.
I have often thought about using the PC to produce lining but never came up with anything suitable so a big thanks for showing us how, however seeing as I have some lining pens I feel I should give them a go first. I did try it at a show demo once and it seemed easy, but doing it on a newly built model is a different thing.
Jim
My layout thread http://yourmodelrailway.net/view_topic.php?id=10930&forum_id=21
Buildings for Hemyock http://yourmodelrailway.net/view_topic.php?id=10931&forum_id=14
Buildings for Hemyock http://yourmodelrailway.net/view_topic.php?id=10931&forum_id=14
Posted
Full Member
John
John
Posted
Full Member
The 6 wheeled brake in this rake is no different. I was able to test it on a friend's layout that has Peco small radius and handbuilt A5 points. I found it to be hopeless on the Peco points and very unhappy on the A5s.
The answer came to me overnight in one of those Eureka! moments.
The intent of the out of the box design is that the entire center "compensation unit" is supposed to slide from side to side. Well, in building this, and after doing some extreme fettling, I couldn't much more than a mm from it. In addition, having the whole unit move is asking for trouble given the friction.
So, I fashioned a U shaped inside bearing unit that permits the axle to move from side to side. I trimmed off the axle pinpoints as well.
I did take a "before" picture but it came out blurred

This is the redesign:
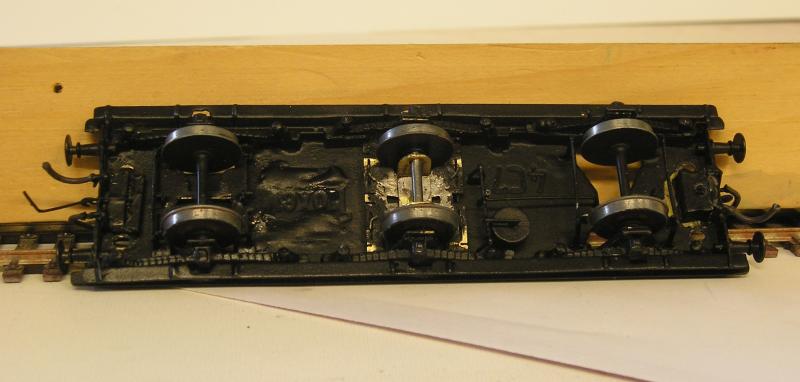
I found an old Peco small point and was able to test the chassis - all seems well now.

John
John
Posted
Inactive Member
Those 6 wheeler vans and coach's can be very temperamental.
Getting your design to work on a Peco short turnout shows its potential.
regards,
Derek.
Posted
Full Member
The kit comes as an etched sheet:
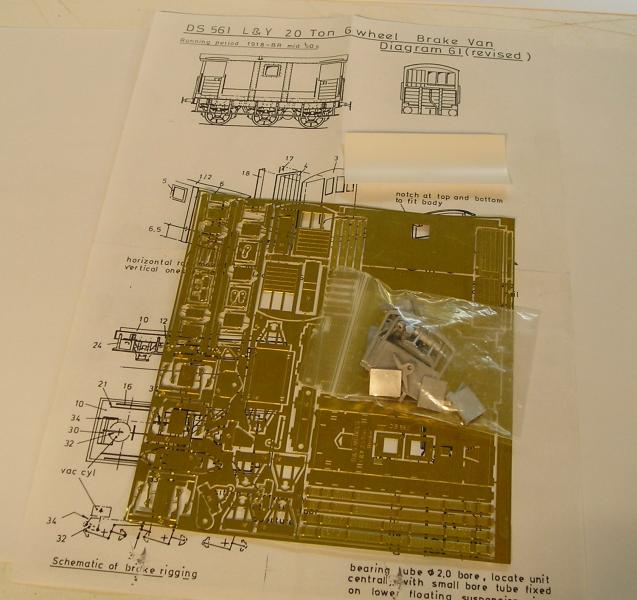
There's also a bag of whitemetal castings and other bits and bobs.
I made good progress last evening, getting the underframe mostly done:
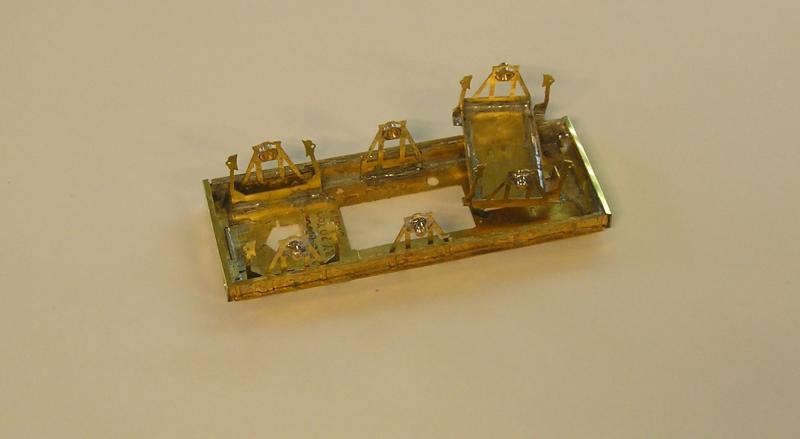
I stopped for two reasons, 1) Death in Paradise was on and 2) the center axle has a special assembly process that I have yet to figure out.
The parts have a lot of folds that are reinforced with solder. Other parts are tabbed so accurate location is easy. The trickiest bit was sweating on the solebar overlays, I took several tries to get that done. Luckily I remebered to wipe the iron so I didn't get solder all over it.
The leftmost axle is fixed and the rightmost axle looks to have rocking compensation.
John
John
1 guest and 0 members have just viewed this.