John's Workbench
Posted

Full Member
Some recent projects
Look forward to seeing this completed, John.
Posted

Full Member
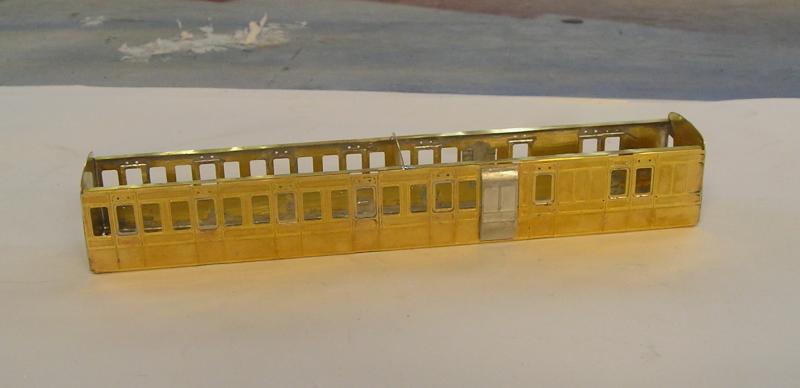
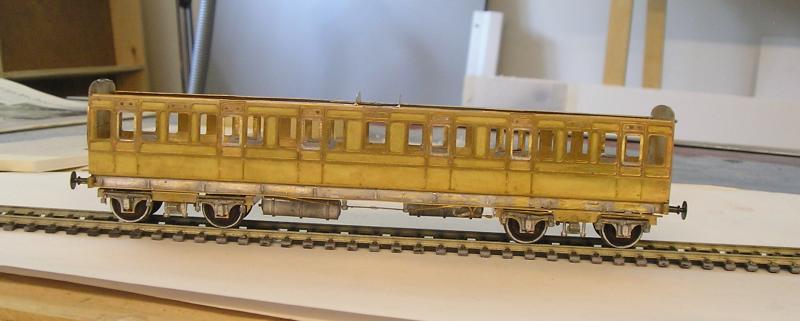
I decided to try the body:
Looking like a coach now.
John
 Last edit: by Brossard
John
Posted

Full Member
I have a few of those Roxey kits to do myself so I'll be following your progress with more than some interest! :cool:
Jeff Lynn,
Amateur layabout, Professional Lurker, Thread hijacker extraordinaire
Amateur layabout, Professional Lurker, Thread hijacker extraordinaire
Posted
Full Member
Posted

Full Member
Posted
Full Member
Painting will be tricky yes. Whenever I build a kit I always have in the back of my mind "how will I paint this?" Sometimes it means leaving bits off until later - like, in this case, the ventilators above the doors.
If my soldering were better, I might agree that it shouldn't be painted. As it is, paint will cover a multitude of sins.
John
John
Posted
Full Member
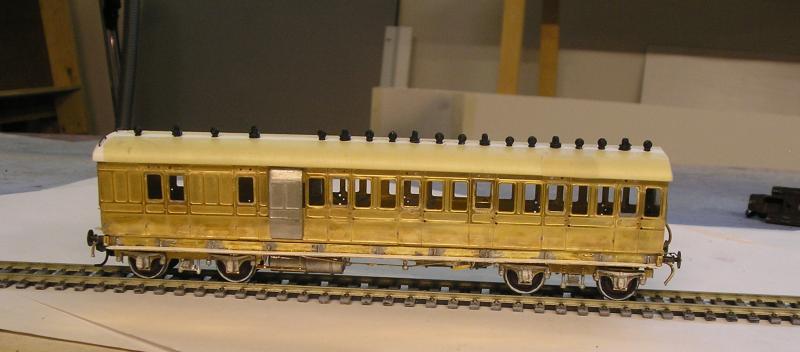
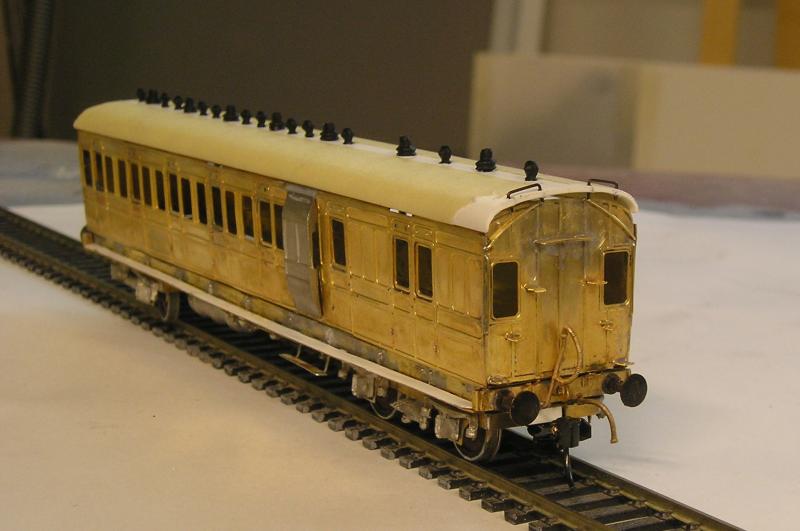
Roof is on loosely and protected with masking tape - white gets grimy very quickly with handling.
Guard end has a Kadee on the bogie, other end has a loop coupling - its' mate will get a hook.
Assembly is now complete, I can start painting now.
John
John
Posted

Full Member
Was it difficult ? I've always imagined those brass sides take some doing to get them true. They're quite thin aren't they ?
'Petermac
Posted
Full Member
Jim
Posted

Full Member
Regards
Ray
Regards
Rhiwderin_Ray
Rhiwderin_Ray
Posted
Full Member
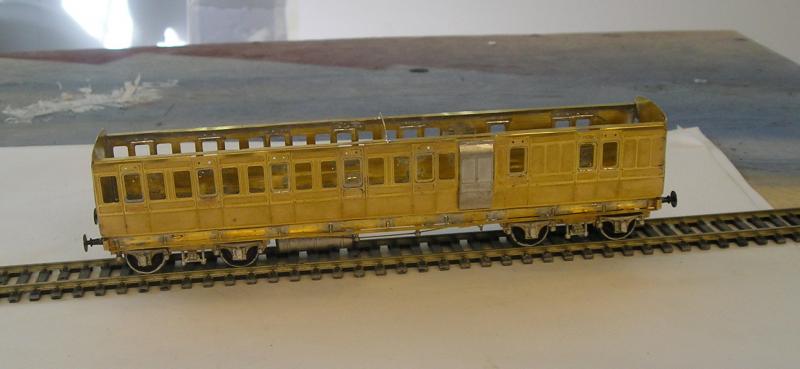
These things are never "easy" but a well designed kit ( as this is ) goes a long way to making the job doable. Yes the sides are very thin since the bead detail is half etched, but fit is precise and didn't require much in the way of fettling.
This is as far as I've ever taken a brass coach, but it's looking promising.
John
John
Posted

Full Member
Regards,
Trevor
Trevor
Posted
Full Member
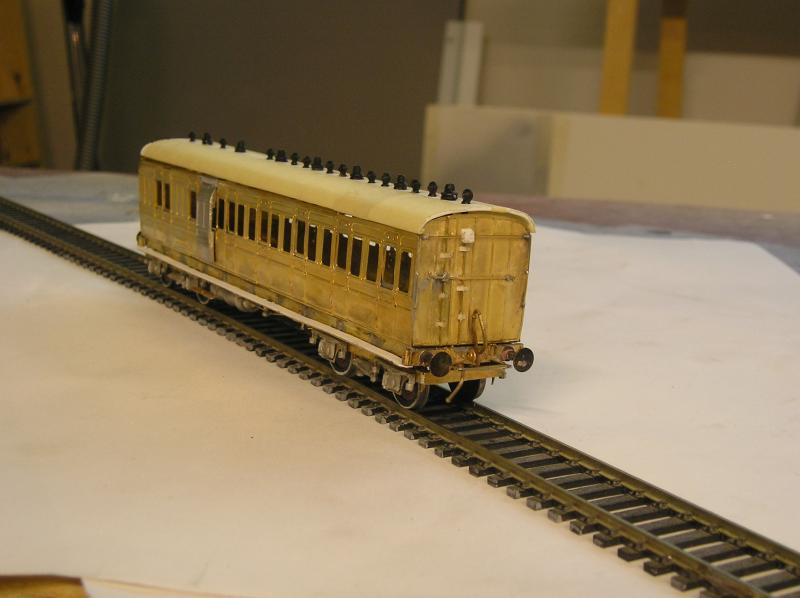
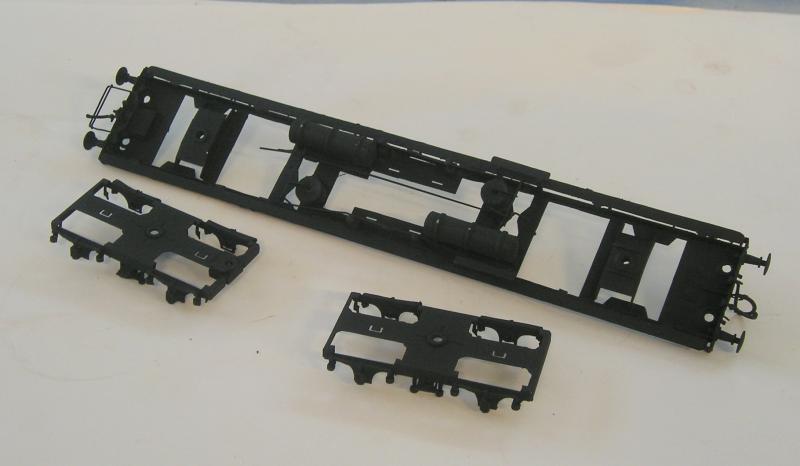
I finished the build of the first coach. I added rainstrips and corbels to the roof - something I had forgotten above.

I was going to paint it but when I started looking at the "salmon" paint I was given, I didn't think the colour was right - so that's on hold. I did paint the underframe and bogies black.
The "salmon" paint has been formulated locally using a swatch in an old book on railway liveries. It is quite different from the colour of a preserved coach I have and other models. The thing about colour of something that disappeared in the second decade of ther 20th century is that there are no reliable colour photos (there may be colourized ones) and no-one left to confirm the correctness. It may well be that the colour I have is correct and everyone else is wrong.
The second coach is well on the way with bogies and underframe completed today.
John
Last edit: by Brossard
John
Posted

Full Member
Doug
PS Love the weathering on the waggons earlier :thumbs
'You may share the labours of the great, but you will not share the spoil…' Aesop's Fables
"Beer is proof that God loves us and wants us to be happy" - Benjamin Franklin
In the land of the slap-dash and implausible, mediocrity is king
"Beer is proof that God loves us and wants us to be happy" - Benjamin Franklin
In the land of the slap-dash and implausible, mediocrity is king
Posted
Full Member
John
John
Posted
Full Member
I would say that this one went together easier and quicker than the first - not surprising I suppose.
John
Last edit: by Brossard
John
Posted
Full Member
Posted
Full Member
'Petermac
Posted

Full Member
Posted
Full Member
John
John
1 guest and 0 members have just viewed this.