Members Monthly Project - June 2012
Posted

Full Member
Dapol Coach Kits
Are you going to leave us in suspense Bob?
John

Posted

Legacy Member
Posted
Inactive Member
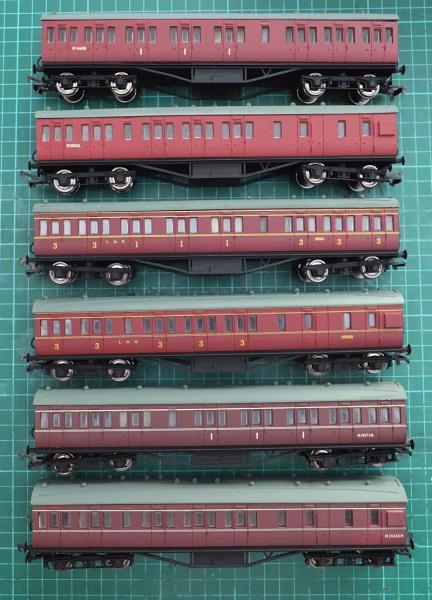
Well, so far there are six coaches in the series released as follows:-
C95C M16658 Composite in BR carmine unlined.
C96C M20562 Brake coach in BR carmine red unlined livery.
C97C 19194 Composite in LMS maroon lined.
C98C 25252 Brake coach in LMS maroon livery -lined.
C99C M19171 M Composite non corridor coach in BR lined maroon.
C100C M25248 M Brake coach in BR maroon livery lined.
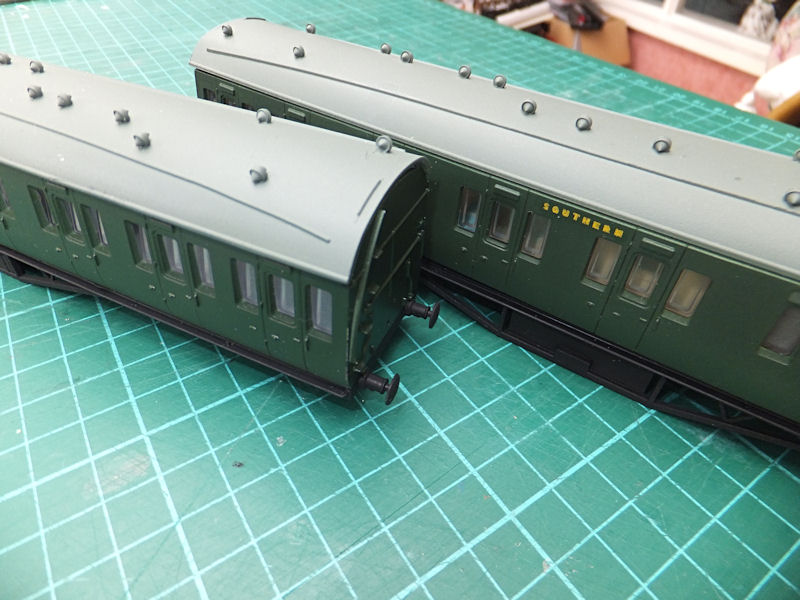
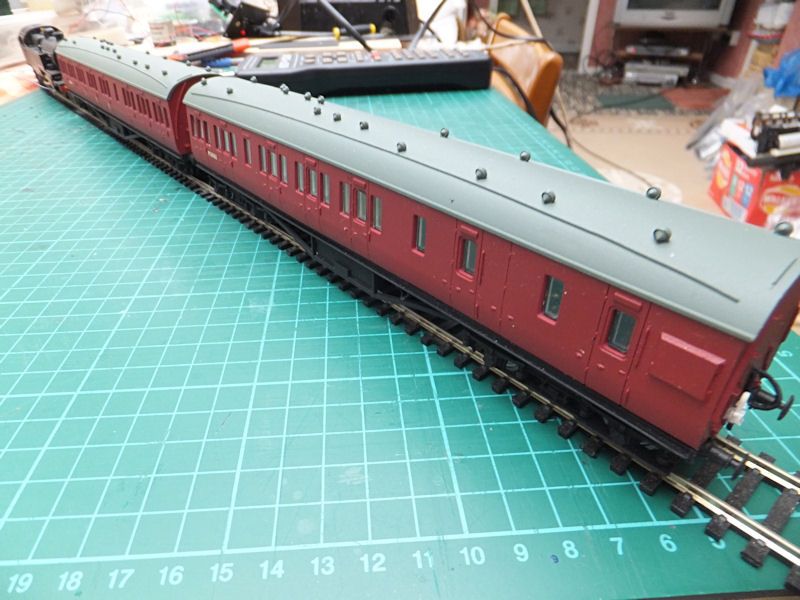
Here's one of each of the bodies after being 'altered' to suit me. C100C nearest camera, C95C at the back.

Let me run through some of my ideas for 'improving' or otherwise , what are already kits just crying out for customisation.
Metal wheels was one priority and packs of Hornby R8218, 14.1mm diameter metal disc wheels with axle . The 4-hole versions were first acquired, and discarded quickly as the electrical pick-ups added later 'clicked' as they were moved on the track. A pack of Romford pin-point shouldered 'top-hat' bearings ( 2mm shank dia, 2mm shank length) was used to mount the wheelsets.
Carefully holding the bogies , the existing holes were drilled at 1.9mm, so the 2mm shank of the bearing is a push fit. With the bearing in place and a solder-free tip in the soldering iron, it was carefully pushed level with the surface of the inside of the bogie, as can be seen here.
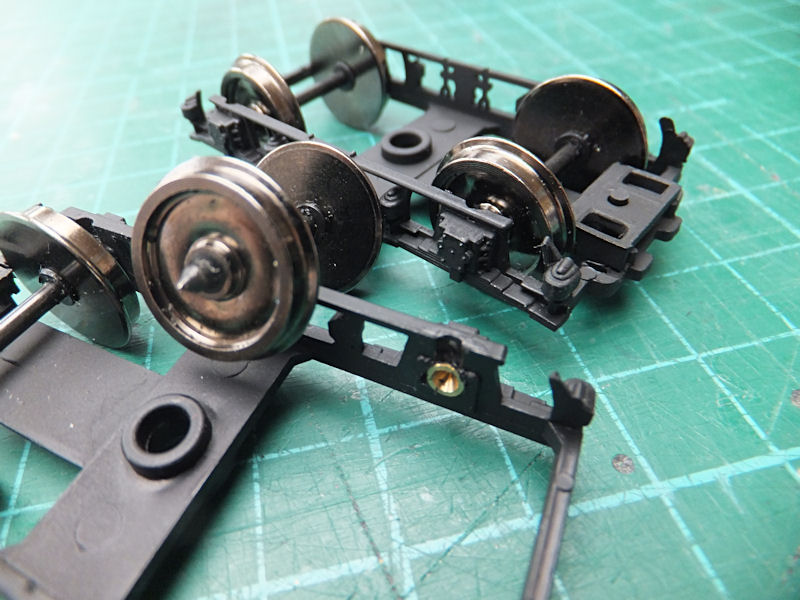
There should be a very tiny amount of axle sideways play, less than 0.5mm so that the wheels run freely- test them on a bit of track and correct if necessary.
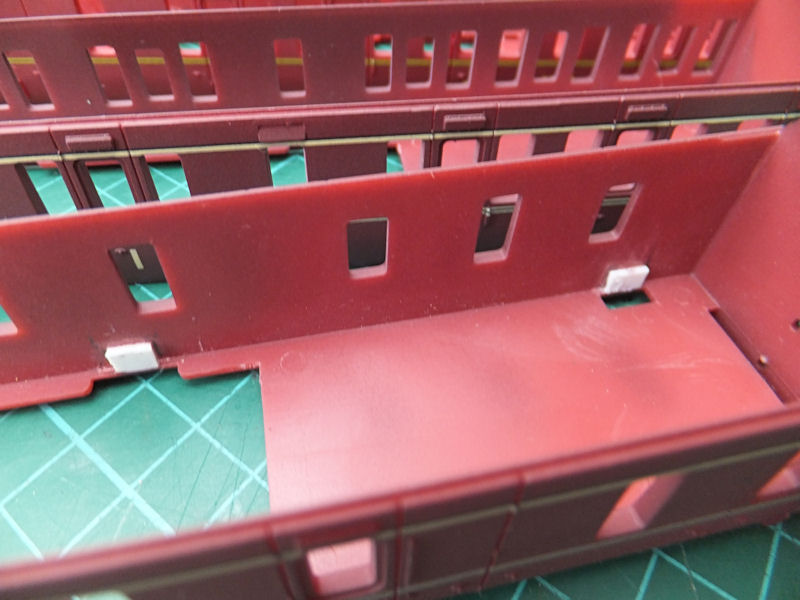
The body is held clipped to the chassis with slots in the glazing, whilst also holds the seating in place , and the roof fixings.
To make it easier to keep dismantling and modifying, I changed the chassis fixings by adding little pieces of plasticard strip , 3.7mm wide, 50 thou thick and about 0.5cms long glued to the body as can be seen here.
The glazing strips were then modified to suit:-
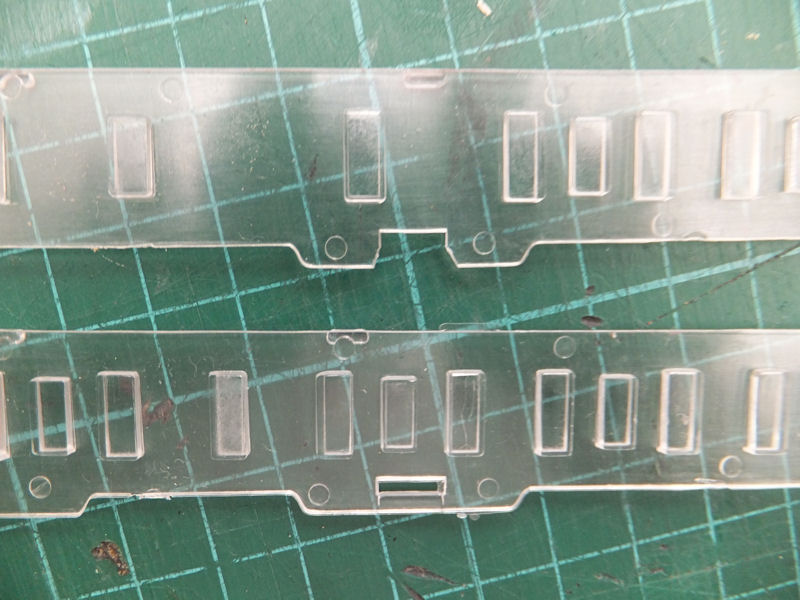
I'm not at all happy with the glazing as supplied and its being worked on to find better substitute- that's where we are today though!
Assembly follows on similarly to the original Dapol paperwork. In addition, I glued the coach weight to the chassis with contact adhesive so it didn't 'rattle around' in use.
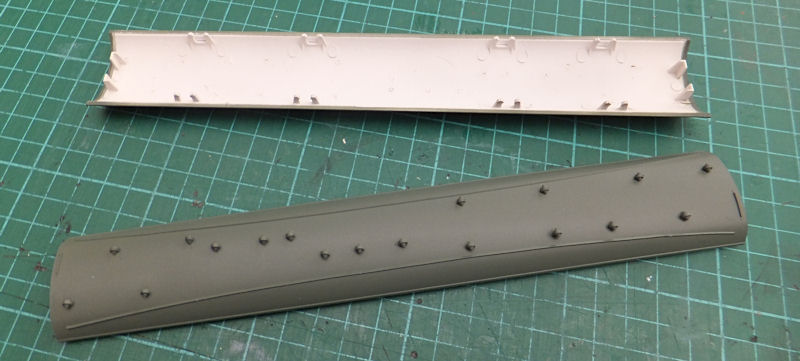
Fitted lighting was also one of requirements, together with wanting to get rid of the shiny plastic appearance. After adding the roof vents , ( inside bits sticking through into the coach interior were carefully cut off with sharp knife and sanded flush), a coat of matt white Humbrol paint was sprayed on the inside of all rooves ( roof's?) . Afterwards a re-usable masking jig was made from card , such that the roof rim and top could be sprayed with Railmatch LMS coach roof grey ( about 30% thinned). The tabs inside the coach roof were carefully left as they form part of the fixings for a home made LED lighting strip.
Whilst the spray gun was handy , the chassis and bogies were given a coat of matt black, thinned about 50% with thinners.
Once happy with the results so far, all parts before any assembly took place was given a thin coat of Railmatch spray matt varnish thinned about 50%.
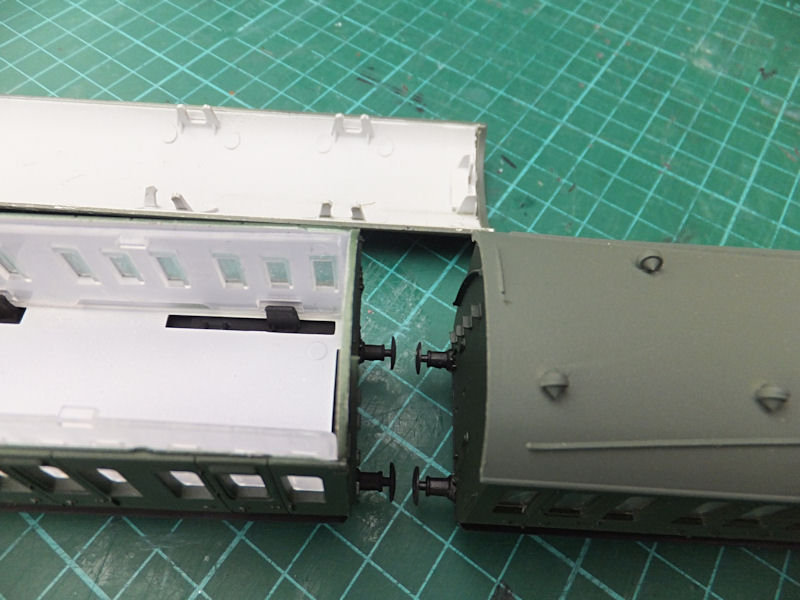
Now we get to the experimental bits. there is always a shortage of Southern region suburban coaches , so a couple , one of each C95C and C96C , had the bodies sprayed SR green , interiors white ( because they will have lighting and will be populated).
Not finished or correctly assembled yet ( and without bogies which are still being worked on, and coach numbers to added with other coach decals) they look like this:-
and inside
I know the purists may be screaming "not a 100% prototypical", its modellers licence I say!
I have also finished a pair of C95C , C96C with a DCC chip onboard with lighting and homemade taillamp. I used a Gaugemaster DCC26 for its size and programability, which is mounted in the brake coach and through-wired in a fixed formation. Wiring was included to allow for a future expansion of a third coach. The chip is programmed with the loco address , so that F0 then operates the tail-lamp off-on, F1 is coach lighting in the brake, F2 is the coach lighting in the composite, and F3 is the next coach to be added. It might not sound much but represents my first foray into total remapping of the DCC chip to reprogram these functions. With the DCC26 chip, I can program the tail-lamp 'flash' or 'steady' (or off) and control individual coach lighting brightness as well.

The carriage lighting is just visible in daylight…
The bogie pickups added:-
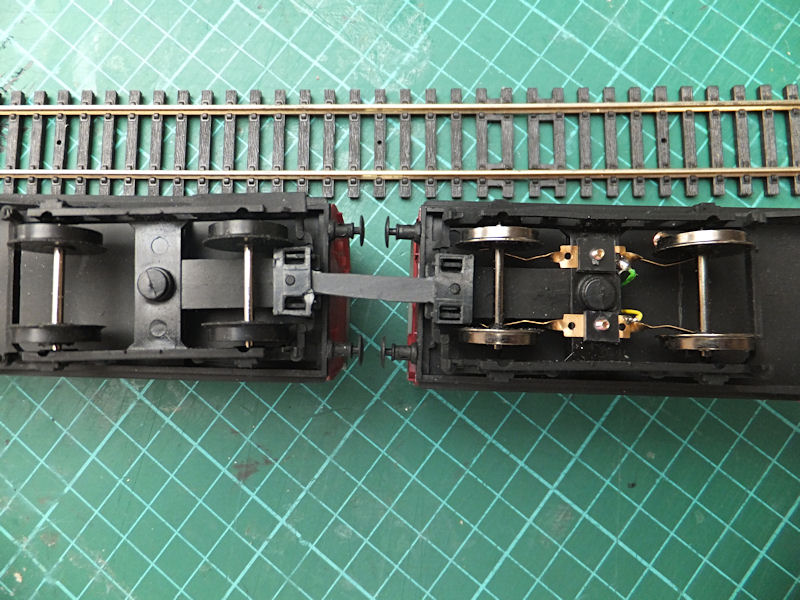
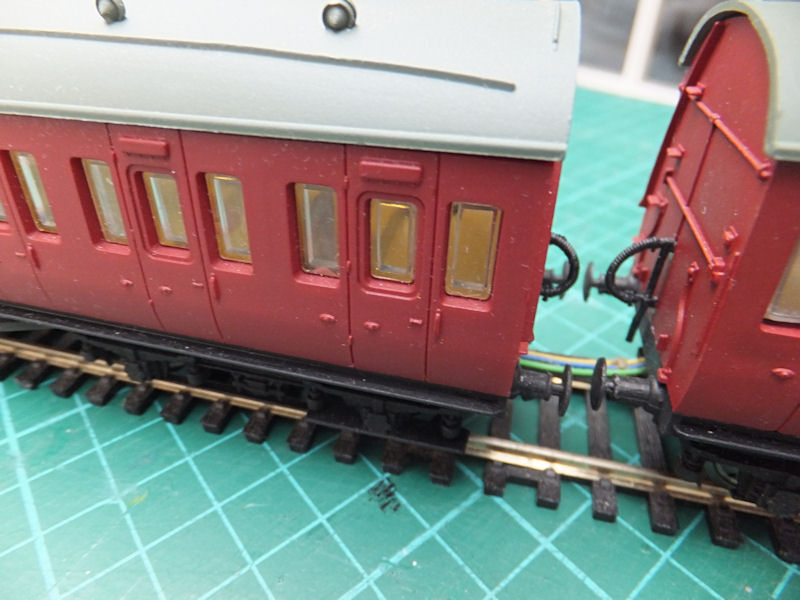
The Dapol coupling was replaced with a fixed length plasticard unit , which also carries the fine wires for coach lighting control.
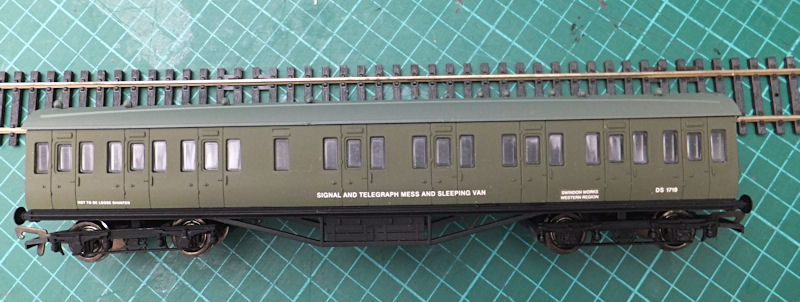
As an aside , I resprayed one of the bodies as a mock up of an 'Engineers coach' to be part of an engineering train currently being worked on. There's no lighting and yes, it needs a few windows boarded up etc, but until I find a time shift machine……
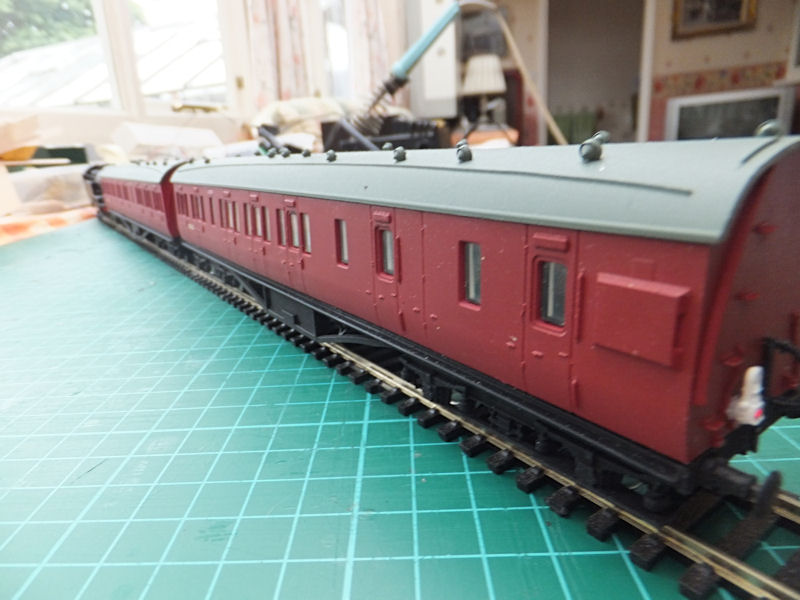
The kits , now assembled, Top to bottom C95C , C96C, C97C, C98C, C99C, C100C…. … (but are they finished?)
All in all a very useful piece of kit for the price, and there's loads more ideas in the pipeline. A couple are being modified with end windows to represent a similarity to a push-pull set for the LMS era, and another pair as a non -prototypical articulated set that should keep me busy. Possibly a short rake of red and creams?.. and then there's that camping coach to investigate……..
The glazing needs a bit of work, and the brake pipework is actively under investigation, as well as detailing the undercarriage area.
 Last edit: by diablo
Posted
Full Member
I upgraded the underframes as shown here:
http://tinyurl.com/7j28drz
John
John
Posted

Full Member
Posted
Full Member
The Bachmann Mk1 corridor coaches are in a different league with flush glazing and well detailed (if a little thick) underframes.
http://yourmodelrailway.net/view_topic.php?id=9806&forum_id=16
John
John
Posted

Full Member
Excellant tutorial - inspired enough to put money where mouth is, my non-corridor coaches have arrived and will follow your instructions to build up a 3 car set (Brk Comp-Brk). Love the figures, Iwas thinking of detailing the interior, but as your figures are hardly visible I dont know if it is worth the effort. :roll:
Just one question are the coach seats a different colour for 1st and 3rd class ?
Thanks Paul
1 guest and 0 members have just viewed this.