Improving the Hornby Signal Box
Posted
Guest user
Mike
Posted

Full Member
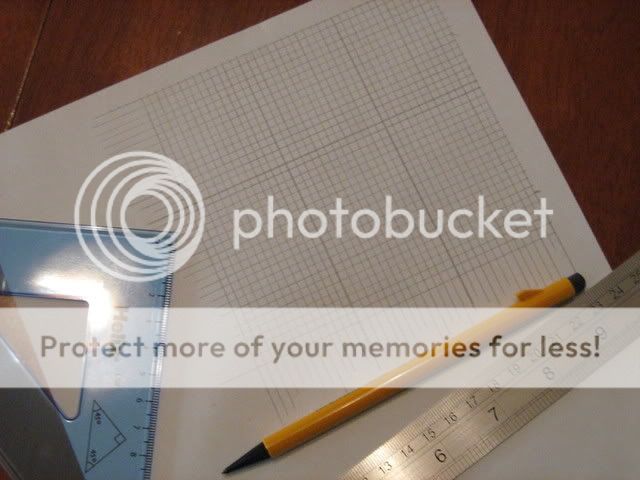
So what to do. I had a scan through some of the threads on this site and have decided to make tiles out of paper. Intially I measured the printed tiles on the sticky paper that comes with the Hornby model and then set about drawing a grid on plain paper.
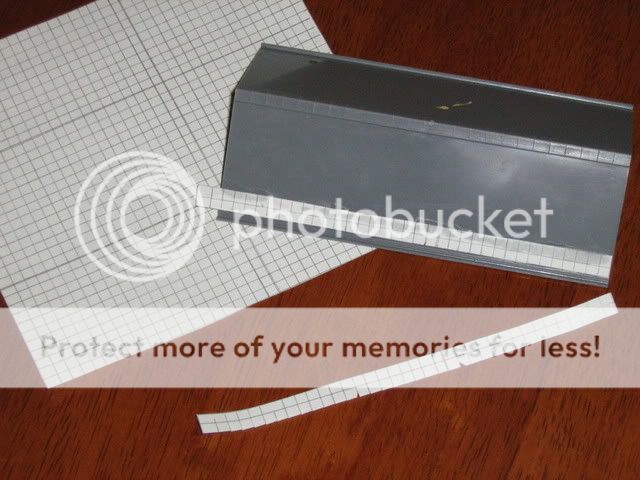
Then I cut a strip of the paper, two tiles in depth. Each individual tile is then cut along two of its sides, to a depth of one tile. This creates a row of tiles fixed to a mounting strip. Some corners were snipped off to simulate broken tiles. The strips were then afixed to the roof in an overlapping sequence, starting from the gutter:
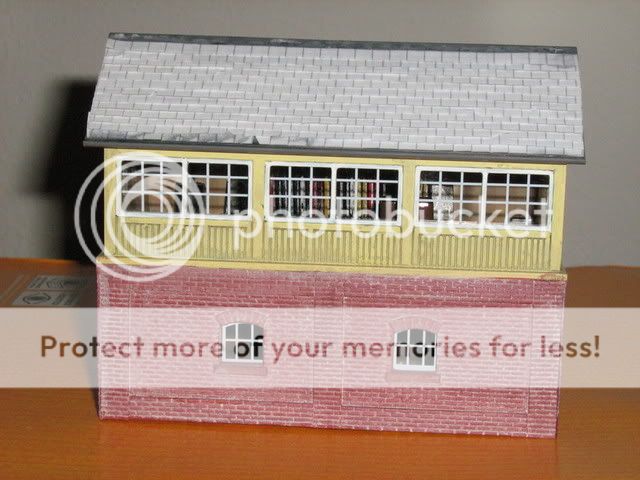
In fact I completed one side of the roof, but was unhappy with the result. My measuring and drawing was not accurate enough to give the correct effect of a tiled roof. So I ripped it all off and looked for an alternative. Eventually I found a school book that had a grid printed on the pages and luckily it was almost exactly the right size for the model. So I started again and here is the result:
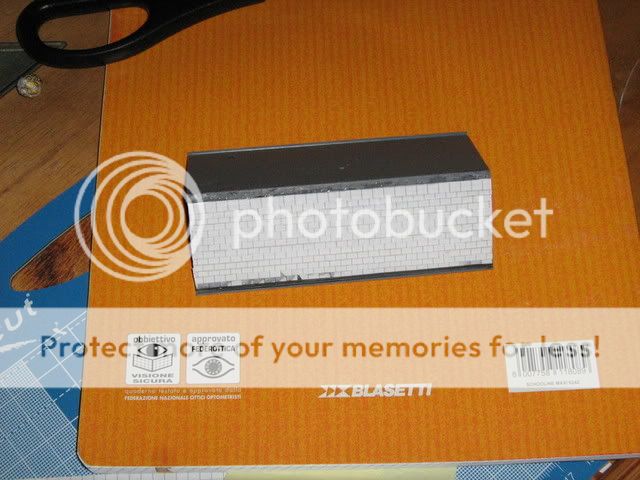
This time it was much more successful. Although time consuming, this method is quite effective. Once the other side is completed I need to work out how to make the ridge tiles.
Bob(K)

Posted
Guest user
I have had an thought for those that model in a scale other then OO.
If you have access to a reducing/enlarging photocopier you could make a grid an exact match for a given tile length.
Bryan
Posted
Legacy Member
reg
Posted
Full Member
Thank you for your very kind offer. Regrettably there is no post here! I thought I had packed everything I need, but forgot the roofing tiles.
 It is amazing how much we take for granted in our world. The internet is really my only means of communicating with the outside world apart from telephone - when its working.
Regards
Bob
Posted
Inactive Member
I packed a box of acrylics
Hi Bob(K),
Hope you're well in Liberia - when are you back?
The signal box is coming along beautifully but I was interested in your comment about acrylic paints and not wanting the hassle of inflammable materials on aircraft.
Those of us living away from the UK have to stock up on materials when we go back (I suppose Bob (FC) and I are the nearest to you so we may pop down for a New Years drink) and I would be interested in what you took with you by way of colours. I'm going to the UK in a couple of weeks and need to try and put a little pack together of commonly used acrylics so I can bring them back on the plane.
Have you any suggestions and/or how did you choose what to take?
I should also like to wish you and your colleagues a very succesful new year with what you are doing - you know what we all feel about it. :D
Regards,
Les
Devon Junction
Kernow Junction
Kernow Junction
Posted
Full Member
The next task will be to finish off the roof and then paint it.
Bob(K)
Posted

Full Member
Well that box is looking real good, a work of art and patience, something i will need to work on when i get re started on my layout.
Phill
Posted

Full Member
Weathering is generally a "dark" art to me and these threads showing how it's done are very informative. They give me the "guts" to have a bash.
Hope things are not too difficult in Liberia at present and that the "roads" are no worse, although, let's face it, they couldn't get much worse.
A Happy New Year to you and your team.
Petermac
'Petermac
Posted

Full Member
Are you going to be adding extra detail like downspouts?
Wayne
Posted
Legacy Member
reg
Posted
Inactive Member
Les
Devon Junction
Kernow Junction
Kernow Junction
Posted
Full Member
Les said
Those of us living away from the UK have to stock up on materials when we go back (I suppose Bob (FC) and I are the nearest to you so we may pop down for a New Years drink) and I would be interested in what you took with you by way of colours. I'm going to the UK in a couple of weeks and need to try and put a little pack together of commonly used acrylics so I can bring them back on the plane.
Have you any suggestions and/or how did you choose what to take?
Les
Les
Sorry to take so long to come back to you but I had to get back to the house to check the paint colours and types. Thanks for you kind thoughts and wishes. All being well I will get back to UK in May sometime.
My fly away paint pack is as follows: mix of Tamiya and Games Workshop (no reason for manufacturer just bought what was available):
Primary colours/basic colours: red, yellow, mid green, royal blue, black, dark brown and white.
Detailing colours: Silver, brass
Special colours for figure painting mainly: flesh, olive green, earth and buff.
For buildings: terracotta (for tiles) and redbrown, plus I also bought Railmatch acrylic light brick and dark brick.
On top of all that I found a pack of 20 mixed acrylic tubes in a bargain book shop for 4.99 pounds, which gave me an excellent range of colours. With the above I think I can make almost any colour.
I also packed 4 brushes, size 2, size 1, size 0 and a triple 0 for detail. This all fits in a little box 8" x 8".
I supose the key to selecting the colours depends on what you want to paint. I have a number of railway building kits to make, the signal box and a number of Dapol figures. I chose colours with these projects in mind
Hope this helps.
Bob(K)
Posted
Inactive Member
I have printed your reply out and will work up a similar pack. I also want to try acrylics for painting the rails a rust colour. I have enamel for this but the latest advice seems to be to go for acrylic so I'll give it a whirl. :D
Les
Devon Junction
Kernow Junction
Kernow Junction
Posted
Guest user
Les, If you are using Metcalfe card kits and want an acrylic to touch in the edges etc. Then, by co-incedence, Games Workshop Terracotta (No 61-80) is an exact match of the Metcalfe red brick kits. Using a size OO brush, the edges can be finished off superbly.
One other games Workshop paint I use is :-
Graveyard Earth (No 61-81) for a good dark sandstone colour
Posted
Guest user
 8)
8)
Posted
Inactive Member
Les
Devon Junction
Kernow Junction
Kernow Junction
Posted
Guest user
Les said
Thanks Jeff, that advice is worth its weight in gold. You'd think Metcalf would tell you that in their instructions. I'll put some on the list. :D :D
Les
Glad to be of service, gents.
I suspect that Metcalfe would have no knowledge of the games Workshop range, but it's worth a visit to one of their many shops and a search of the colours they do.
They are a little bit more expensive than some of the other ranges, but brush beautifully, mix well, are easy to work with, clean easily with cold tap water and have no bad smell like Tamiya acrylics.
If you want some more stone shades, Owen, take a look at:-
Bubonic Brown (61-15) and Rotting Flesh (61-43) With some dark brown and mid grey, you'll easily mix and match any stone colour you need.
Posted
Guest user
or is that a colour too ? :roll: :roll:
8)
Posted
Full Member

I think the roof has made a very great difference to the overall effect of the model and I am now getting closer to the effect I was trying to achieve at the outset of this project. Next I will deal with the ends of the roof, which I think I will paint in white. I also want to put a figure inside the box and I have started to paint him.
Bob(K)
1 guest and 0 members have just viewed this.