00 Gauge - Jeff Lynn / SRman's New Layout
Posted
Guest user
Progress (or otherwise) on Jeff's new layout
 good photos and progress, Jeff. It looks to be very well built.
Mike
Posted

Full Member
cheers

Posted
Full Member
cheers
Neil

Posted

Full Member
Neil, of course, that welcome extends to you too but I know it is much easier for you to get here!! How did the move go? I tried calling you on Friday but you must have already been in the process of moving out. I gather your layout has now gone, so I'd guess you'll be going through the same process around next Christmas time!
Jeff Lynn,
Amateur layabout, Professional Lurker, Thread hijacker extraordinaire
Amateur layabout, Professional Lurker, Thread hijacker extraordinaire
Posted
Full Member
First pic shows an overall view from the doorway, with the newly laid track. Note that the crossover points are not pinned down yet so I cannot do the final adjustments to the alignment yet. With this in mind, the track pins are only pushed in far enough to allow rolling stock to pass. The back tracks are not yet pinned as I intend to put cork underlay along there too. For the Underground tracks where they are near tunnel mouths and in the open, I am laying the tracks straight onto the boards, as I really want the loud rumble of the trains at those places!
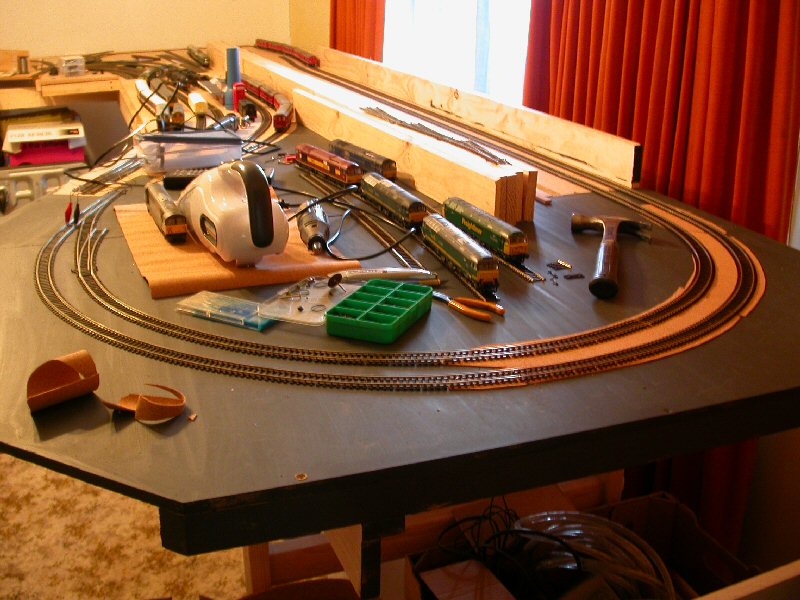
Sorry about all the tracklaying paraphernalia still on the boards! It is an ongoing job, so I did not want to clear everything off at this stage. :roll:
This shows the temporary track feed from my Power Cab, allowing me to test run a couple of trains. Clearances were set using the two non-powered driving coaches from a Bachmann class 166 unit, the longest and widest stock available.
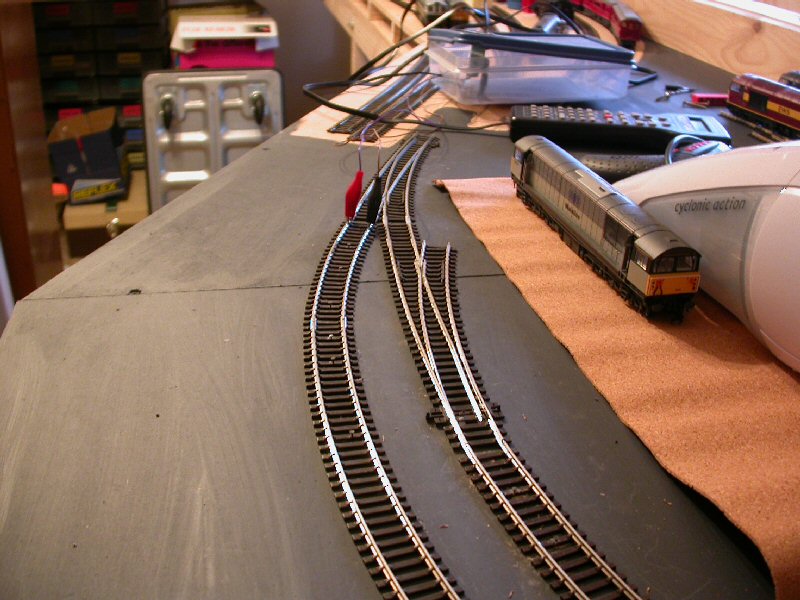
Finally, the first LT Underground train to run, at the end of the line. I spent some hours soldering a TCS T1 decoder into the double-motored car (second from the front in the pic), making sure I got all the polarities correct for the two opposite facing Black Beetles. It works like a dream! :cool:

 Last edit: by SRman
Jeff Lynn,
Amateur layabout, Professional Lurker, Thread hijacker extraordinaire
Amateur layabout, Professional Lurker, Thread hijacker extraordinaire
Posted
Inactive Member
My cat Meow calls into the railway room every day and leaves in disgust, nothing running yet!Those last photo,s with work gear made me feel at home:thumbs
regards,
Derek
Last edit: by shunter1
Posted
Full Member
Toby has taken to sleeping under the layout. He will be very put out when I start locking the doors to keep him out! At the moment, he wakes up if he hears something running and hops up via the window sill to see what's going on.

Jeff Lynn,
Amateur layabout, Professional Lurker, Thread hijacker extraordinaire
Amateur layabout, Professional Lurker, Thread hijacker extraordinaire
Posted
Guest user
Posted
Full Member
I have a couple of hundred white metal cable hangers to start with but will probably need to order more before I am done. I do intend to have third and fourth rail and, with a couple of friends in the P4 Society, I will be able to acquire some conductor rail ramps for use around the points. I have not decided whether to just lay the third and fourth rails directly onto the sleepers, using code 100 rail, or to go the extra and add chairs and use code 60 or 75 rail. Either way, I want to make sure the conductor rails are level with, or slightly below, the running rail surfaces for ease of cleaning and maintenance (past experience here!).
Jeff Lynn,
Amateur layabout, Professional Lurker, Thread hijacker extraordinaire
Amateur layabout, Professional Lurker, Thread hijacker extraordinaire
Posted
Guest user
I still harbour a fond hope that I can at some time power EMU stock from a third rail but with the new 2011 prices for such items there isn't going to be much added to the train cupboard in the near future and the SR-themed layout is probably at least a year away still.
Posted
Full Member
I have rearranged the boards in the corner and laid some 3rd radius Hornby set track temporarily so I can mark the boards for cutting the centre well (for access later when the tracks will be under cover).
At least the LT tracks are only in the open for a small portion of the whole run so I won't have a large amount of third and fourth rail to lay. I am inclined to agree with Rick's last post and go for the code 60 rail in Peco "pots". As he said, the rail section is not really correct for London Transport but I think I can live with that! :hmm
Once I work out how much code 60 I'm going to need I'll order it from Brunel Models here in Melbourne as postage can be a bit of a killer where lengths of rail are concerned! All of the code 100 plain track came from the same source - Mary de la Lande quoted a very good price on the four boxes I bought (that's 100 yards of track!).
Points, on the other hand, were ordered from a certain "box shifter" in northern England (Liverpool!!) as the cost over here is not at all competitive.
I'm not sure how many point motors I will have to order as I still have a substantial number intended for, but never used on, the previous layout.
I have added insulated joiners around the middle of the back straight so the LT circuits will be divided into three electrical sections each for the inner and outer tracks (is this part of the Circle Line?? ;-) ).
For test purposes I have rigged up a two wire feed to each track and some very temporary jumpers to bridge the insulated gaps. I have trundled a variety of trains up and down the tracks at low and high speeds. The ultimate test was to put on half a dozen of my most unreliable four-wheeled wagons and pull and propel them around the layout at increasing speeds with various locomotives. Even at full speed in reverse, there were no derailments, so I'm very happy with the track laying at the moment. :Happy There was one minor casualty though; one of my kit-built china clay wagons lost a coupling in the process, although it still didn't derail.
The only other casualty was the plank standing at the back for clearance testing: Toby decided to pop his head through the curtain and give the COP stock a little prod as it passed by and he accidentally pulled the plank off the layout with quite a thud - needless to say, he gave himself quite a scare!
Once I have done some more work and it actually looks a bit different to those last photos, I'll take some more pics and post them here.
Jeff Lynn,
Amateur layabout, Professional Lurker, Thread hijacker extraordinaire
Amateur layabout, Professional Lurker, Thread hijacker extraordinaire
Posted
Inactive Member
I am myself at a similar stage fixing track, wireing electro points and learning my way around Seeps.
Also waiting on track and point delivery.
Goodluck with the build,
Derek
Posted
Full Member
I think the hardest part is being patient and doing things in the right order. I can lay the plain track but need to cut the boards or track bases first then paint them. That means laying the track temporarily, then marking it out, lifting it again and doing the cutting and painting. Next, where there are points, one has to add cutting holes for point motors (or, if mounting them below the boards, cutting the slots for the actuators), then painting, then mounting the motors on the points with bits of card (also painted!) to hide the holes. I intend to solder the wires to the motors as well before fitting the points into their places, then use the "chocolate block" connectors to join the wires up to the main wiring runs.
Before all that with the point laying, I also want to make sure I prepare them for DCC!
Concurrently, I have to solder dropper wires to the plain track and connect those to the main wiring runs. Overall wiring will be radial rather than using buses. This also suits the simplified cab control for DC usage.
After that I want to paint the rails (something I regret not doing with the previous layout).
Third, and third and fourth rail laying could occur before or after painting the main running rails but, whichever way it goes, those will also need painting.
While doing all this on the lower level, I am also thinking ahead for the upper level track beds, boards and supports and also accessibility for the lower level after the upper level is in place. Thinking three-dimensionally can give one a headache at times!! :hmm
At the moment, with students and teachers having returned to school, and a technician who has decided to move us off Novell and on to Microsoft (with good reasons, I should add) means that time is a bit tight with longer hours required to get things running or converted, and sort out the bugs. Add to that we have to prepare 400-odd new netbooks for students, that means the longer hours apply to the next three weeks.

While that means layout building time is reduced, it means that the hobby comes as a welcome relief to the stresses of work.
Last edit: by SRman
Jeff Lynn,
Amateur layabout, Professional Lurker, Thread hijacker extraordinaire
Amateur layabout, Professional Lurker, Thread hijacker extraordinaire
Posted
Full Member
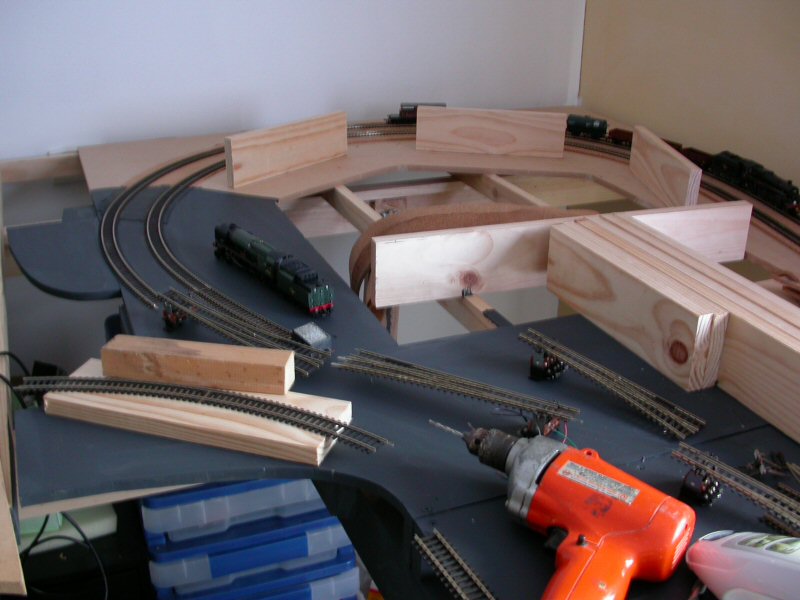
I have also started soldering some of the feed wires along the previous sections. There is lots more to do but it allows me to continue running test trains along those sections.
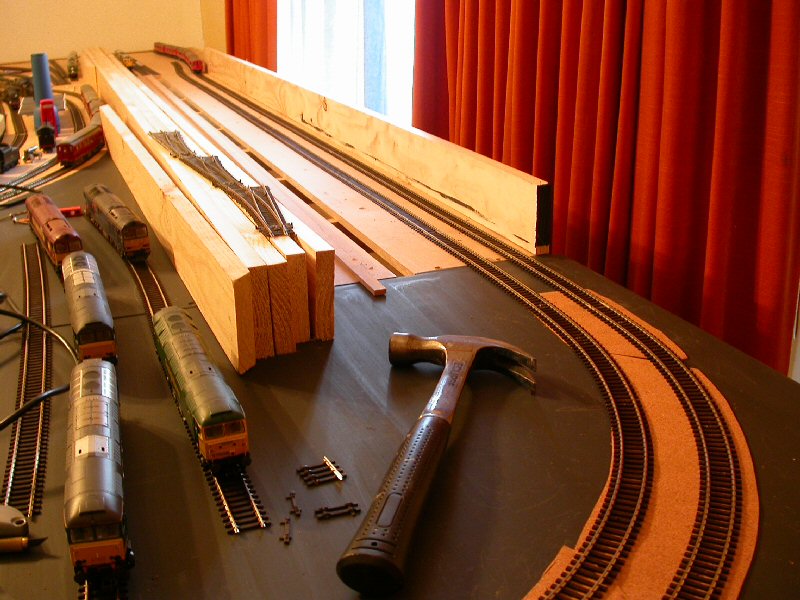
The track with locomotives on crossing at the bottom of the picture gives an idea of the alignment of the upper level tracks to come.
The supports at the left of the picture will be cut back a bit to match the way I have cut the board surface there.

Jeff Lynn,
Amateur layabout, Professional Lurker, Thread hijacker extraordinaire
Amateur layabout, Professional Lurker, Thread hijacker extraordinaire
Posted
Full Member
I have laid track to half way along the station loops and wired the three points at the right-hand end on the inner circuit … one of those is an extra one leading to a storage siding inside the curve. This will be outside of the tunnel so will have to have high retaining walls, at least on the tunnel side of the track. I still have two points on the outer circuit to wire at the right-hand end, and four at the left-hand end to lay and wire, together with the remaining track.
No pics yet but they will follow in the next couple of days.
Jeff Lynn,
Amateur layabout, Professional Lurker, Thread hijacker extraordinaire
Amateur layabout, Professional Lurker, Thread hijacker extraordinaire
Posted
Full Member
Here are the promised photos of the progress. The trains in the station loops were all driven there under their own power, notwithstanding the fact that some of the points were not fully wired and, therefore, had dead sections through the frogs. I deliberately tested those that had been through wired using my Hornby 09 shunter as its wheelbase was shorter than the dead sections. Locos with longer electrical pickup wheelbases were able to drive through the dead sections with no problems at all.
The extra curved siding can be seen in the foreground of some of the pics and is able to take a five-car Underground set - I can't quite get six cars in without tightening the radius to 18" or so (2nd radius for train set curves) but that is a compromise I'm not prepared to make.
The station buildings are perched precariously on bits of wood at approximately platform height to check clearances. The holes where the point motors and switches are mounted will be covered with stiff card.
As it is a work still in progress, I make no apologies for the tools and bits of wire lying all over the place!
Track laying continues, as does the work of wiring it to at least get things running for Saturday's AMRA visits.


Jeff Lynn,
Amateur layabout, Professional Lurker, Thread hijacker extraordinaire
Amateur layabout, Professional Lurker, Thread hijacker extraordinaire
Posted

Inactive Member
Max
Port Elderley
Port Elderley
Posted
Inactive Member
Have a good meeting .
regards,
Derek
Posted
Guest user
:doublethumb
:cool:
Posted
Guest user
1 guest and 0 members have just viewed this.