Stu's Boxfile Layout
Posted

Full Member
(This is just my size)
Hi Nick,Yep, the lids will be upright. The will be clipped together, probably by more use of magnets, and supported by the side-screen between the fiddle yard box and the leftmost scenic box, again using magnets. The upper part of the lids will be covered in sky paper, the joins hidden by suitably placed, removable chimneys.
Stu
Stubby47's Bespoke Model Buildings
All photos I post are ©Stu Hilton, but are free for use by anyone.

Posted
Full Member
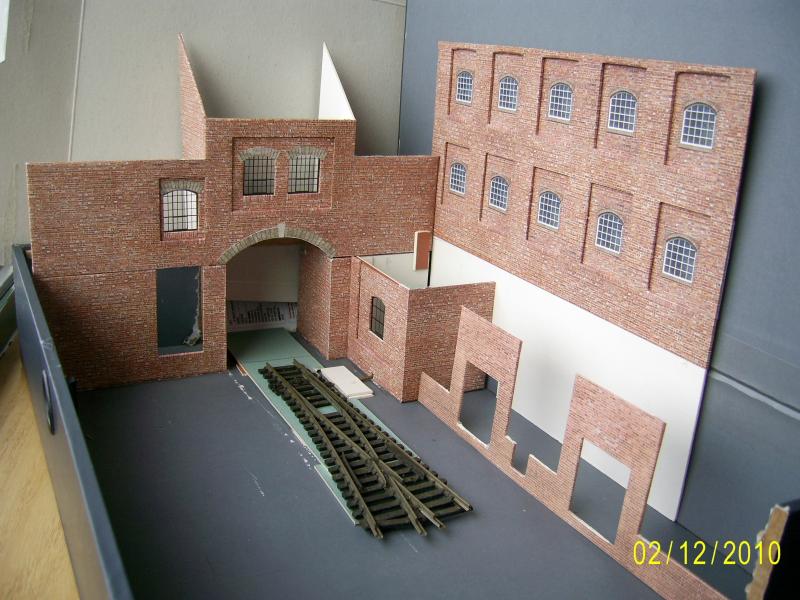
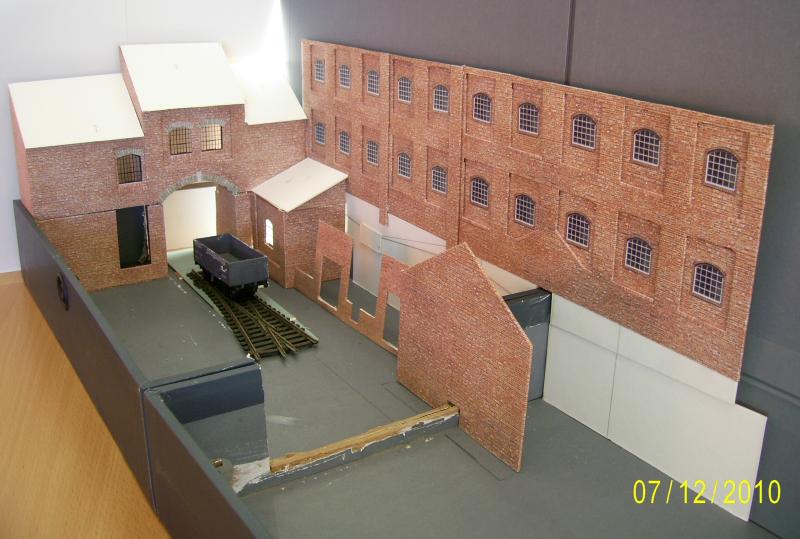
I've created the first of probably three panels of Doug's micro-thin warehouses. Note that this will be split just below the paper line to allow the lid to close. There will also be a sloping roof type-thingy to cover the tops of the lower buildings, which will also lift off.
The main entrance building needs to have the the lower window and roof panels added - again, all of this lifts off at the fairly obvious (at the moment) join.
The point is in positon, and is worked by a wire-in-tube just visible in front of the wall, and which exits the boxfile by the conveniently placed finger hole in the spine wall.
 Last edit: by Stubby47
Stubby47's Bespoke Model Buildings
All photos I post are ©Stu Hilton, but are free for use by anyone.
Posted

Full Member
Progressing nicely. I've been study your last picture and note how you've left the building tops slightly lower than the top edge of the boxfile to make room for the lid to close without removing the low relief building. Neat :thumbs
Are those Brassmaster etched windows you have used?
Posted
Full Member
The windows are Scalescene's, part of the window arches kits.
You get the arches, templates for the windows, windows to print on paper (which are similar to Doug's) and windows to print on OverHead Projector clear film (Big tip - print these on the 'rough' side of the film!).
Stu
Stubby47's Bespoke Model Buildings
All photos I post are ©Stu Hilton, but are free for use by anyone.
Posted
Full Member
I have the Scalescenes windows form the arches kit, but thought they were the etched brass because the ones on the right are white. In the Scalescenes kit they are all black frames. How did you manage that?
Posted
Full Member
Those are from Doug's warehouse backscenethread. Theyare just photos of windows, printed on paper and stuck directly on the brick paper.
Stu
Stubby47's Bespoke Model Buildings
All photos I post are ©Stu Hilton, but are free for use by anyone.
Posted
Full Member
Hi Nick,
Those are from Doug's warehouse backscenethread. Theyare just photos of windows, printed on paper and stuck directly on the brick paper.
Stu
Blimey ! They're effective :thumbs
Posted

Full Member
Cheers,John.B.:thumbs
Posted
Full Member
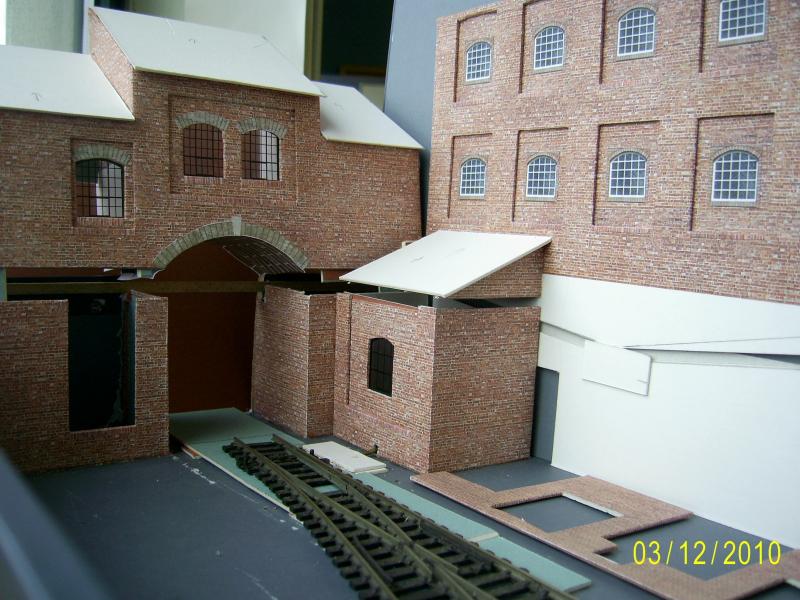
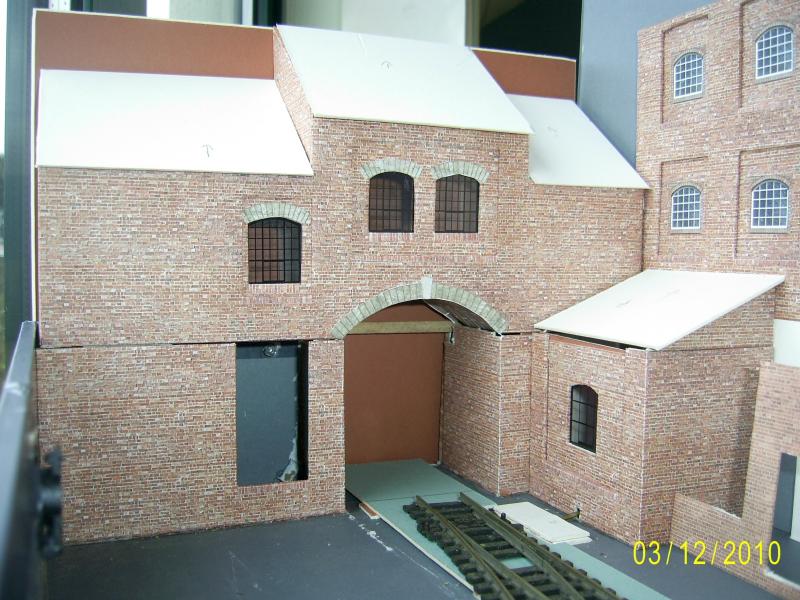
This show the buildings so far, roof bases on but needing slates, and the joins certainly need disguising.
Stubby47's Bespoke Model Buildings
All photos I post are ©Stu Hilton, but are free for use by anyone.
Posted
Full Member
Stubby47's Bespoke Model Buildings
All photos I post are ©Stu Hilton, but are free for use by anyone.
Posted
Full Member
I am debating how to construct the small building which will span the boxfile join, I've also got some of the Scalescenes painted brick, which I might use as a contrast to all the red. From this angle, a small smithy might look quite good.

Comments are welcome.
Last edit: by Stubby47
Stubby47's Bespoke Model Buildings
All photos I post are ©Stu Hilton, but are free for use by anyone.
Posted
Guest user
Posted
Full Member
I have raised the floor for the track, all of 3mm. It is made from 1.5mm card spacers and a 1.5mm card trackbed. This gives me just enough room to get the wire-in-tube point control and power wires under the trackbed.
The rest of the floor area will be at various heights, depending on the height of the buildings and how much clearance is needed to shut the lids.
I did try using a 5mm spacer / 5mm trackbed, but this was too high for the strengthening bar across the box entrance…
Stu
Last edit: by Stubby47
Stubby47's Bespoke Model Buildings
All photos I post are ©Stu Hilton, but are free for use by anyone.
Posted
Full Member
However, when I ofeered up the pieces to the box itself, I've somehow made them a few mm too high… So it'll be out with the big knife tonight to reduce the height a bit.
Stubby47's Bespoke Model Buildings
All photos I post are ©Stu Hilton, but are free for use by anyone.
Posted
Guest user
This is looking very nice indeed. Love the height and depth contrasts of the builings in relation to the railway line. A "smithy" should fit right-in, mate. Perhaps he could be making scroll-work for gates and fencing or "fixing" agricultural equipment(ploughs, reapers etc",
Kind Regards,
Michael Thornberry.
Posted
Full Member
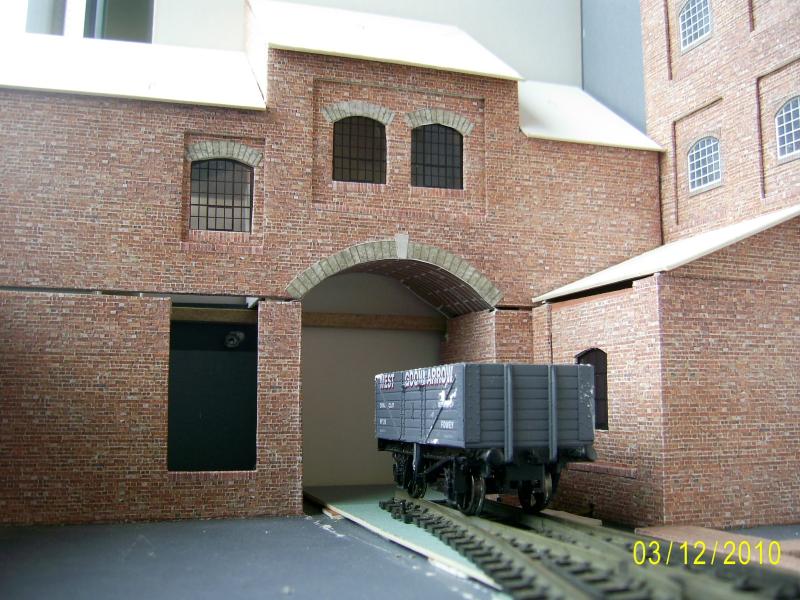
So the building is now a office. I had intended to put a smithy in Box 2 anyway, facing the track with a semi-detailed interior.
The whole complex was originally intended to be a wagon works, but the height of the 'factory' really precludes that, so it will be an engineering firm of some sort. Thus the smithy will be making tools for internal use, rather than being a commercial outlet.
Stu
Last edit: by Stubby47
Stubby47's Bespoke Model Buildings
All photos I post are ©Stu Hilton, but are free for use by anyone.
Posted
Full Member
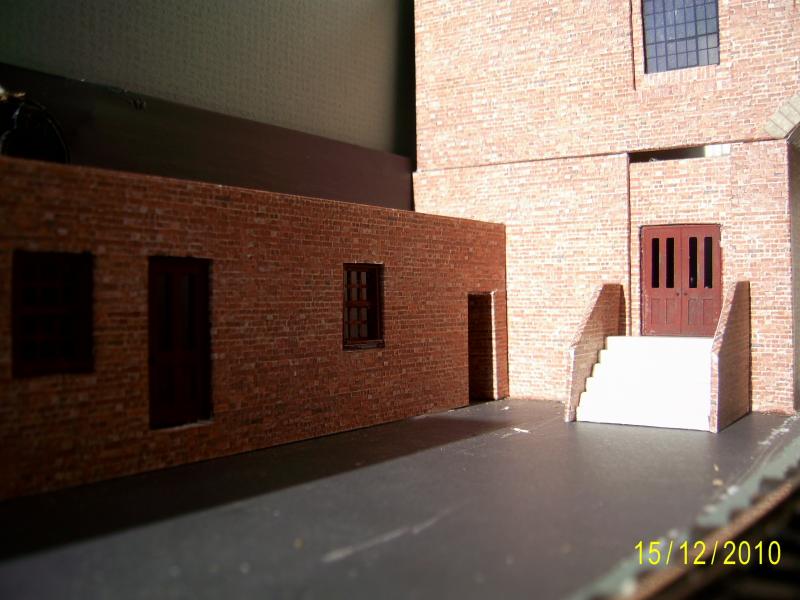
The main steps to the entrance building will also need adjusting for the 3mm high ground level - as yet these elements are only posed for photos and assessment.
Stubby47's Bespoke Model Buildings
All photos I post are ©Stu Hilton, but are free for use by anyone.
Posted

Full Member
Phill
Posted
Full Member
Stubby47's Bespoke Model Buildings
All photos I post are ©Stu Hilton, but are free for use by anyone.
Posted
Guest user
1 guest and 0 members have just viewed this.