First tree for Much Murkle
Posted
#84778
(In Topic #4655)

Full Member
Going barking......
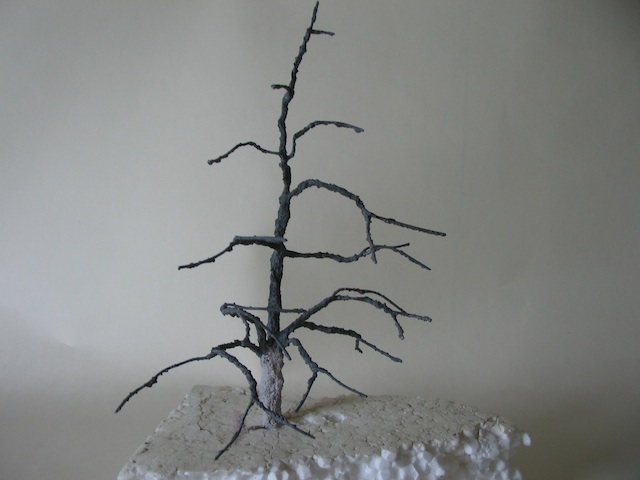
As the rain has persisted it down all day today, I decided it was time to experiment with tree making. I've spent some time researching different methods. There are some great tutorials here, as well as other forums and some really tedious but ultimately informative videos on youtube. Everyones method is slightly different so I thought i would share mine. Trouble is I didn't think about until I was part way into the process.It is a mature specimen to hide the corner joint in the newly erected backboards. It will sit behind the fence overhanging the entrance road and the weighbridge office.

I bought some of this at the Warley Show last year knowing that I would get round to using it one day.

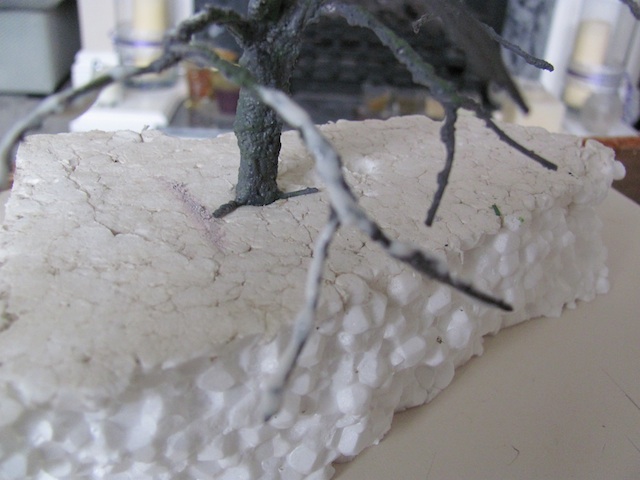
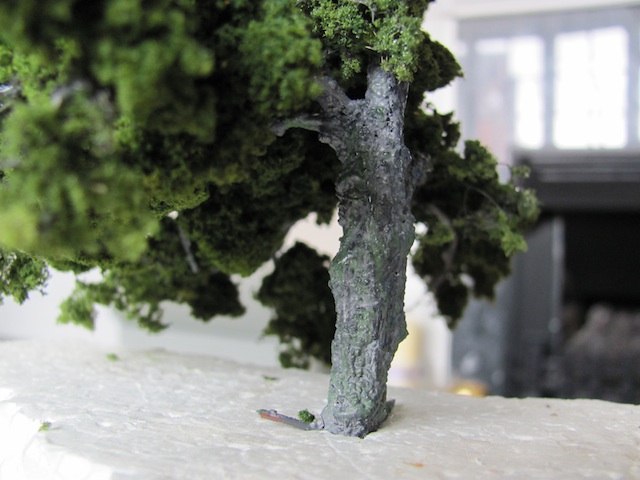
I forgot to take any photos until I had nearly finished painting the tree frame. It is made of copper twisted wire. The bark is painted (stippled) on with a large flat artist's brush and when dry painted with acrylics. I used Games Workshop Codex Grey as the base coat and then dry brushed some Chaos Black, let down slightly with Snakebite Leather followed by another dry brushing with Goblin Green. I just love the names of GW paints and they cover well too. The base of the trunk in the photo below is how the bark looks straight out of the tub. It has a gritty texture and when first applied it looks smoother than it does when it dries.
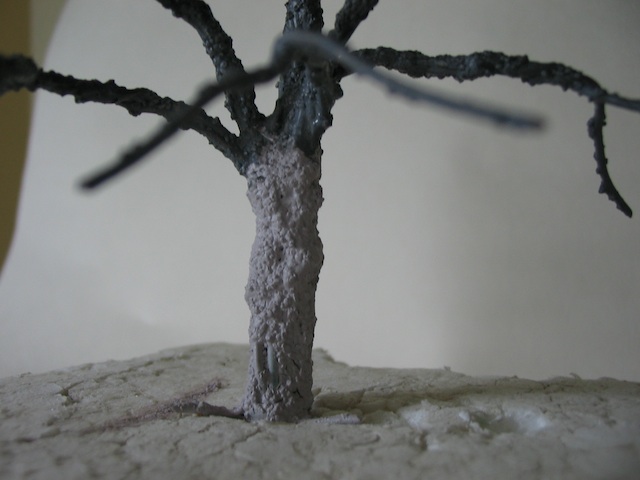
:oops: I didn't realise that I'd missed a bit until I saw the photos.
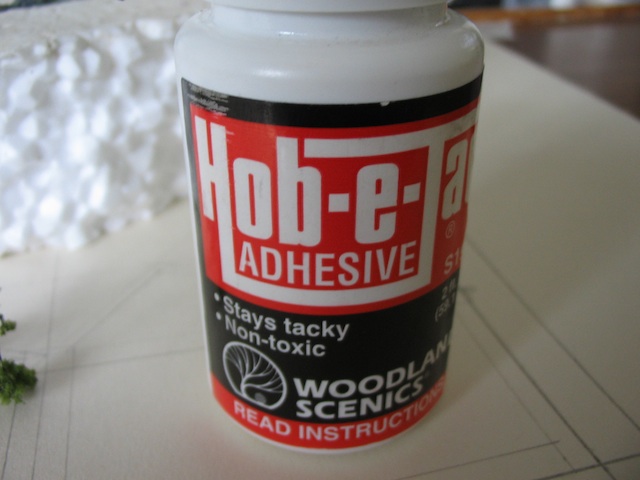
When the painting was completed and dry I then used some Woodland Scenics products. First Hob E Tac glue
Fine foliage
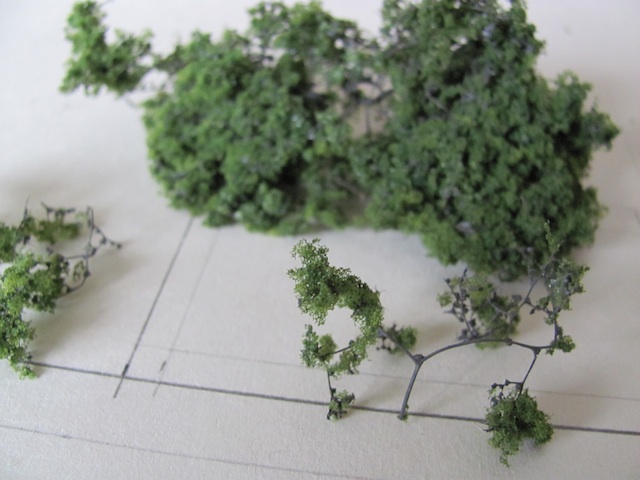
and clump foliage

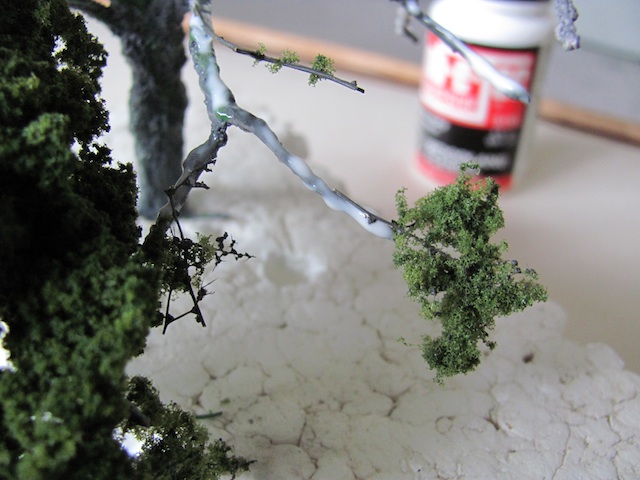
Coat the branches in Hob E Tac and leave to dry for at least 15 minutes. This is important as the foliage will not stick until the glue goes tacky, but it will stick to your fingers which will then stick to anything and everything. Been there and done it:roll:
I didn't do all the branches in one go but you could do if you wish, particularly on a smaller tree. When the glue has gone tacky then just press the foliage in place and move on to the next bit.
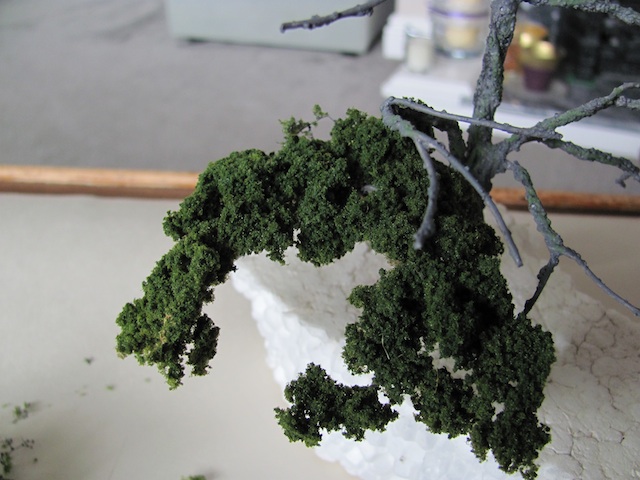
I tended to put the fine foliage at the end of the branches and the clumps further back. this gives the impression of the smaller growth at the ends.
The tree was gradually built up from the bottom to the top and the next few shots show the development to the finished tree.

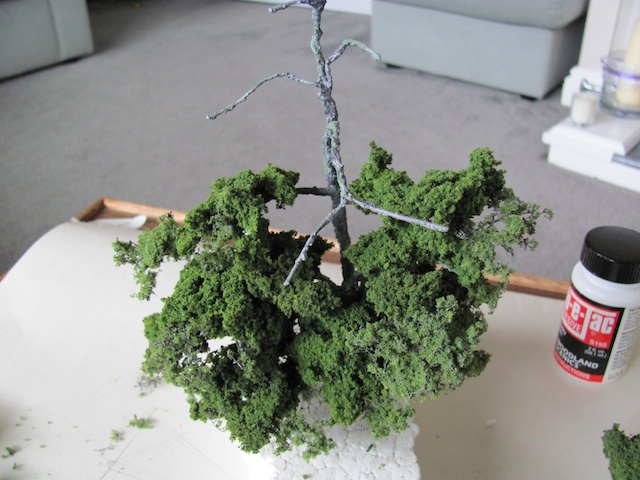

I tried hard to place the foliage so that you could still look into the tree and see the branches and trunk and get the feeling that you could climb inside.

This is my first attempt at a tree and I'm sure I can improve on it but overall I'm pleased with the result. Now I just need to plant it.
:cheers

Posted

Inactive Member
Max
Port Elderley
Port Elderley
Posted

Legacy Member
Posted
Guest user
 I like and I might try that method in due course.
 The tip about leaving Hob-e-Tac to part-dry is a good one. I have never some across a stickier substance yet somehow it doesn't seem to glue scenic items together until you have left it to cure for a while first. You're so right about sticking to fingers …..

Posted

Full Member
'Petermac
Posted

Full Member
Yew have made it easy to understand, even for the forum Elders. I Cedar are several members who Walnut be ungrateful for your post, making you very Poplar.
Tree-mendous.
Silly Doofer
'You may share the labours of the great, but you will not share the spoil…' Aesop's Fables
"Beer is proof that God loves us and wants us to be happy" - Benjamin Franklin
In the land of the slap-dash and implausible, mediocrity is king
"Beer is proof that God loves us and wants us to be happy" - Benjamin Franklin
In the land of the slap-dash and implausible, mediocrity is king
Posted
Guest user
Forget all the silly remarks using words from tree's :roll::roll:
Lets talk about the one that you have made, you have made it look fairly easy, but with a great result, one question if I may, appox how much has that tree cost, or how much did you spend, and how many trees will it all make?
Tree-mendous effort
Posted
Full Member
I was waiting for all the silly remarks to pass, but I have to admit that was very clever Doug

I'll try and put some perspective on costs.
First off - the tree I have made is 25cm tall (10" in old money)
Copper twisted wire - Cost nothing. Old mains cable wire begged or stolen from skips, friendly electrician, neighbours etc etc. Lighting cable is best as it is a smaller section
Green Scene Flexi-bark ref GS 402. was £3.25 when I bought it in November for a pot that I conservatively think will do at least 25 trees of this size and a good deal more smaller ones.
Woodland scenics clump foliage £12 approx for a bag that will probably do about 10 trees of this size. Available in various shades including fall colours
Woodlands Scenics Fine Leaf foliage £12 approx again available in various shades. One pack will be more than sufficient for a number of trees and bushes on small layout such as mine.
Woodland Scenics Hob E Tac £4 approx
So not cheap especially as you will probably want to vary the shades a bit so more than one pack of each is required. But when you consider how many trees youcan get for your money it is not too bad.
The shade I used for my tree was medium green.
Link to Woodland Scenics on Bachmann website.
http://www.bachmann.co…_selected=scenics&prod=19
Hope this helps
Posted
Guest user
be about £15 to buy.
keep up the good work, i like them.
 lol::cool:
Posted

Full Member
Nice job. The bark looks very good.
To get a little more variation in the foliage, try spraying the tree with a hobby adhesive or tacky hair spray and then sprinkling with a lighter coloured fine scatter.
Done right, and it's not difficult, it represents newer leaves at the ends of branches and really brings trees to life.
cheers
Posted

Full Member
The flex-bark, how did you apply it? Did it go on all in one coat or did you have to do it in layers?
I have never seen flex-bark here in the US. Does anyone know if it's sold over here?
Wayne
Posted
Full Member
Having tried this with polyfilla like stuff, the first attempt to 'adjust' the armature leaves you with shiny wire and a collection of coloured polyfilla!
Doug
'You may share the labours of the great, but you will not share the spoil…' Aesop's Fables
"Beer is proof that God loves us and wants us to be happy" - Benjamin Franklin
In the land of the slap-dash and implausible, mediocrity is king
"Beer is proof that God loves us and wants us to be happy" - Benjamin Franklin
In the land of the slap-dash and implausible, mediocrity is king
Posted
Full Member
Nick,
Nice job. The bark looks very good.
To get a little more variation in the foliage, try spraying the tree with a hobby adhesive or tacky hair spray and then sprinkling with a lighter coloured fine scatter.
Done right, and it's not difficult, it represents newer leaves at the ends of branches and really brings trees to life.
cheers
Marty, thanks for the tip, sounds a good suggestion. I'll try it in future on a smaller tree and if it looks ok I'll do a bit of retro-fitting :thumbs
Posted
Full Member
Very nice looking tree there Nick. I do have one question though.
The flex-bark, how did you apply it? Did it go on all in one coat or did you have to do it in layers?
I have never seen flex-bark here in the US. Does anyone know if it's sold over here?
Wayne
Hi Wayne. It's just like a thick gritty paint. I used a large brush and just dabbed it on. It takes on the bark like texture as it dries. Don't know if it is available in the US but here is their website http://www.green-scene.co.uk/It doesn't appear to be fully operational but you can contact them through it.
Posted
Full Member
Presumably, being called Flex-bark it can be bent without cracking off?
Having tried this with polyfilla like stuff, the first attempt to 'adjust' the armature leaves you with shiny wire and a collection of coloured polyfilla!
Doug
Doug, I've tried the polyfilla and pva mix approach some time ago when I last tried to make a tree and it was worse than useless, the slightest knock and it cracked and broke off. This stuff seems to have a degree of elasticity. I have knocked it and nothing happened. I don't know if it will take some degree of bending as I haven't tried it and I'm not about to take the risk with this tree, but I think it would take some minor adjustments ok.
Posted
Full Member
D
'You may share the labours of the great, but you will not share the spoil…' Aesop's Fables
"Beer is proof that God loves us and wants us to be happy" - Benjamin Franklin
In the land of the slap-dash and implausible, mediocrity is king
"Beer is proof that God loves us and wants us to be happy" - Benjamin Franklin
In the land of the slap-dash and implausible, mediocrity is king
Posted
Guest user
Here's one I made in the same way :-

Posted
Full Member
That is superb and puts mine firmly in the teachers report. "Good effort, must try harder".
Posted
Guest user
You can mix just about anything you like with it for a rougher texture. And Jo Sonja's brand is cheap. No need to fork out for Winsor and Newton, for example - it won't be any better.
I even found a UK supplier, if anyone's interested
http://www.hofcraft.com/josonjatexturepaste.htm
Nice tree, Nick, and I like those paint names too
Mike
Posted
Full Member
I use the same mix for "Ground Goop" but add sawdust and Burnt umber oxide to colour to give it some texture and colour.
Going to investigate the texture paste though…
1 guest and 0 members have just viewed this.