New Tramway
Posted

Inactive Member
I'm determined to come up with some useful diagrams. I ask the question again. Do the diagrams show the principles of switching the frogs correctly? They are schematic only, so I can understand what's going on. Once I understand how it works, I'll draw it up so we "simple folk" can wire our turnouts.
Max
Port Elderley
Port Elderley

Posted
Full Member

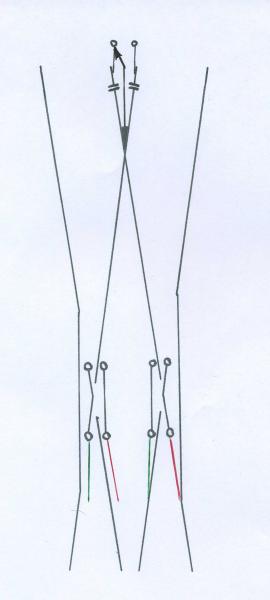
I know it is for a junction and not a double slip, but I could create a similar one for a double slip if it is the sort of thing that would be helpful.
Posted
Full Member
Yes, I agree! Your drawings are electrically correct and yes, the frogs are switched by the opposite pair of points.. . . and are these the double slips?
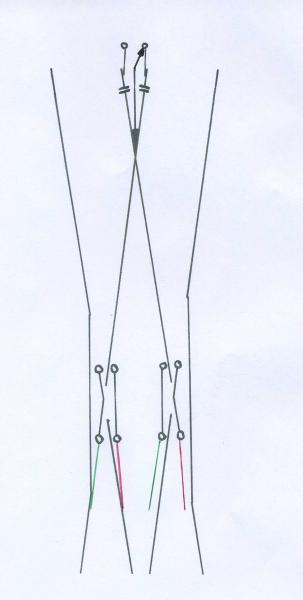
It looks as though the frogs are switched by the opposite pair of points.
Does anyone disagree with any of the propositions?
Posted
Inactive Member
I want to deal with powering the moving rails separately, once I'm confident that I have the frog correct.
From what I can see, the moving rails never change polarity. They are either up agains the stock rails or away from them. It's a mechanical connection issue to make sure they have a reliable connection.
It's like the Emporer's new clothes. I'm the idiot who's putting up my hand saying, "I really can't follow the drawings by the 'experts." If I dissect the task into bite size bits, I might have a chance.
Thank you for the photo. It will come in handy as I progress. :thumbs
Max
Port Elderley
Port Elderley
Posted
Inactive Member
Max
Port Elderley
Port Elderley
Posted
Full Member
I'm sure it will be when I understand the principles, Geoff. What I'm trying to get an answer to is, have I drawn the "polarity" shifting to the frog correctly? YES I know it's not strictly polarity with DCC, but I don't know how else to describe it.
I want to deal with powering the moving rails separately, once I'm confident that I have the frog correct.
From what I can see, the moving rails never change polarity. CORRECT They are either up agains the stock rails or away from them. It's a mechanical connection issue to make sure they have a reliable connection.
It's like the Emporer's new clothes. I'm the idiot who's putting up my hand saying, "I really can't follow the drawings by the 'experts." If I dissect the task into bite size bits, I might have a chance.
Thank you for the photo. It will come in handy as I progress. :thumbs
Posted
Full Member
From what I can see, the moving rails never change polarity. They are either up agains the stock rails or away from them. It's a mechanical connection issue to make sure they have a reliable connection.
Again, correct with the mechanical issue for reliable connection, BUT …..
When you purchase a new code 75 point (not a double slip, just an ordinary turnout), the moving rails are connected to each other via links from each of them to the frog. Effectively they carry out frog switching for you, by making an electrical connection to one stock rail or the other.
So, if you wish to connect a moving rail to a stock rail, you have to remove the link to the frog first.
These pictures I posted on my layout thread show me doing just that:-


Posted
Full Member
Posted
Inactive Member
 Last edit: by MaxSouthOz
Max
Port Elderley
Port Elderley
Posted
Inactive Member
Max
Port Elderley
Port Elderley
Posted
Guest user
http://yourmodelrailway.net/view_topic.php?id=4179&forum_id=6
The link is also listed in the YMR Index under Wiring Live Frogs.
Posted
Inactive Member
Max
Port Elderley
Port Elderley
Posted

Full Member
I didn't think of W. I looked under F for frogs, L for live, T for turnouts and P for points.
Could give you the reason but its Lent and i am being nice :cool wink.
Phill
Posted
Inactive Member
Max
Port Elderley
Port Elderley
Posted
Inactive Member
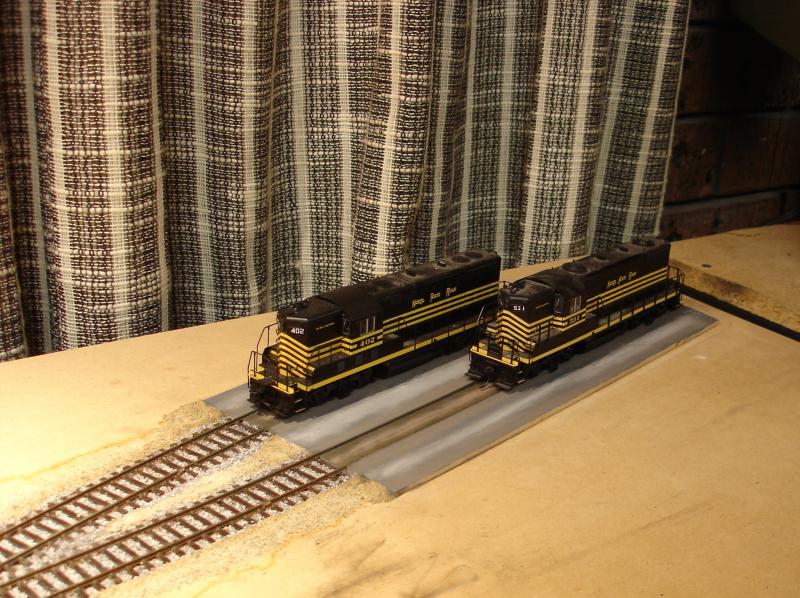
This is a GP-7 number 402 and GP-9 number 531, pretending to be trams at the northern terminus.
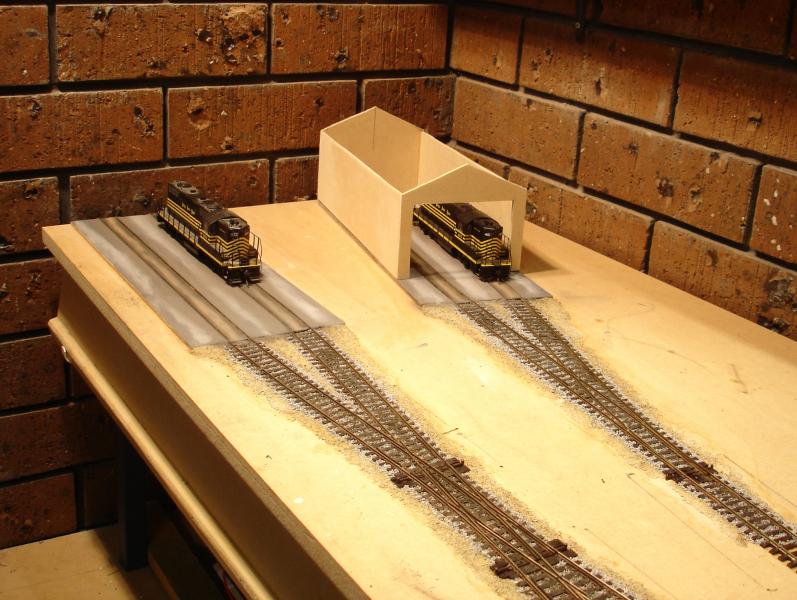
This is GP-9 number 534 at the southern terminus and GP-7 number 415 hiding in the tram barn. Ballasting will continue on the rest of the track and then the board will be turned over to fit the Tortoise motors and wire up all the bits.
Lenz parts, L1 USB and LS 150 are winging their way from the US as we speak. I'm still having trouble getting the 2 x LR 101s and the 8 x LB 101s all together from the one supplier. I distrust back orders.
I might give DCC Supplies another go - if they're still speaking to me.
Max
Port Elderley
Port Elderley
Posted

Full Member
Knowing little about US outline locos, is there any significant difference between a GP 7 and a GP 9 ?
'Petermac
Posted
Inactive Member
Then there were quite large body mods like on John Flann's GP-9s, which were undertaken by individual roads. The GP-7s and GP-9s were the VW beetles of the railroad industry. There are still some old ones around as well.
Max
Port Elderley
Port Elderley
Posted
Inactive Member
OK. The remaining Lenz bits arrived from Chris yesterday, so turn the board over and begin.
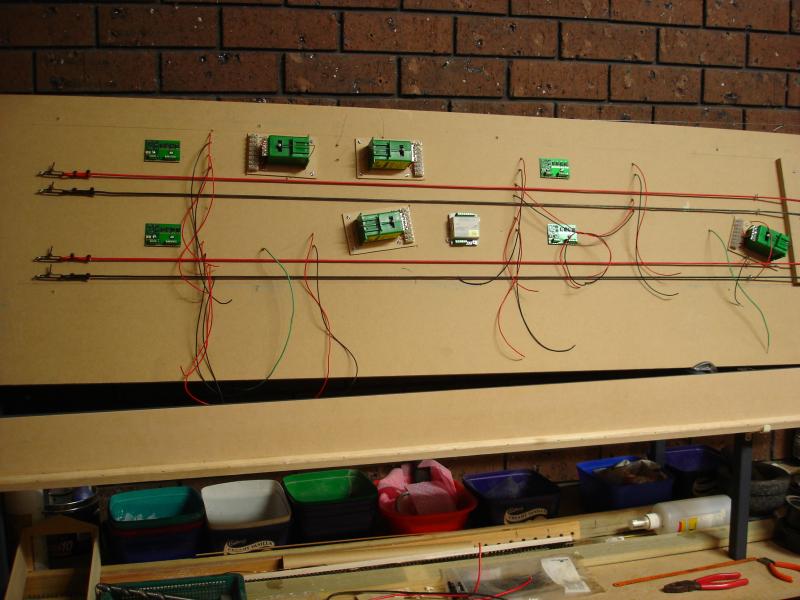
Eastern end, showing the patented bus tensioners, Tortoise motors, LR 101 and LB 101s, buses and droppers.
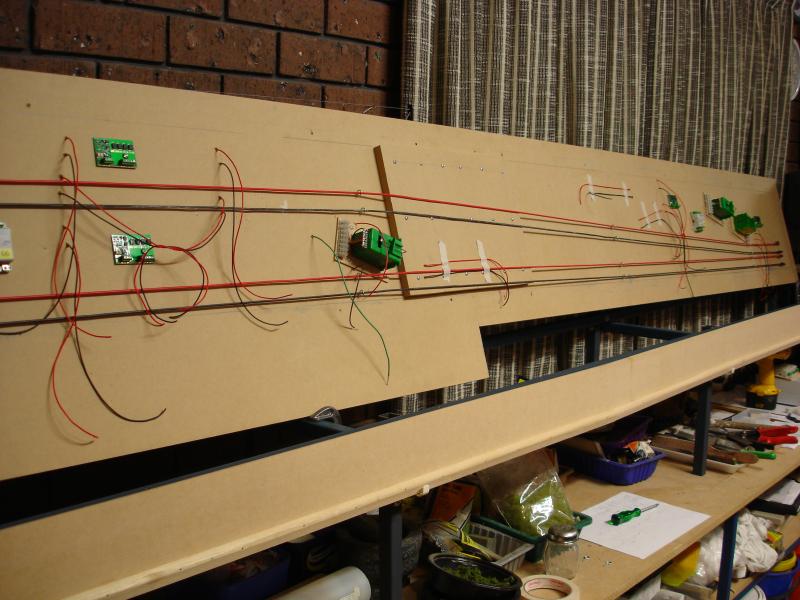
The middle bit. The top bus is the J K track bus and the bottom one is going to be a 12 Volt DC bus for LEDs, et al.
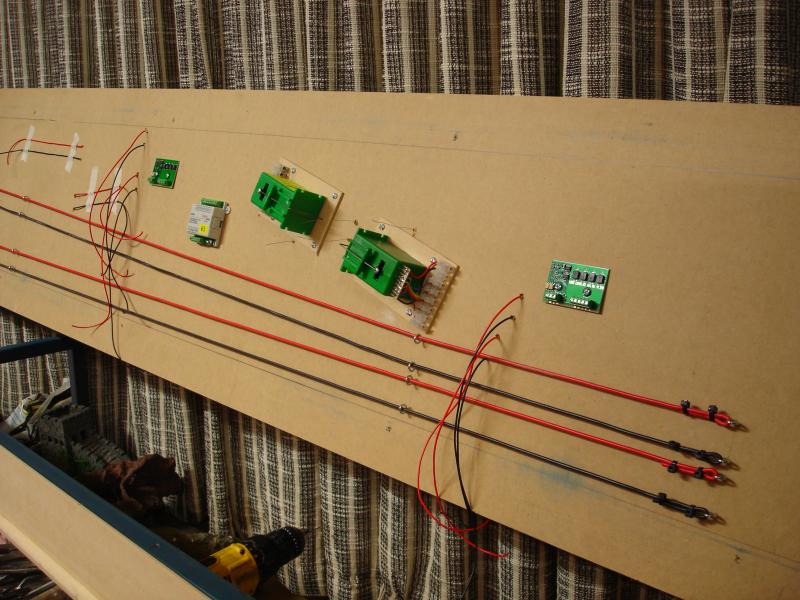
The western end. Another LR 101 and two more LB 101s. The anchor end of the buses and more droppers.
Max
Port Elderley
Port Elderley
Posted
Guest user
Posted
Full Member
 hmmhmm
Have I missed something here ? I'll re-read the thread to see what they are but they certainly seem to work.
 thumbs
Those bus wires look extremely tidy. :pathead
'Petermac
1 guest and 0 members have just viewed this.