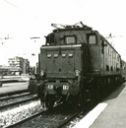
Granby Junction 1948 N. Wales
Posted
Inactive Member
GWR/LMS OO Gauge DCC RR&Co
Now this was well worth the wait. Interesting to read and lots of lovely pictures! :thumbsThomas
TUTTO IN GRIGIO ARDESIA

Posted

Full Member
Another load of stuff to buy and a vast compendium of knowledge to assimilate.
Extremely well done.
Posted

Full Member
Another load of stuff to buy and a vast compendium of knowledge to assimilate.
Extremely well done."
Woteesed x 2!
Is a model railway ever finished?
Thank you for taking the time to include an explanation, too.
Doug
'You may share the labours of the great, but you will not share the spoil…' Aesop's Fables
"Beer is proof that God loves us and wants us to be happy" - Benjamin Franklin
In the land of the slap-dash and implausible, mediocrity is king
"Beer is proof that God loves us and wants us to be happy" - Benjamin Franklin
In the land of the slap-dash and implausible, mediocrity is king
Posted

Full Member
Re the picture in post 119(last piccy),featuring the token apparatus…I'm not 100% sure,but I think they were usually on the firemans' side.(left for GWR),so your gadget should be on the same side as your Royal Mail pick-up!
I don't recall ever seeing a token taken by a driver,he'd be busy driving!!
Cheers,John.B.:thumbs
P.S. Ditto for the pick-up horn for the token!
 Last edit: by spurno
Posted

Full Member
Thanks for the question regarding the token, John B.
I may not have been clear enough……..The token is to cover access to the mine branch travelling from left to right……so the token pick up is positioned on the left, Firemans side…………similarly the horn and safety net are on the Firemans side for the journey out of the mine branch…………..does that make sense??
Kind Regards
Posted

Full Member
'Petermac
Posted
Guest user
i have been looking at my layout the past couple of nights trying to figure out haow i will put in my 3 aspect signals:eek: that is just half of the problem, the other half is working out how to use them in TC. you are right that the signals are the finishing touch.
great job:thumbs
Posted
Full Member
Just re-read the caption to those token apparatus pictures again. My Bad!!!
In my defence,I was very tired,and not paying enough attention to reading your explanation.You were/are of course absolutely right,and I'm pleading a senior moment!!ops:ops:ops:
(I even thought the net was for a mail pick-up!!:roll
ooooppps!!!
Cheers,John.B.
Last edit: by spurno
Posted
Full Member
Out of interest what colour(s) should the token be based on what you have seen?
Regards
Posted
Guest user
This rule held true right up until Chris Green painted all the lamp posts red and installed red platform seats everywhere, causing an outcry among drivers which was ignored.
Posted
Full Member
So I didnt need to paint it after all……..its a white metal kit!
I guess next time I have the silver paint open I ll give it a once over
Regards
Posted
Full Member
It is now virtually finished and I think this is just the second post. This, then, is a kind of interim or linking post before I show you the finished module next week.
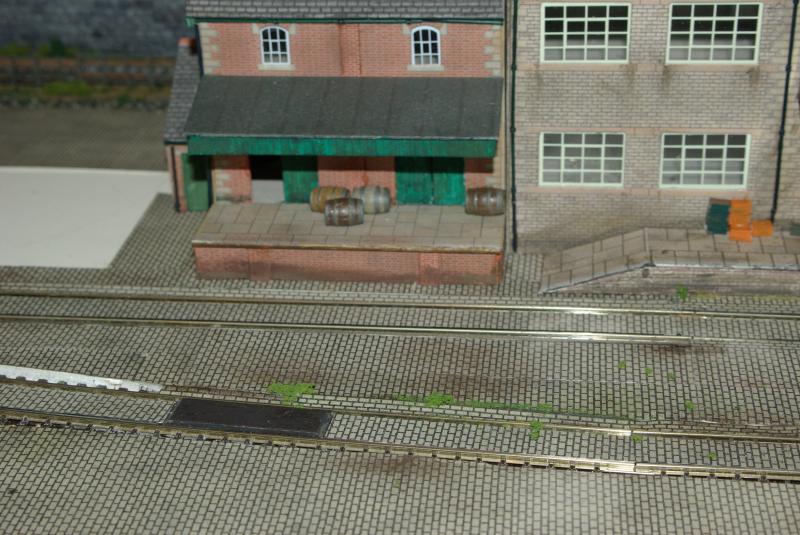
The embankments and walls you have already seen. I then ballasted the branch track and fixed the boundary fence in place. All a bit redundant because most of it will be obscured by the brewery buildings
I then used some spare Foam board to build up the baseboard to track level…….well actually as I found to my cost…..and as you can see about 1/8" above track level…….not quite the plan and caused me a load of problems later on.
On top of the Foam board I pasted Metcalfes Sets…….this is a new version, they are not self adhesive or embossed like the previous version but I think I prefer them…….they still have a textured surface and if you weather them with pastels they can look quite authentic
Operation in the Brewery yard is key because, using RR&Co, I intend to automatically shunt on a daily basis picking up 3 wagons and replacing them with 3 others. So I decided to sacrifice appearance to operation so the infill gaps are a bit wider than they should be.
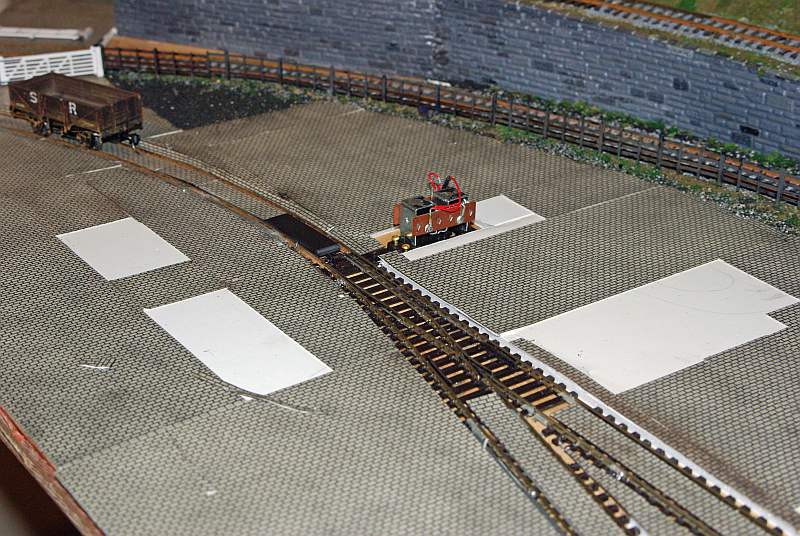
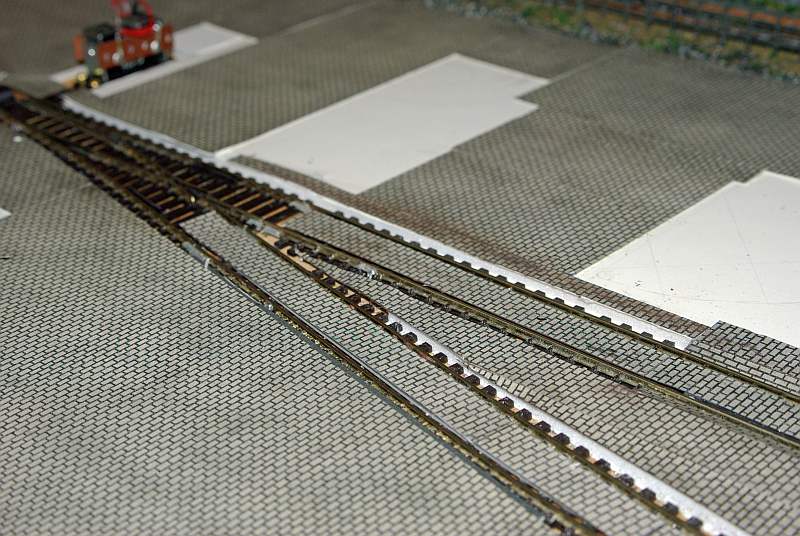
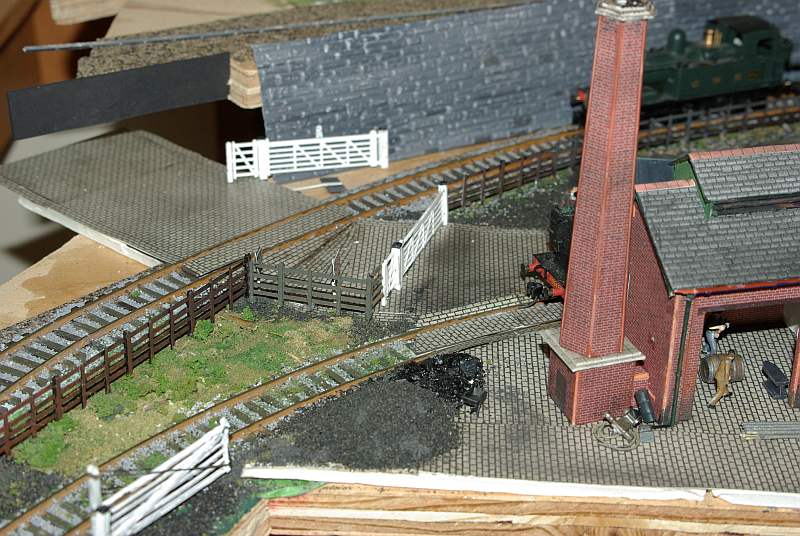
This shows one of the 2 uncoupling magnets and the single point. I deliberately departed from my standard practice of 36" min radius and med radius points and put in a short radius because I wanted to replicate those tight flange squealing curves one got on industrial track.
As this is a warts and all thread I must reveal that for reasons I dont understand I installed an insulfrog……to ensure the loco could really crawl…..didnt bother to switch polarity the way I normally do…….then screwed up the wiring…….then found the loco stalled repeatedly and ripped up everything before discovering that my infill had prevented the switch balde from making contact……………………so I took a deep breath…….two fingers of malt and finished the signalling!
A couple of weeks later I started installing some of the buildings
Followers of Matilda's Travels may be confused in that the building on the right was last seen at the Olympics masquerading as a ski lift building…….amazing the bargains one can pick up at post Olympic Sales. I have added some Wills drain pipes and done some weathering and detailing
Here is a close up and you can see my attempts to dirty down the rather pristine pale blue that Metcalfe provide. Again I have added some drain pipes, guttering and detail
Here is a before for reference
As you will shortly see I really went to town on this one.
Hopefully I will post the conclusion and happy ending to the Brewery saga next week……….right now modelling is edging down the priority list as spring is on its way here and there is a ton of work to do on the boat before we head down to Seattle.
Regards from a very very wet Vancouver
Posted
Full Member
 thumbs
Has that post-Olympic sale finished ? I could do with the odd bargain here in a very wet France…………….:roll::roll::roll:
I hope you're right about spring arriving - I'm sick of this lot !!!!
'Petermac
Posted
Full Member
Well, Peter, I hope this cheers you and every one else up a bit!
Doug
'You may share the labours of the great, but you will not share the spoil…' Aesop's Fables
"Beer is proof that God loves us and wants us to be happy" - Benjamin Franklin
In the land of the slap-dash and implausible, mediocrity is king
"Beer is proof that God loves us and wants us to be happy" - Benjamin Franklin
In the land of the slap-dash and implausible, mediocrity is king
Posted
Full Member
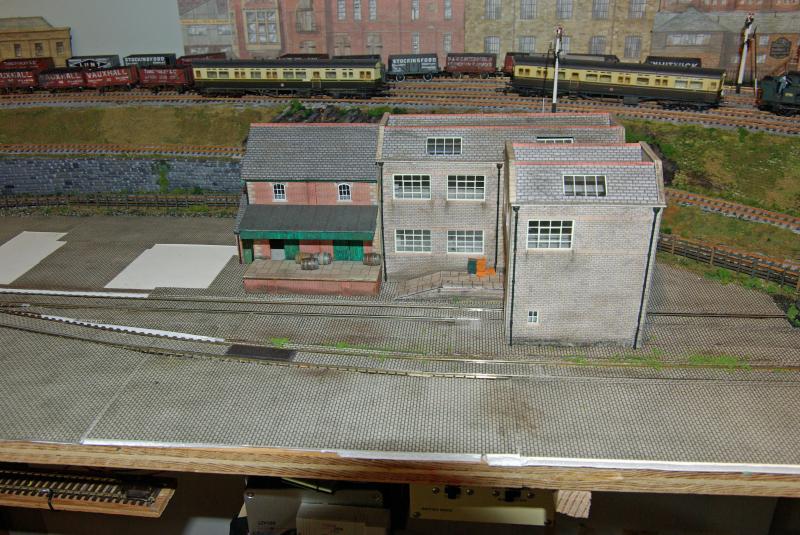
This was before I put the end moulding on but gives an adequate overall impression. The aim is to create an image of a compact industrial site that has grown through the ages…………still active, busy and very grimy!
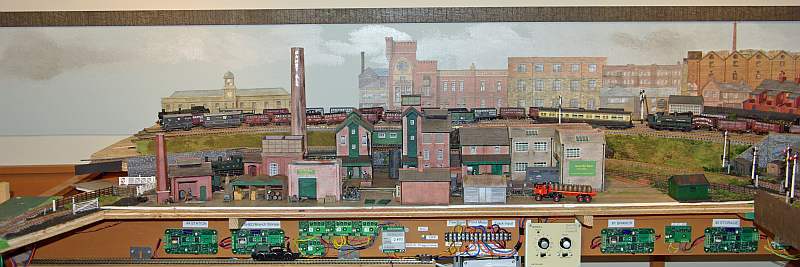
Starting from the right there is the relatively modern bottling plant and distribuition warehouse last scene as a ski lift building
The area to the extreme right will be a staff car park……even in 1947 there would be cars for the directors and senior managers…….I have always been short of road vehicles so this was a good excuse to get some ordered…..particularly with a strong Canadian $ (Thats the good news…the bad news part of my pension is in UK L!!)
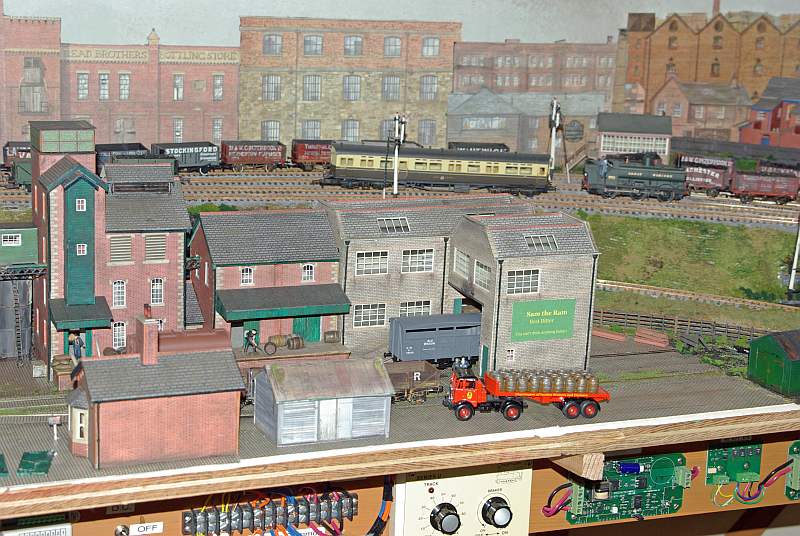
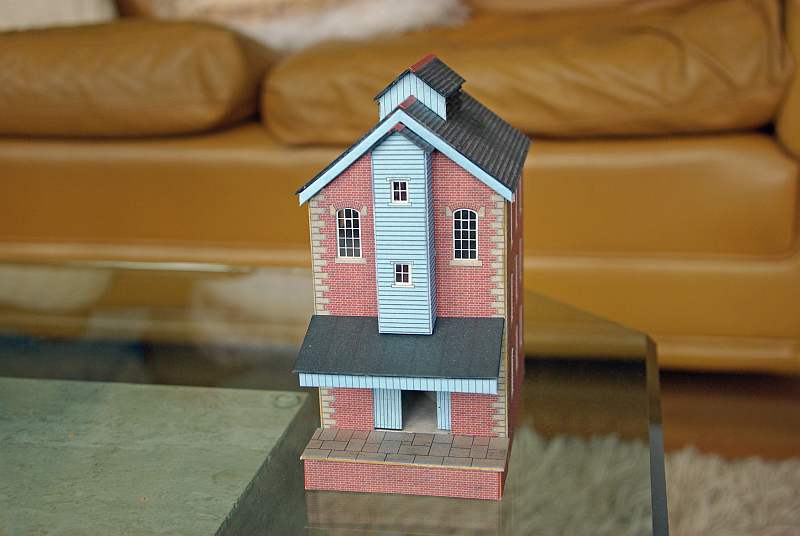
On the left is a gatehouse/entrance lodge built from Metcalfe scraps
I decided to perpetuate Matilda's visit by naming the Brewery's principal product…."Sam the Ram Best Bitter"

Before anyone else makes the comment……If I had a day job I won't give it up for a career in advertising!
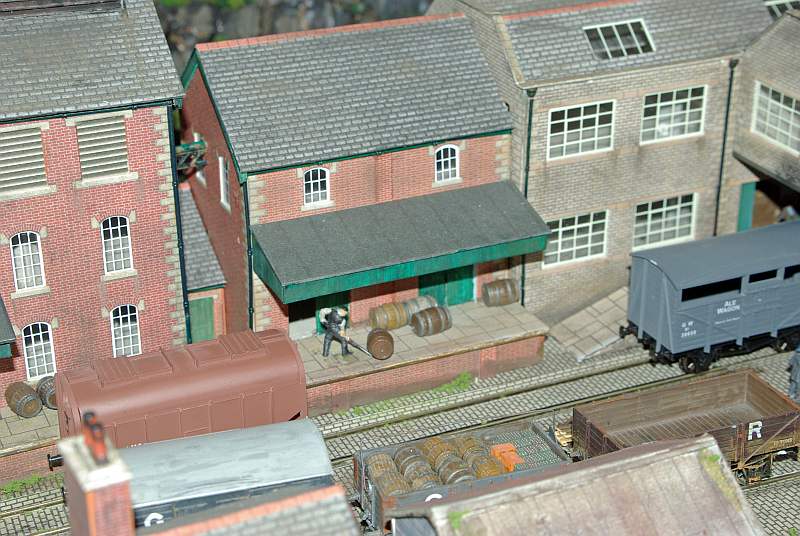
I want the brewery to look busy so I have raided my store of Dapol (ex Airfix) figures……………I am not sure if people rolled barrels this way but it looks fairly credible to me
This shows, rather cruelly, my attempts at painting out Metcalfe's pristine and somewhat unlikely Pale Blue. You can also see the start of the pipework I have inserted to connect the various buildings.
More Dapol figures, ancillary structure and clutter. The camera is very cruel I was certain I had water coloured the cut on the corner of the platform

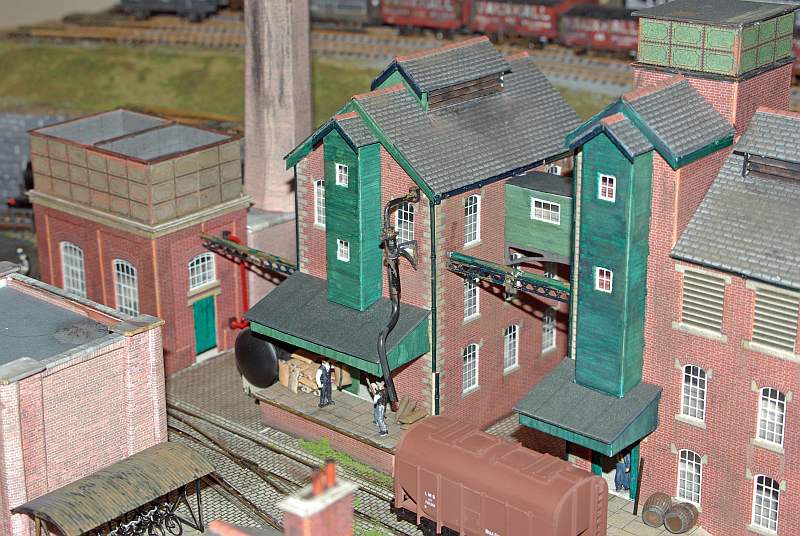
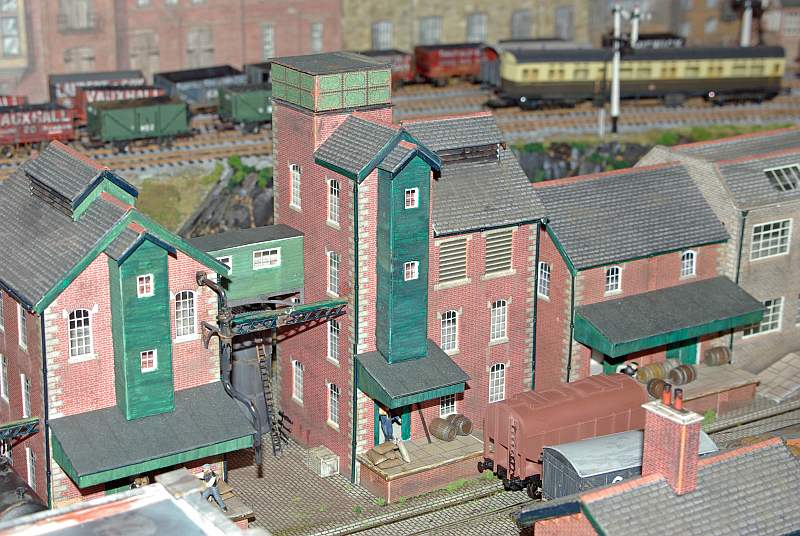
The boilerhouse is a Metcalfe water tower and a Scalescene Chimney

Dooferdog has been known to browse these pages…….the scalescene freebie was made before your excellent tutorial……the bull nose corners are all my own work I am afraid
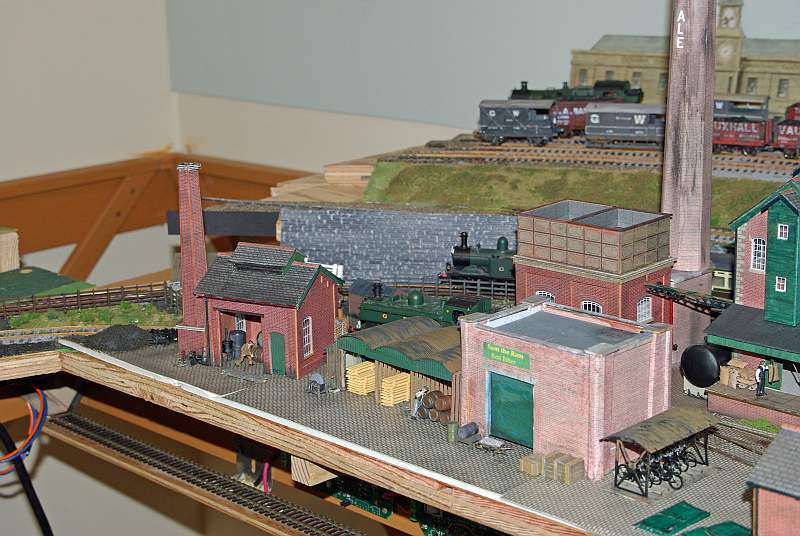
The cooperage is a Metcalfe Sandhouse and the timber for the barrel staves is stored in a Wills Kit which I thoght too small for a Timber Merchant but ok here
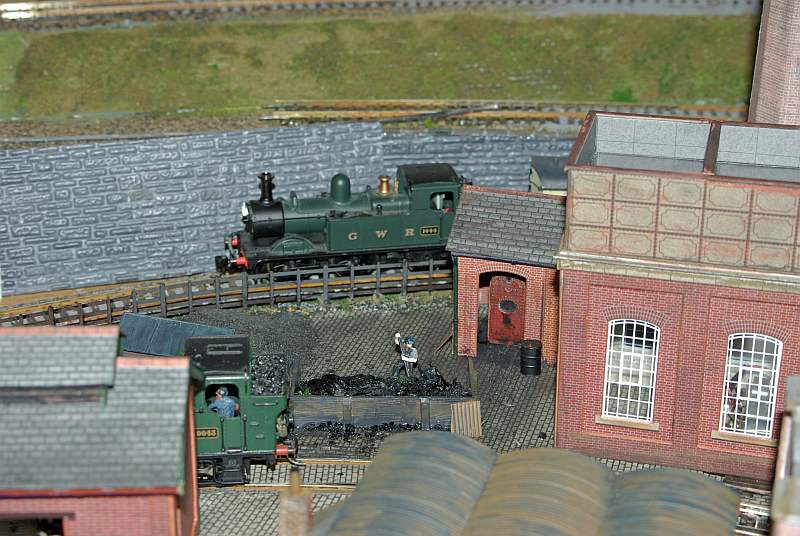
The shot below shows the coal dump complete with rusty corrugated iron as per Wheeltappers suggestion…..thank you Richard
The 14 xx in the background is taking the autotrain from Cynwyd………….the 97xx is shunting the brewery yard…….and I almost have sorted out the RR & Co schedules!

At the left end of the set up there is a gate for the brewery siding and a road level crossing and eventually when I start on the main line the road will be landscaped underneath

I have now fitted the edge trim
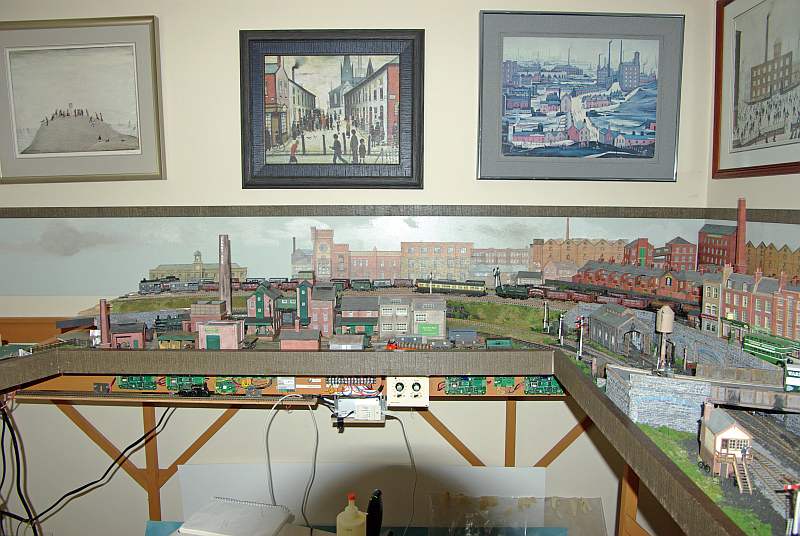
And this shot…………despite the drunken Lowry………..fits the brewery into the overall layout context with the Branch Engine Shed on the right
It may seem a little childish but it was extraordinarily satisfying to nail in the last bit of trim and know that half the layout is now completed.

The next segment to work on is the canal scene at the other end of the room. I have ordered some lock gates and other bits and pieces from Langley and hopefully will start work in the next month……………meantime on Wednesday I have to set out on our annual pilgrimage to Seattle…………some 200 miles south of Vancouver…………there and back…a leisurely two week trip in a sail boat…………..so forgive me if I am a little slow in replying
Regards from ,happily, a warm and sunny Vancouver
Last edit: by John Dew
Posted
Guest user
Posted
Guest user
I think your grime has worked very well.
Mike
Posted
Full Member
Certainly not.
Lots to like, John.
Hope you do lots of splicing on your trip.
Posted

Full Member
Bob(K)
Posted

Full Member
Hope you do lots of splicing on your trip.
That would be the main brace would it DD :cheers
John,
Nice work with trying to change Metcalfe's "unlikely" blue, gives me courage to try and change the warehouse I have in N.
I like the brewery clutter too. Coming along nicely.
1 guest and 0 members have just viewed this.