Granby Junction 1948 N. Wales
Posted
Guest user
GWR/LMS OO Gauge DCC RR&Co
That's really super John, brilliant job.
 Last edit: by spurno
Posted

Full Member
I have spent too much modelling time looking at all the little details!
Thanks for posting it,
Doug
'You may share the labours of the great, but you will not share the spoil…' Aesop's Fables
"Beer is proof that God loves us and wants us to be happy" - Benjamin Franklin
In the land of the slap-dash and implausible, mediocrity is king
"Beer is proof that God loves us and wants us to be happy" - Benjamin Franklin
In the land of the slap-dash and implausible, mediocrity is king

Posted
Guest user
they are spot on .
:wow
 :cool:
Posted

Full Member

Posted

Full Member
I'm now going back to the first page to actually read it all :cheers
Posted

Full Member
I'm officially very envious!! Pure GWR.
Cheers,John.B.
Last edit: by spurno
Posted

Full Member
Phill
Posted

Full Member
. It is really very encouraging to get this sort of feedback. I am very chuffed, and somewhat surprised, to have the bridge voted in as photo of the week particularly when there were so many other excellent shots.
I guess I am lucky it happened this week because ,as you are about to see, I have embarked on another construction phase and although I am looking forward to reporting it, I dont imagine there will be any photos even approaching nomination status for a while.
I have now virtually finished one long side of the layout so the next project is to develop the two short ends and build some storage sidings for the branch on the undeveloped long side.
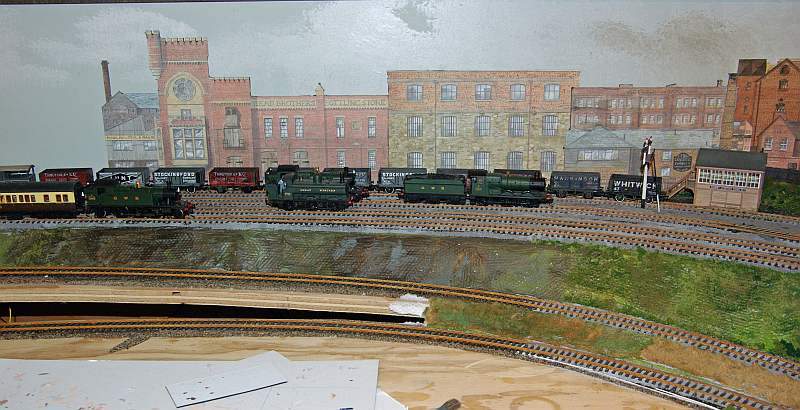
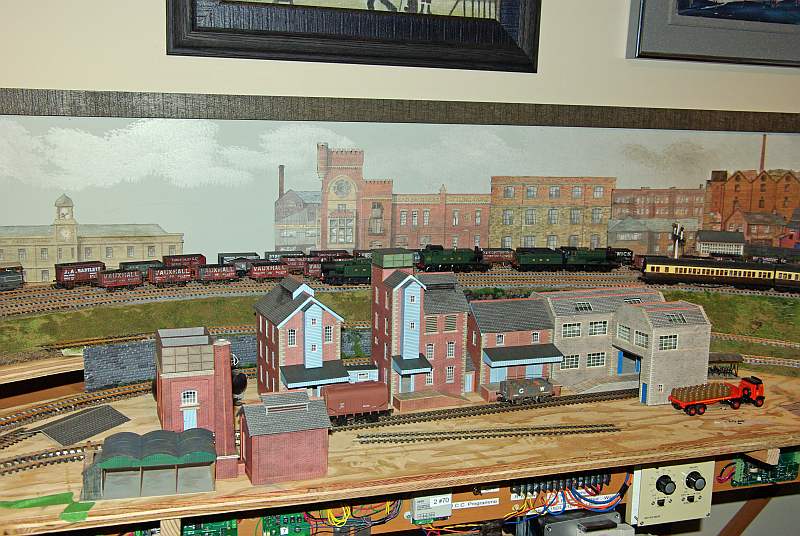
So starting with the brewery end here is the blank canvas

To the right is the Branch engine shed. At the back is the 4 road mainline exiting the storage yard and heading for the terminus
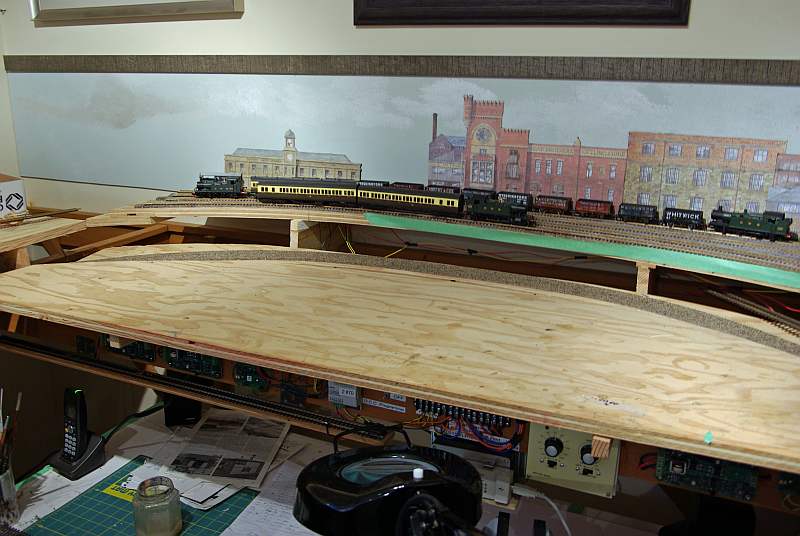
The main baseboard will be 1" higher on the left hand side and you can see the fairly gentle gradient on the main line. I needed the extra height because I changed my mind (again) and decided to run 2 long storage sidings for the branch underneath the main level
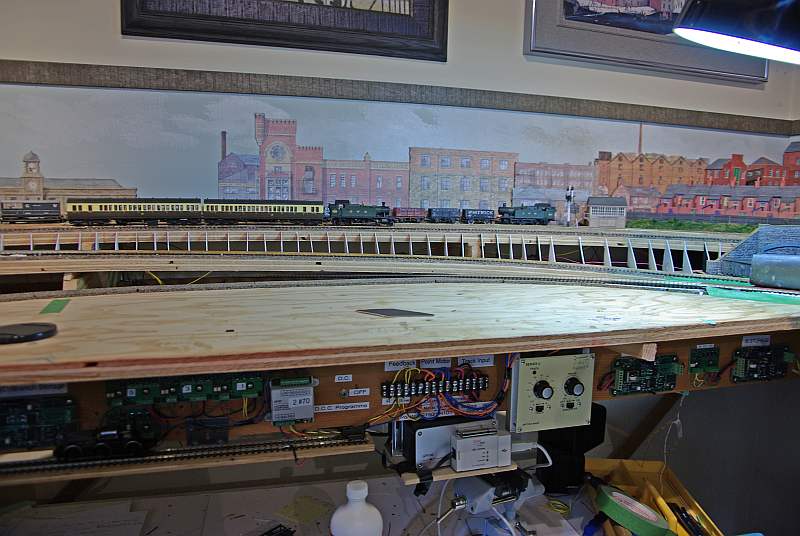
This is the branch line climbing to connect with the main line and on a much steeper gradient (1:40)….. I have checked this with some stock and it seems to be ok but I will only relax when I get long coal trains climbing up……the curve by the retaining wall on the right is more of a concern in that it is rather less than the 36" radius I aspire too……but again so far so good……one of the advantages of RR&Co is whenever there is some dodgy track you just bring the maximum speed right down…..fine for a secondaty branch
The next shot is a close up of the card formers I cut and glued for the embankment foundation

The track in front is the minor branch connecting with the branch storage sidings and the brewery……the radii here are down to 24" and I have used some set track curves
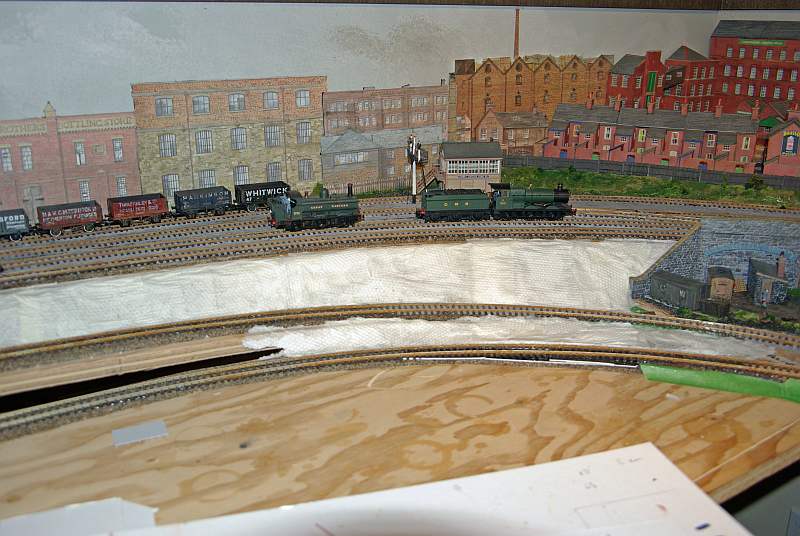
The formers were covered with damp paper towel painted over with dilute white glue
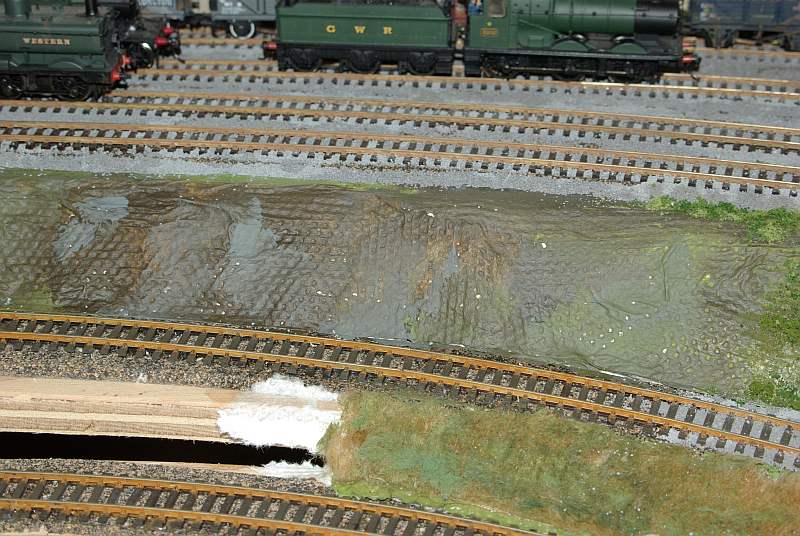
I painted the paper with brown and green acrylics. I hadnt expected the indentations to show up to the extent they did but it wasnt a huge issue because I always planned to add Woodland Scenics Turf as per the lower embankment
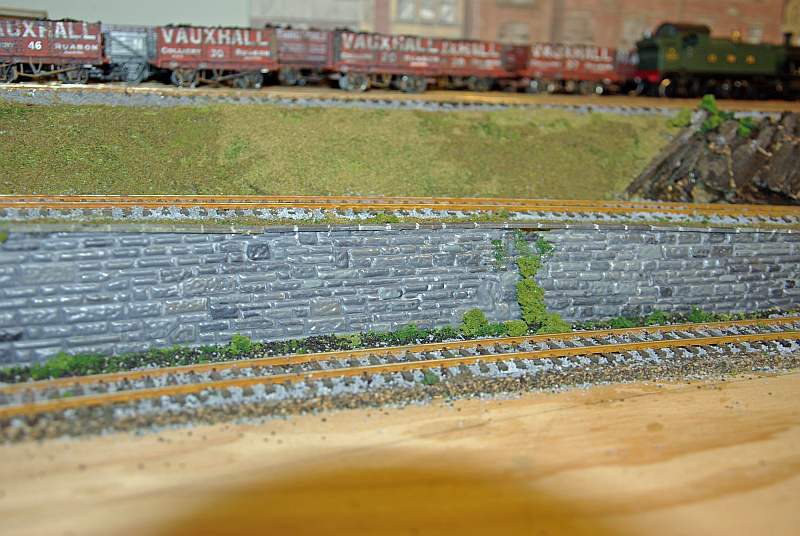
The brown section in the centre is a bit too steep for grass so I created a rock face with bits of cork
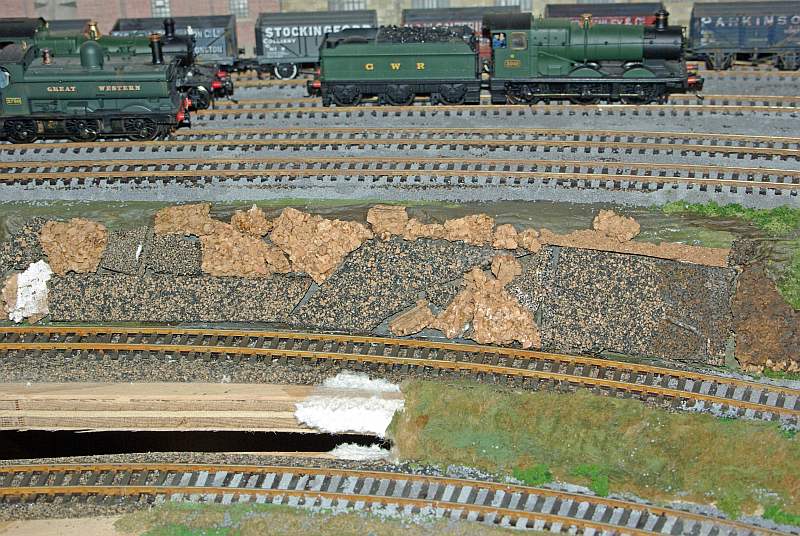
I then slapped on lots of black and brown acrylic and dry brushed with grey and added some green shrub. Most of the grass on the embankment is burnt turf which I havent used before but I am quite pleased with the effect.
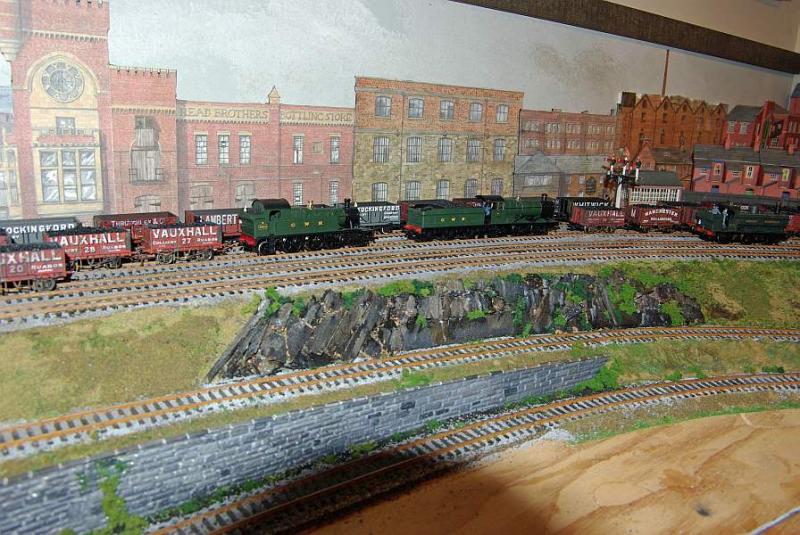
The retaining wall is cut from a sheet I got from Langley for the viaduct at the other end…….its perfect for this situation, where I have a curve and a gradient, because its both flexible and easy to cut. The coping stones are plasticard with little notches cut in for the mortar.
So having done all this detail its going to be covered from view by buildings!
The ubiquitous Metcalfe Brewery:
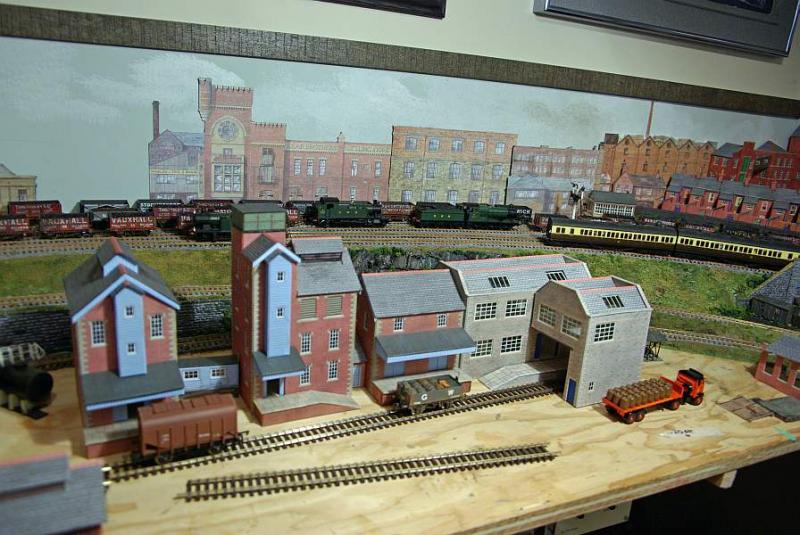
I want to create an impression of something more than a country boutique brewery. I would have liked to have used Metcalfes brick mill or factory but they are both currently out of production…….so I settled, with some misgivings to go with the square building on the right as an extension to the warehouse/bottling plant with offices above……but it has sort of grown on me and there is a fairly credible reason for an extension.
The plan is to do some fairly heavy weathering with some detailing………drain pipes gutters etc. My wife thinks that pale blue is highly unlikely for North Wales so I am going to attempt to paint the blue stuff over with dark green water colour…….yes I know……I am a brave man Gunga Din!…….anyway time will tell
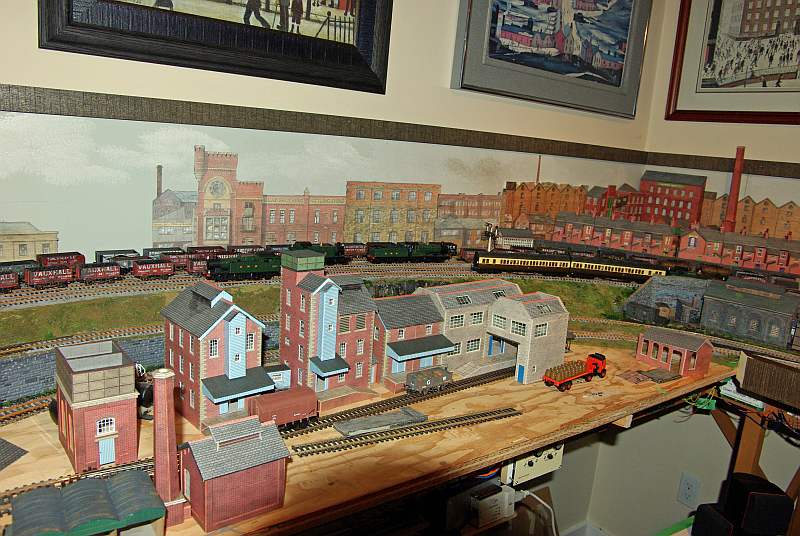
I have added a Metcalfe Sandhouse and Water Tank and in the far right I hope to build a gatehouse from bits and pieces left over from some Engine Sheds
Although I can claim to some modest knowledge of the brewing industries products…….I know very little about how beer is actually produced.
This is very much work in progress……..I am not planning a perfect scale model of a brewery but I would like to create a diorama that looks credible. Any suggestions regarding the building layout would be much appreciated.
In the foreground there will be a large cobblestoned (Metcalfe) yard with two sidings one storage and one serving the loading bays…….I realise the infill will be a challenge!
From the left there will be a large coal dump serving the water tank/boilerhouse (which conceals the siding point motor) with a tall shirescenes chimney behind. In front is the Cooperage using the Sandhouse and chimney ,Wills Timber store and Shire Scene freebie.
Then what I believe is the malt store, followed by the brewhouse and small warehouse. Attached to the warehouse is the new office/warehouse extension. There will be a few other small buildings,bike sheds etc
If I have the sequence wrong or omitted something crucial please let me know
I am trying to get me head around how the coal wagons would be emptied and the coal subsequently mover to the boiler house…….I doubt if there would be between the rail drops …………I was toying with some sort of scratch built rudimentary conveyor but again any suggestions would be welcome
Kind Regards from Vancouver
Posted

Full Member
I'm interested in the paper towel idea for the embankment. How many layers of towel did you use and had you any concerns about putting damp towels on card formers ? Did you simply paint the diluted glue on and how strong is the finished surface ? Could you, for intstance, drill holes to carry trees or telegraph poles ?
It really is coming along very well. :thumbs
'Petermac
Posted

Full Member
I like the way you have done the embankments and retaining walls, the final result is very effective. Also that brewery looks the part and makes a very fine foreground, giving the whole layout superb depth. I like if very much.
Bob(K)
Posted
Full Member
William
Posted
Full Member
[user=6]Petermac[/user] wrote:
I'm interested in the paper towel idea for the embankment. How many layers of towel did you use and had you any concerns about putting damp towels on card formers ? Did you simply paint the diluted glue on and how strong is the finished surface ? Could you, for intstance, drill holes to carry trees or telegraph poles ?
I only put on an average 3 layers……roughly torn and randomly laid……and painted each layer with glue, thus only the first layer was actually damp before the glue was applied. I keep a jar of diluted glue for ballasting and I used that to thin the neat glue that I splattered over the area……I just used an old artists wide paint brush.
The formers did not appear to be affected and the surface has dried hard and quite firm. I used this technique on my earlier layout and there I was less impatient and put on more layers…..the indentations were less obvious and I did drill the surface for fence posts
Hope that helps
Kind Regards
Posted
Legacy Member
A small brewery would probably not had the need for a large number of coal wagons delivered so they would most likely to be off loaded by hand using the good old shovel , with the coal guided down a temporary shute made from a piece of rusty corrugated iron into a wheel barrow or alternatively into a small narrow gauge tub/hopper wagon which would be pushed by hand into the boiler house . A short piece of Peco 009 crazy track and a couple of skip wagons would be all you need.
Richard. A sorely missed member who lost a brave battle in 2012.
Posted
Full Member
Cheers
Posted
Full Member
Phill
Posted
Full Member
That area is looking really good, John. You should have some fun with RR&Co shunting full and empty wagons around that brewery. Congrats on the front page, by the way. Well deserved.
Cheers
Thanks Phil and Geoff……much appreciated.
As you will shortly see shunting the brewery will indeed present some challenges:twisted:
Kind Regards
Posted
Full Member
Phill
Posted
Full Member
More please! And yes,I agree with GWR Phill….I'd love to see some vids of the layout "in action".
Cheers,John.B.
Last edit: by spurno
Posted
Full Member
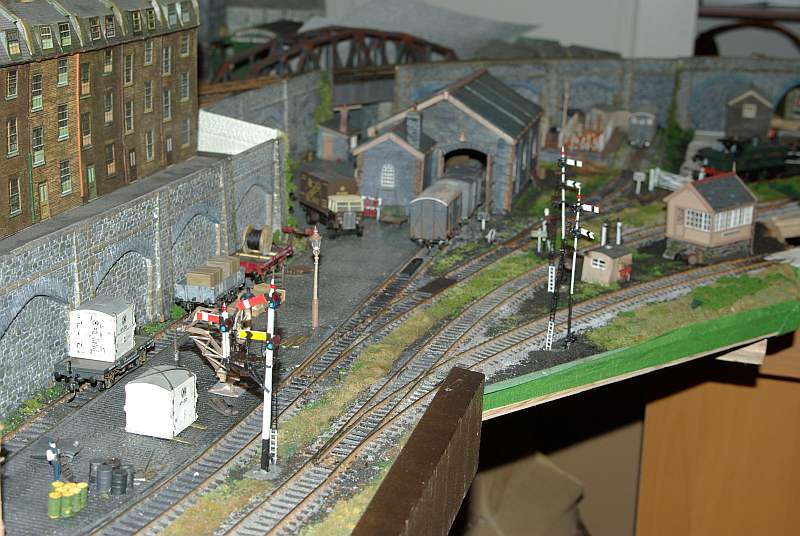
. I guess my excuse is Matilda, the actual Olympics and a really nasty dose of flu.I have actually made some progress on the brewery yard and yes the infill has been a right pain. To get a break I decided to finish the Branch Signalling, another job I had been putting off! You guys have been far too kind too me. Until 2 weeks ago I didnt have one signal on the layout:shock:. I am surprised Petermac entrusted Matilda to me, although I suppose you can only go one way on a ski jump.
I think many of you will be puzzled by my ambivalent approach to signalling (I certainly am!)…………..on the one hand I attempt to have the signalling diagram absolutely prototypical and correct in every way yet on the other , when I am really honest with myself, I know they will never work! Thus I will agonise over the accuracy and positioning of the Down Home yet not turn a hair when the Down Goods routinely rolls past it at Danger…….go figure!
The problem is that a GWR Branch in 1947 has to have semaphore signals. Frankly, expense apart, I dont think I have the ability to make effective working models. I am lost in admiration at Geoff's achievements.
Anyway, enough handwringing, for better or for worse, working or non working there is no question Signals add the the final touch to a layout……….look at this before and after

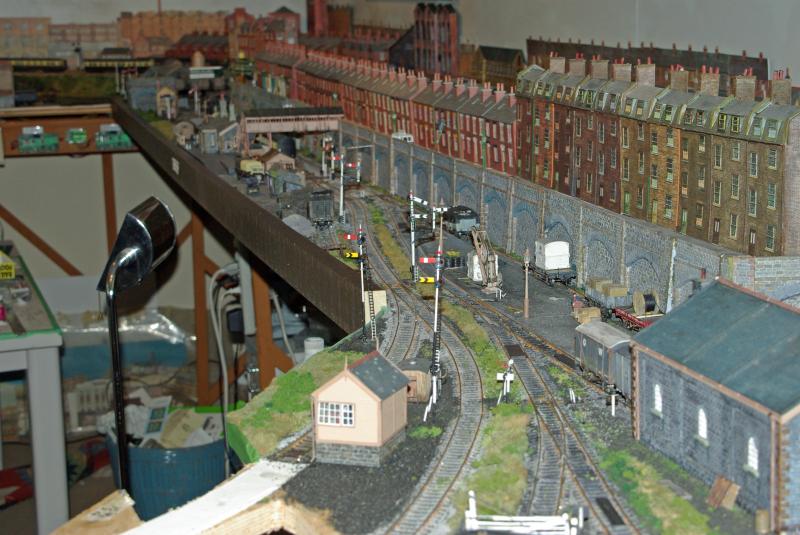
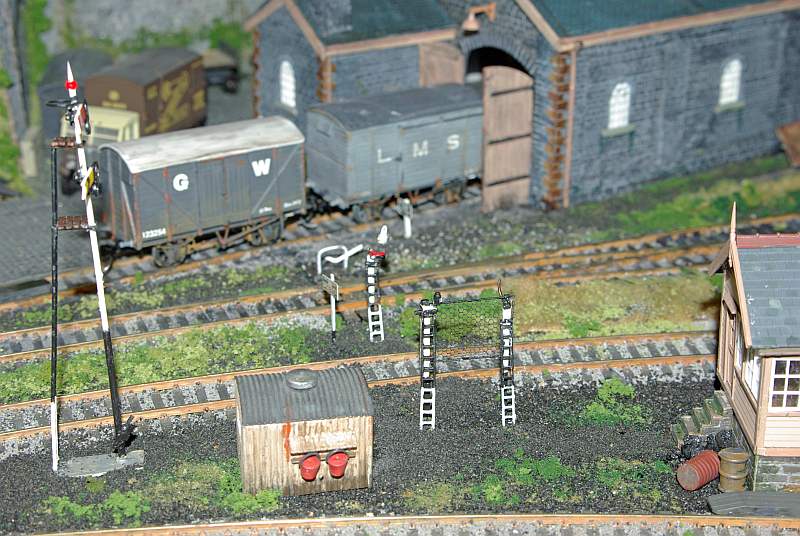
It is astonishing how many signals one actually needs on such a small section of single line track. There are 14 signal posts (some bracketed) and 6 ground signals. I tried to balance doing it "properly" and not making it over signalled. I got some really helpful advice from the resident gurus on another forum (some of which you will see, I ignored:oops: ) So here is the signal diagram:
Starting from the right we have
[1] Down Home for both the main branch and the brewey branch………..and here is one of the first problems……the junction has to be protected but subsequently a train can go to one of three lines….the bay,main or loop. So the experts said I either make this an advanced home and have an additional 3 bracket signal jist beyond the junction in front of the bridge or each signal would have to have three brackets. I felt either solution would look too busy and lacked credibilty. So I supplied each signal with an indicator board which you can just see on this shot
2 Advanced Starters for each line are facing us above. The main signal has a distant for the next block. Advanced Starters are required because there is a lot of shunting over the junction so the station limits are placed beyond.
3 Up Starters
Next shot shows the Starters for Bay and Main. Again you can see the difference compared with earlier shots I have posted of this area. Technically both Starters should be double brackets but again I felt that would be over signalled.

4 Ground Signals The engine shed siding and Up relief starter are controlled by these.
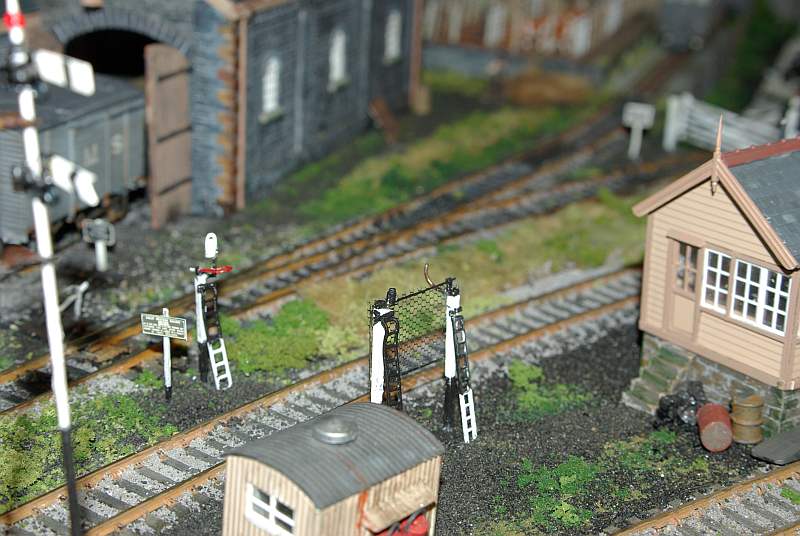
5 Down Loop and Goods Yard Entrance
At one stage I was going to control these with ground signals but I was advised it would be more appropriate to use GWR short signal arms. It kind of makes sense because the Pick Up Goods have to enter the Engine Shed Siding before they can clear the relief xover and back into yard. Thats a scale 100 yards away so it would be difficult to spot the ground signal. I got conflicting advice about the yard signal. CJ Freezer suggests a backing arm but others say this was rarely used and a siding signal is better.

6 Down Starter and 7 Goods Yard Exit and Ground Signals
The Down Starter has a short post to give the driver a clear line of sight under the bridge. The Goods Yard Siding exit would always be on a short pole

7 Down Advanced Starter
Bracketed signal controlling the mine branch Junction with a distant for the next block on the main. Advanced starter is used again because of shunting
You can see the signals controlling the Up access to the junction in the background along with the second signal box. I was doubtful about a second box here because I had this idea that the distance between boxes is 700 yards and this is a scale 500 yards…….in fact 700 yards is the distance between blocks with the b ox in the middle because 350 yard is the maximum distance for mechanical control.
Apart from anything else it neatly fitted a blank spot as well
Here are the Up Signals controlling the junction complete with Distants for Cynwyd box
I use Ratio Kits but had to use their tubular steel version here…..they are a bit too flimsy but actually are quite authentic for the period

I unearthed a Dart Casting kit of a token exchange apparatus which I must have had for at least 15 years and had completely forgotten about so the Mine Branch operates on the Single Engine in Steam Principle which cuts out a few more signals.
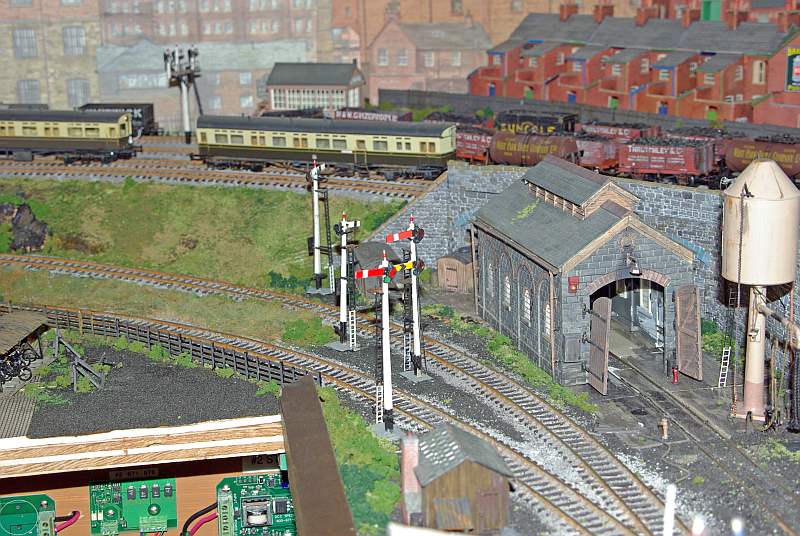
Here is an overall shot
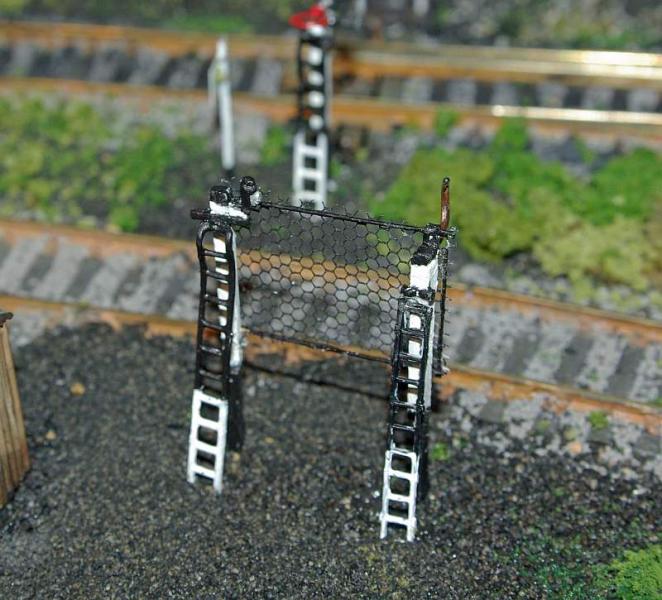
On the farside you can see the Pick Up apparatus and near side the Set Down hook ("the horn") and safety net
Here is a close up of the pick up arm. The token is set at a height and angle so that the fireman can hook his arm through it without stopping the train. I am not sure if tokens were in fact red but this at least stands out so I wount lose it…..it can be removed from the holder.
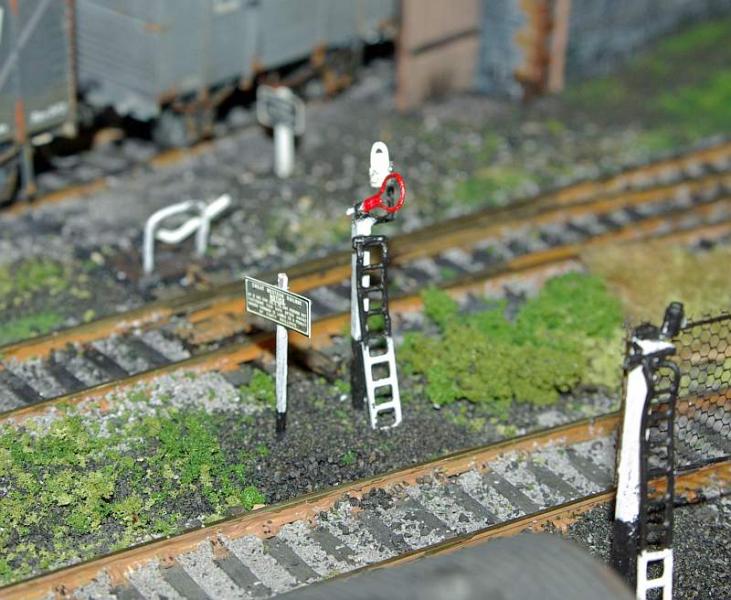
Finally a shot of the horn on which the fireman would deposit the token on his return journey and the safety netting if he missed. The close up is rather cruel and exposes my rushed painting but does give a good idea of how it operated.
And thats it……………….I hope it hasnt been too boring or repetitive. I realise the minutae of GWR Branch signalling in 1947 is something of a minority interest but I would welcome any comments or criticism particularly if I have done anything glaringly incorrect……………other than they should work:sad:
Kind Regards from Vancouver where the sailing season is fast approaching
Posted

Inactive Member
Max
Port Elderley
Port Elderley
1 guest and 0 members have just viewed this.