H0 Scale - South Shore Line
Posted

Full Member
I will more than likely change all of these trees later on too, but I needed to a least see what it was going to look like.
Wayne


Posted

Full Member
Posted
Full Member
Wayne


Posted

Legacy Member
Posted

Inactive Member
Max
Port Elderley
Port Elderley
Posted

Full Member
'Petermac
Posted
Full Member
The Old Republic, as you can see, is not settled down into it's foundation quite right. The wires are holding it up a bit. I put it there just for the picture and it was too much to get those pesky wires back where they belong. Plus I don't have the LED's working yet so I didn't want to take the time, and then take it back out again.
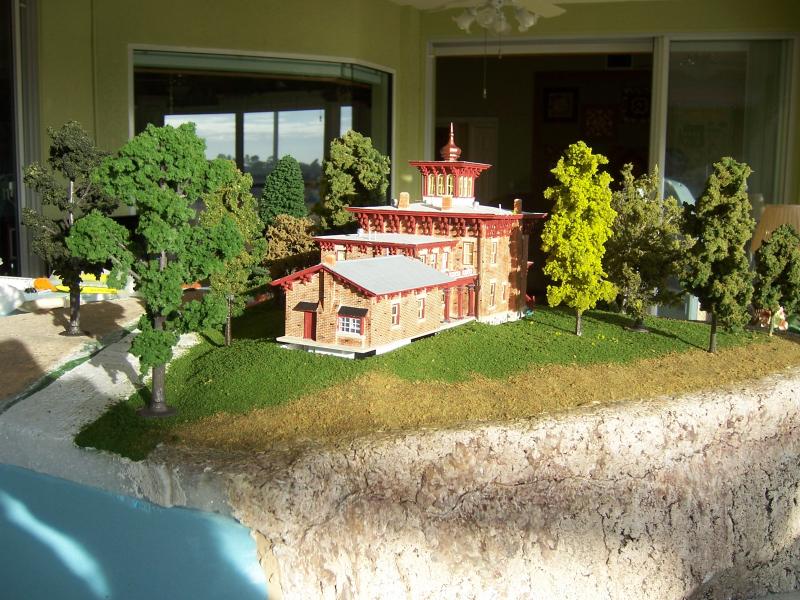
It is amazing how much a tree costs! The tree in the foreground is 7" tall, and I figure I have $5.00 into it, and I bought the armature at a swap meet for $3.00 per package instead of $17.00 new.
I am experimenting with different "leaves". The foreground tree has Woodland Scenics "Bushes" and the tree to it's left has Woodland Scenics "Clump Foliage" for leaves.
The Bushes look better but I used 12 cubic inches from the package for it. The clump foliage only has 6 cubic inches on it. Both are 7" trees.
I may try another one and start with the bushes and put less of the on, then switch to the clump foliage to finish it. Maybe that will help keep the cost down and still make the tree look presentable.
Wayne
Posted

Full Member
Posted
Legacy Member
reg
Posted
Full Member
I like that ;last picture Wayne . The fact that there are no figures in it ,adds to the tranquility. I can imagine its late evening and everybody has gone home leaving a beautiful setting in peace.
I have been contemplating building a light house for the front corner (right side in that photo), that over looks the great lake below the Old Republic. There is not much room there, but It would fit in well with the scene.
Of course more trees would be needed to separate the Old Republic from the light house.
I agree with you Sparky, in the early morning with the sun shining in, I stand there staring at that view while I drink a whole cup of coffee.
wayne
Posted
Full Member
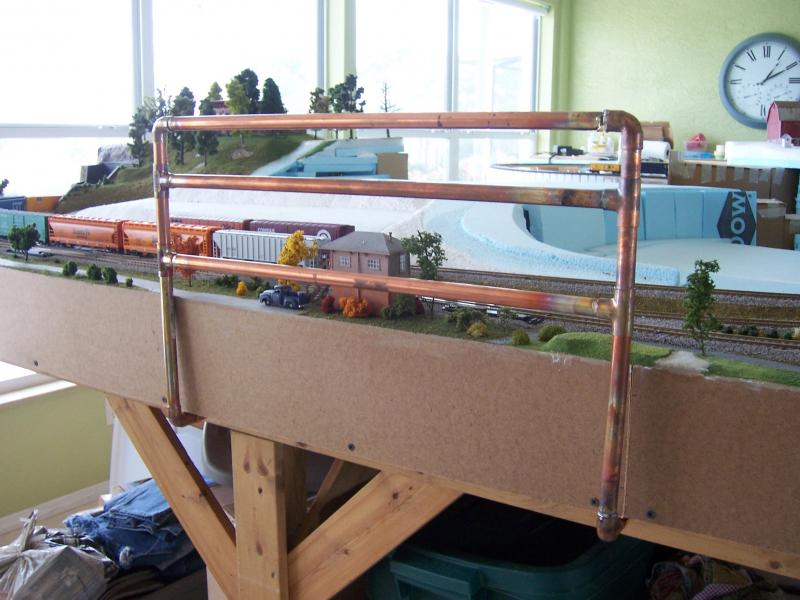
The top vertical tube is 2" tall and the middle tube is 3". By swapping them I can lower the middle tube to protect something on the edge, at that height.
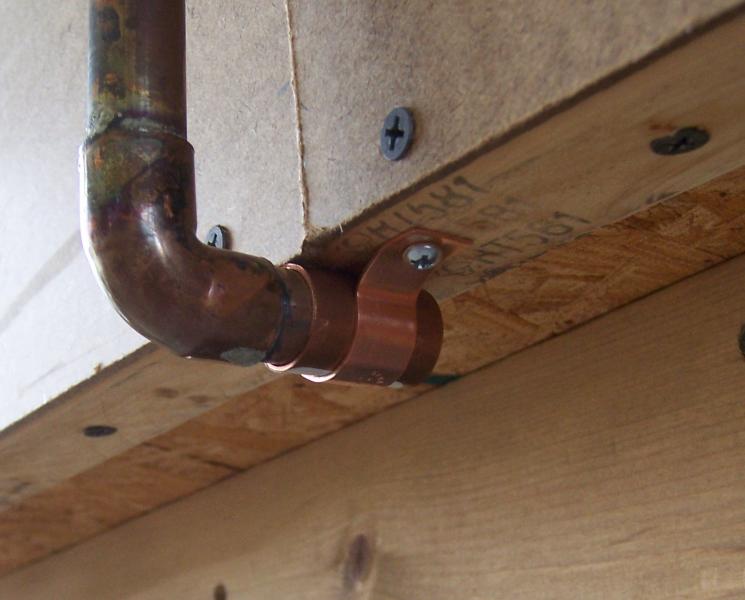
The second photo shows how it's all attached to the layout. Just a bracket around a coupler, keep in mind that the elbow can rotate in a circle, so the couplers don't have to be perfectly aligned, only perfectly spaced. No tools required to move it around either, just grab the two bottom elbows and pull out, move to the next location and slide it all back in place.
I had this idea over a year ago and went out and bought all the materials. Just now got around to installing it all. This works great, I can actually lean down and even in on it, and it holds me up without flexing one bit.
The last photo shows additional couplers farther down the layout. I eventually intend to install more couplers around the entire layout, but for now the seven locations I have, are enough.
Wayne
Posted
Full Member
At first, I thought you'd installed a coffee shop for the golf course on the layout - either that or central heating for the showers…………:roll::roll:

'Petermac
Posted
Full Member
Bob
Posted
Full Member
Wayne
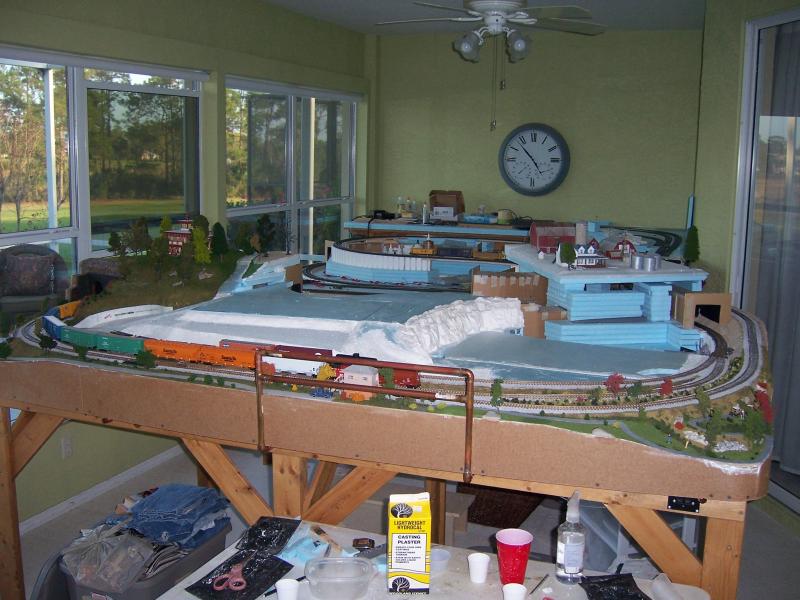
Here is an overall photo so you can see where it is located on the layout.
Posted
Full Member
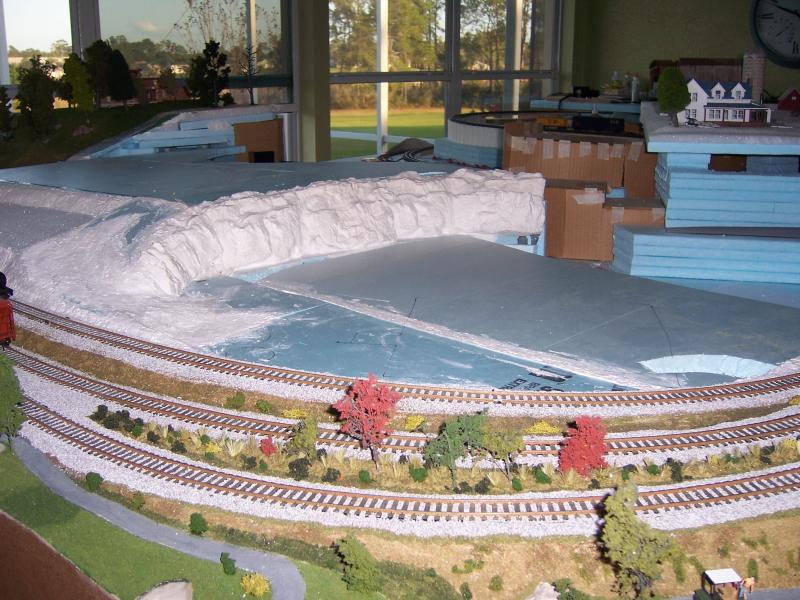
Is it made out of the Woodlands "Casting plaster" seen in the 2nd shot ?
'Petermac
Posted
Full Member
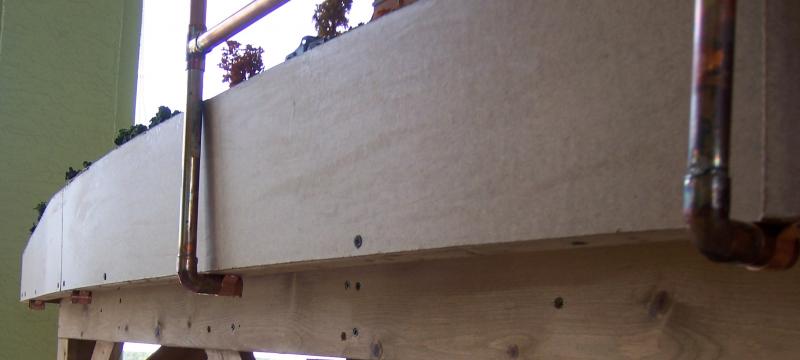
The wall is made up of about 25 "rocks" made from rubber molds using the Woodland Scenics lightweight hydrocal.
The. Individual rocks were bonded to the blue foam with sculptamold, and the joint was covered with plaster cloth strips, which were then covered with the hydrocal. Really quite easy to do.
Wayne
Posted

Full Member
Posted
Full Member
All of us have suffered the cuff taking out a signal or a chimney stack.
Your solution is simple, doesn't obstruct the view of the layout, light and easily made.
Gold star!
Marty (good to see you): All those fixings can be bought from a DIY shop and easily made up.
You can even get them with the solder already in the joint.
Just need a blow lamp to join them, some flux and some glass paper to clean the joins first.
 Last edit: by ddolfelin
Posted
Full Member
But even with the pre-loaded joint, it does take some practice DD ……………….;-)………………………………………………….
Marty (good to see you): All those fixings can be bought from a DIY shop and easily made up.
You can even get them with the solder already in the joint.
Just need a blow lamp to join them, some flux and some glass paper to clean the joins first.
Thanks for the explanation of the cliff Wayne. I have some of the "rock" moulds but haven't tried using the "Hydrocal". I presume it's lighter than normal plaster. :roll:
'Petermac
Posted
Full Member
I once made a dog guard for the back of the estate using the same principle.
Cheaper than the Volvo version.
1 guest and 0 members have just viewed this.