Jeff's (SRman) work bench and projects
Posted

Full Member
I have also now added the underfloor detailing, although, while clear about positioning, the instruction sheets are not entirely clear as to orientation of a few of the components.
In one DTSO (Driving Trailer Second Open) I have experimentally put some seats I bought at a swap meeting some time ago, intended for an Australian model but ideal for the 455 as it has 3 + 2 seating. They had to be cut up a bit to fit the door arrangement and raised end floor of the chassis but overall it doesn't look too bad.
I have taken a few photos but they are still in the camera right now - I'll post them in the next day or so.
Jeff Lynn,
Amateur layabout, Professional Lurker, Thread hijacker extraordinaire
Amateur layabout, Professional Lurker, Thread hijacker extraordinaire

Posted

Full Member
your comment about derailing - I have found that with most DMUs ( including the old Triang Blue Pullman that I upgraded ) that they are prone to derailment when running with the motorised unit at the back end. Additional weight in the non-motorised cars and making sure the buffers have plenty of clearance has, in my experience reduced the number of derailments to a more tolerable level
:hmm
Posted
Full Member
 Last edit: by SRman
Jeff Lynn,
Amateur layabout, Professional Lurker, Thread hijacker extraordinaire
Amateur layabout, Professional Lurker, Thread hijacker extraordinaire
Posted
Full Member
For the lights, I found I had some brass tube of the right diameter (alright, a teensy bit small for the headlight but right for the marker/tail lights!).
I cut five short sections of the brass tube and filed any out-of-square ends square again.
I drilled out the lights on the front of the coach, to the outer diameter of the brass tubing.
I then superglued the tubing into the holes, leaving the ends just proud of the front surface, except for the headlight which was mounted flush. In fact, I need to redo the tail light on the right (as you look at the front) as it is projecting just a little more than the rest, and also slightly crooked.
I painted all the brass bits in a Humbrol bright yellow but this will need toning down to match the more faded yellow effect of the Bratchell finish - a touch of thinned Humbrol primrose should do the trick.
Next, the jumpers. Using photos as a guide, I drilled holes where each jumper or connection needed to go. I intended adapting some EPB type cables but actually used some Blacksmith cast white metal cables and sockets intended for the 1930s SR EMUs, simply because they were ready to hand and looked just as suitable. In either case some adaptaion and modification is required for accuracy. I haven't modified the jumper socket on the right in the pic although it really needs to be a bit more rounded. These will all need to be painted orange, with black cables/pipes.
The pic shows the work in progress.
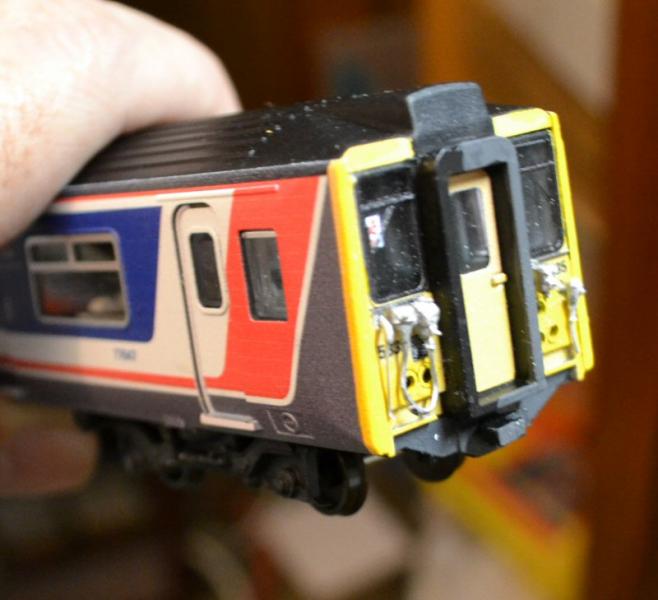
Next, I'll do the cab front handrails.
Then, I have to repeat all this for the otehr driving cab! :roll:
Last edit: by SRman
Jeff Lynn,
Amateur layabout, Professional Lurker, Thread hijacker extraordinaire
Amateur layabout, Professional Lurker, Thread hijacker extraordinaire
Posted
Full Member
Then, I added some handrails, using steam-type handrail knobs. At first I tried blind ones at the ends of the handrails but this mostly ended with more of the knobs in my caroet than were actually on the model! They do appear overscale and the handrails seem to project further than they should but I don't think I can do much better than this. It remains to paint the handrails white.
More to follow soon!
Jeff Lynn,
Amateur layabout, Professional Lurker, Thread hijacker extraordinaire
Amateur layabout, Professional Lurker, Thread hijacker extraordinaire
Posted
Full Member
The model itself has two pre-ringfield motor bogies fitted and through wired so runs remarkably smoothly and will pull the side out of the house! I have detailed it with etched brass roof fan and grille plus new wire front handrails and turned brass horns.
I am thinking along the lines of using the BR coach stock roundel as part of this livery experiment.
The yellow warning panels still need repainting as do the aluminium window and grille surrounds on the sides.
Jeff Lynn,
Amateur layabout, Professional Lurker, Thread hijacker extraordinaire
Amateur layabout, Professional Lurker, Thread hijacker extraordinaire
Posted
Full Member
I must get back to finishing the class 455 after this!
Last edit: by SRman
Jeff Lynn,
Amateur layabout, Professional Lurker, Thread hijacker extraordinaire
Amateur layabout, Professional Lurker, Thread hijacker extraordinaire
Posted
Full Member
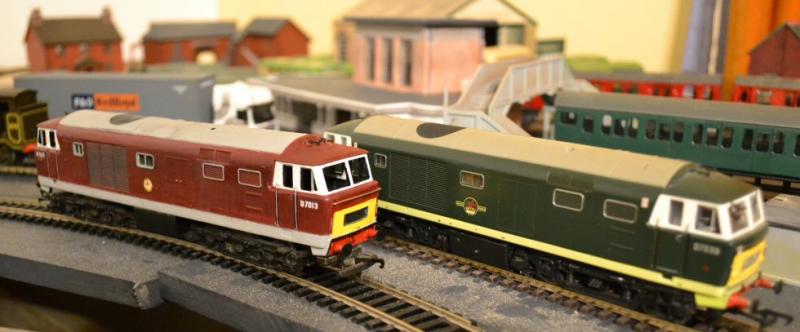
Is that the early early livery for the hymek? I had a BR blue one in the 70's-80's with a set of container wagons. All sold off to buy better detail models.
Mark
Posted
Full Member
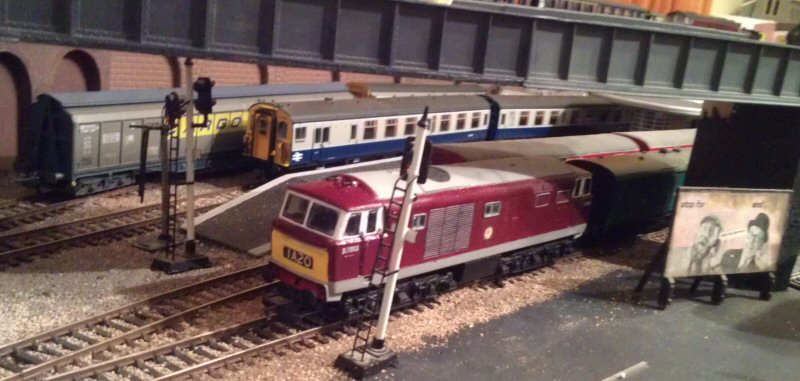
It was inspired by D605Eagle's maroon hymek (with no grey skirts) on the NewRailwayModellers forum, so even there I can't really claim originality! :roll:
Jeff Lynn,
Amateur layabout, Professional Lurker, Thread hijacker extraordinaire
Amateur layabout, Professional Lurker, Thread hijacker extraordinaire
Posted

Site staff
Ron
NCE DCC ; 00 scale UK outline.
NCE DCC ; 00 scale UK outline.
Posted
Full Member
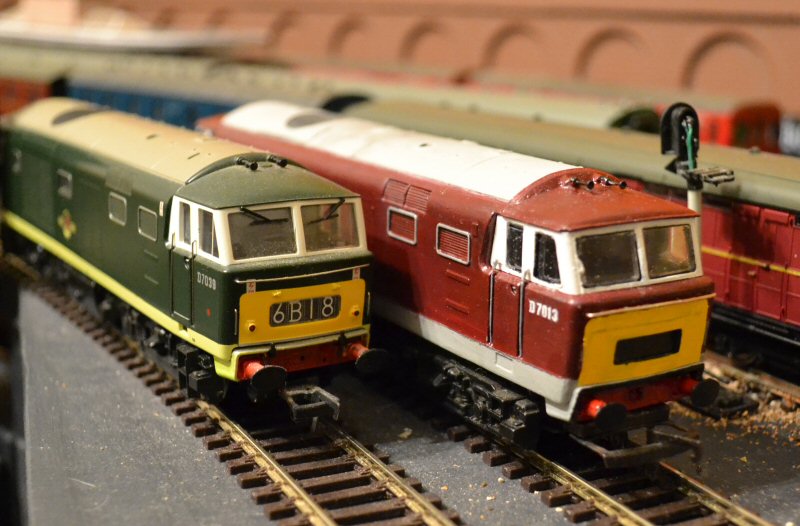
I have now flush-glazed that maroon Hymek (photos will follow later).
I finished the platforms (as shown in my layout thread).
I glued the remaining ballast down (again, see my layout thread).
I tried out an alternative method for modelling the front handrails on the class 455 unit. I drilled the three mounting holes as before but this time I bent the wire to fit each end into the end holes and glued a short piece of micro-rod into the remaining hole and cut it off at the distance the handrail had to be supported off the cab front, then superglued the handrail into the holes and onto the rod. It looks much better and less coarse than the earlier effort so I'll now have to redo the handrails on the other cab end! I still have to mount the jumper cables on this end but that will be relatively easy. Again, photos will follow soon.
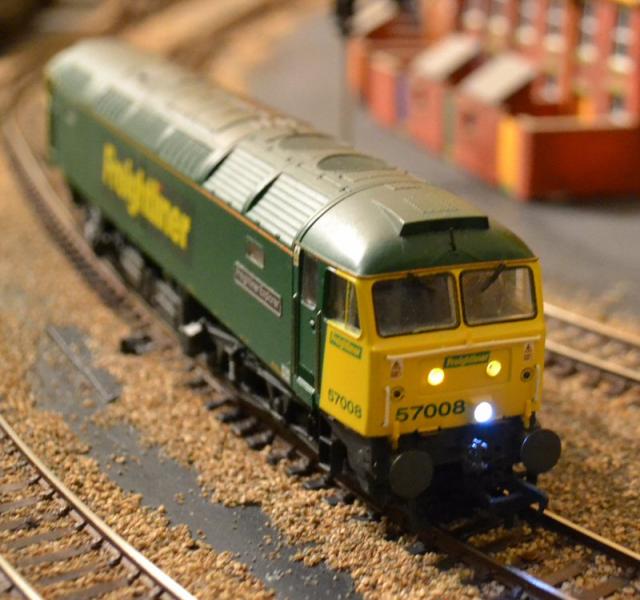
My Freighliner class 57/0 (a Bachmann model) has been irritating me for a while with two of the three forward lights out at one end (one marker light and the headlight). I decided to investigate a bit more thoroughly to see what was wrong. I dismantled the loco so that I could get at the lighting circuit board and LEDs. This one had sound fitted (a Howes aftermarket ESU LokSound) and I didn't want to damage the decoder (in fact I decided to transfer it to my "Purple Ronnie" 57 601) and I temporarily fitted a DCC blanking plug and tested it with an analogue (DC) controller. Sure enough, the two LEDs were still not lighting up, so I rigged a couple of AA batteries and a pair of wires to test the LEDs individually.
The white headlight lit up perfectly with the batteries, indicating a wiring problem.
The yellow marker light refused to light up, indicating the LED itself had failed.
So … I was dealing with two separate problems! Tracing the wires back to the main pcb on the locomotive, I worked out that both the yellow and the blue wires were broken at the soldered joints on the main pcb. Having fixed those, the white and one working yellow light lit up on DC power. First problem fixed!!
I then found an approximate replacement for the faulty yellow LED, a 'lighthouse' yellow LED. To match the Bachmann item I had to chop off a little of the extension cylinder, then soldered it into place after carefully noting which way round the anode and cathode were on the original one. I trimmed the legs and resoldered the yellow wire (which had dropped off when desoldering the original LED), then tested. The yellow was a little dimmer and a slightly different colour compared to the original but I can live with that - in fact, I might even be tempted to replace the others as the new one looks rather better than the originals!
I reassembled the Freightliner 57 with the decoder out of 57 601 (a TCS M1P) with much cursing as the screws kept dropping into the wrong places and one of the tail light guides came unglued and dropped out while I was reassembling but it all tested out OK and now looks reasonable running in either direction (I had to keep it facing one way before to hide the faulty lighting).

The sound swap into 'Purple Ronnie' didn't go entirely smoothly; I had to remove the fan group to clear the speaker and I fitted the decoder plug the wrong way round (the marking of pin 1 on the Bachmann pcb was wrong! The lights didn't work because of this), then lost one of the body screws when reassembling after reversing the decoder plug but that, too, is now running perfectly … with sound.
All in all, a reasonably productive couple of weeks. :cheers
Last edit: by SRman
Jeff Lynn,
Amateur layabout, Professional Lurker, Thread hijacker extraordinaire
Amateur layabout, Professional Lurker, Thread hijacker extraordinaire
Posted
Full Member
The maroon Hymek with glazing.
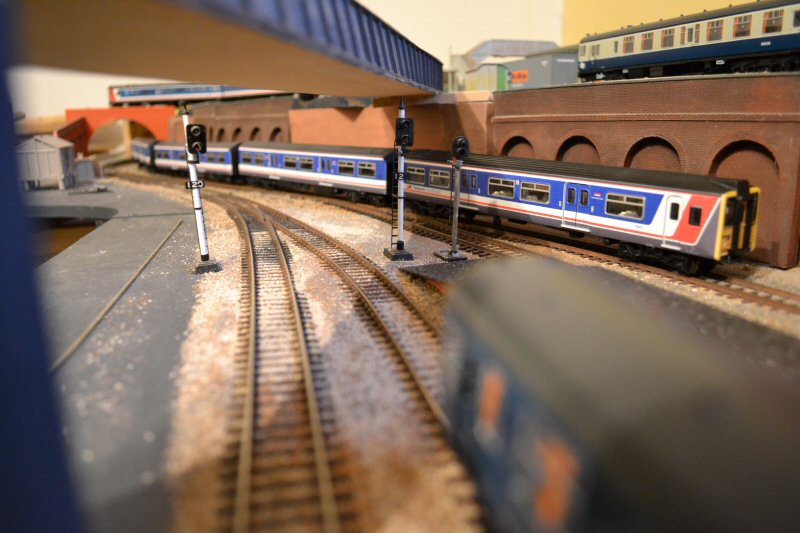
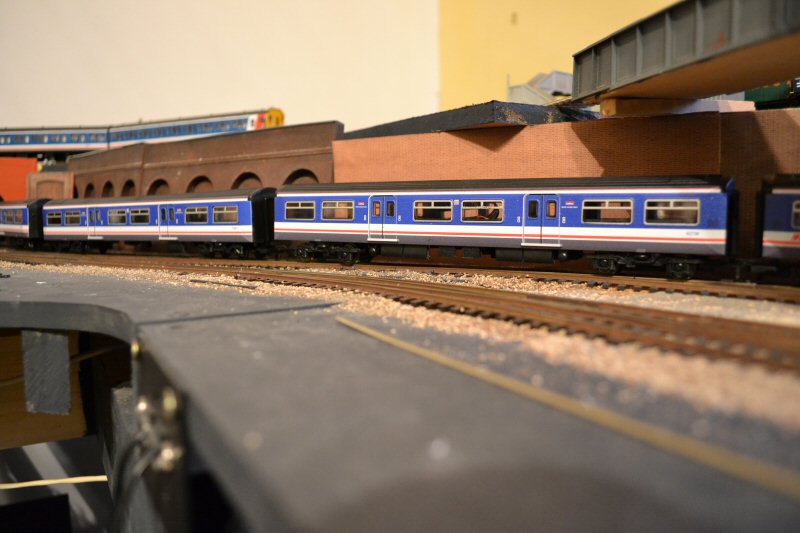
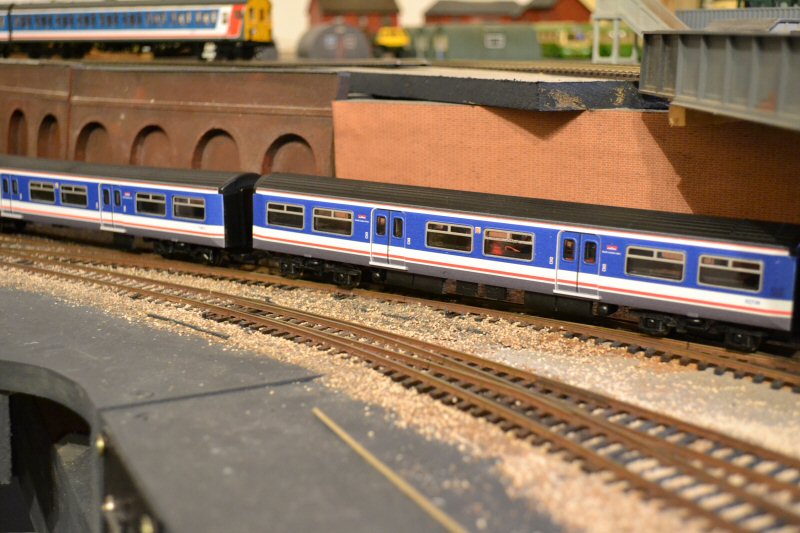
The class 455 with the new treatment of the handrails - these have to be painted white when I am ready.

The Bachmann class 57/0 57 008 'Freightliner Explorer' lights. In the second pic you can see that one of the marker lights (the new one!) is a little dimmer.

And here is the Bachmann Collectors' Club Porterbrook class 57, 57 601, now with sound fitted (if you put your ear to the photo you may just be able to hear it! ;-) ). Enthusuasts nicknamed it "Purple Ronnie".

Jeff Lynn,
Amateur layabout, Professional Lurker, Thread hijacker extraordinaire
Amateur layabout, Professional Lurker, Thread hijacker extraordinaire
Posted
Full Member
A different project, but also a sod of a job, was doing the wasp stripes and cab end glazing on the Maunsell diesel-electric shunter. This also has been hard-wired to run on DCC but the DCC Concepts decoder was much easier to wire in and secrete behind the radiator. The tricky bit was finding somewhere to put the stay-alive capacitor but I eventually stuck it in behind the fuel tank on one side. It is still not quite sitting properly on its chassis but I'll fix that properly after I have fitted all the handrails and the footsteps. It will be numbered 15201 but it has not yet received any transfers.

The wasp stripes are still a teensy bit uneven but I am reasonably happy that they only need a few minor corrections now.
Last edit: by SRman
Jeff Lynn,
Amateur layabout, Professional Lurker, Thread hijacker extraordinaire
Amateur layabout, Professional Lurker, Thread hijacker extraordinaire
Posted
Full Member
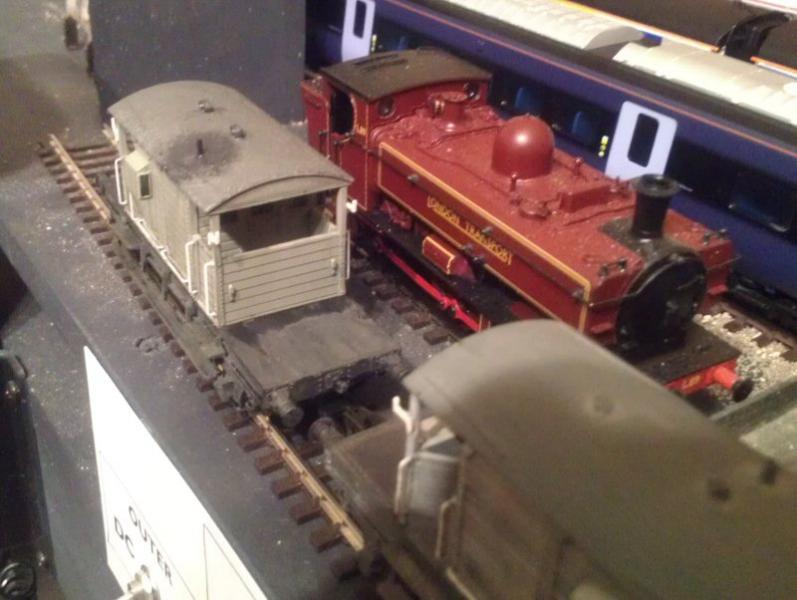
I received three variations of the Hornby ex-SR 'pill box' brake vans recently. The left-hand ducket version has a minor fault, in that Hornby have modelled the guard's stove chimney on the wrong side - the stove woould be obstructing access to the ducket if the model was correct! I decided to cut off the Hornby chimney. Unfortunately, it flew off into the ether … or, at least, into the carpet!
Not too upset with this, I smoothed off the roof where it had been, then cut a small piece of thin brass tube off to represent the replacement chimney. I drilled a hole in the roof opposite where the chimney had been and superglued the new brasss tube into it.
These operations meant I had to repaint the roof, so I thought I would start weathering the model as well. The photos show the results so far, together with my Cambrian Kit right-hand ducket version, which I have also been weathering.
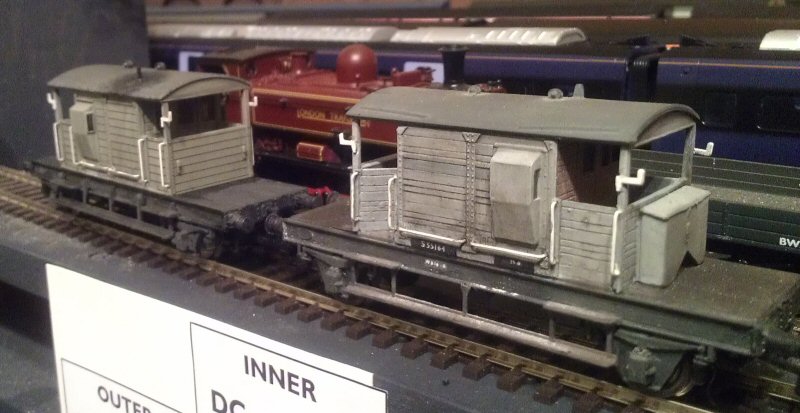
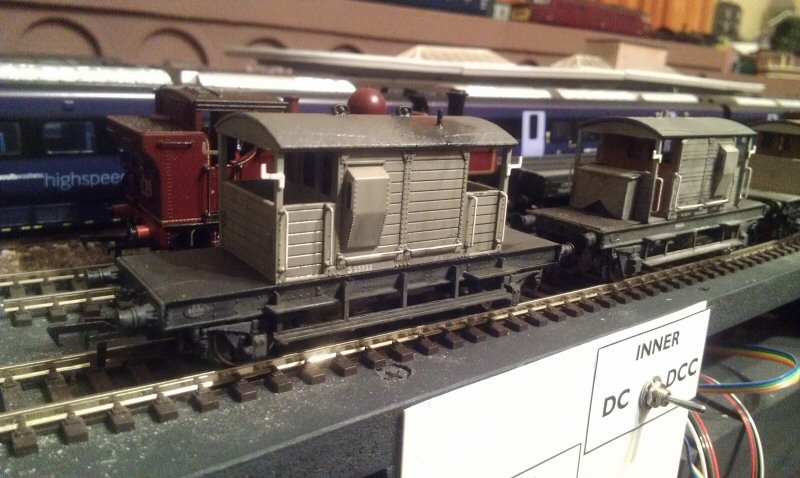
I think I need to blend the black patch around the chimney a little more but, overall, it is taking shape quite nicely.
With the forthcoming Bachmann C class 0-6-0 in fully lined SECR livery due soon after the New Year, I started assemblinga train of private owner wagons to go with it. However, there were no suitable brake vans for this train, either already in my collection or in ready to run form. The Cambrian SECR 'Dance Hall' brakes are too modern (although not by much!) so I had to shop around a bit, eventually settling on a Roxey Models etched brass LCDR brake van kit.
This kit required the sides to be built up from three layers of brass, something I was not too sure of doing with my own soldering skills. However, my good friend Doug (who also did the baseboard engineering) has a resistance soldering kit, so I asked him if he would mind laminating the three layers for me - I considered I was quite capable of soldering up the body box and solebars, etc. Anyway, two day after giving Doug the flat kit, he dropped in after work to present me with a complete body assembly with solebars and axleguards all fitted - he said he enjoyed doing it and got 'a bit carried away'!

I have subsequently been adding the white metal fittings like axleboxes and springs and all the various etched brass rivetted hinges, strapping and 'T' pieces, plus a plasticard floor and extra end cross-planks. There a few etched bits still to go on, plus all of the brake gear, the long side footboards and some handrails but the photos show the progress to date. Incidentally, I use superglue to attach the rivetted bits.
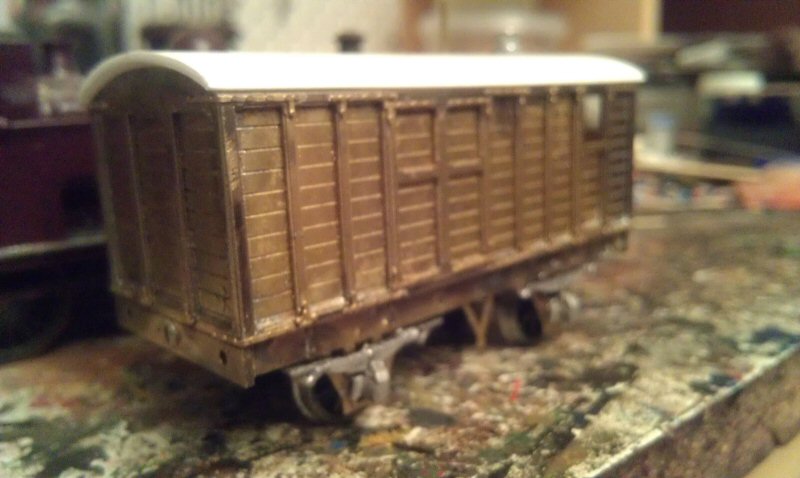


One of the spring hangers on the opposite side broke off, so I'm going to have to get the low-melt solder out to fix that.
Jeff Lynn,
Amateur layabout, Professional Lurker, Thread hijacker extraordinaire
Amateur layabout, Professional Lurker, Thread hijacker extraordinaire
Posted
Full Member
nice work.
I have just finished a Metcalfe Viaduct today.
Mark
Posted
Full Member
The Metcalfe kits generally go together well. I'll look forward to seeing the results in due course. :cool:
Jeff Lynn,
Amateur layabout, Professional Lurker, Thread hijacker extraordinaire
Amateur layabout, Professional Lurker, Thread hijacker extraordinaire
Posted
Full Member
It was built on the remains of a previous diorama which was to the original competition rules of being 200 square inches or less (a 'squinch') but I cut another strip off of it to allow it to fit into the school library's shelves when they have a hobbies display. Current rules allow up to 400 square inches.
I have kept the scenery generic so it can represent any country area and almost any modelling era. For this entry I used a First Bus Olympian with Northern Counties Palatine II body (an OOC model) and placed my Hornby class 153 Sprinter with Electra Railway Graphics overlays on the track, so it could be a branch somewhere in the Avon/Somerset area.
Still needed are some finishing edges and backscenes, people and more fences.

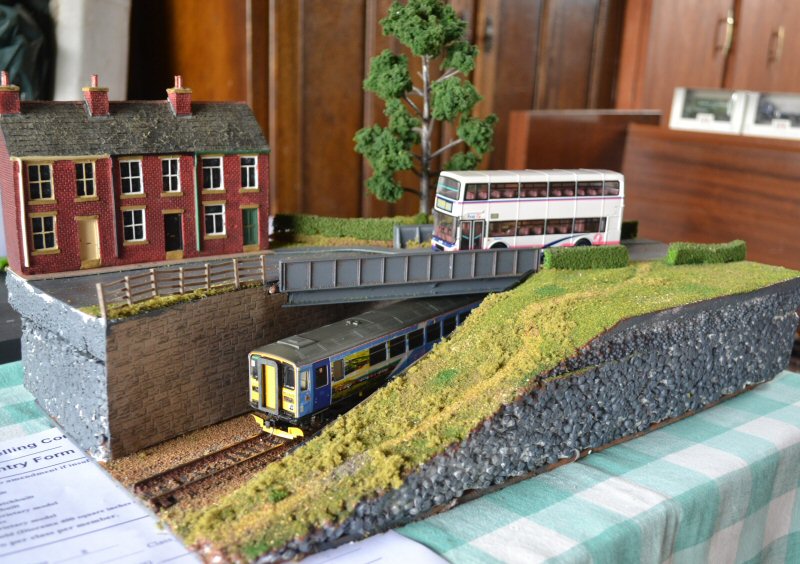
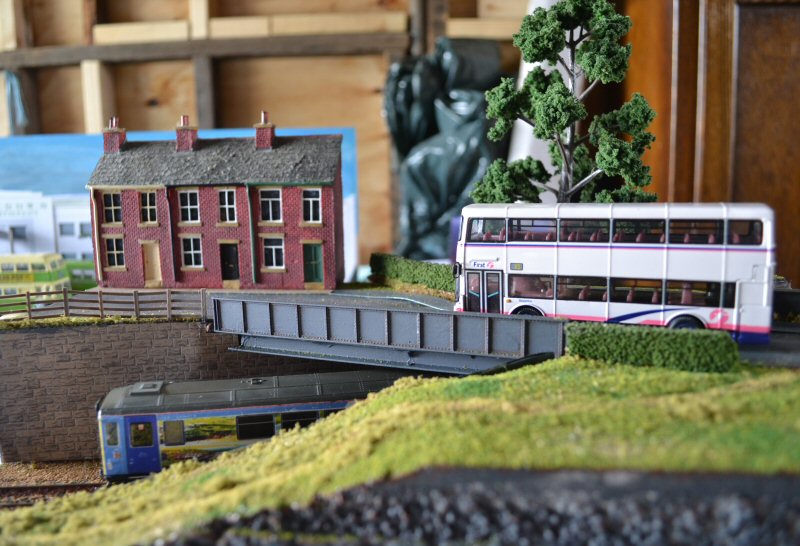
I probably need to do a couple of supports for the bridge too!
Last edit: by SRman
Jeff Lynn,
Amateur layabout, Professional Lurker, Thread hijacker extraordinaire
Amateur layabout, Professional Lurker, Thread hijacker extraordinaire
Posted

Inactive Member
I really like the girder bridge.
Max
Port Elderley
Port Elderley
Posted
Full Member
Jeff Lynn,
Amateur layabout, Professional Lurker, Thread hijacker extraordinaire
Amateur layabout, Professional Lurker, Thread hijacker extraordinaire
Posted
Full Member
The kit is designed to fit a modified Hornby Stanier 8F 2-8-0 chassis. This entails sawing off a bit from the back and mounting a resin block, adding a front extension, and shifting the valve gear and cylinders forward a bit (the valve gear operates off the second axle on the G16 but the third axle on the Stanier original).
Of course there are many other details that will need to be added as I go. I have some LSWR sprung buffers to hand, a suitable whistle, and things like lamp irons will have to be fabricated and added.

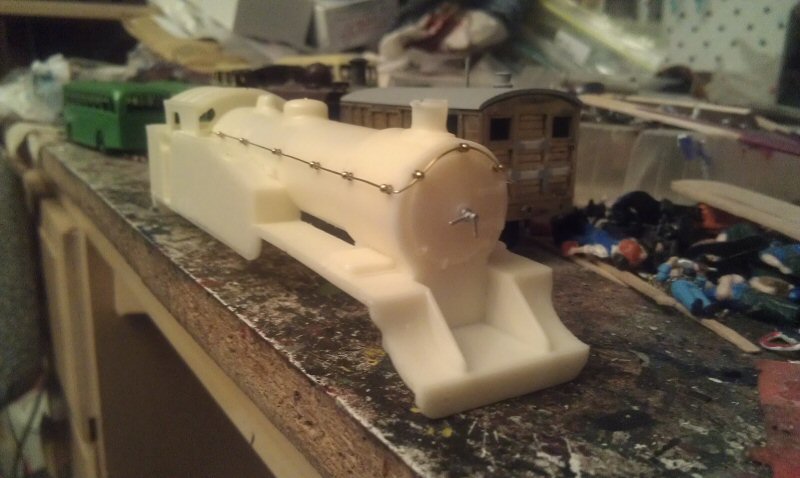
At least the livery will be simple - all over unlined black!
Jeff Lynn,
Amateur layabout, Professional Lurker, Thread hijacker extraordinaire
Amateur layabout, Professional Lurker, Thread hijacker extraordinaire
1 guest and 0 members have just viewed this.