Jeff's (SRman) work bench and projects
Posted

Full Member
I was "lucky" enough to ride the Tin HALs occasionally too although, like you, a BIL was much preferred. I have an unmade Ian Kirk 2BIL kit lurking somewhere in the mess of boxes, drawers, cupboards and shelves around here. I don't think I ever saw a pre-war HAL, let alone rode in one, so I don't have the urge to model one of those.
I have always had London Transport as my number one bus interest but I have now filled most of the gaps, although you may have noticed an LT 'Scooter' hiding behind the Southdown buses in a couple of those pics. I finished the Marshall rebuit version (Little Bus Company resin kit) but the ABS (ex-GS Models) white metal kit requires more work, not least because I'm doing it in full pre-war livery. Another unstarted LBC kit on my bench is their ST and I also have two partially finished country STLs, a 'Godstone' one I'm finishing in the very first livery and a forward entrance one also being finished in the earlier country bus light green. There is also a partly finished white metal CR to do.
Next in interest is the Southdown fleet and LBC have been particularly good at producing specific Southdown types, so much so I cannot afford them all at the time they are produced!
Having said that, Tony Asquith of LBC is bringing a Bristol MW bus for me over to Australia with him - his latest production run was for dual purpose vehicles but he is substituting a spare bus seated moulding for me. This bus will go into Hants & Dorset livery as that is the third fleet of interest to me (with the associated Wilts & Dorset and Royal Blue connections). He is also very obliging and can order other manufacturers kits on my behalf, although I try not to abuse that privilege. I did ask him to try to get me a Trystco kit Southdown East Lancs Leyland Royal Tiger (as built with centre entrance). I'm not sure if they are in production at the moment though.
Hopefully, I won't actually need to call on any of them for rail replacement though!!!! :twisted:
 Last edit: by SRman
Jeff Lynn,
Amateur layabout, Professional Lurker, Thread hijacker extraordinaire
Amateur layabout, Professional Lurker, Thread hijacker extraordinaire

Posted
Guest user
A few of the early batch of Bils (2001-10, built as 1891-1900) were still in use at the time with their distinctive white-panelled corridor woodwork and smaller brakes allowing eight full compartments in the DMBS rather than 7 and a coupé in the main fleet (2011-2152). The DMBS of 2008 later found itself a late survivor running with the DTC of 2024 and oddly taking the number of the trailer. Misformed units usually took the unit number of the motor coach.
A few workings were 2-car or 6-car, the latter more so at school times and on the peak workings to and from Brighton meaning all three types sometimes appeared in one train and sometimes in three different livery variations as well.
Many of those units went to the breakers in BR green with either a small yellow panel or full yellow end; a few early casualties retired in plain green and late survivors made it into BR blue with either a small yellow panel or full yellow end again. With the occasional reformed unit (such as 2069 which ended its days with a Bil DMBS and the tin Hal DTC from 2700 IIRC) there was plenty of variety on offer there!
The main ("pre-war") Hal fleet (2601-2692) was only to be suffered if a Bil wasn't in the train. The post-war "tin" units were 2693-9 with a short lived 2700 which was disbanded to keep other units in traffic. The DTC was similar to a 2Bil with side corridor to the compartments but with less generous upholstery while the DMBS was "horse-box" or in Australian terms "dog-box" compartment-only accommodation six-a side on hard bench seats. Even in the late 1960s us young lads were advised to avoid travelling in those compartments which closely resembled the "Sheba" 4Sub units 4101-4110 in style except those had very "cozy" 7-a side seating.
Posted
Full Member
That unit 2700 was kept separate from the others as it had a standard 4SUB DMBS which had (at least in the beginning) only one periscope, thus precluding it from working on its own.
Jeff Lynn,
Amateur layabout, Professional Lurker, Thread hijacker extraordinaire
Amateur layabout, Professional Lurker, Thread hijacker extraordinaire
Posted
Full Member
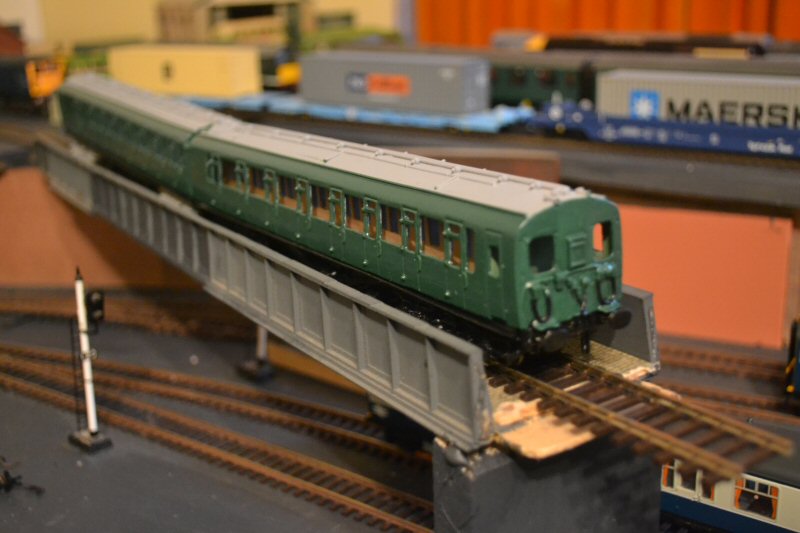
Next, a few thin coats of my specially mixed BR(S) green. It is not quite a match for the Bachmann 2EPB green (seen in the third pic of this sequence) but it is close enough for me. I have not picked out the jumpers in black, yet, nor added the handrails. Underframe and headstocks and buffers also yet to be painted.
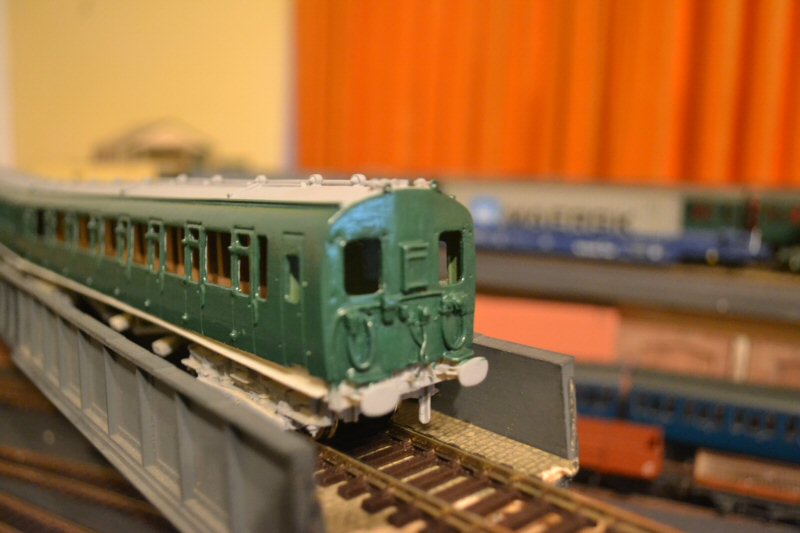
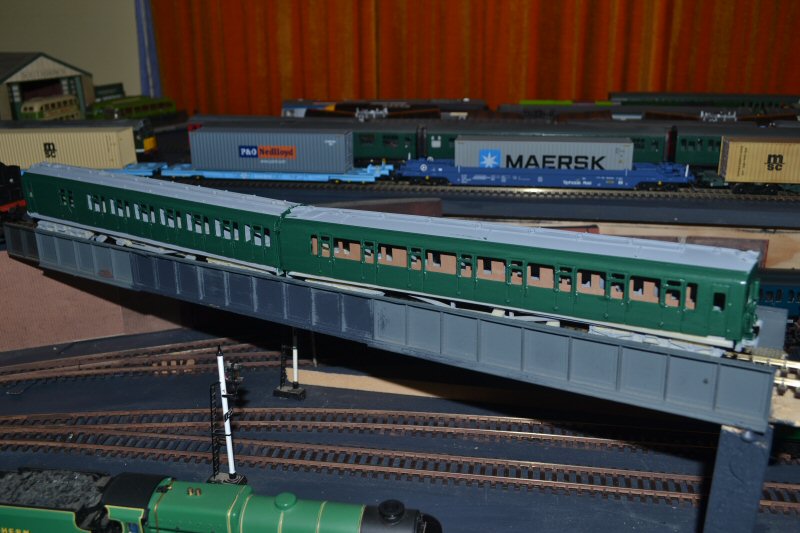
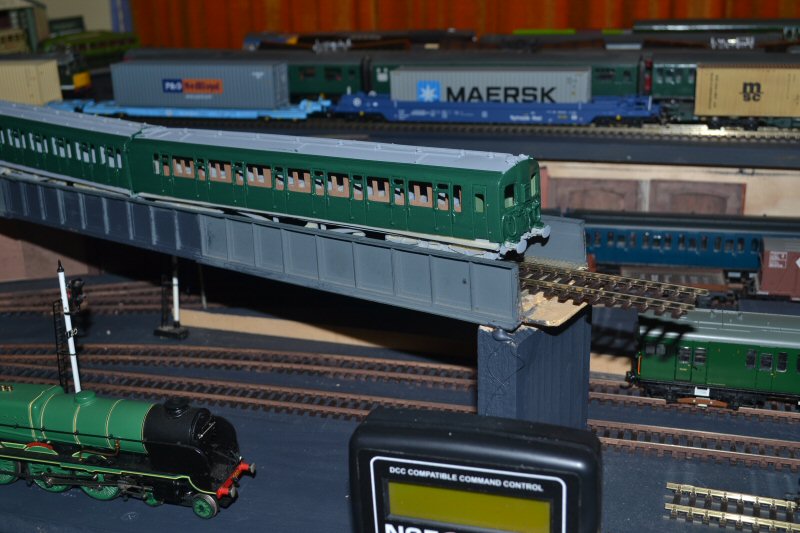
There is also an interesting contrast with the pre-nationalisation malachite green on the Lord Nelson in the foreground of a few of these pics.
Now to the buses and coaches. I have now painted the first coat of Southdown light green on the Beadle and Duple coaches while tidying up the 'V' on the Marshall bus. The BR(S) green mentioned earlier also works well as Southdown's darker green! The first coats have been applied to the Duple coach skirts but, of course, there is a lot more tidying up to do before these will look presentable.
Jeff Lynn,
Amateur layabout, Professional Lurker, Thread hijacker extraordinaire
Amateur layabout, Professional Lurker, Thread hijacker extraordinaire
Posted
Full Member
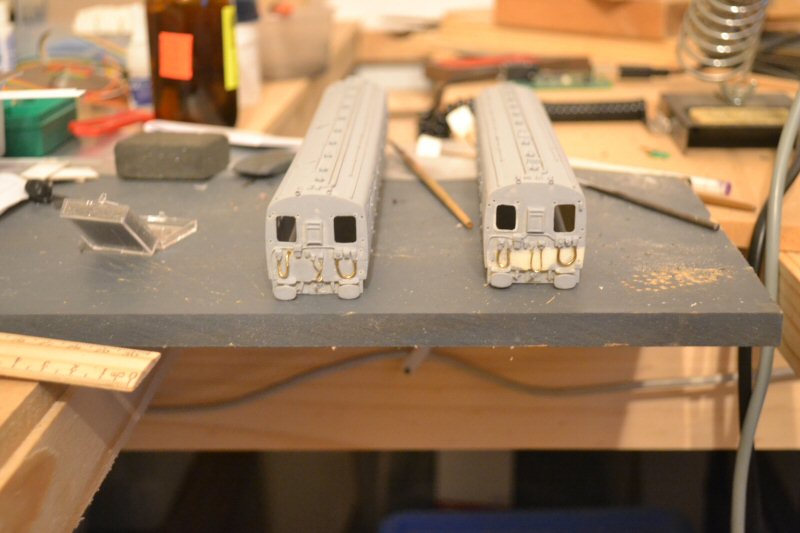
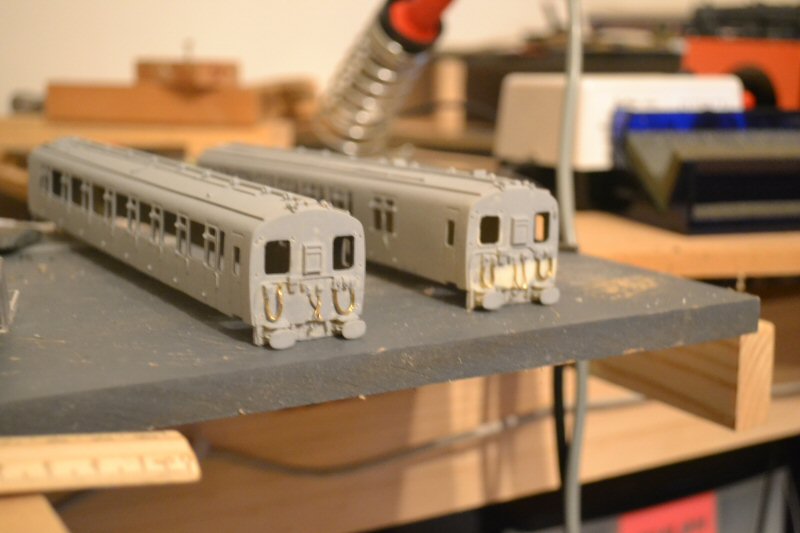
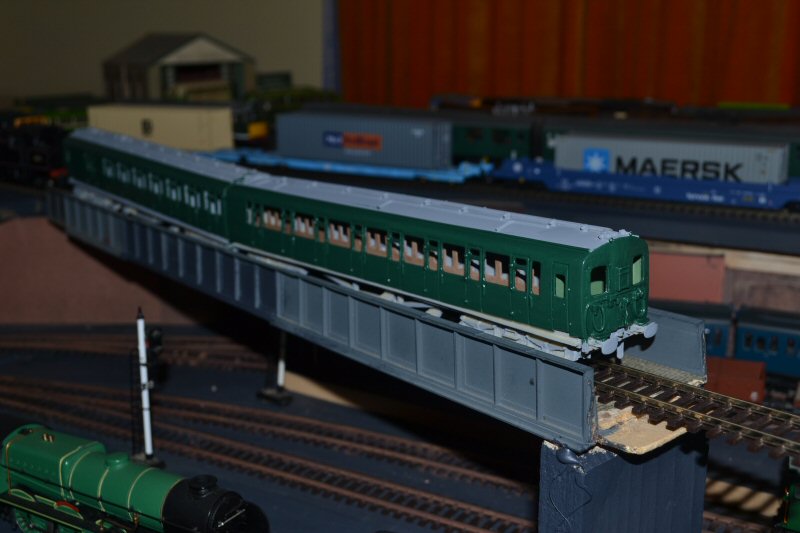
I suspect I have used too heavy wire for those main jumpers. Still they are relatively easy to change if I decide I don't like what I have done so far.
Sorry, I still don't have that focus quite sorted out. I used manual focus but I need to change the aperture priority to get better depth of field.
Jeff Lynn,
Amateur layabout, Professional Lurker, Thread hijacker extraordinaire
Amateur layabout, Professional Lurker, Thread hijacker extraordinaire
Posted

Full Member
I'm not an "electric" man myself but I can see the appeal of those HAL units particularly for anyone living in "the South" of the UK. My memories are more of A4 "Streaks" thundering through York.
The buses also are looking good and certainly some of them bring back memories of youthful days ………….:roll::roll:
Regarding focus on the photos - I don't know what camera you have but if it's a "normal" digital, try taking a longer distance shot on "Auto", focus on the main subject then download the image to your computer. You'll surely have some kind of "photo manipulation" software on the computer so use that to "crop" the photo to the area you need. You'll find that, provided the original was sharp, the crop will also be sharp. Trying to get a sharp picture using the zoom facility is almost impossible unless you have a very expensive lens and a steady hand. Trying to take a close up shot is equally difficult with "everyday" cameras. The lenses are simply not good enough even if your hands are steady enough.
'Petermac
Posted

Full Member
If you choose to use a smaller aperture (the higher numbers) the subject and background will come more into focus and it will help your image have a long depth of field.
Last edit: by ddolfelin
Posted
Full Member
Peter, I am using a Nikon D3100 SLR, only bought earlier this year. I do have some experience with photography, even teaching a unit on exactly the sort of things you have suggested. However, the lighting in the train room is not yet up to scratch and i prefer to kill the flash so I am still experimenting with distances and apertures versus exposure time. Ideally, I should rig some extra lighting for the photos and that would eliminate most of the depth of field problems as well as the possibility of camera shake due to longer exposures.Regarding focus on the photos - I don't know what camera you have but if it's a "normal" digital, try taking a longer distance shot on "Auto", focus on the main subject then download the image to your computer. You'll surely have some kind of "photo manipulation" software on the computer so use that to "crop" the photo to the area you need. You'll find that, provided the original was sharp, the crop will also be sharp. Trying to get a sharp picture using the zoom facility is almost impossible unless you have a very expensive lens and a steady hand. Trying to take a close up shot is equally difficult with "everyday" cameras. The lenses are simply not good enough even if your hands are steady enough.
The other thing I could do is dig out the tripod … gotta stop being so lazy! It's just that i want to get the photos quickly so I can post them then continue with the work. :roll:
Most of those photos have been cropped in PaintShop Pro but the depth of field is still very shallow even with all the various tricks.
Of course, everything you said and suggested is absolutely correct and worth noting for anyone reading these pages. :thumbs
Thanks for the kind comments, guys.
Jeff Lynn,
Amateur layabout, Professional Lurker, Thread hijacker extraordinaire
Amateur layabout, Professional Lurker, Thread hijacker extraordinaire
Posted
Full Member
This is the 2nd time on here I've dropped one regarding "photo advice" !! I recall offering Perry some advice - he's a "Master Photographer", a member of the professional photographers organisation and a competition judge…………I think I suggersted he use a bean bag.
 :roll::roll:
My experience was also gained as a professional but nothing like the experience (or skill) he has.
Having said that, I do think I'd dig out my tripod ………….:roll:
'Petermac
Posted
Full Member
Posted
Full Member
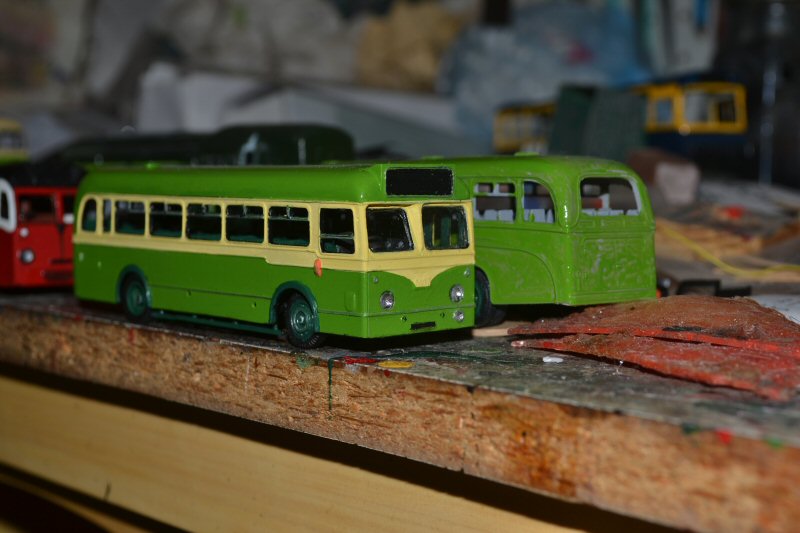
The first photo shows both of the buses near completion. The 5Q5 has just had its windscreens glued in so the glue is still white but dries clear. The Little Bus Company kit comes with pre-printed windscreens but i put them somewhere safe, which means I still haven't found them and had to make up my own!
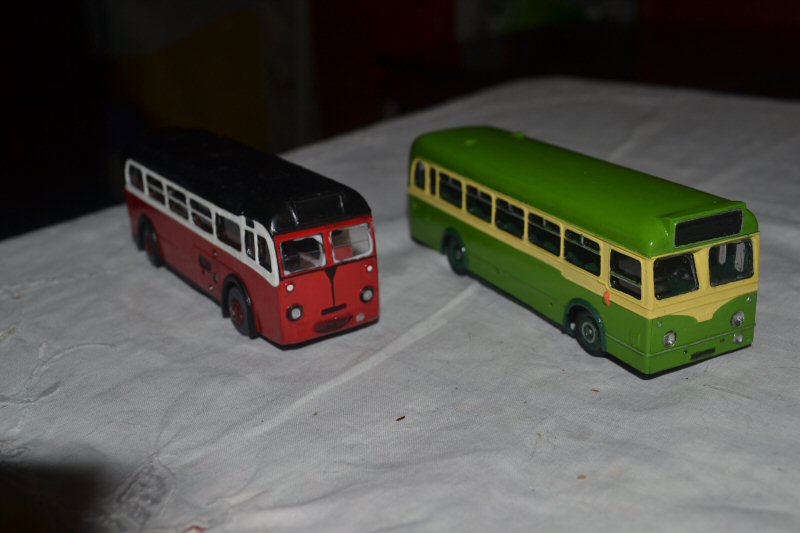
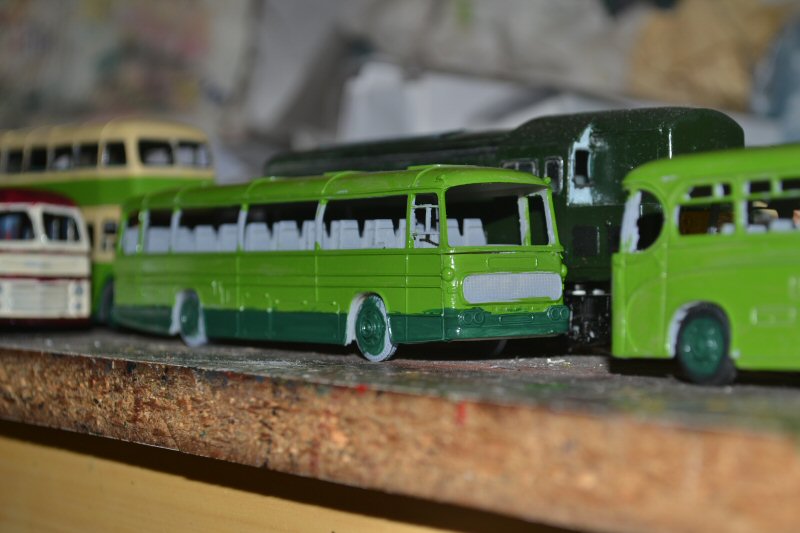
The Southdown Tiger Cub has its fleetnames in place but I ran out of medium sized Mackenzie script fleetnames so had to use some oversized versions. Also, I discovered a paint run on the nearside of the roof, too late to do anything about fixing it. The windscreens are now clear on the 5Q5 and I have (rather crudely) painted the red bars across them. The 5Q5 now has its fleetnames, registration numbers and badge in place.
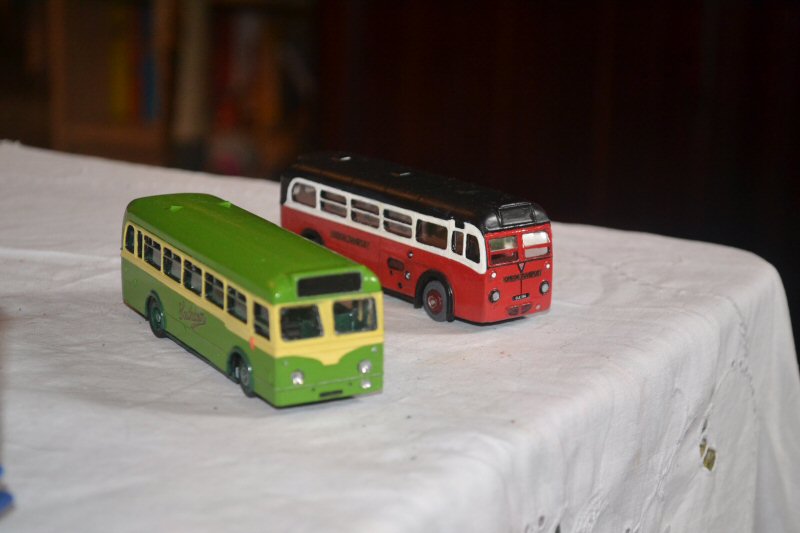
I printed suitable destinations for both plus the Southdown registration numbers up and glued them in place. Unfortunately, the photos I took of the Tiger Cub are too blurred but the 5Q5 has come out OK. I'll post a final shot of the Tiger Cub later. You can see the slight roughness in the finish of the white areas.

Last edit: by SRman
Jeff Lynn,
Amateur layabout, Professional Lurker, Thread hijacker extraordinaire
Amateur layabout, Professional Lurker, Thread hijacker extraordinaire
Posted

Full Member
:thumbs
Posted
Full Member
I can see so many rough bits on the 5Q5 that I will have to do a little more work on it before I'm happy.
Jeff Lynn,
Amateur layabout, Professional Lurker, Thread hijacker extraordinaire
Amateur layabout, Professional Lurker, Thread hijacker extraordinaire
Posted
Full Member
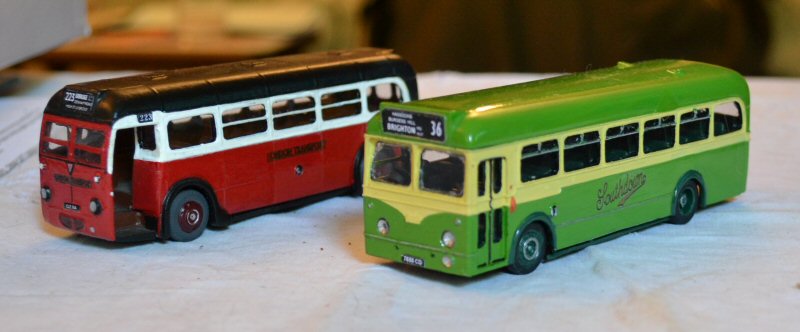
. :cheers:cheers:cheersThose buses do look rather neat - is the windscreen on the 5Q5 flat or is there a slope in them where the bars cross ? If the latter, they must be pretty small pieces of perspex ………..:shock::shock::shock:
'Petermac
Posted
Full Member
I should add that the competition rules mean that we can only enter two buses in any one category.
I didn't enter a diorama this year (I ran out of modelling time!) but I have won several times in the past. On a couple of occasions I entered a token entry to try to give others a chance (after winning several years in a row) only to find that I was the only entry!!
The 5Q5 windscreens have an angle in them, although I think mine might be at slightly too much of an angle. I simply scored the back of the clear plastic and bent it to suit. The line of the joint is also too high up so I will be redoing the windscreens at a later date.
Thanks for the compliments, too. :)
Last edit: by SRman
Jeff Lynn,
Amateur layabout, Professional Lurker, Thread hijacker extraordinaire
Amateur layabout, Professional Lurker, Thread hijacker extraordinaire
Posted
Full Member
Jeff Lynn,
Amateur layabout, Professional Lurker, Thread hijacker extraordinaire
Amateur layabout, Professional Lurker, Thread hijacker extraordinaire
Posted
Full Member
Posted
Full Member
:doublethumb
Snap !!!
They look great Jeff. :thumbs
'Petermac
Posted
Full Member
Last edit: by SRman
Jeff Lynn,
Amateur layabout, Professional Lurker, Thread hijacker extraordinaire
Amateur layabout, Professional Lurker, Thread hijacker extraordinaire
Posted
Full Member
I have now fully glazed the windows, after earlier drilling and filing out the solid engine room side window apertures. I flush-glazed the windscreens a couple of years ago but I think I will have to redo one of them. I also painted the body at that time but have now finished off most of the details. An added refinement was to fit Bachmann sprung buffers. I still need to tidy a couple of rough patches on the light stripe along one side, and then give it a good coat of varnish, followed by a decent weathering.
The major operation was to fit the resin sideframes to the bogies. The kit was designed to fit the Lima Class 20 chassis but the Bachmann side frame attachments are slightly further apart lengthways which meant that the bogies became rather flimsy and delicate after the operation. One in particular broke off one end, which meant the clip-fitting mechanism didn't hold the frame assembly to the main structure of the bogie - because the coupling is attached to the frame, put a load behind it and it would fall off! I overcame this with a sort of cat's cradle of wire reinforcements and araldite which have proved quite successful, as the locomotive can now haul a train of wagons facing either way without dropping a bogie frame onto the track and derailing or just stopping dead!
I then added some 60 thou plasticard ends and bottom to the fuel tanks to give a more solid appearance, then coated the lot with matt black.
The photos show the result to date, although the camera flash has highlighted all the plastic filings still lodged in the side radiator grilles - I'll have to brush those out later!
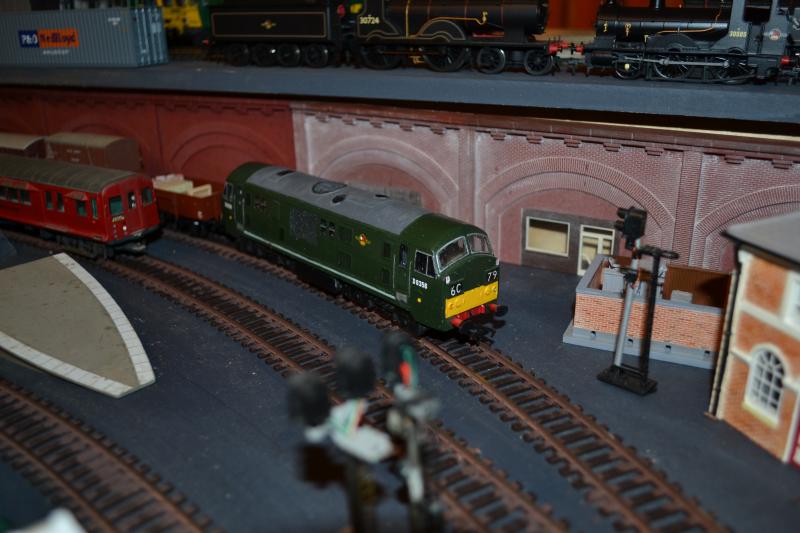

The red thing in one of the engine room windows is the TCS MC2 decoder. A later enhancement I am considering will be to drill out the headcodes and fit LEDs to illuminate them from behind.
Last edit: by SRman
Jeff Lynn,
Amateur layabout, Professional Lurker, Thread hijacker extraordinaire
Amateur layabout, Professional Lurker, Thread hijacker extraordinaire
1 guest and 0 members have just viewed this.