A tale of Three Rivers
Posted

Full Member
Experiments with 3 methods of modelling water
Thanks all, :oops::oops::oops:I'm just doing what I've learnt from those that have gone before me on this forum.
Well done Max, wonderful depth to those lakes and the ripples look like a bit of a breeze is blowing.
Wayne, hopefully the 1st photo in the next post should give you more of an idea how big the river beds are, I will measure them for you and let you know but they are at home at the moment.
As an idea, both the plasticard and printed paper walling is N scale.
The photos have been taken on macro or supermacro with the lens touching the test bed.
Onwards….

Posted
Full Member
Anybody loan me an Ark… I think I’m going to need it :question
OK… here we go. :chicken
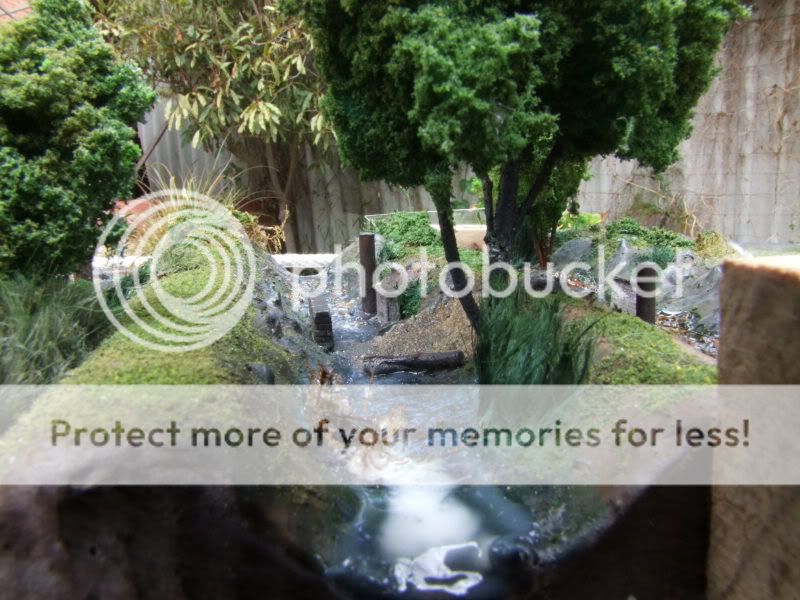
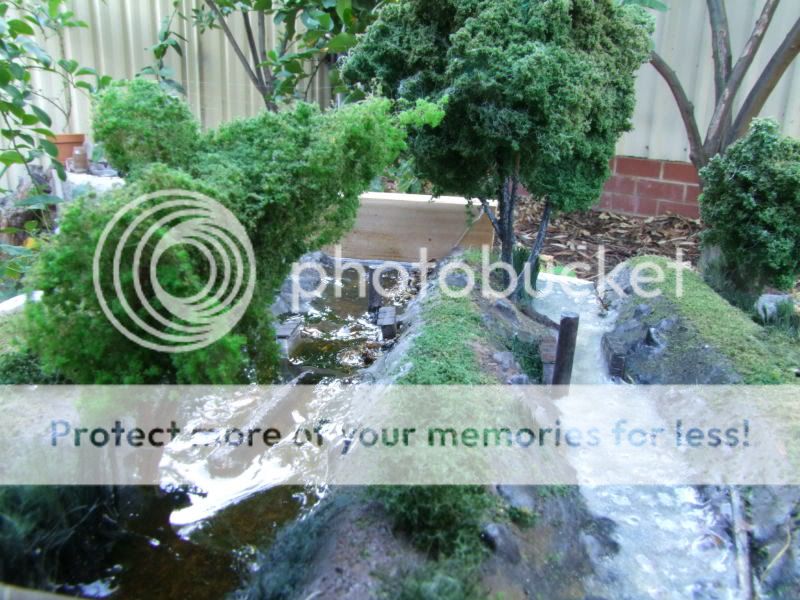
Three Rivers overview prior to damming and addition of model water.
From left to right
The Varnish, The Glue and The Resin.
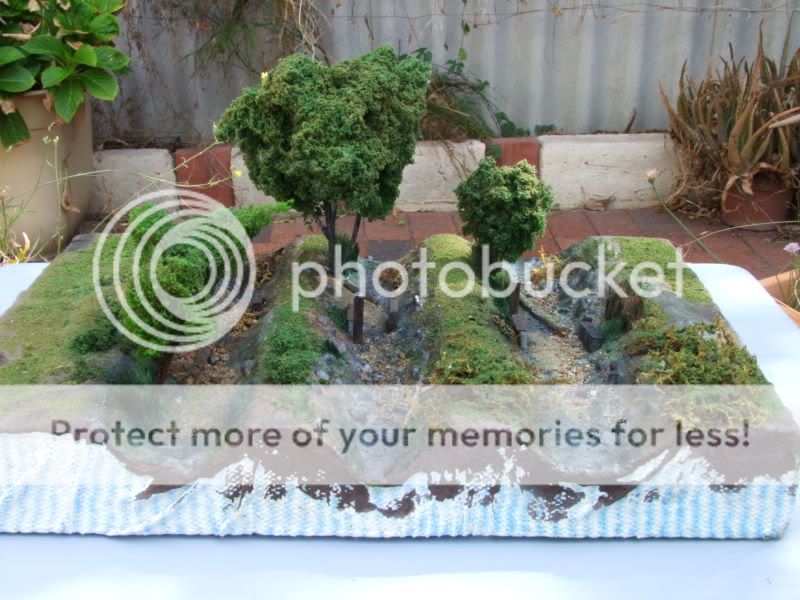
The dams are just a couple of bits of plastic cut out from some bits and pieces that were left over at the shop. Held in place with a bit of rope tensioned up around the polystyrene block with a truckies hitch.
PVA first, neat glue poured into a spare plastic yogurt container and a couple of squirts of 50/50 water/glue mix stirred into it until the mix was fluid enough to pour.
It will take longer to dry but flows better around the objects in the river bed.
The picture below was taken shortly after the pour while it was still wet.
The first layer has been deliberately thin to see what effect it has.
Marine Varnish next, also poured into a disposable container, neat from the tin that has been sitting in the works shed for at least 18 months. It seems a little thick but we’ll see.
Then poured into the river bed, again a thin layer to see how it gets on.
The picture below shows the varnish still wet.

And finally a two pack furniture coating resin, mixed carefully in equal parts according to the manufacturers instructions in a disposable container with a flat stick.
This layer is a bit thicker than the other two but still relatively thin. Poured in carefully trying to ensure an even spread was achieved.
A couple of important things to think about.
A) make sure that the project you are working on is level or the fluid will pool at one end or the other and look odd…
B) make sure that the dams are firmly in place without any gaps for the fluid to leak through… it’s a bit of a bummer when all your careful work leaks out… and I've still got to sand back and repaint the occasional table… sigh.
Which leads me to the third point…
C) Cover the surface you are working on with something disposable… yes dear. :roll: :pedal
Still, so far so good.
 Last edit: by Marty
Posted

Full Member
It will be interesting to see how it all sets up. :roll:
Last edit: by Petermac
'Petermac
Posted

Inactive Member
Max
Port Elderley
Port Elderley
Posted
Guest user
Posted

Full Member
I like the last one Marty, but you are telling lies aren't you , it's real water……………………….Isn't it :question:question :doublethumb Brilliant
'Kev
Posted
Guest user
Beautiful landscaping!
Mike
Posted
Full Member
Amazing how quickly this thread disappears onto the 2nd (or 3rd page) while I'm waiting for things to dry.
First Layers dry
Well, it’s not officially a drought, but Perth, Western Australia, has had one of the driest Aprils on record.
The city picked up just five millimeters of rain throughout the month, below the long term normal of 28mm. This made it the driest April since 1994.
As such, things dry pretty quickly.
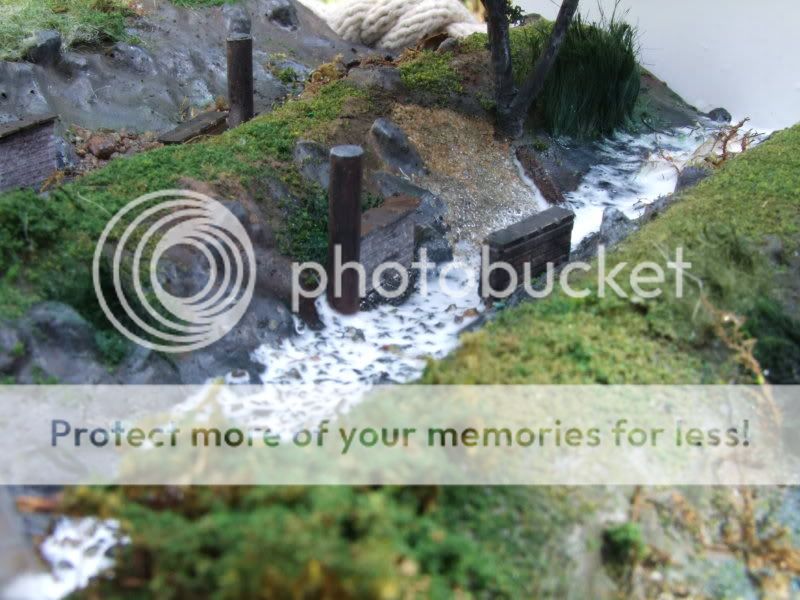
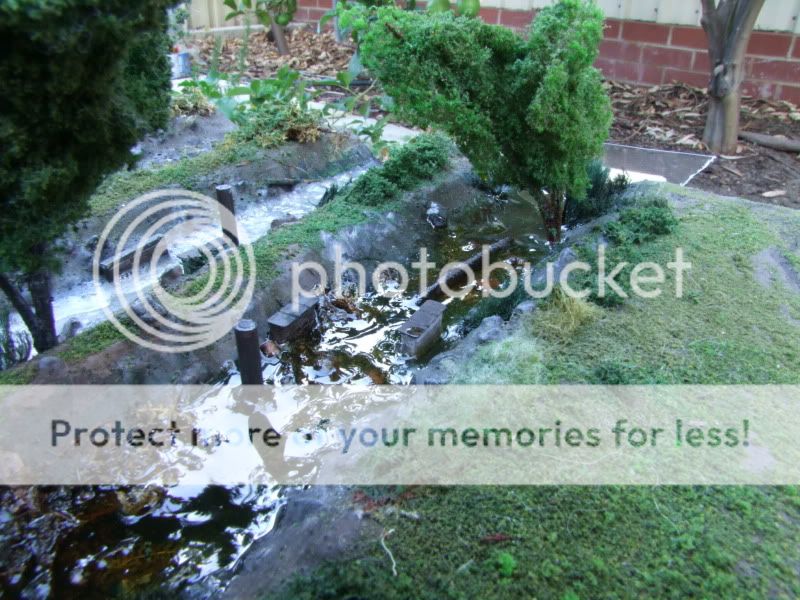
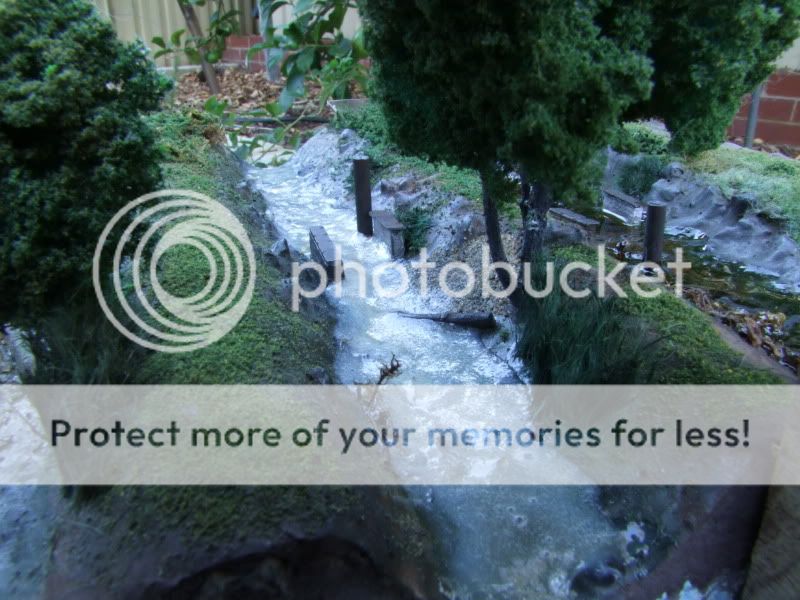
The Resin River was rock solid 48hrs later when poked and prodded with a finger, it looked just like it did when it was wet and it was left in peace previously because the PVA still looked like this…
The surface seemed to dry hard and not let the moisture out and the PVA river threatened to be forever milky. But, another 24 – 48hrs later the milk had gone and it was solid if opaque…
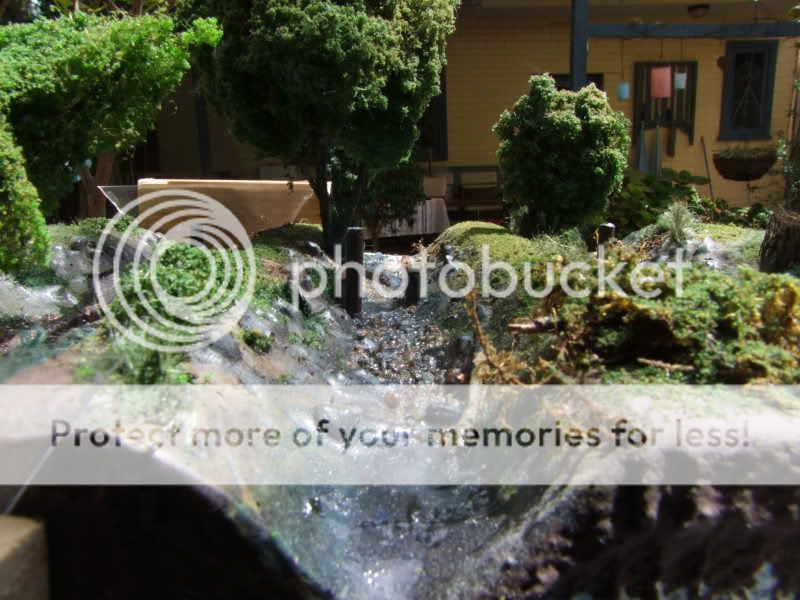
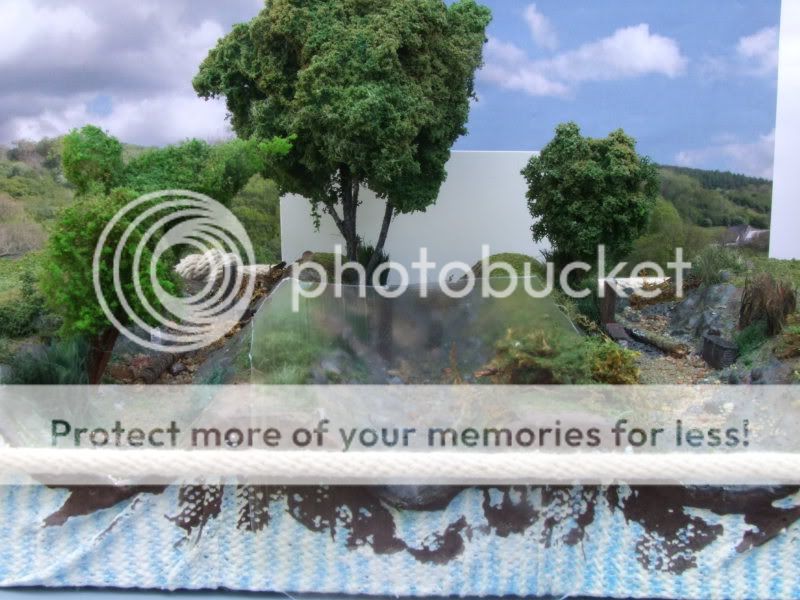
The Varnish River dried up beautifully from this angle, as long as you like your water to have a tee-tree stain, or look, as Chris says, like someone has spilled a pint of best bitter … You can probably get clear varnish though?
But the concave effects around objects and along the banks are obvious from this angle. Hmmm. Would thinning with turps work?
More experimentation required. 2nd, light layers will be applied, the PVA already done…
The plan is to fill the rivers up to the top of the capping on the walls. This doesn’t mean that that’s the best way, just curious as to the effect the different mediums will have when done that way.
Discussions and comments elsewhere indicate that a suitably painted “flat†river bottom, sandy edges to darker coloured middle, once covered by a thin layer/s of suitable “water†will appear quite convincing. MikeC, Chris N, Tim and Max, amongst others, have shown us this works.
Any questions or request for details fire away.
Hey ho… on we go.
Last edit: by Marty
Posted
Inactive Member
Max
Port Elderley
Port Elderley
Posted
Full Member
Means I've got to be around while it drys?
The old "watching paint dry" scenario.
I'll have to try and arrange a morning pour on a day I'm going to be home.
Flat out like a lizard drinking at the moment…
Posted
Inactive Member
Max
Port Elderley
Port Elderley
Posted
Guest user
I like the colour of the varnish river.
My first river was done with varnish about 4 1/2 years ago wow! that long ago! I used Estapol Crystal Clear . It did taint the colours very slightly but it hasn't changed much in that time. Or maybe the process is so slow that I haven't detected it.
I have to say I'm very sceptical about the PVA, but also very interested to see how it turns out. I really don't think it'll look wet enough for my liking. Damp, maybe, but wet? Feel free to prove me wrong. It wouldn't be the first time.
I've just bought some artists acrylic gloss varnish and I'm going to have a play with it to see what sort of surface effects I can get.
Mike
Posted
Guest user
 thumbs
Posted
Full Member
Thanks Max, I'll give it a go.Marty. When you pour, the concaves appear. You release the surface tension with the toothpick, then off you go. It doesn't come back until the next pour.
Posted
Full Member
It would be good if you could add your observations on the efficacy of such a product, Michael.
Yes please Mike.
The more info the better.
The next layer of PVA and varnish should be dry tomorrow…. we shall see.
cheers
Posted

Full Member
Phill
Posted
Full Member
Posted
Legacy Member
reg
Posted

Full Member
Thanks,
Wayne
Posted
Full Member
If it helps you out, so much the better.
Perth, Western Australia has had it’s first rain today since 24th April, officially it is the sunniest May since records began in 1876,
A glorious “Indian Summer†but not a drop of rain.
Good weather for drying imitation water too.
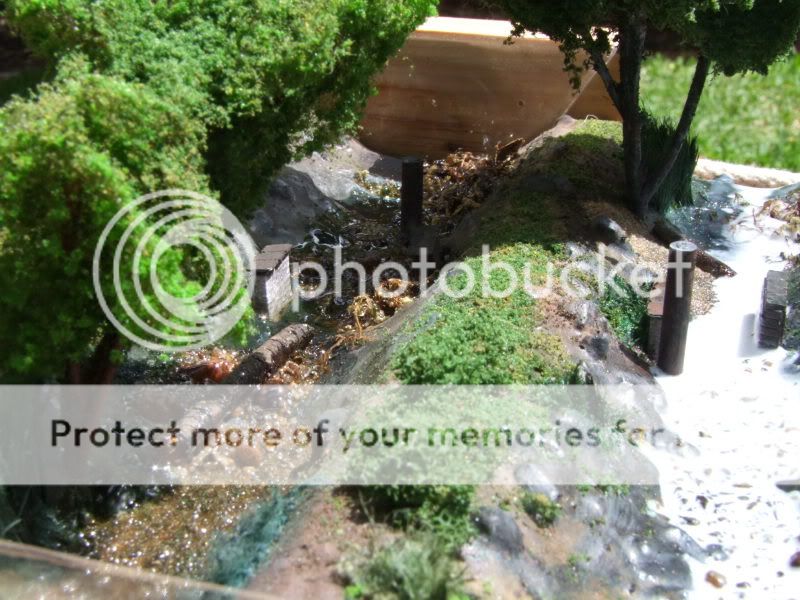
2nd thin layer dry
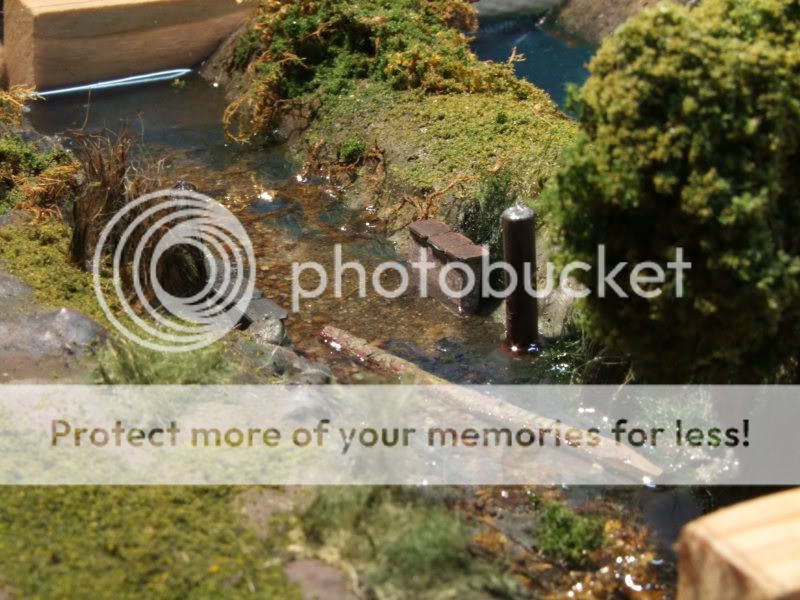
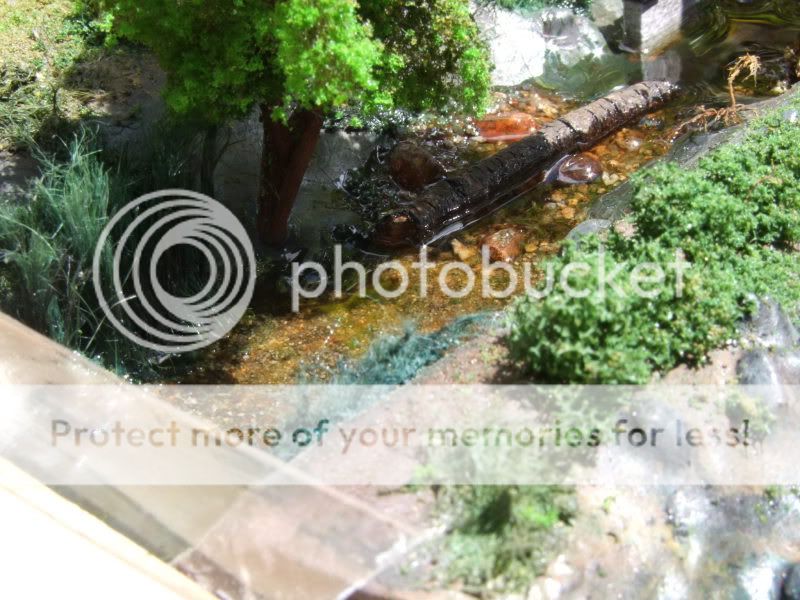
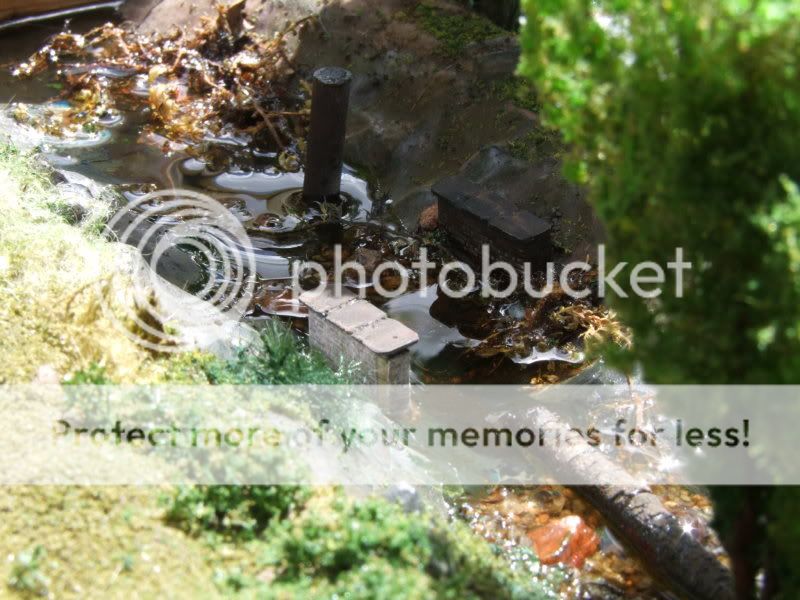
Both the PVA and Varnish rivers in the photo below have had a 2nd thin layer added.
The PVA has dried quite opaque, the varnish still clear but a little murkier.
A close up of the varnish river.
As yet to employ the toothpick to even out the edges while pouring.
Note that the river bed is still visible where the daylight reflection doesn’t interfere.
Also, have a look at the brick walls, there is evidence of either the “water “
creeping up or evaporation. Particularly in the PVA river behind.
The PVA river has some bubbles in it that have burst while drying leaving a hole in the river!??
The opaqueness and bubble make it look like a raging torrent racing and boiling along.
Next layer of Varnish is going to be a deep one…. Just to see what happens.
Next layer of PVA is going to have some acrylic blue/green mixed with it … once again, just to see what happens.
cheers
Last edit: by Marty
1 guest and 0 members have just viewed this.