Mike's late 80's BR layout
Posted

Full Member
As you're using fairly thick cork, I'd go for the thin track pins - Hornby I think - and press them in with a pin pusher. Once everything is set and your Copydex has dried sufficiently, pull the pins out and the track should stay put. Using the thin pins, you won't see the holes they leave.
TOIL sounds like a good move - unless you have some expensive locos on your shopping list …………. :hmm
'Petermac

Posted
Full Member
Posted
Full Member
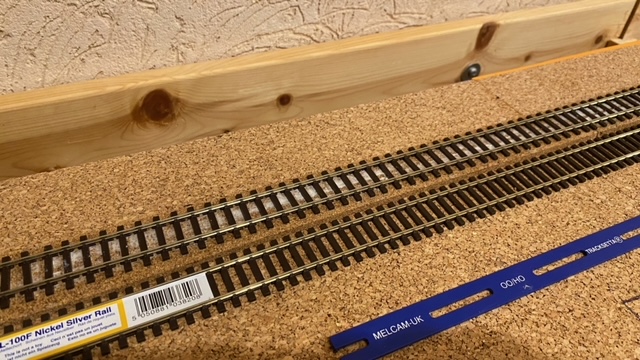
Thanks Peter.There are pre marked holes on the back of the Peco flex-track sleepers Mike - just flip it over and drill whatever size holes you need wherever you need them in the indents.
As you're using fairly thick cork, I'd go for the thin track pins - Hornby I think - and press them in with a pin pusher. Once everything is set and your Copydex has dried sufficiently, pull the pins out and the track should stay put. Using the thin pins, you won't see the holes they leave
Still waiting for track pins and other stuff to arrive and in what should be a quiet time it's been manic at work so very little done this last week.
Hopefully progress in the next few days. From Wednesday my project is finished and we were put on "work/stay at home if you can" last week - my job normally means I have to go in the office but with the project finished, I plan on saying I need some "admin" days to catch up which obviously means I'll be in the shed!
One concern I hope you guys can help with.
I planned a slight gradient on the layout, nothing silly, it's about 4cm (inch and a half) from south end down to north end. My thinking was that flat earth is very rare and i wanted a slight decent leading down from the scenic area towards the small bay station.
Having had a conversation with another modeller, he advised against it.
Considering I've already laid the boards down how I wanted, I don't want to go any further if I've done something that isn't right. The inch and half is over nearly 6 metres and hardly noticeable anyway, I really didn't think it'd make that much difference.
One day I'll settle on a trackplan….
but likelihood is it won't be today!
but likelihood is it won't be today!
Posted
Full Member
One thing you do need to bear in mind is that any rolling stock parked on the gradient won't stay put - if you must park it there, leave a loco hooked up. ;-)
'Petermac
Posted

Full Member
Posted
Inactive Member
I have steam, diesel and DMUs and they usually pull 3 or 4 carriages. The steam engines struggle from a standing start at the base of the slope but they all handle the slope with a bit of a run up.
I also put in the powerbase plates when I built the layout but so far have not needed to install the magnets, touch wood.
Cheers
Evan
Posted
Full Member
Hopefully i'll be ok then!
I'm using 2 woodland scenics styrene incline kits to get trains to the upper mainline - one to get them up and one to get them back down. I've some of the power base plates and magnets on order to help older trains but in all honesty it's probably going to be newer diesels up there.
The incline to take them up I want to try and keep straight to help not complicate things!
Working on the "lift out" section at the minute… and I'm not sure I'm going to keep it like that.
Had a think and I've come up with a new plan for hinges… so hopefully lift out will become lift up!
One day I'll settle on a trackplan….
but likelihood is it won't be today!
but likelihood is it won't be today!
Posted
Full Member
'Petermac
Posted

Full Member
Thanks guys.
Working on the "lift out" section at the minute… and I'm not sure I'm going to keep it like that.
Had a think and I've come up with a new plan for hinges… so hopefully lift out will become lift up!
Mike,
you should have a look at this design for a lift up flap, a lot of thought went into it. Lots of details regarding construction, you'll just need to search around his early posts during the build phase.
St Enodoc Lifting Flap
Posted
Full Member
Well, it's been a while since I last updated.
In that time I made little progress… then went backwards and have spent the last two days getting back on my way again!
I had family over since November so time for the shed was rare anyway but after a quick weekend trip to the UK last week to make sure they got back ok, I've had this week off to try and move forward again!
Straight away before I even got going, I discovered the tongue and grove facia of the car port had started to warp in the almost continuous monsoons we've been having out here.
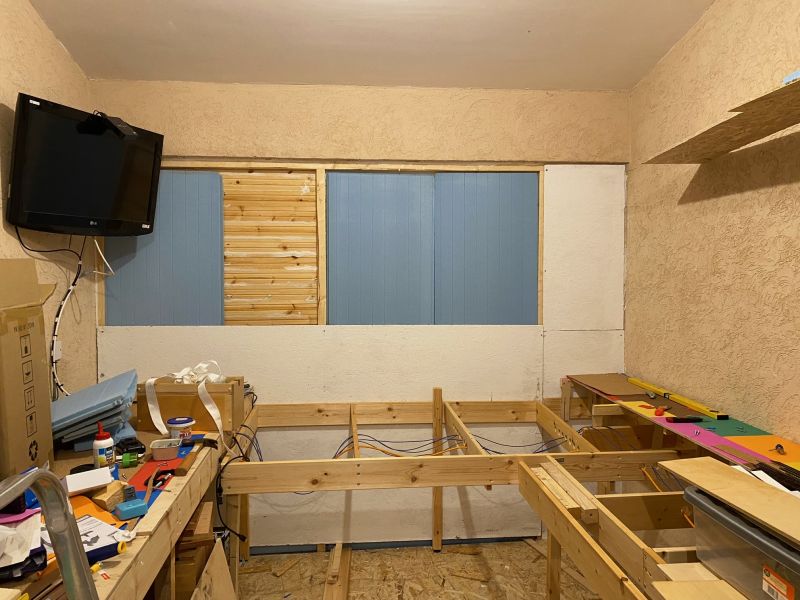
Couldn't tackle it from outside so had to go at it from the inside, removing the panels and installing 2 additional beam supports to screw the warped beams to and bring them back in line.
This meant dismantling the far section which conveniently were covering screws I needed to get to to get panels and insulation out.
Still, this is done now and I suppose better to get it sorted whilst I'm still in early stages rather than when track and scenics were down.
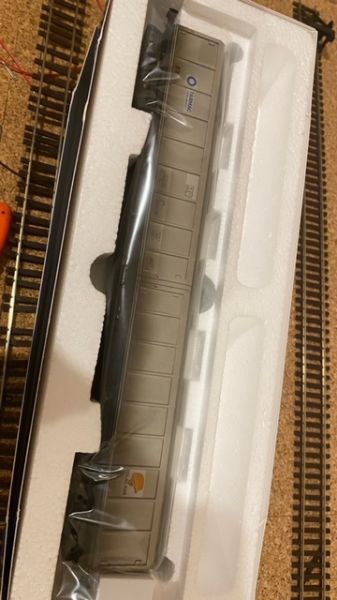
The trip to the UK was fruitful, I've brought back a load of goodies including my 7 car Farewell Tour HST set which arrived luckily in the Saturday of my 72 hour whistlestop trip!
Unfortunately, my luck ran out for my 7 car APT-P pack. Dispatched Thursday but delivered Monday… and seeing as I was on a 6am flight to Paphos Monday, this will now stay at my parents house in the UK till I next return!

 Got a nice fleet of 3 HST's now… I really need to stop buying trains!
I've been getting the final section sorted - the lift up.
Everything seems to be in place, I've a good plan on securing it and everything lines up.

I'll add pine bracing tomorrow but I'm not going to cut the wood and add hinges yet as I want to get the track sorted and see where lines will be before committing to placing everything.
After ripping everything out yesterday I made a real mess and so for the god knows how manyeth time, I had a tidy and organised everything (AGAIN) but bought a few more storage boxes. Everything now has a place!
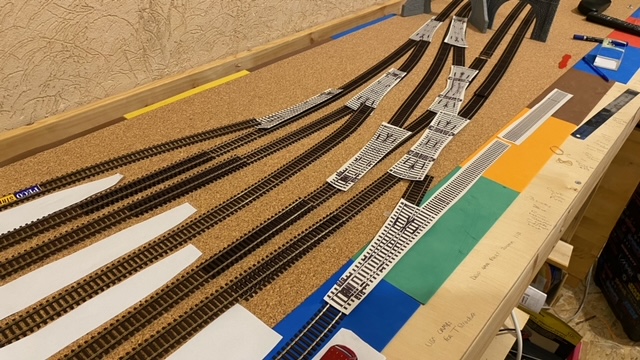
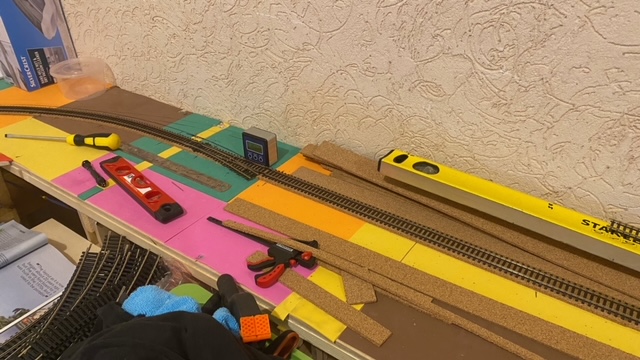
Got track templates out so hopefully finally ready to get going.
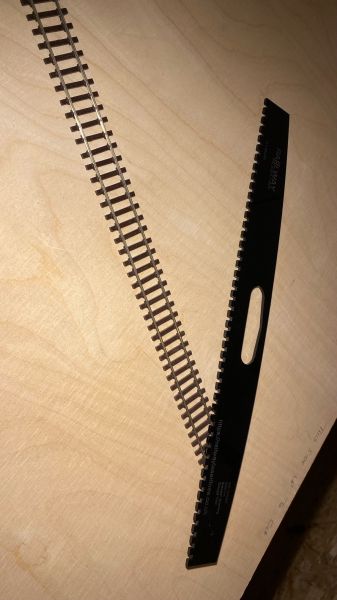
I'd been working on correct (or more prototypical) spacing the code75 peco flexi.
I bought a jig from Railway Laser Lines and am quite happy with how things are looking.
Awfully repetitive though but hopeful the end result will make it worth it.
I've decided to make the layout simpler than my original idea. I don't think I'm going with an upper section anymore.
Couple of reasons but ultimately, this is my first layout. Its not my "forever" layout as I only rent so I'm scaling things back, using this to learn what I'm doing. All singing and dancing can wait.
I've redone my list of what I want… can't have it all so prioritised and ditched whats not practical… or likely beyond my ability!
Trackwork is still spinning in my head so I've decided the only thing that solid is ow I want my station area. So, I'm going to start there, work myself out to the station approach and then continue.
Hopefully will progress a bit quicker from here.
Finally feels good to get back on with things after so much delay. I'll just be happy to get on with the layout rather than constant work on the carport itself!
 Last edit: by 1867Adelphi
One day I'll settle on a trackplan….
but likelihood is it won't be today!
but likelihood is it won't be today!
Posted

Full Member
Excellent work thus far and watching with interest.
I am layoutless at the moment due to a house sale but hopefully once re-located here in Spain I can start the building process and get things out of storage.
Keep up the good work.
Gary
__________________________________________________
I am no expert but I do what I can, when I can, with what I can.
__________________________________________________
I am no expert but I do what I can, when I can, with what I can.
Posted
Full Member
I've got the lift up section installed. It's secure enough but not complete as I've items coming from the UK to secure and lock in place.
Couldn't find any alignment dowels in Cyprus so they're coming, as are some better adjustable feet that I can lock at the right height.
When the board is lowered, long arm microswitches will make the circuit providing power. When lifted, circuit broken and power lost. so hopefully no trains falling from a cliff!
So, just about got a circuit around the room!
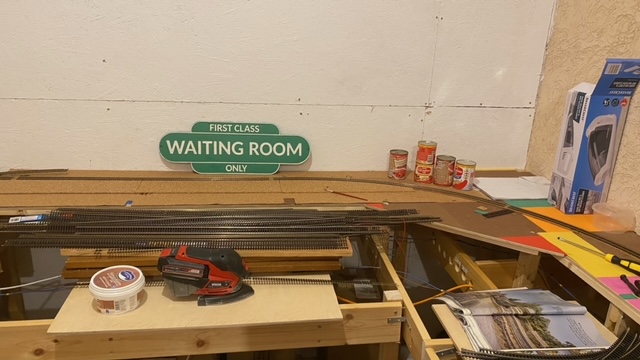
I've been having a play with how I want the station area.
I've always loved watching trains slowly emerge out of a tunnel then wind across tracks to their platform. That was something high up the list for me to have.
I've two double tunnels on the approach. 2 mainlines at the bottom then the top two lines will be a relief/goods line and a line up to a small incline leading to a TMD…. I know, I said inclines would go and they did… for a few hours!!
I've also decided to take a lot of reference for my station from Preston. Especially the now disused mail platforms they had.
The road leading down to Preston station is also something I can model as most of my station will be covered by town. I don't want to model a full mainline passenger station in full as I'd need upwards of 3-4m for an 8-9 rack express and it would just dwarf what I have available.
I've spent a couple of nights messing around with templates and stretches of flexi. I'm starting to get to a place I feel happy at.
The inner and outer sections seem OK, I think I just need to work a bit more on the central area it weak.
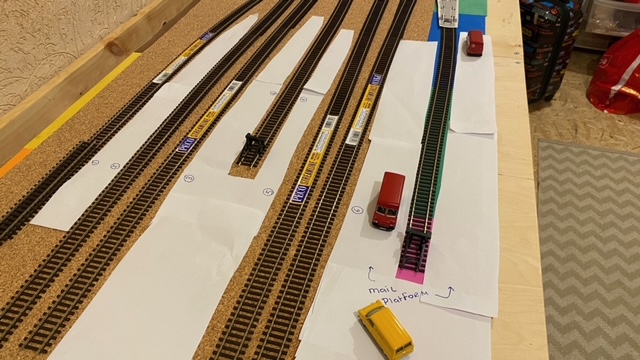
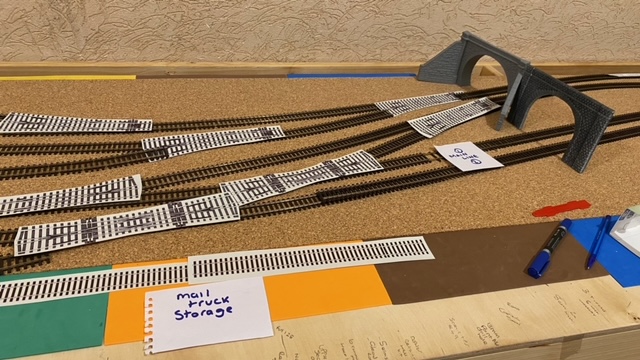
It is just rough but something visual really helps… and it's just nice to see some sort of plan coming together at long last.
I've only one single and double slip which considering their expense I wanted to make use of.
I'm 50/50 on keeping the central bay platform as I may need to make some space.
Hope platform widths are ok. I'm above what I've read is "minimum" but considering I'm tight on room I'm trying to be as clever as I can on space. Happy with the width for the mail area. The bay on the mail platform will be home to a couple of Heljan 128 parcel DMU's I have.
I've a couple of other plans which I'll lay out and see how they look before making a decision but thats not for tonight!
Last edit: by 1867Adelphi
One day I'll settle on a trackplan….
but likelihood is it won't be today!
but likelihood is it won't be today!
Posted
Full Member
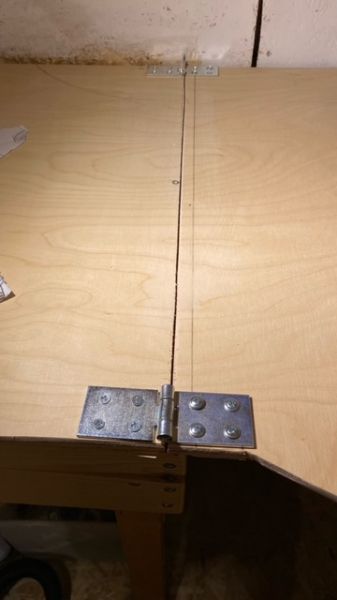
Just a comment - unless I'm mis-reading something - you need to mount those hinges above the datum level of the boards otherwise they'll bind on the track ends. Not much of a lift but they ought to be raised slightly. :thumbs
I'll go back and read the rest now ……. :cheers
'Petermac
Posted

Site staff
If you type this into Google or Bing
lifting sections for model rail
you will get lots of answers
Ron
NCE DCC ; 00 scale UK outline.
NCE DCC ; 00 scale UK outline.
Posted
Full Member
Thanks Peter & Sol.Looking great Mike and you're making excellent progress.
Just a comment - unless I'm mis-reading something - you need to mount those hinges above the datum level of the boards otherwise they'll bind on the track ends. Not much of a lift but they ought to be raised slightly. :thumbs
I'll go back and read the rest now ……. :cheers
Yep, taken that on board from previous advice. I've 4x 9mm ply squares cut for each of the hinges to sit on top of.
Will do that along with bracing the underneath of the board when the dowels and adjustable feet arrive.
Just got carried away to be able to come and go easily without sliding boards out of the way!
One day I'll settle on a trackplan….
but likelihood is it won't be today!
but likelihood is it won't be today!
Posted

Full Member
Earlier, you mentioned about mocking up buildings, which is something I always do. It helps me to plan things and see what it will look like, and provides some interest while I get around making the models. I use photographs of the buildings I intend to make stuck on to cardboard frames - really very basic but it really helps to get a feel for how things will look and (usually) gets me modelling.
Watching along….
Michael
Posted
Full Member
I'd initially followed the "just put some track down and have a play" route but when doing that, as soon as I tried to gauge the bends, the flexi just popped out of the fishplates! Come back set track, all is forgiven!!
Quick question - should I seal my ply and if so, with straight PVA, diluted PVA, varnish or can wood primer paint be good enough?
I've forgot this and laid down .5mm craft foam with 2mm cork on top boards for the main station section but this can easily be taken up at this stage.
I get that when sealing ballast and things like that there will be a good bit of liquid put down and even though I've a top cover of .5mm craft foam and 2mm cork, I don't want to risk problems with the wood
I plan on painting the underside white as previously instructed to make things more visible when fixing faults
Last edit: by 1867Adelphi
One day I'll settle on a trackplan….
but likelihood is it won't be today!
but likelihood is it won't be today!
Posted
Full Member
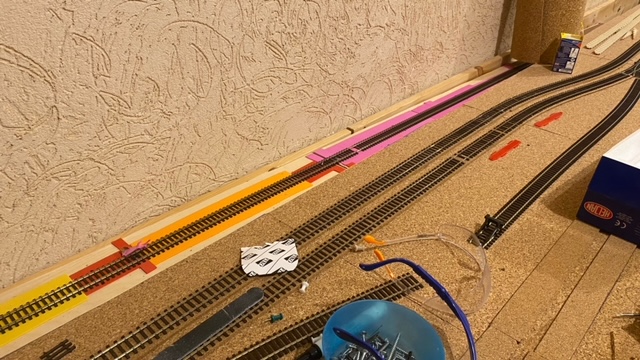
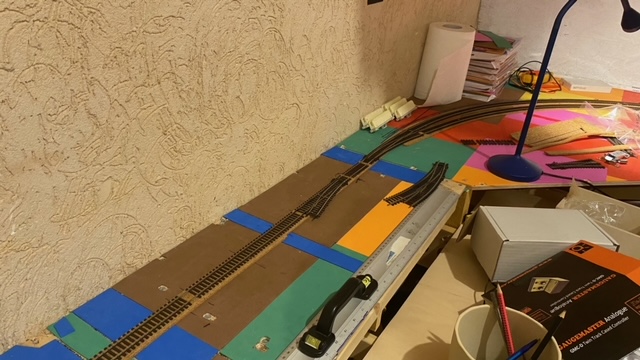
Lift up works fine so now to work… Finally laid some track!
A bit bitter sweet though but will come to that later.
Not sure if I've mentioned but I decided to space sleepers further out to a more 00 scale than HO.
I think this looks really well compared to a normal run of flexi.
Brings me on to the downside of that and what still seems my nemesis - curves.
When testing out track I mentioned previously I had problems with flexi on curves - If I join a rail it pops out of the fishplate when I put a bend on it - even if the bend is a distance away from the fishplates.
I watched loads of videos on Youtube on various methods. Staggering the joins, pinning etc
My choice of gluing track with copydex along with the cutting of the webbing to space the sleepers caused me issues with pinning. When I inserted pins, everything moved and I kept causing the rail to pop out of the chairs!
I first decided to stagger the distance in the rails to fishplates before the bend so they were not in parallel… that worked partly but I then decided to solder the outside of the tracks together on the fish plate to create a longer piece of flex.
One section I laid was a small s-bend, gluing, keeping the correct bend in place, keeping sleeper spacing correct and weighing it down for glue to set was… fun!
I plan on drop wiring every flex section. With getting into a tizz with the curve, when eventually it all looked good I realised I'd forgotten to solder droppers to the bottom of the rails and drill holes in place! I'll solder drop wires to the fishplates for the next section to compensate.
All in all I eventually got by. The first few sections are in place. I tested with a coach and it rolls fine over the sections.
I finished the night getting a load of really old set track straights I've had years and did some practicing on soldering track together to do it better than I had earlier in the day! Still it works and hopefully it'll be hidden with ballast later.
Moving in the right direction finally.
Last edit: by 1867Adelphi
One day I'll settle on a trackplan….
but likelihood is it won't be today!
but likelihood is it won't be today!
Posted
Full Member
Physically was my own fault.
I play in goal and in mid January tore my bicep making a save in ridiculously cold snowy conditions here in sunny Cyprus!
I'd just about recovered when Blackburn Rovers Walking Football Club came out to play us so I strapped my arm up and put the gloves on.
Unfortunately their striker blasted one at me and although I save it, it broke my wrist!
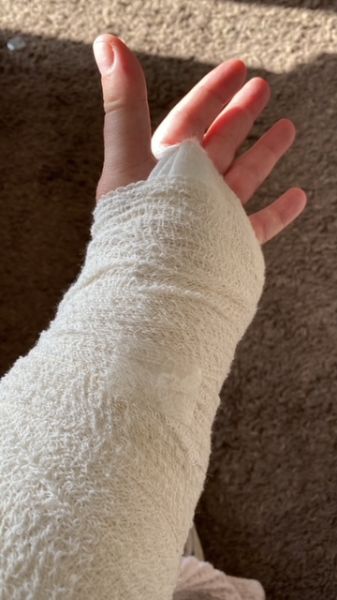
Didn't really help my mood!
So, between my last update and now I have progressed… then regressed as I usually do.
I've also continued to spend spend spend. :) Pretty sure it's an addiction at this point. Still, my wife thinks it's better than me spending on fags, beer and "godknows what" so for now she approves!
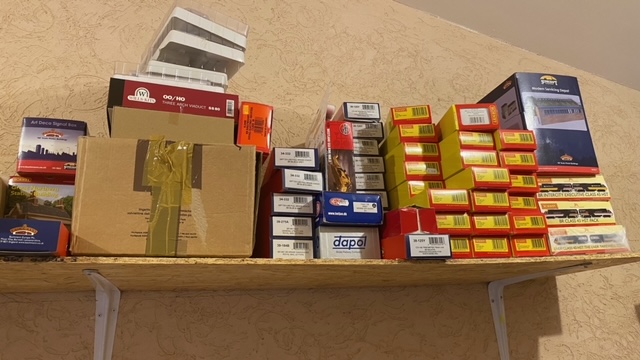
KMS Railtech had a great Easter deal on wagons a few weeks back including these Heljan cement wagons at £22 each! Naturally I got a rake!!
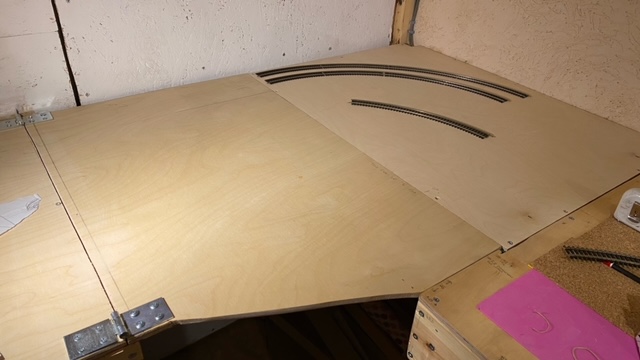
So, to the layout. I finally completed the circuit of the lower level (but not lower mainlines) by finally pulling my finger out and working on the lift up section.
I also finished the rear decline to the fiddle yard which will be hidden behind a retaining wall and under the upper mainline / town scene. I needed this finishing and I maintained a steady 2-2.5% gradient. If i have problems I'll add DCC Concepts power base.
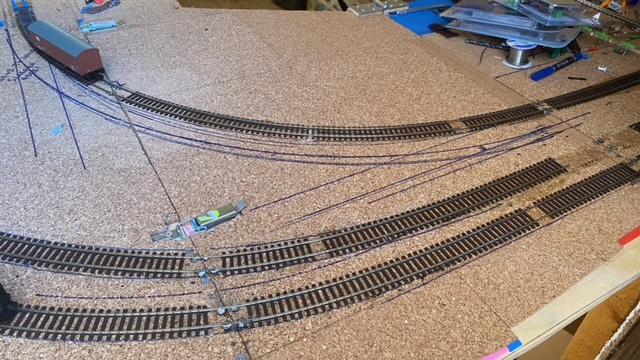
The two photos above show what will be the hidden lower loop. There will be a siding for storage under (points in place) but I don't have enough flexi to complete it.
When I know measurements for the upper section I'll cut back unwanted wood and leave space to get an arm up to access the track from below to clean or recover anything.
One day I'll settle on a trackplan….
but likelihood is it won't be today!
but likelihood is it won't be today!
Posted
Full Member
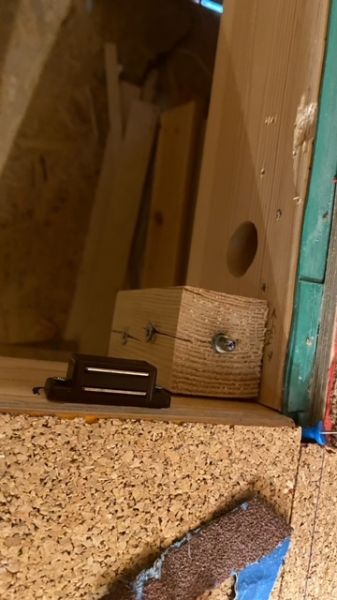
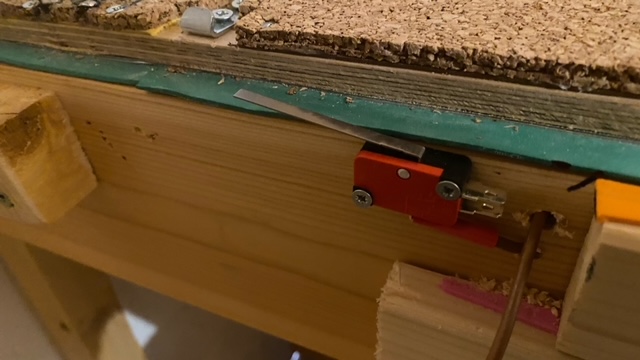
To make sure there won't be problems I've installed a microswitch which will only supply power to the powerbus when the board is down.
I started with the outer rail for the lift out and having soldered the rails using the brass screw method.
I found it easier to keep things straight when soldering by using a tracksetta
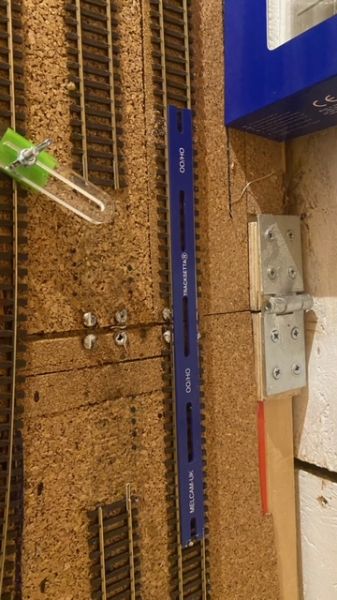
When I was happy , I cut the rail.
I ran trains, coaches and wagons and everything went over the rails fine.
Now, we move onto the first mistake I made. (The second mistake is also in the above photo but we'll come back to that)
So, the first track I did was the one nearest the bottom. It was a lovely hot day so I did most of the work from outside the shed with the door propped fully back.
As said, everything I thought had gone fine. I made one last lift up and drop, ran coaches and then lifted, went in the shed and closed the door. Immediately I noticed an issue, the rails were now out by 2-3mm.
It took a bit of time but I worked out my mistake.
I've secured the middle section to the shed facia. Immediately on the back of that facia was the hinges for the door.
When I opened the door, it moved the frame out slightly. Photos below show this better.
Door open -
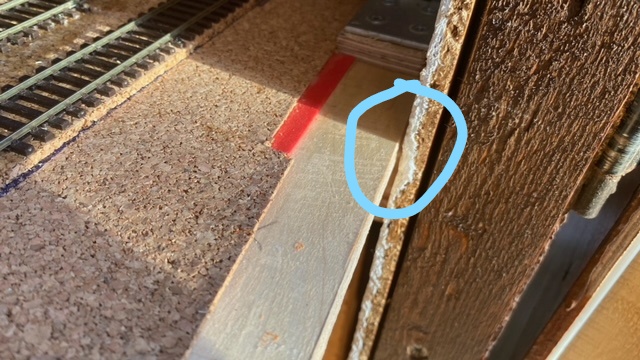
Door closed

So, I had to unsecure it from the facia which had problems as I'd installed a bar 1" down at the rear of the frame which would eventually hold the backscene.
Lost my rag a bit but with brute forces I finally got it done before resorting to getting access by taking the outside panels off.
After removing contact with the rear facia, the lift out was perfect either with the door open or closed!
So back to my other mistake.
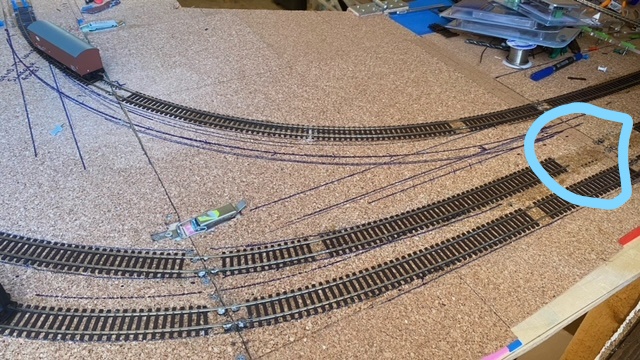
After the first rail worked, I started laying other track.
Now part of my issues lately is having incredible insomnia. So, one night when after 40mins I woke wide awake, I went back in the shed.
Started soldering rails and then I decided to dremel the tracks before going back inside to try and sleep.
After thinking I'd cut them all I lifted up the board… ooops, forgot to cut that section! the rails lifted and buckled!
Had to cut that out!
I really had hoped this thread would show quality calculated work… but hey, if people get "what not to do" out of it then thats good too.
Don't do tricky things quickly when you are tired!
One day I'll settle on a trackplan….
but likelihood is it won't be today!
but likelihood is it won't be today!
1 guest and 0 members have just viewed this.