Knottworthy Magna in 0/16.5 7mm Narrow gauge.
Posted
Site staff

A new circular layout by the creator of Glen Ogle in 009.
That is one thing with this hobby Brian is how fast we go or not, is upto us… I work on the fact that the good lord can't take me to the final station until I finish my layout….that is why I do modifications every so often…
Ron
NCE DCC ; 00 scale UK outline.
NCE DCC ; 00 scale UK outline.
Posted
Full Member
Caravans sadly no, the condo board would have a fit. Coal - the tank engine. Bunker or towed flat car?
Trash and recycling we pay for using contractors, the city keeps well out of it.
Nigel
©Nigel C. Phillips
Posted
Full Member

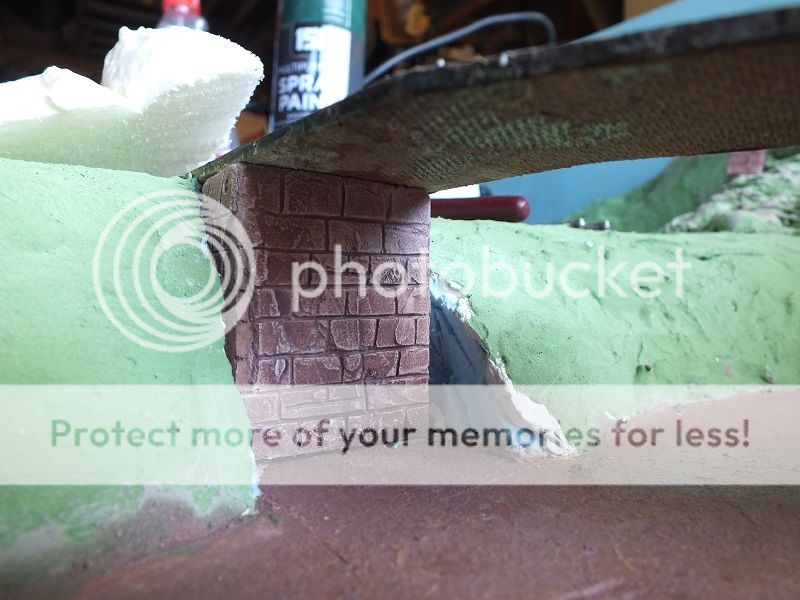
The riverbed has had a wash of colour ready for its coating of varnish. The two bridge anchor piers at the bank sides have been scribe'd, colour washed and fitted into the rebates formed in the riverbanks, and is still awaiting the fill texture to be added at each side and fully scenic ed.


The off-cuts of the foam, when sliced off the hardened foam, I save and use to fill in any where where I think they will enhance the scenic view.
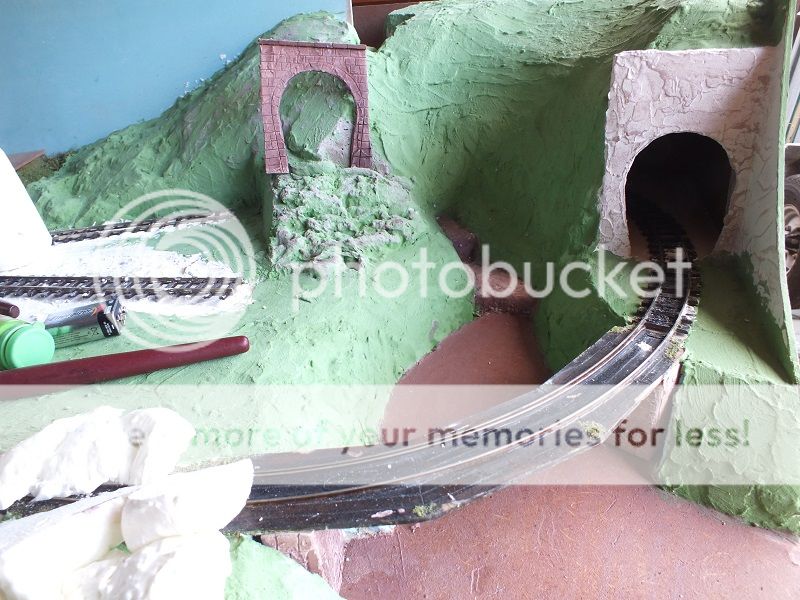
The entrance to the tunnel at the station side is a case in point, where its limited space precludes using the squirted foam use straight from the container. The off-cut has been glued to the back scene near the tunnel entrance, and has s colouring of ground daubed on because I had some paint already mixed at the time.

That's about it for tonight folks.
Regards,
BrianT.
Posted
Full Member
Posted
Full Member
I can't make my mind up whether to make the bridge middle piers from timber the same as the Mk1 iteration, or whether to put stone piers in place, I would make the stone piers from a thinner piece of wood core for the scribed plaster, or if a trestle type wood, possibly thinner timber section then last time to make it look more delicate, any thoughts anyone :hmm.
I'll give it 24 hours to allow our American members to respond before I please myself


 , Rule one applies.
Tarrah for now,
BrianT.
Posted
Full Member
Posted
Site staff

Quick question, how do you work out the size of the tunnel mouths (portals)?
Ed
Posted
Full Member
As for tunnel portal size. I decide on the type/shape I fancy, measure my largest rolling stock and loco's, if its on a curve I allow 1/2" (12mm) more width and height over what the stock will pass through in theory to allow for any overhang swing, draw it out on some old card and cut it out, and stand it straddling the track, and run my stock through, it especially on any curved track, and just eyeball it for any near misses.
There is probably a formula some where, but trial and error usually works for me.
I have always liked the lozenge shape, but this is the first time i've tried it, if it fails for whatever reason, it's only a scrap of MDF, a pencil and compass, a fretsaw, some PVA glue and a smear of polyfiller to scribe into when dry, and you have as many shapes and sizes as you wish. :cheers
I hope that helps, and thank you both for your participation.
Kind regards,
BrianT.
 Last edit: by gtmspyder
Posted
Site staff

Trial and error then, thanks Brian.
There is probably a formula some where, but trial and error usually works for me.
Ed
Posted
Full Member
Great progress and it looks really good too :thumbs
Make that three votes for timber trestle construction, so much more interesting than ubiquitous stone!
Have fun,
Bill
At 6'4'', Bill is a tall chap, then again, when horizontal he is rather long and people often used to trip over him! . . . and so a nickname was born :)
Posted
Full Member
Regards,
BrianT.
Posted
Full Member
II have been busy with the trestle bridge, making new support trestles, a little landing for the fisherman to be known as Knotts Landing.:) ,and some access steps.
They are still not completed, but I thought it was a long time since I posted anything, so here they are in the rough:-
I wanted the trestle to look a little more rickety and flimsy, so I searched our local suppliers of anything remotely suitable, and found a pack of square 1/8" bamboo sticks, I think possibly used for Kebabs?? Any way they looked adequate, so a purchase was made and they have been cut into various lengths, laid over a drawing on a piece of foam board, glued and held in place with dressmakers straight pins, to form one of four trestles I require to support the old bridge decking I had managed to salvage to cross the new river Knott.

I also thought that the loan fisherman would look better if he was placed where he could be better seen, and made a little more comfortable during his stay, so to this end, I am supplying him with a small boat landing he can sit on, with more water to aim at as he casts his line across the ever widening river down stream of the bridge, The landing stage has some steps to access it rather than sliding down the bank on his bum. Here they are propped on my dining room window sill until the glue dries.

Here the new structures are fitted, temporarily into position, to show their new locations.

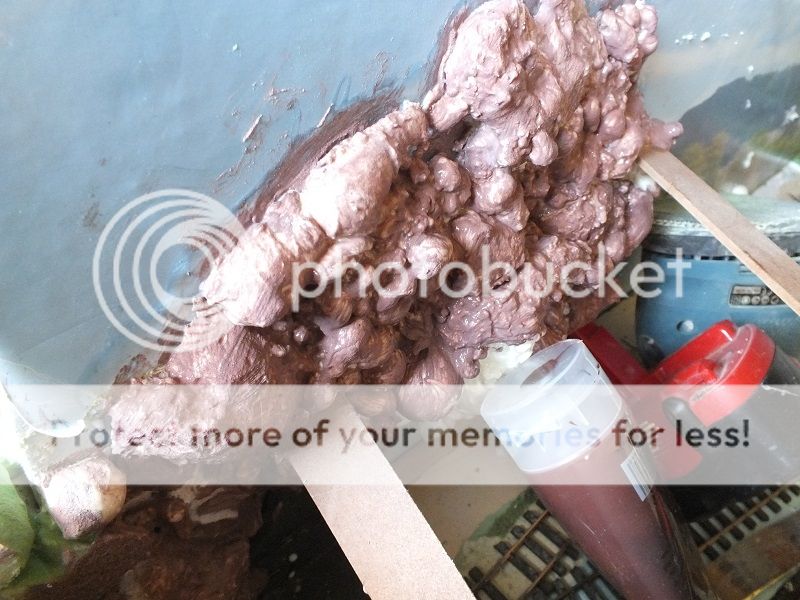
As you will see, the river bed has it's first sealing coat of varnish applied, the trestles wedged under the bridge decking, the landing stage in place, and the steps laid into the cut out base foam. The brown rocks are some polyfiller coloured with brown acrylic paint that had bean roughly daubed into the gash in the blue Styrofoam riverbank, and then attacked with a chisel to accept the new step structure.]

All the new raw wood has to have a suitable finishing colour and or texture adding to complete the scene. The bottom of the piers will be resting on stone semi pillar/Islands in the water.

Regards,
BrianT
Posted
Full Member

The bridge was finally set in place , the lower cross pieces have become little islands with a coating of pollyfiller around them, painted, and then glued to the riverbed varnish and the decking above.


The high level view gives some scale to the scene, and I couldn't resist placing two of my seated model figure within the scene on the landing stage, although I could not find my angler, hopefully he will be found as the river receives its many more coats of varnish.

I need to buy some more ballast grit to coat all the additional track that has been laid, and start placing some models around the industrial side, but I have not yet decided exactly what they will be?
That'll do for tonight.
Regards,
BrianT.
Posted
Full Member
Something will have to be done before the next coats of varnish are applied, but now they are glued down, that's not going to be easy unless I just make them bigger, hey ho, the joys of unplanned modelling.

Something will come up.
Regards,
BrianT.
Posted
Site staff

Ed
Posted
Full Member
Bill
At 6'4'', Bill is a tall chap, then again, when horizontal he is rather long and people often used to trip over him! . . . and so a nickname was born :)
Posted
Posted
Full Member
Posted
Full Member
Posted
Full Member
I think I've managed it this morning, below is what I was trying to transfer.
Another look at Knottworthy Magna's change of scenery.
The river Knott source in the hills of the back scene board, has had another very thick coat of varnish, and at the first cascade, a volcanic eruption has formed a convenient island

Down stream at the trestle bridge, the islands that support the bridge trestles have been altered with the aid of a little plaster and some cork rocks to beef them up. The river has received a new coat of varnish, and as I type, I hope is settling shiny and level. Again the islands have to have more work on them when the glue and varnish have dried.

A few of Knottworthies original model structures have just been placed on the site in an approximate position of where they may well be fixed in future. The overlarge signal box, is now in a more likely area as there are far more points to be operated at the factory sidings than was the case at the original station position, so the signal man will have less time to fill with polishing his little three wheeler.

I have yet to build the new station for the front side and a smaller signal cabin, more in keeping with its location :roll:

The signal box and waiting room shelter have yet to have a platform laid for them to be bedded onto, and as can be seen, the track ballasting has begun.

The white splodges on the baseboard sides are not a scenic element, just smears of the filler material to cover the countersunk screw heads of the build additions, they will be smoothed flat before I paint the baseboard in black.
And so the reformation continues.
Regards,
BrianT.
 Last edit: by gtmspyder
1 guest and 0 members have just viewed this.


