The art of compromise.
Posted
Full Member
Finally gettiing out of my system.
Thanks all for your comments and suggestions. I ordered some flat magnets online yesterday. Rather than the hassle of lifting the track to install them , I am minded to cut through the required number of sleepers, using a new scalpel blade, gouge a small trench, glue in the magnet and then glue the part sleepers back in place. I'm thinking that it might be less noticeable if I were to cut the sleepers just beside the chairs. I shall do a test one where the goods shed will sit. If it doesn't work out, the damaged sleepers will not be seen inside the shed.
Terry

Posted

Full Member
Magnets. Happens to us all. Drill holes between the sleepers where you want it to go, give the required section an overnight treatment with a damp cloth covered in cling or foil (you did use pva, right?), cut between the holes from underneath. Or just use a Dremel a router but and leave a thin layer of the baseboard. Make sure the magnet is centered.
If this Finescale track, code 75, with thin sleepers, KD magnets could have issues with the couplers, and the steel axles used by UK manufacturers. May need a spacer to optimize the distance. Check the website.
Nigel
©Nigel C. Phillips
Posted
Full Member
Thanks Nigel. Interesting idea.
Regards.
Terry
Posted
Full Member
I fixed masking tape to the platform leaving the edge clear. The plan was to give it a spray with Halfords white primer. As you would expect, the paint ran out half way into the job. I resorted to brush painting some white acrylic paint over the rest.
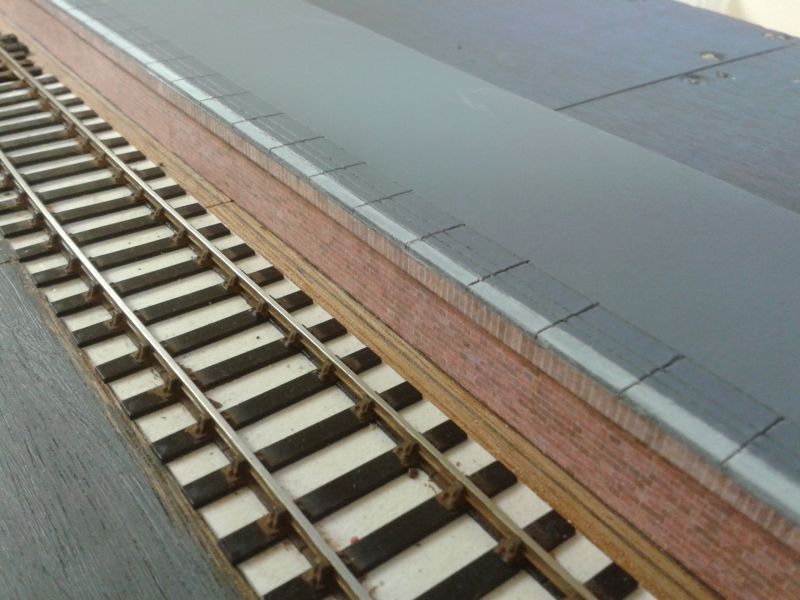
This week I put together the Scalescenes kit for the arched bridge. A lovely model. This will be situated over the entrance to the fiddle yard. Some black weathering powder was dusted over. I must do the same for the platform face.

One extra wing wall was made and will be situated just inside the fiddle yard, as shown in the picture above. I will ballast the track for a few inches to give the impression that the scenery continues away out of sight. Hopefully, the extra wing wall will cut down the view into the fiddle yard. This is how it will look from the fiddle yard side.
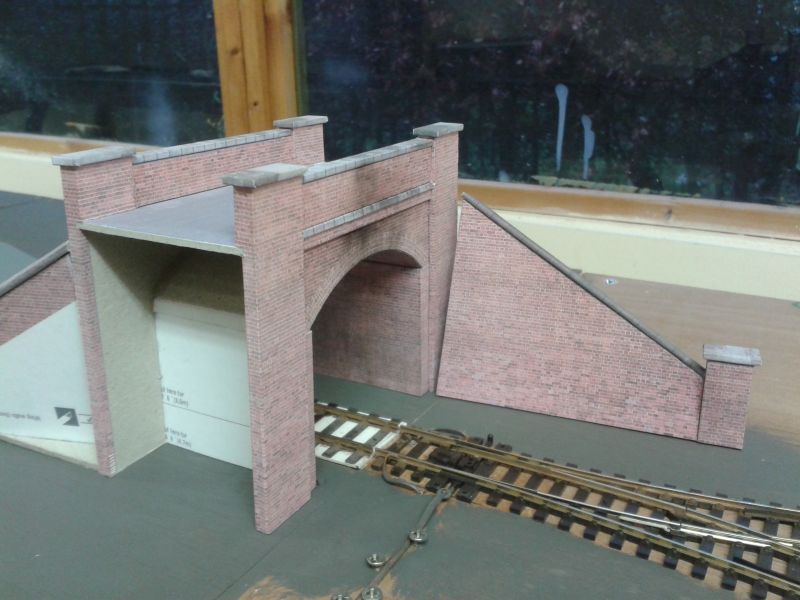
I might even create an embankment for a foot or so to help with the illusion that the scenery continues.
I have decided to build the Scalescenes Goods Shed as it is not very different from the LMS shed which I had intended to scratchbuild. More on this soon.
Terry
Posted

Full Member
Staying on the thread Kevin.
Posted
Full Member
Thank you Kevin, very kind of you. However, best wait and see how it all turns out first.
Regards,
Terry
Posted

Full Member
Good luck with the Goods Shed
Cheers
John
Posted
Full Member
Posted
Full Member
Nice idea to take the bridge into the fiddle yard. Same with the ballast and a bit of scenery?
Nigel
©Nigel C. Phillips
Posted
Full Member
Thank you all. Yes Nigel, the ballast and scenery will extend a short distance into the fiddle yard.
As mentioned earlier, I forgot to install the magnets for uncoupling, before gluing down the track. How to remedy the situation without resorting to lifting the track? This is where the first magnet will be installed…
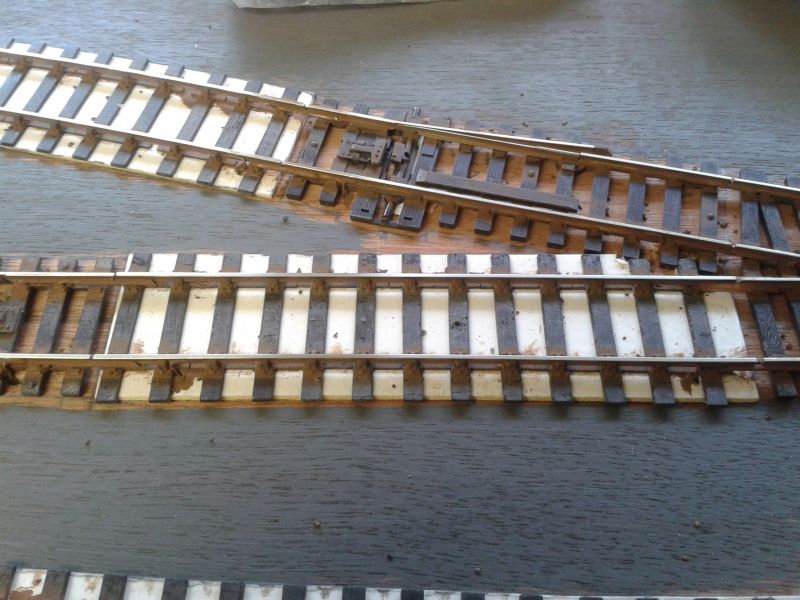
Three sleepers were cut through with a scalpel just in from the chairs and the pieces put to one side. Holes were drilled in the baseboard surface to assist in cutting through the baseboard…
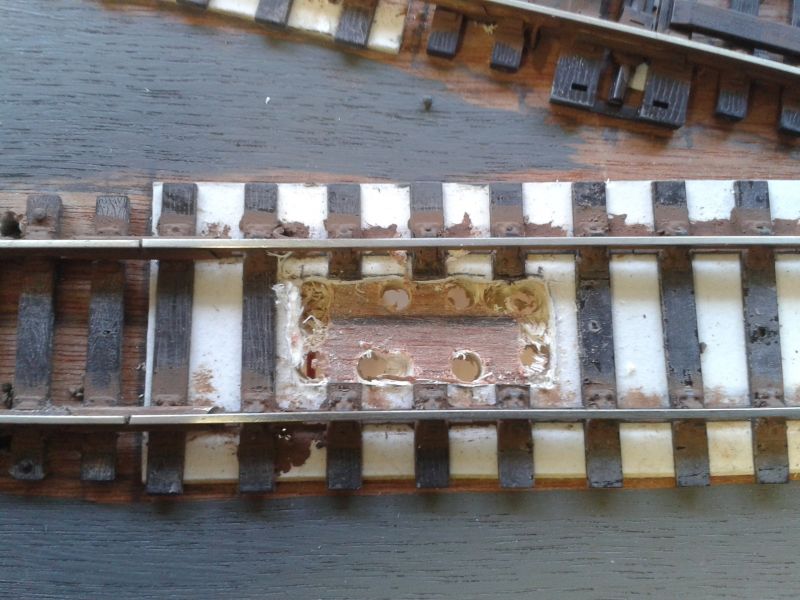
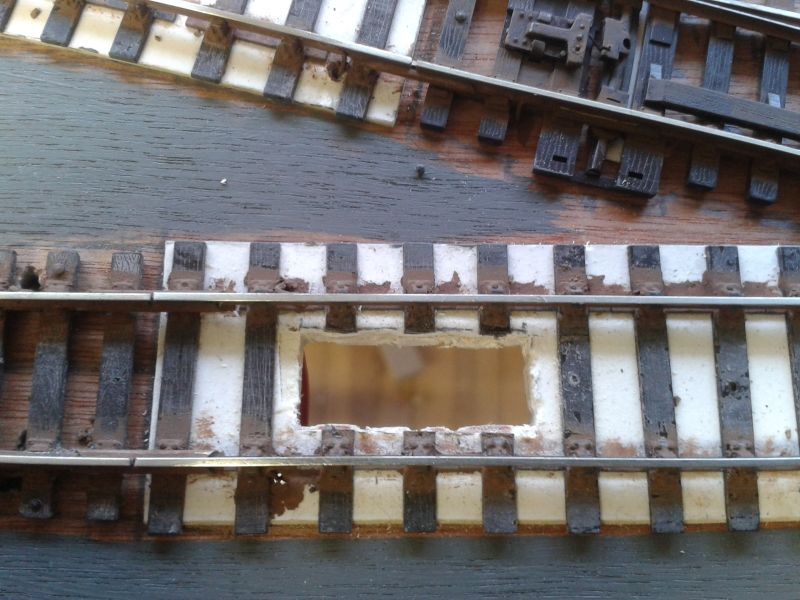
A small rectangle of plywood was glued to the underside of the hole with the trusty old 'Hard as Nails'. Card packing was glued inside the hole to bring the top of the magnet up to the level of the underside of the sleepers and the magnet was superglued in place…

The sleeper pieces were superglued back in their original positions…

Job done!
Or it would have been had I not at this point realised that one magnet is not long enough to uncouple two wagons. I am now in the process of installing another magnet just to the right of the one shown above.
More soon.
Terry
Posted

Full Member
Ouch. Le sigh.

Posted

Full Member
Michael
Posted
Full Member
Thanks Michael.
The second magnet has been installed alongside the first…
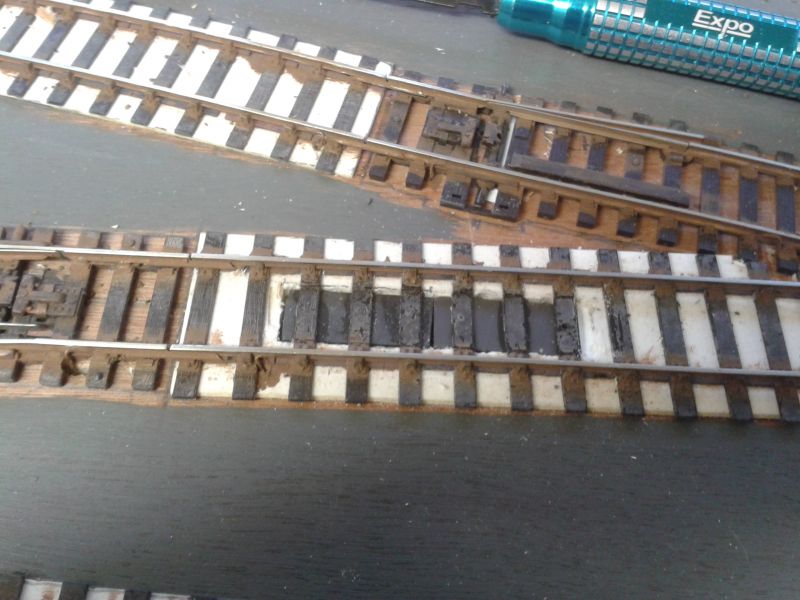
All appears to be working well as shown below…
Terry
 Last edit: by col.stephens
Posted

Legacy Member
Do you know what is the maximum distance away from the couplings they will actually still uncouple succesfully?
Brian
OO gauge DCC ECOS Itrain 4 computer control system
Posted

Inactive Member
Nice job Terry but is it really necessary to use such large magnets? The reason I ask is that I use these tiny ones on my Coombe Hinton layout and they work 100%. The fact that it's N scale may make a difference of course! Anyway here's a very close up photo of them in situ between the sleepers and they are hardly noticeable at normal viewing levels.
Ken.
'It don't mean a thing if it ain't got that Swing'
Posted
Full Member
Last edit: by ZeldaTheSwordsman
Posted
Full Member
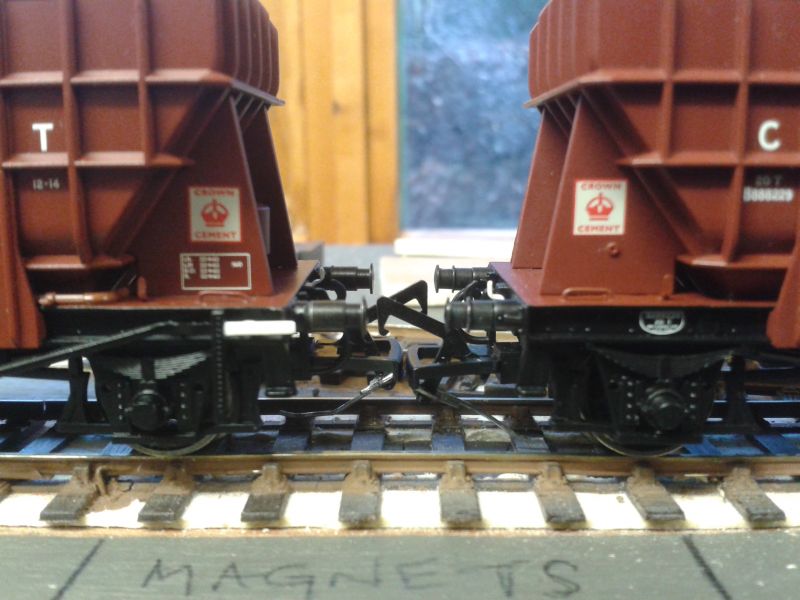
Two magnets? I thought, but then I saw why. Unlike KD couplers those tension lock add-on actuators need a long one. Any grab on the axles?
Nigel
©Nigel C. Phillips
Posted
Full Member
Staying on the thread Kevin.
Posted
Full Member
Hello Brian. I don't know . These particular magnets are 3mm thick and are quite powerful. I suspect that if the magnets were mounted under the baseboard (5mm ply) you would have a problem. I am using code 75 track (C&L) and the sleepers are very thin compared to code 100 track.
Ken, as pointed out by Brendan (Zelda), the magnets have to be long enough to cover two adjoining Bachmann couplings. I have tried using small magnets between the sleepers and it required four in a row and even then uncoupling did not always take place. It is far easier to use long magnets. You won't actually see them once the track has been ballasted as they will be covered.
Nigel. No grab whatsoever on the axles.
Kevin. I remember your thread. I have never had any problem with the hooks falling off in use. If they do come off they just clip back on.
Next job is to install the remaining magnets on the two sidings. Now I know how many are required at each uncoupling point (two) and that this type of magnet is quite capable of doing the task, I have ordered more for future use. They are Ferrite magnets measuring 25mm x 10mm x 3mm. I paid £2.79 post-paid for thirty magnets on ebay. Bargain!
Terry
Last edit: by col.stephens
Posted

Full Member
One of these days I'm going to try eBay. sigh.
1 guest and 0 members have just viewed this.