The art of compromise.
Posted
Full Member
Finally gettiing out of my system.
After what seems like a lifetime, I have finally finished wiring the point motors to the switches on the new control panel. Each point motor has six wires and the layout has four point motors. The numerical amongst you will have worked out that twenty-four wires require to go somewhere or the other! And this is just a small layout! The new control panel is a simple affair made from three pieces of ply…
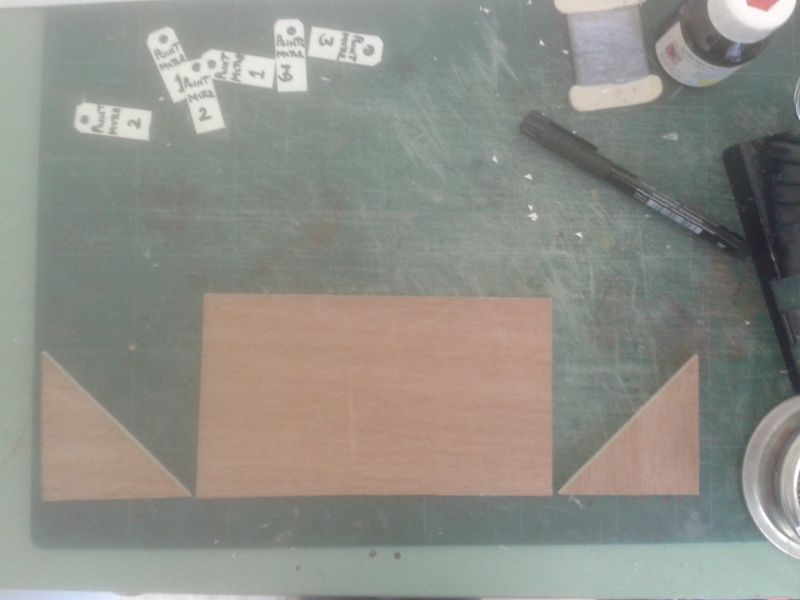
The two triangles were glued to the underside of the ends of the rectangle with my trusty tube of 'Hard as Nails', available from the local £1 emporium in a town near you. The simple track diagram was drawn on a piece of card with permanent ink and a spray of matt varnish was wafted over it. Holes were drilled at the appropriate places and the switches were fitted from behind. Voila…
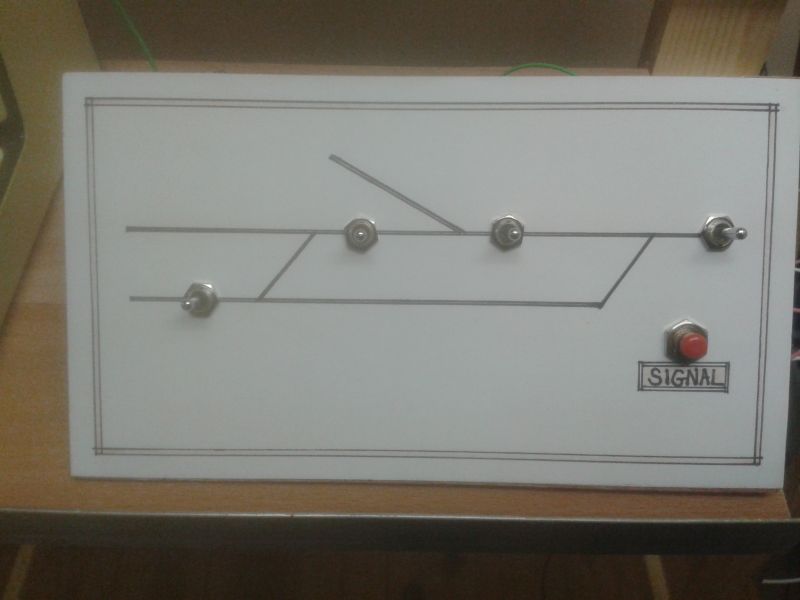
Not quite as extensive as the track diagram for Clapham Junction, but it works for me!
Here is a rear view showing the works. The panel will be sited over the tag-strip and will be removable, being attached to the shelf via screws from below biting into the two small blocks of wood glued on each side ('Hard as Nails' strikes again!).
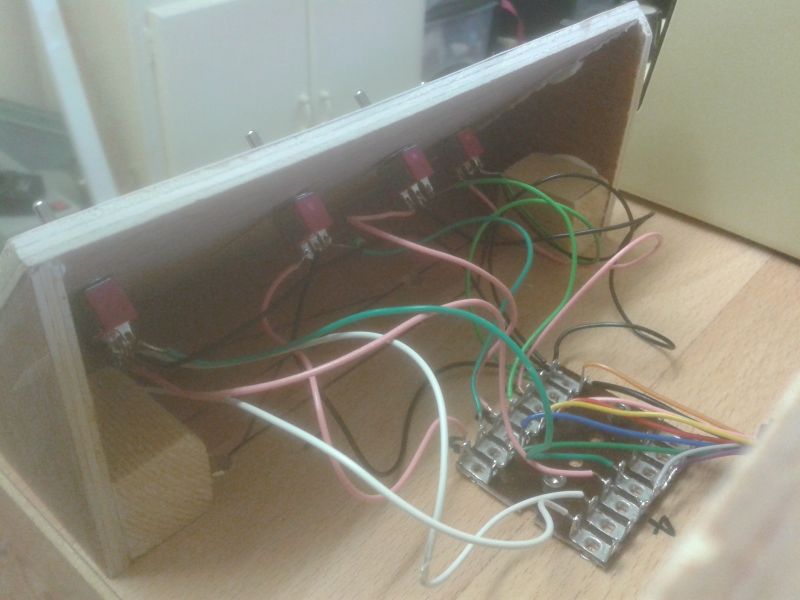
I just need to cover the original holes drilled in the shelf and splash some paint over the lot to make it all more presentable. Meanwhile, here is a general view of how things currently stand…

Terry

Posted

Full Member
I know it might be a bit late but if the panel is going to move about, shrink wrap over the wire connections to the switches and tag strip could help avoid unwanted issues.
That said, still very nice work.
Shed dweller, Softie Southerner and Meglomaniac
Posted

Full Member
As you so rightly say, the wires required can mount up alarmingly - as you know, DCC is only 2 wires ………………. :cheers
I'm impressed with your faith in "No More Nails" - it it really that strong ? Maybe I should re-think my screw collection…………………………. :hmm
'Petermac
Posted
Full Member
Thank you Barry and Peter.
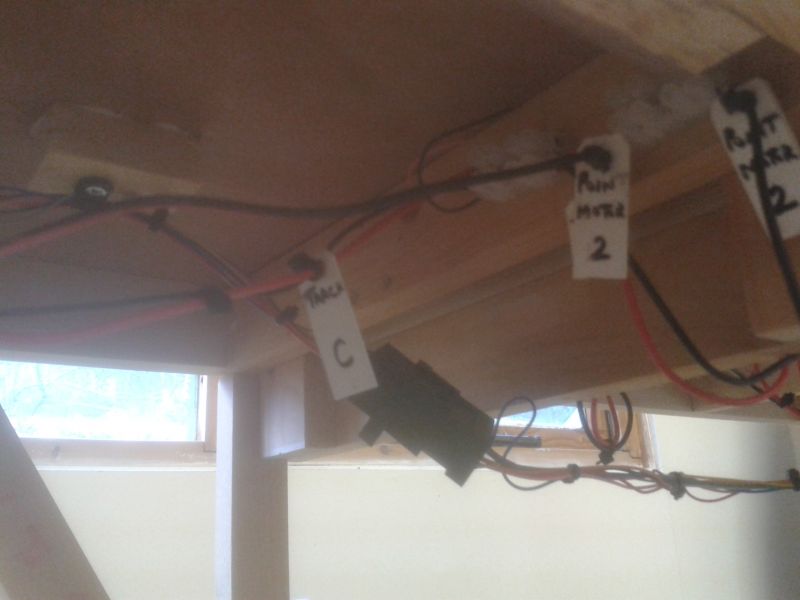
The 'Hard as Nails' is part of the '151' range of items sold, I think, by Poundland. I have found it to be a very useful solution to those awkward problems where you can't use a screw, such as fixing small blocks of wood to the underside of the thin ply baseboard top. I used it when attaching the point motors as shown earlier in this thread. I have also fixed small blocks of wood to give me something to hang the wiring from, as you might see on the top left of this rather poor photo…
Regards,
Terry
Posted
Full Member
Now the track and point motor wiring is finished I decided the time was right to paint the sides of the code 75 rails. But which colour? Study two different pieces of track in two localities and the chances are the rail colour will look different. To me, it seems that the rail colour varies from dark brown through different shades of red oxide. If you have a book with colour plates therein, have a quick look and you will see what I mean. I dug about in my paint drawer and came across this old tin of Humbrol Matt No. 168…
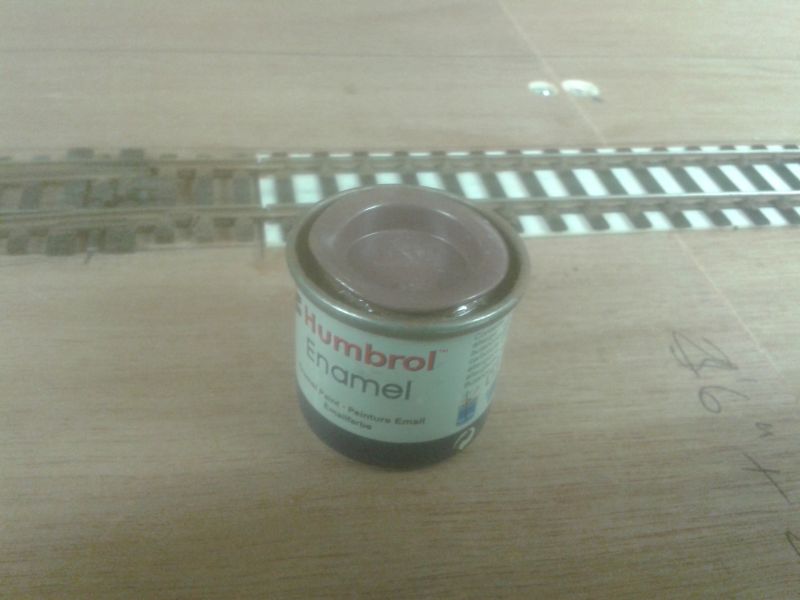
It appears to me to be a deep red with a brown shade to it. This is how it looks on the rail…
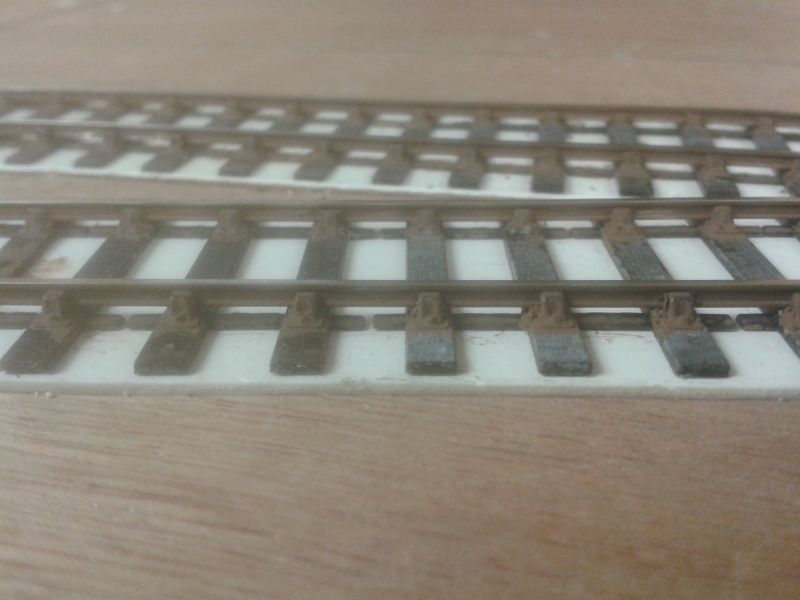
I used a brush which was wide enough to paint the chairs at the same time as the rail. Paint finding its way onto the sleepers around the chairs is no problem. Look at real track with wooden sleepers and note how the rust often stains the wood in the area of the chairs.
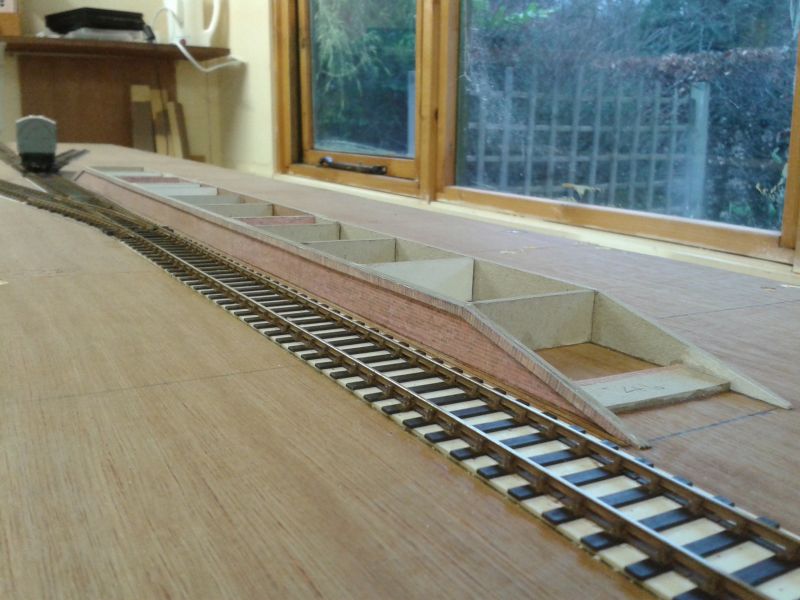
Before getting bogged down in the chore of ballasting, I decided to glue the Scalescenes platform walls in place. This is how the card walls look tonight, groaning under the combined weight of whatever I could lay my hands on…

Next job will be to add the ballast. Deep joy!
Terry
 Last edit: by col.stephens
Posted

Full Member
Staying on the thread Kevin.
Posted
Full Member
Thank you Kevin, very nice of you but you had better reserve judgement until it is finished.
Best wishes,
Terry
Posted
Full Member
Best wishes Kevin
Staying on the thread Kevin.
Posted

Site staff
I think Kevin, you purchased a lemon - looked at the item - it is for weathering tank tracks. But with care and not leaving on the rail tops or the inside curvature of the rail head, it may do the job., he had sold me “enamel track wash†by A K , more for war gamers. I think? Have you either seen this or used it? Best wishes Kevin
Ron
NCE DCC ; 00 scale UK outline.
NCE DCC ; 00 scale UK outline.
Posted
Full Member
Staying on the thread Kevin.
Posted
Full Member
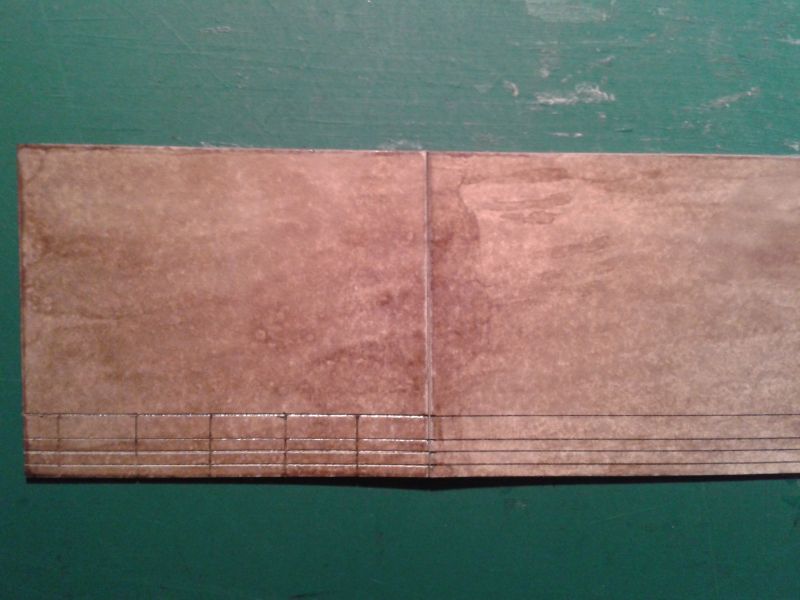
So, we have the Scalescenes platform awaiting a top surface…
The surface was cut from artists' mounting board and given a coat of french polish, mainly to harden the edges to stop them fraying with use. Once dry, I drew the edging stones with a pen and scribed the same.
Once the edging stones had been fully scribed, I gave the whole surface a spray with Halfords' grey primer. This was supposed to be just the undercoat but when dry, it appeared to me to be an ideal colour for the finished platform surface. It will require weathering of course. I quickly painted the edging stones with a slightly darker shade of diluted acrylic paint. The white line at the platform edge will be painted before the platform surface is glued in place. This how it presently looks…
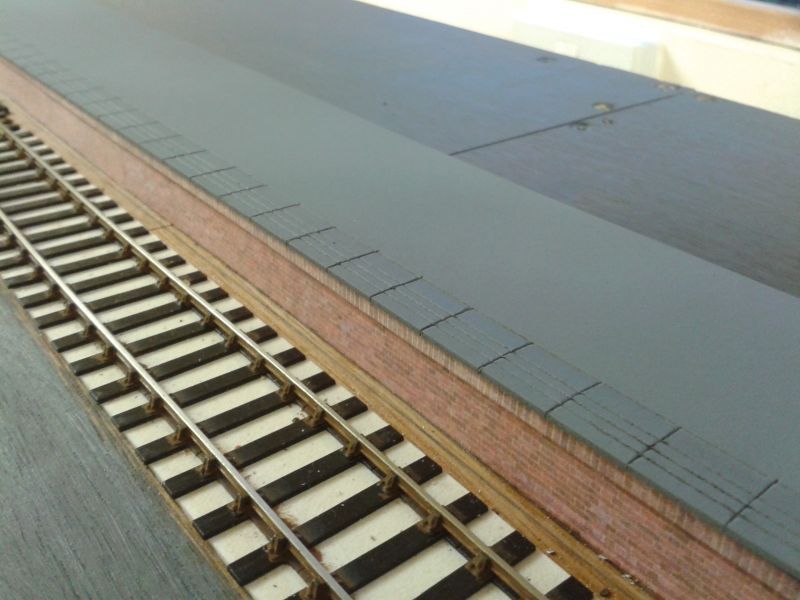
You can also see from the last photo that I decided to give all of the baseboard surface a quick coating of grey/brown acrylic paint. Unfortunately, the grain of the plywood surface is still very prominent so I will have to think of another way to camouflage the baseboard surface where it is not covered by other scenery.
Thoughts… how to install uncoupling magnets under track which has already been glued down, because somebody wasn't thinking far enough ahead…duh!
More soon.
Terry
Posted
Full Member
Staying on the thread Kevin.
Posted

Legacy Member
I must say i like that finescale oo track really does look pucker i know you can buy the finecale point kits but i would imagine they take some time to put together.
I know if i did not already have loads of track i would certainly probably use that track.
Brian
OO gauge DCC ECOS Itrain 4 computer control system
Posted
Full Member
Re hiding the ply grain Terry, you could paint a sloppy plaster mix over it - when dry, it would look like caked earth. You'd just need to paint it with your chosen base colour which in turn, would probably stop any future crazing.
Re the uncoupling magnets - been there, done that !!!:thud Alas, I didn't learn anything from the experience……….. :oops: :oops: Why not have a look at cube magnets ? Perry did an excellent thread on them (for Kadees) - it's there somewhere ………………….. :roll:
On edit - forgot to mention it but the platform looks brilliant. I'll bet you could stand on that. :doublethumb
'Petermac
Posted
Legacy Member
Brian
OO gauge DCC ECOS Itrain 4 computer control system
Posted
Site staff
http://yourmodelrailway.net/view_topic.php?id=8481&forum_id=6&page=1.
Re the uncoupling magnets - been there, done that !!!:thud Alas, I didn't learn anything from the experience……….. :oops: :oops: Why not have a look at cube magnets ? Perry did an excellent thread on them (for Kadees) - it's there somewhere ………………….. :roll:
.
Ron
NCE DCC ; 00 scale UK outline.
NCE DCC ; 00 scale UK outline.
Posted
Full Member
'Petermac
Posted

Full Member
I too like the grey primer as a base coat or even top coat when appropriate.
Last edit: by Marty
Posted
Full Member
Staying on the thread Kevin.
Posted

Full Member
As to covering the plywood, there have been sound suggestions - it depends what finish you want. an alternative is to give the plywood and good covering in water, then sprinkle fine plaster over it through a sieve, and let it dry thoroughly. Then paint in your desired colour. I have used this old method for anything from dry dusty roads to tarmac….
As to the magnets…. I kept telling myself, "Don't glue the track down until you've worked out the magnets, Don't glue the track down until you've worked out the magnets….. Too late, I've glued the track down!" I think iit might be a rite of passage!
Michael
1 guest and 0 members have just viewed this.