Newton Regis, it'll never be finished, hopefully!
Posted

Full Member
A GWR journey through the 1920s and 30s
Hi Peter and thanks for your kind words. I always strive to do better than I’m capable of, but must admit that, at least for now, I’m pleased with the results produced, all thanks to a few hours with Mick Bonwick at Pendon (see his blogs on RMWeb).Good to know that you’re aware of the need for a cleaning regime, but worry not, as provided you do a minimum after every session, approx. 5 minutes, including cleaning the needle, the need for a more intensive strip-down is reduced, although you should do this periodically and when you won’t be spraying for a while. You’ll know if you’ve done it right when you next pick up the airbrush and it works! In short though, you’ll be spending much more time using the airbrush than cleaning it, provided of course you work smart and don’t waste time like so many I see on YouTube who make it up themselves without using the basic references of logic and common sense to guide them.
I’ll put a quick guide together based on my learning experiences at Pendon and subsequent practice, with the intention of getting as many people who want to, to begin to use that airbrush hidden away at the back of the tool chests. I’m no expert though, just a serious modeller who’s learnt from real experts in an inspiring environment . . . which is why I’m going back soon to learn more from Tim Shackleton.
Bill
PS, everyone deserves a visit to Pendon Museum, near Oxford, full details which are available here:
https://pendonmuseum.com/
 Last edit: by Longchap
At 6'4'', Bill is a tall chap, then again, when horizontal he is rather long and people often used to trip over him! . . . and so a nickname was born :)

Posted
Full Member
So here is something a little different for me, a GWR modeller, in the form of a very fine Hornby LMS horse box, acquired new from Hattons for just £8.00 a few months back. I’m on the lookout for an open cab Fowler 1F as well, but that’s a different story!
Out of the box, it has plenty of detail, including separate handrails and a good representation of the emergency brake rodding, but far too new and plastic looking.
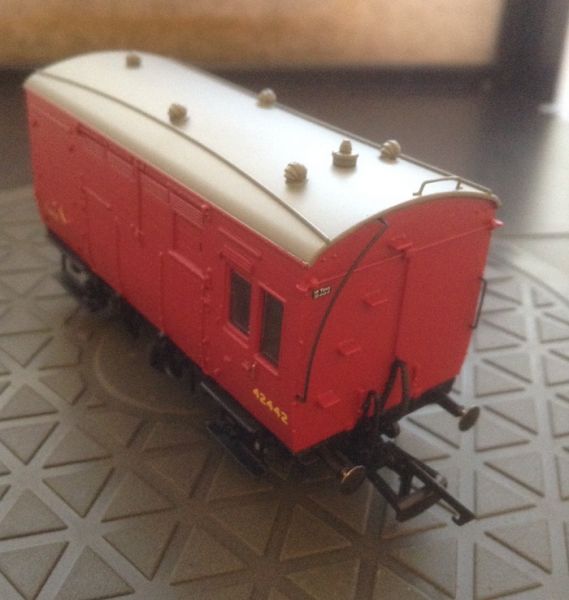
So after a few minutes, it’s looking far more workmanlike. Apologies for the poor lighting.
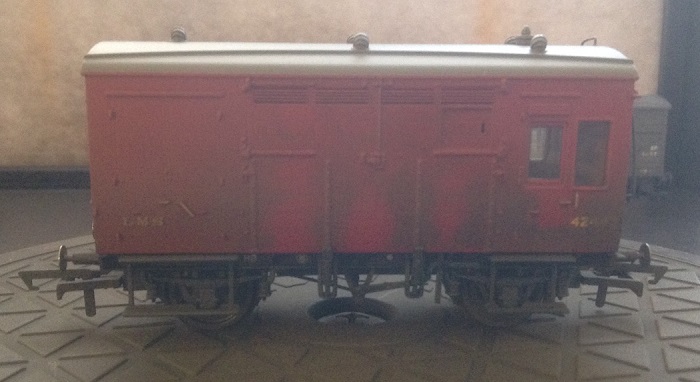
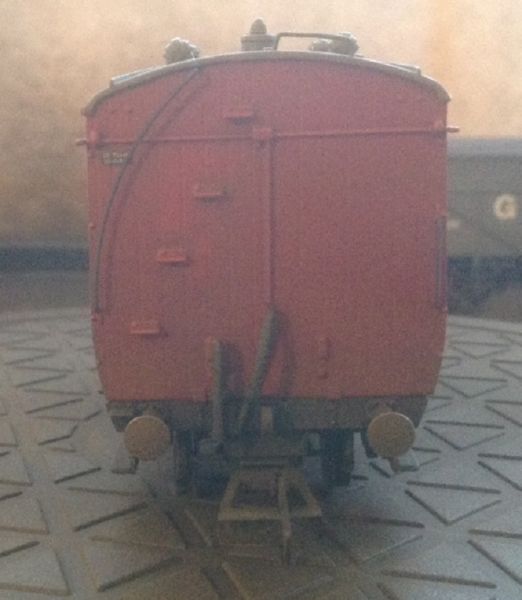

I used just two colours, both well thinned Humbrol enamel and increasing the quantity of black after spraying the underframe. I’ll only be adding a more sooty mix to the roof to complete for now.
The next excitement will be a visit to Kernow Model Rail Centre’s new branch in Guildford and then up to Pendon for another course on weathing.
Cheers for now from the sunny Loire Valley,
Bill
Last edit: by Longchap
At 6'4'', Bill is a tall chap, then again, when horizontal he is rather long and people often used to trip over him! . . . and so a nickname was born :)
Posted

Full Member
I agree its a lovely model, even if I did pay full price :sad:, with some superb detailing. Unfortunately the red bodywork does stand out and make it look toylike (which I suppose in fairness…it is). I have weathered mine a couple of times but have not managed to tone it down enough…….I think I need to be bolder. Yours looks just right.
Cheers
Posted
Full Member
Anyway, it’s good to be back home following almost a week in the UK for optician and dental appointments, a progress visit to see the latest engine rebuild for my oldest car, collect several boxes of ebay railway purchases and then spend a splendid few days in historic rural Oxfordshire to learn more weathering techniques from Mick Bonwick and Tim Shackleton. I’d met Mick before and read some of Tim’s books and these cheerful chaps provided a truly rewarding time and expert advice and tips in the work room.
We were invited to bring a project, or projects of our own choosing to work on and I knew the time had come to put some more expensive stock in the spray booth and trust that I’d learned sufficient not to make a mess of them, well not a complete mess anyway, so out came some locomotives.
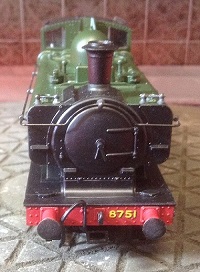
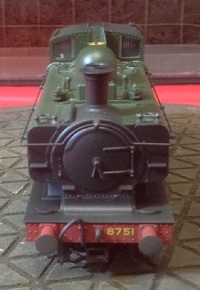
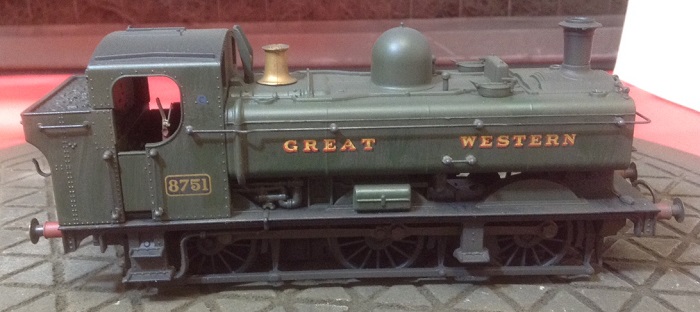
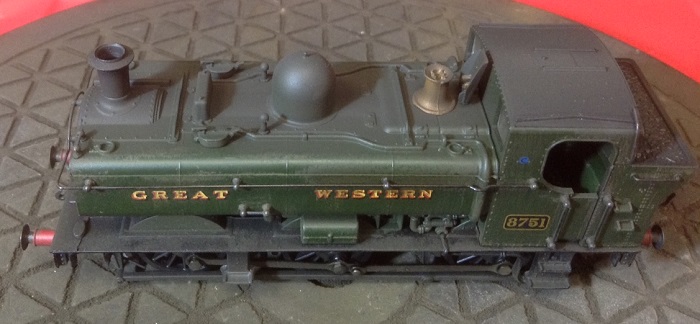
I’d brought a small selection and selected a smaller item as my first foray into loco weathering in the form of a ubiquitous Pannier, a Bachmann 57XX, actually sourced as used from Hattons, as evidenced by the over handled handrails, which hopefully would be rectified in the weathering process.
Here’s the before images, a fine model, but somewhat toy like and unbelievable on the layout.

To begin, I gave my Humbrol matt leather and matt black enamel tinlets a thorough full two minutes stir with a purpose made flattened scooped stirrer, although one minute with a battery milk frother works as well. This stage should never ever be skipped, or reduced in length with enamel paints, as every trace of pigment needs to be completely incorporated, otherwise you are likely to get spitting and eventually blocking of your airbrush, which will need stripping, cleaning and reassembling, so this stage saves time in the long run, if carried out correctly.
I spray thin mist layers to build up the desired weathering effect, starting with the undercarriage and motion using a thinned 50/50 mixture of white spirit to paint (no, you do not need expensive thinners and enamel thinners in particular contain undesirable solvents which you do not want inside your lungs).

This first underframe layer has more matt leather than black, approx, 60/40, representing accumulated track dirt, the mixture containing progressively more black as I work up the tank sides and onto the top and cab roof.

The photos above represent three mist layers, together with some initial rain streaking to the tank and cab sides. Without streaking, the weathering, while graduated, looks unconvincingly uniform, but the effect of rain, water spillage and footfalls on footplate, steps and buffer shanks add much realism of an engine in service.
Streaking is achieved after letting the enamel dry for 10 to 15 minutes, just the right time for a cuppa. With a flat half inch brush in hand with a few drops of white spirit dripped onto the bristles and almost dried off on kitchen paper, place the brush almost flat on the top of the tank sides and draw it firmly downwards. The enamel paint can be worked for quite a while this way and you can remove as much paint as you wish and easily work ‘dirt’ into corners, a line above the footplate, into details, around rivets, etc.

For a more heavily worked look, I’ve sprayed some almost all black (90/10) coat over the tank top and cab roof, which is as much work with the airbrush as I want, but will add some powders for extra sooty smoke deposits on the smokebox top and cab roof.
I haven’t fitted the detail pack yet, but will do so, duly pre-weathered, after I add crew, coal, lamps, tools, etc. I’ll demonstrate a similar approach, but with a subtle twist for the other loco I weathered at Pendon in my next post.
Oh, I think I got away with those dodgy handrails!
A little more soon,
Bill
Last edit: by Longchap
At 6'4'', Bill is a tall chap, then again, when horizontal he is rather long and people often used to trip over him! . . . and so a nickname was born :)
Posted
Full Member
Now for the detail…….did you mention Fire Irons and engraved plates?
Best Wishes
John
Posted
Full Member
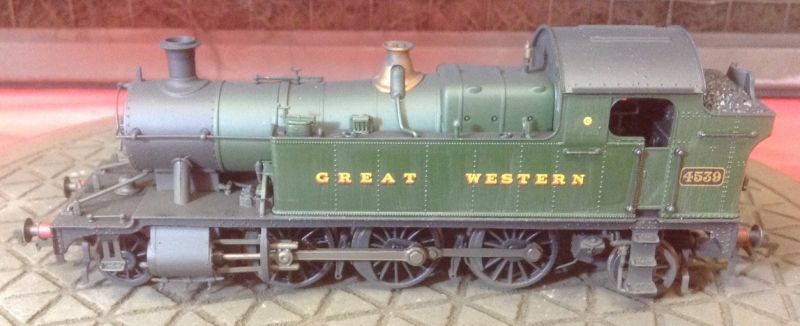
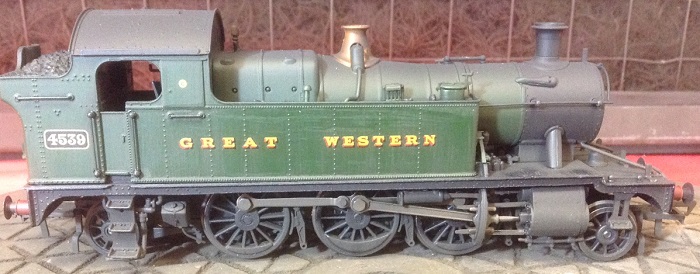
Now here's a lovely loco we GWR types know well and one of my favourites. This is a superbly running 45XX small Prairie, again by Bachmann and which received much the same treatment as the Pannier. Whilst the previous Pannier is destined to be rostered mainly for freight, 4539 will handle local branch passenger stock, so as photographs reveal, was often cleaner than freight stock. This will not be a fastidiously cleaned loco, but will show signs of determined cleaning of the tank sides from oily rags. The two principle differences between the weathering of these two locos will be reduced heavy sooty deposit to 4539’s upper works and cleaner tank sides.
The photos tell a similar story to the Pannier build up of layered mist coats, streaking, etc
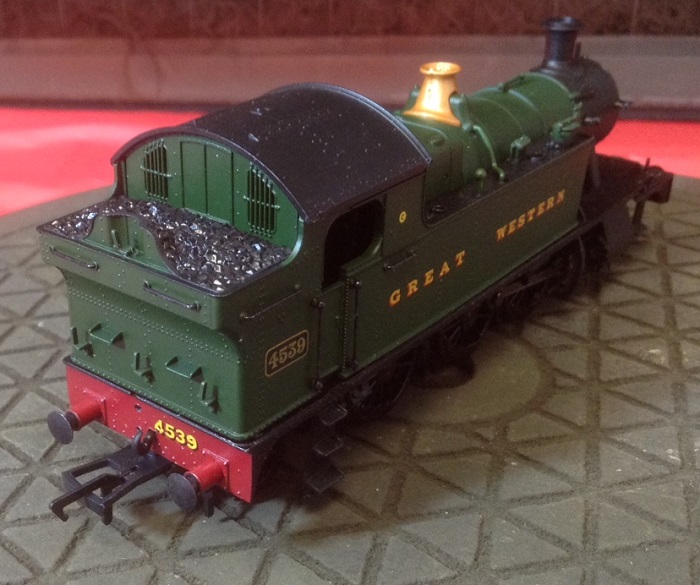
Right out of the box
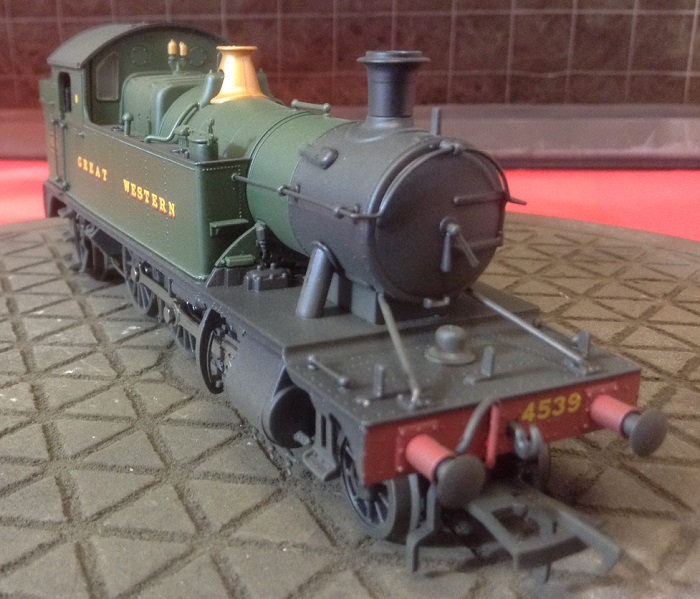
All over light warm mist first layer

Darker second layer with smoke to top surfaces
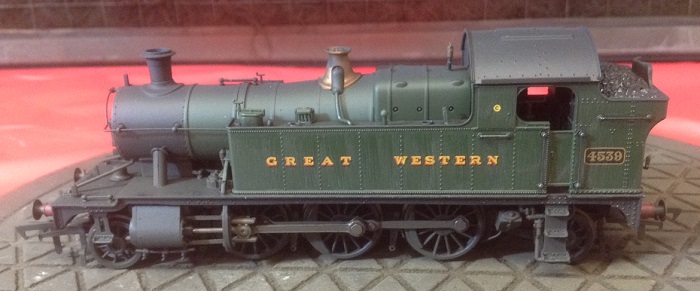
Streaking to vertical surfaces
The trick for representing an oily rag spit and polish is to apply a thick coat of neat floor polish, Johnson’s Kleer in fact, now sold under the name of Johnson’s Pledge (see my photo gallery). Once applied, just leave it well alone and go have another cuppa and when you return, the surface levels out to a subtle, gentle sheen. If you want to represent a much cared for loco, or perhaps one prepared for a special run, apply a thin second coat.
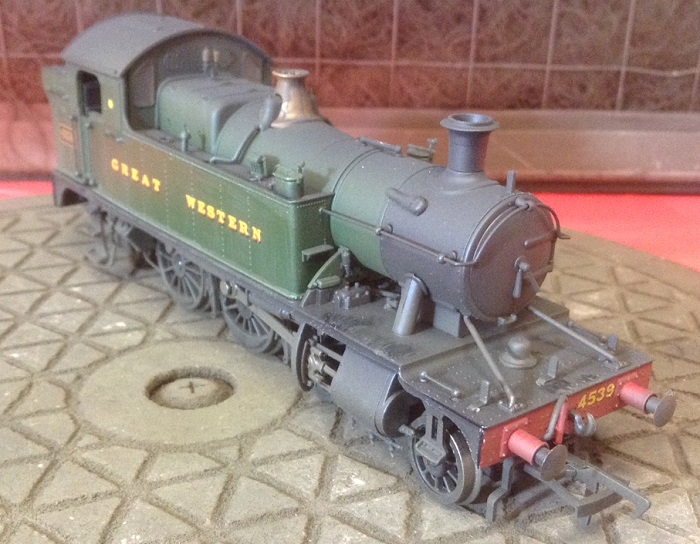
Again, finishing touches have yet to be added.
I hope this helps demystify what many consider to be one of the hobbies’ dark arts. It is not and once you’re confident in using and looking after your airbrush, you’ll realise that weathering stock is a pleasure and doesn’t take very long.
My future intention is to follow a regime of weathering to all visible parts of my modelled environment, as everything not indoors is subject to all the natural elements and manmade influences.
Happy modelling,
Bill
Last edit: by Longchap
At 6'4'', Bill is a tall chap, then again, when horizontal he is rather long and people often used to trip over him! . . . and so a nickname was born :)
Posted

Full Member
Regarding my fear of a lifetime of airbrush cleaning, how long did you leave it between "washes" and did you clean the airbrush each time.
My thoughts are, it takes probably 30 seconds to spray a wash. 5 minutes to mix it up and 30 minutes to clean the darned airbrush. That makes 35 minutes downtime for a 30 second job …………………for each pass !! :???:
I like the idea of airbrushing very much but I do want to actually paint something, not just clean the machinery. …………..
'Petermac
Posted
Full Member
It's nowhere near as bad as you think Peter, just a question of a smart work approach. The reason for starting at the bottom of the loco and working up, is that you can add more thinners and black to what's left in the colour cup of the airbrush, as you work up the loco with a darkening hue.It's looking very good Bill. :thumbs
Regarding my fear of a lifetime of airbrush cleaning, how long did you leave it between "washes" and did you clean the airbrush each time.
My thoughts are, it takes probably 30 seconds to spray a wash. 5 minutes to mix it up and 30 minutes to clean the darned airbrush. That makes 35 minutes downtime for a 30 second job …………………for each pass !! :???:
I like the idea of airbrushing very much but I do want to actually paint something, not just clean the machinery. …………..
As soon as the paint is atomised, it starts to dry, so when I finish the first pass along the side of the loco, below the footplate in about 4 seconds (an inch per second from about 4 inches away is a good enough rule of thumb), I turn the turntable through 90 deg and spray the front, then spin and spray the other side, then the back. This uses only a tiny amount of paint and I now repeat above the footplate and again upwards and do the top of the loco as well.
I was using my small 2ml colour cup with these two examples, so then used a pipette to put another 10 drops of white spirit in the cup, then 5 drops of colour. The colour this time though had a tad more black than the first mix and then a tad more for the top surfaces and cab roof. I use a paintbrush to transfer the colour to the cup and also to mix it in the cup as well.
There are some detail tips to do while you have the initial warmer colour, like touch a 9 volt squarish battery to the wheels to turn the motion to allow you to spray behind the parts previously covered by the rods, etc. I'm sure you get the idea. By the time this is done, even with my small cup (9ml is a more normal size for many airbrushes), it's time for a cuppa, so I empty whatever paint is left from the cup and refill with white spirit and spray this through into the cleaning pot, put a few drops of thinner back in the cup, place the brush on the stand and go have my tea for ten minutes, after which, the paint has gone off sufficiently for manipulating with the flattie brush and a trace of solvent. The enamel paint will remain workable for about an hour.
So to put 4 or 5 mist coats on the loco took perhaps 5 or 10 minutes (if you are chatting to someone) and involved no cleaning of the airbrush whatsoever.
Let me know if you are ever likely to be up this way and pop in for some practical experience.
Always happy to help, so keep the questions coming and I'll soon have you fondling that shiny airbrush. Go on, you know you want to!
Best,
Bill
At 6'4'', Bill is a tall chap, then again, when horizontal he is rather long and people often used to trip over him! . . . and so a nickname was born :)
Posted
Full Member
As autumn heads toward winter and I’ve winterised everything externally, I can finally get back to some railway modelling. I’ve installed a 4 metre wide insulated roller shutter door inside the ancient rustic and largely knackered timber doors on the workshop, which is now always cosy and warm, yet delightfully cooler to work in during the hot summertime. However, I still need to prepare and move on at least one of the cars to make space for the railway room. In the meantime, I’ve set up a worktable in a cosy place and was contemplating what to work on.
During the last weathering course I attended, we touched on the use of pigment powders for use in weathering and I wanted to see how effective they could be, following on from airbrush weathering as I want to enhance some of my airbrushed stock (see earlier posts above) with powders.
So earlier today, I dug out some Oxford Diecast vehicles, with a view to make them look more lifelike and realistic for the modelled environment.
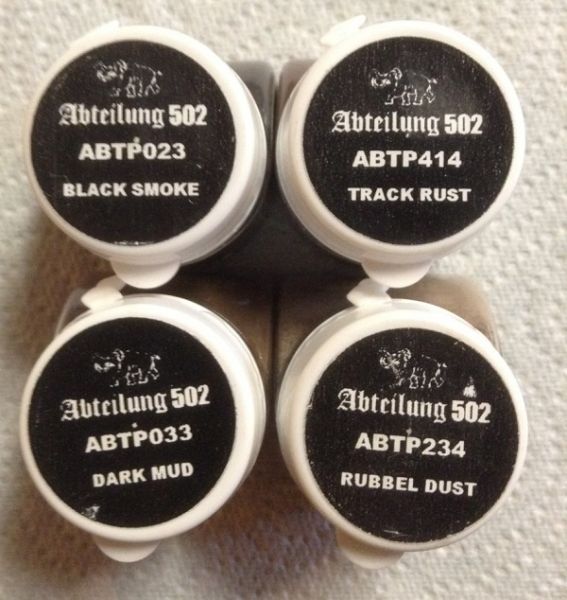
Just like airbrush weathering, I will be using a limited range of colours and am relying on the proven sage advice from Mick Bonwick, who suggested the following four powders will cover pretty much any weathering project, although only dark mud would be used today:
Before any powder can be added though, the bodywork needs to receive a dark wash and the high gloss finish reduced. Although most cars, commercials and other machinery will have had a high gloss finish, not only will this have faded with age and a hard life, but the gloss finish at small scale will simply not display the high brilliance as on the full scale prototype, or indeed as that applied by the model manufacturers, so a matt varnish will be required.
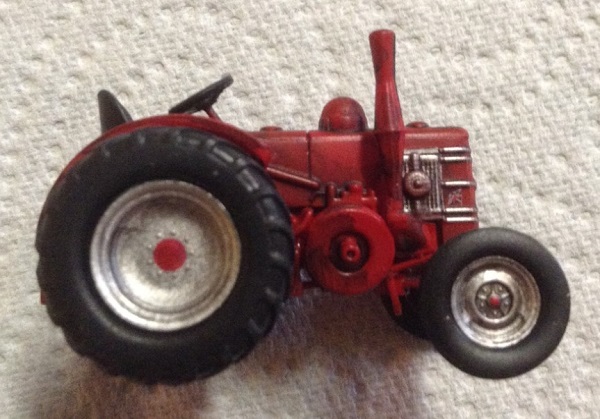
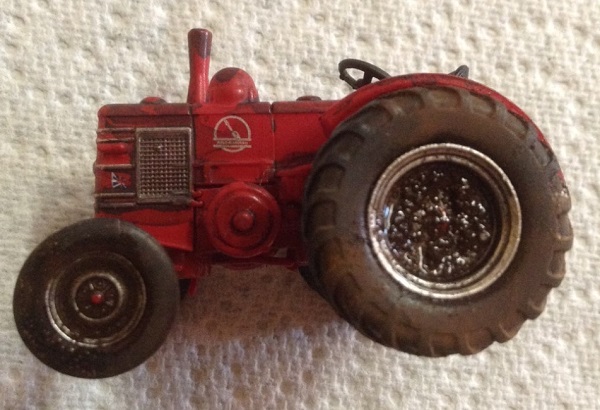
So here is our test piece, a very bright red Field Marshall tractor, new and shiny straight from the box:

https://www.hattons.co.uk/231478/oxford_diecast_76fmt003_field_marshall_tractor_in_red/stockdetail.aspx
An inexpensive model, but one needing to look like a workhorse, so first a dark wash, which brings out the detail, as well as tones down the showroom condition.
I used an acrylic dark grey wash, applied with a rigger brush, making sure it gets into all the nooks and crannies. Acrylic paint dries so much faster than enamel, which is just what I wanted to speed the process and I was able to remove most of it from where is wasn’t wanted with a cotton wool bud, before applying subsequent coats to build up the effect desired.
Washes take much easier to a gloss finish, readily running into and around detail so much better than on matt surfaces, so Oxford’s over glossy surface is perfect for this first stage.
Dark washes complete, next comes a quick coat of Testor’s Dullcote from a rattle can, left 20 minutes to dry before getting a tad more messy, as the wheels, tyres and lower bodywork are generally muddied.
The idea, much the same as applying weathering colour with the airbrush, is to add small quantities of pigment in layers to gradually build up the patina to the required degree.
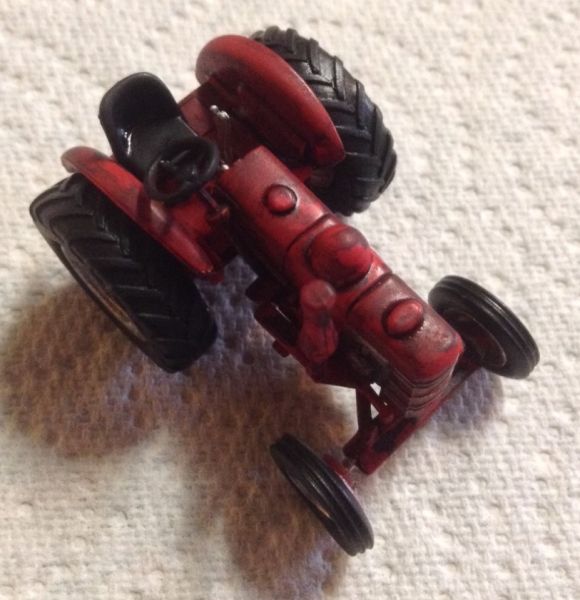
I shamelessly followed Mick Bonwick’s instructions and soon had a pleasing look, so turned my attention to the wheels. This required a more liberal quantity of pigment placed and arranged in the wheels with the tractor laid on its side. When you have the mud as you like it, add one drop of white spirit with a trusty pipette. This immediately turns into a right mess, so best forget it and make and enjoy a brew.
A right mess!
More dark earth pigment is brushed over the tyres and layered about the lower parts, mudguards and the floor. I didn’t hang about for the wheels to fully dry to get a photo, so below is as I left it earlier.
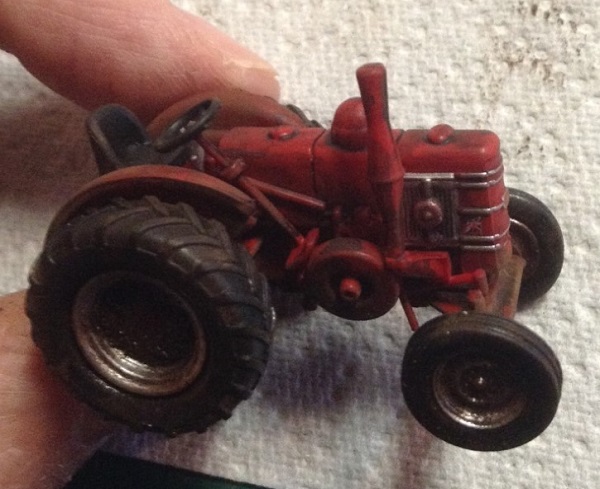
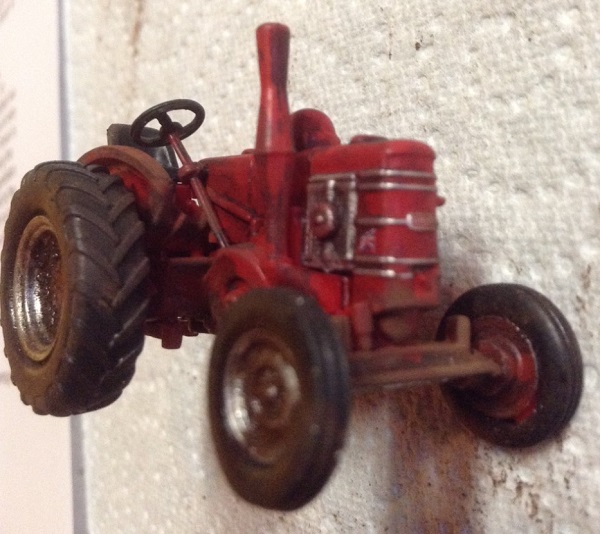
The front of the tractor is out of focus, but the rear wheel is almost dry!
I’ll take a last look at the Field Marshall tomorrow and probably add a few more touches. But this is pretty much done now. The model is actually smaller than these pictures suggest and the whole process is really quick to do. Just as well, as I seem to have accumulated quite a few road transport items and that’s not counting the many kits.
What fun!
Bill
Last edit: by Longchap
At 6'4'', Bill is a tall chap, then again, when horizontal he is rather long and people often used to trip over him! . . . and so a nickname was born :)
Posted

Site staff

By the way, a nice job Bill. :thumbs
Ron
NCE DCC ; 00 scale UK outline.
NCE DCC ; 00 scale UK outline.
Posted

Full Member
Michael
Last edit: by Headmaster
Posted
Full Member
Do you dribble the white spirit on to act as a fixative for the weathering powder?
Best wishes
John
Posted
Full Member
We see plenty of well kept tractors in and about the village, but plenty of very well used examples as well, where their patina tells a story of decades of still useful service!
The drop of white spirit does two things John, first by levelling the powder to the irregular surfaces of the wheel, while also as you surmised, fixing it to the surface.
The tractor and also commercial vehicles usually display more signs of use than private cars, so I'll use much less powder on cars. In fact, if one has a large quantity of cars to tone down, it's amazing just how much 'normal' they look with just a coat of Dullcote.

Consider the mechanical horse above. Not a private car, but all I've done is a minimum of dark wash to the wheels, window frames and the rear of the corrugated cab, before the lightest mist of Dullcote.
The matt finish works wonders and you don't need to waste time to mask windows. Just wait until dry, then burnish the glazing with a blunted cocktail stick or similar, to clean the dirty glass where desired.
Best,
Bill
Last edit: by Longchap
At 6'4'', Bill is a tall chap, then again, when horizontal he is rather long and people often used to trip over him! . . . and so a nickname was born :)
Posted

Full Member
I have enjoyed seeing your progress thus far. Good work. Will we be able to catch up in person at the Southampton Show at the end of January?
Mark
MarkL71A,
Chandlers Ford
Chandlers Ford
Posted
Full Member
Did you manage to sneak any inappropriate stock into the layout at Fareham? I'm there myself for a few days as it happens, just poor timing for the show!
See you soon,
Bill
Last edit: by Longchap
At 6'4'', Bill is a tall chap, then again, when horizontal he is rather long and people often used to trip over him! . . . and so a nickname was born :)
Posted
Full Member

The method follows pretty much the same way outlined with the Field Marshall tractor above. These Lledo models may be on the basic side, but have decent decals and I wanted to see how easily their appearance could be improved in a short modelling session. As powders would be used after a detail wash and Dullcote, I decided to do the pair of steam lorries and a pair of cars at the same time, thus reducing the lingering smelly effects of the spray varnish, thankfully a rapid process.

The very first task was a quick coat of bright red acrylic to the wheels, like all GWR mechanically powered commercials seem to have been turned out with. I didn’t need to be too careful or accurate about the painting, as the wheels received a dark wash and powders.

I varied the chassis treatment from that on the tractor, by using two types of rust, the first with the ATK powder, sparingly applied, being quite red, then some Humbrol Track Rust to tone it down and give some variation.
The cab steps are on the heavy side and may well be replaced, but I’ll definitely be adding glazing, as soon as I track down some suitably thin acrylic sheet.
STOP PRESS: I was just about to post this when I saw the latest decorated samples for the Dapol Mogul and they look lovely: https://www.hattons.co.uk/newsdetail.aspx?id=495
Best,
Bill
Last edit: by Longchap
At 6'4'', Bill is a tall chap, then again, when horizontal he is rather long and people often used to trip over him! . . . and so a nickname was born :)
Posted
Full Member
Unfortunately, that also means I cannot construct the railway room at the end of the workshop, as I need a shed-load of timber and plasterboard to even get started.
So I’ve moved a work table and some tools into a favourite room above one of the holiday cottages and am taking stock of the multitude of kits stashed in boxes, trunks and bags from several locations. So far I’ve been gathering up wagon kits and knew there would be a few, but not the 33 plastic kits ( including a useful 15 from Coopercraft, mainly opens of several diagrams) and then there are some dozen more in white metal and brass.
Although this confirms my kit hoarding instinct is probably as strong as anyone’s, if I keep finding more unmade kits, I’ll become overcome by the prospect of never being able to build them all.
So before I gather the coach and loco kits together, for sanity sake I need a plan. Among the timber offcuts pile, I found a piece of 9mm plywood, some 125x600mm long which will form the basis of a programming track and a home for the rolling road, so I can easily run-in and programme an as yet unknown number of locomotives. I suspect however, I’ll need to order more decoders! I’ll make a start tomorrow and also select some wagons and get the Clifton Downs trailer back onto the work bench 😊
Please stay safe everyone and enjoy some modelling and other activities we seldom have time for.
Best,
Bill
Last edit: by Longchap
At 6'4'', Bill is a tall chap, then again, when horizontal he is rather long and people often used to trip over him! . . . and so a nickname was born :)
Posted
Full Member
During this lock-down, I ought to go through my stock and decide what to move on - the current layout is much smaller than my last so the big inter-city trains will have to go I fear.
Speaking of the current situation, it seems you won't have to move your work table out of your holiday cottages for some time yet……………… Have you had many cancellations for this season - if in fact, there is a season !!
'Petermac
Posted

Legacy Member
If not those wagon kits will keep you busy.
Plus programming decoders properly will certainly burn a few hours getting locos running exactly as you want them to.
keep safe
Brian
OO gauge DCC ECOS Itrain 4 computer control system
Posted
Full Member
We’ve had very few bookings this year, but including a lovely couple bringing their 1932 Austin Ulster to race alongside our own around the village streets in July. Unfortunately, I don’t imagine the event will happen this year, as it’s just too close, but as yet has not been cancelled and we suspect we’ll lose all our 2020 bookings. We will however, continue with our glasses half full and enjoy the summer with hopefully plenty of catch up entertaining with our friends.
Hi Brian and thanks for your well observed comments. If I thought we really needed to get the cottages completely up to spec, I would indeed make some orders for merchant delivery, but I’m now relaxed with the situation, but as an added project this year, we now have an outbuilding to reconstruct, following a fire frying the roof and all internals and the fireman kicking in the doors and window for rapid access. As it serves the swimming pool, it’s perhaps just as well our season will be a quiet one, as it cannot be rebuilt in time with the current difficulties.
I’ve now almost finished the loco schedule, so can soon decide on decoder strategy and then pick some brains for recommended CV settings.
Keep calm and on the right track 😊
Bill
Last edit: by Longchap
At 6'4'', Bill is a tall chap, then again, when horizontal he is rather long and people often used to trip over him! . . . and so a nickname was born :)
1 guest and 0 members have just viewed this.