Trackwork
Posted
#238220
(In Topic #13179)

Full Member
Using a Razor Saw versus Dremel to cut track at baseboard gaps
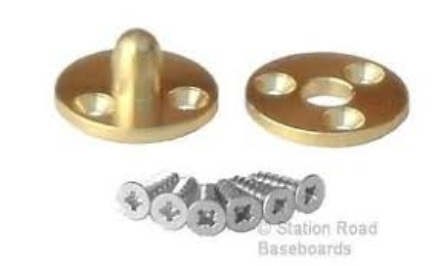
Hi All Following on from my fiddle yard thread , I used toggles to secure the two boards together , fitted the copper clad, although I now think that brass screws could have been superior ? soldered the rails .Anyway so far so good, but, cutting the track over the joint isn’t going so smoothly . Would a Dremel have been better? Or maybe the Xuron track cutters ? It isn’t too late to begin again, but, it would be a PITA. As it is or was before I started cutting the rails, the wagons rolled along without a discernible bump at the joint. Best wishes. Kevin
Staying on the thread Kevin.

Posted

Site staff
I do assume that the rails did not alter from being level after you cut them? And how wide is the gap after you cut the rail - about 1-2 mm or 1/16th maximum ?
Ron
NCE DCC ; 00 scale UK outline.
NCE DCC ; 00 scale UK outline.
Posted
Full Member
Staying on the thread Kevin.
Posted

Legacy Member
I cant say if a Xuron cutter is any better as i have never used one i would guess its the same as any cutter when brand new great but after a while big burrs and distorted rail i would guess
Brian
OO gauge DCC ECOS Itrain 4 computer control system
Posted
Full Member
Staying on the thread Kevin.
Posted
Legacy Member

Brian
OO gauge DCC ECOS Itrain 4 computer control system
Posted

Full Member
Cheers MIKE
I'm like my avatar - a local ruin!
I'm like my avatar - a local ruin!
Posted
Full Member
 Last edit: by Passed Driver
Staying on the thread Kevin.
Posted

Full Member
Dremel with a 90 degree head attachment and a thin cut-off disc. John (brossard) has a useful tip, lay flex track across the gap, cut, move the rails in to the desired gap, fix ends using copper clad or the heads of brass screws or good old epoxy.
Nigel
©Nigel C. Phillips
Posted
Full Member
Hi Nigel. Thank you . When you say “ Fix ends “ and “ Or good old epoxy “ does that mean you don’t prefer solder?I have already soldered the rails directly to the screws, but, of course if this fails I am open to all polite suggestions.Hi Kevin,
Dremel with a 90 degree head attachment and a thin cut-off disc. John (brossard) has a useful tip, lay flex track across the gap, cut, move the rails in to the desired gap, fix ends using copper clad or the heads of brass screws or good old epoxy.
Nigel
I am not keen on the idea of purchasing a Dremel for one job though. There is an “ old tip “ that I have read about placing a sheet of cardboard between the two boards, soldering the rails, and cutting them. And when one removes the cardboard the rails are closer together. Best wishes. Kevin
Staying on the thread Kevin.
Posted
Full Member
It's all in the weak link. Lay track to the edge and the rail end is held in place by the chairs and whatever was used to glue the sleepers down. Fine for stationary layouts, anything modular that gets moved around will normally need something a bit more robust than white glue or sealant. Some observations based on (often bitter) experience with modules:
Copper clad always sounds like a good solution until the copper delaminates. I have had this happen when using Xurons. Best to do the last 2-4 sleepers with copper clad, not just the last one, and avoid Xurons. The torque generated will flex and buckle track. There are some neat commercial copper clad ties/sleepers available for HO that I have used with great success. $$$ though.
Brass cheese head screws are robust, the height can be adjusted, but the last sleeper will need patching in. The down side can be the smaller contact area compared with copper clad.
Epoxy used for gluing the last few sleepers and the rails to the chairs is more robust than pva or CA. The underside of the sleepers needs keying.
The weak link is the chairs. Code 100 HO/OO chairs are robust tabs, once you get down to code 83 or 75 not so. A knock is more likely to displace the rail than the sleeper unless soldered or spiked.
As long as the sleepers are firmly attached rail spikes at the ends work well.
Most modular systems use removable sections of track, anything from 2" to 8" long. Weak link is the relatively loose rail joiners. Long sections need a power supply.
The gap left by a cut-off disc does not affect running.
What do I do now? For straight track, to the edge then back a tad so when the board is stood on edge the rail is not quite in contact with the floor. Think paper sheet thickness. Two copper clad ties on each side epoxyded to a piece of wood glued to the top, not to the cork underlay. I use single sided copper clad and rough up the bottom with # 80 paper. Rail spikes just in case (drill holes and epoxy). For curves I lay the track over the joint, solder to the attached copper clad, then cut with the Dremel. Most modular standards do not allow curves within 6" of the edge, and I try and avoid them at home. Most copper clad is thinner than regular ties/sleepers, I use wood glued to the baseboard not the underlay to get the correct height. Modules that travel need protection, I use a piece of thick corrugated cardboard taped over the ends.
You can avoid all of this by using track sections over the joint. Especially in fiddle yards where you do not need gravel.
just use what works best for you. We all have our own pet schemes.
Nigel
©Nigel C. Phillips
Posted
Full Member
Last edit: by Passed Driver
Staying on the thread Kevin.
Posted
Full Member
 and purchase the correct equipment to do the job of cutting the track “Over Baseboard Gaps†. Of course all safety equipment too. Best wishes. Kevin
Staying on the thread Kevin.
Posted

Full Member
I have a Dremel and use it often for a variety of tasks, even some model railway related. Please think very careful before you buy one as they can be very dangerous. They can tend to run away from the wary and spin at very high speeds, therefore they must be treated with great respect and a reasonable amount of skill to avoid a trip to A&E.
You also need a firm and very steady hand, otherwise the workpiece and operator are both in danger.
Dremels were not around when we all first started in model railways. In those days, I used a junior hacksaw and needle file to great effect and still do. I would recommend you try one again on your track before spending money on something you may find bites you!
Before hacksawing, clamp the track in a home made clamp before you cut it. My clamp was made with an offcut of timber batten about 2'' x 2'' x 3''. Cut with two shallow cuts with the hacksaw (or tenon saw for greater accuracy) across the width of the block, to hold the two rails down. Fit it over the track, press down with left hand, cut the track with the right, using the edge of the clamp as a guide.
Be safe and enjoy modelling at you own pace.
Best,
Bill
Last edit: by Longchap
At 6'4'', Bill is a tall chap, then again, when horizontal he is rather long and people often used to trip over him! . . . and so a nickname was born :)
Posted
Full Member
Staying on the thread Kevin.
Posted
Full Member
Staying on the thread Kevin.
Posted
Full Member
Bill is right, a Dremel is not for the faint hearted. Tidy workpkace, eye protection, work gloves. the disc/blade/bit in the pointy end is at 8000-36000 rpm. That said, I use mine for everything.
A piercing saw with metal blade works fine on nickel silver rail, which is just a fancy name for a brass alloy. I use one for the places where the Dremel will not go.
You can always use the Xurons (eye protection), cut slightly over long, then solder, file gently as required. Less noise and happy neighbors.
Nigel
©Nigel C. Phillips
Posted
Full Member
Staying on the thread Kevin.
Posted

Full Member
Every modeller will have their preferred preference when it comes to bridging the gap. What works for some will not work for others. This could be down to a lack of or different tools available.
I would say that it would be best to bridge the gap with straight track if you can.
That said I have 4 areas on my layout with gaps - needs must for access and window maintenance. Some have a slight curvature and some also have point work.
My preferred method is brass screws to which the track can be soldered to and the use of a thin disc in a Dremel.
Works for me but that said, no matter how accurate you may be with your alignment, sods law will dictate that there will be a slight rise after you have made the cut.
Get the file out or try and live with it. If it doesn't derail your stock then it may just be worth while living with it.
Gary
__________________________________________________
I am no expert but I do what I can, when I can, with what I can.
__________________________________________________
I am no expert but I do what I can, when I can, with what I can.
Posted
Full Member
Staying on the thread Kevin.
1 guest and 0 members have just viewed this.