Clifton Downs Auto Set from Ratio coach kits
Posted

Full Member
Fun with a razor saw
Hi Bill,i was going to add that you need to do the conversion with an old Airfix or Keyser model, the Hornby one is not amenable to hackery and butchery unless you want that big lump of a motor/chassis visible.The Phoenix kit at £80 is way beyond my zero-cost Keyser kit. I went through the differences in dimensions a few years ago when I was thinking about doing a conversion, the couple of mm difference is modelers license.
That engineer's square might be a tad heavy as a floor, and the MOW folks might have a few words to say on track clearances.
Nigel
©Nigel C. Phillips

Posted

Full Member

Posted

Full Member
Quite right Nigel, engineer's squares pack a lot of weight for their size, which is why they are such reliable assistants despite demolishing the loading gauge!
Thanks for your kind words Brendan. I'm enjoying this bash muchly, as it's required a fair amount of research, as well as modelling.
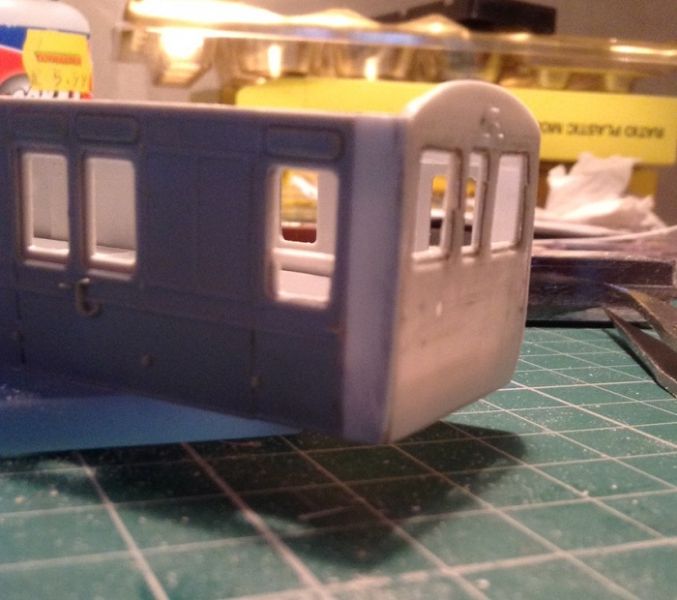
A major reconfiguration of very large kitchen furniture continues tomorrow, so progress is severely limited. Today, I just glued a strip of 30thou styrene to the lower inside part of the driving end. This will enable me to safely sand the tumblehome, as I chickened out of bending the end for fear of breaking it.
Bye for now,
Bill
At 6'4'', Bill is a tall chap, then again, when horizontal he is rather long and people often used to trip over him! . . . and so a nickname was born :)
Posted
Full Member
https://www.ebay.co.uk/itm/173215159122?_trksid=p2471758.m4704
The ebay item, which had been painted in BR black over GWR green, needed a good few days soaking in brake fluid to get it back ready for detailing and painting. Ebay madness struck pretty hard, as some uninformed modeler paid a staggering £53 for it.
There is certainly one born every minute!
Enjoy the modelling chaps and buy wisely.
Bill
 Last edit: by Longchap
At 6'4'', Bill is a tall chap, then again, when horizontal he is rather long and people often used to trip over him! . . . and so a nickname was born :)
Posted
Full Member
Posted
Full Member

I’ve left the rear end off until last, as it’s brass and needs careful fitting with superglue and plastic angle.
I’ve just noticed, as often happens with these close ups, that some bolection sections are loose, so it’s out with the CA again in the morning!
Cheers,
Bill
Last edit: by Longchap
At 6'4'', Bill is a tall chap, then again, when horizontal he is rather long and people often used to trip over him! . . . and so a nickname was born :)
Posted

Site staff
Cheers
Matt
Wasnie me, a big boy did it and ran away
"Why did you volunteer ? I didn't Sir, the other three stepped backwards"
"Why did you volunteer ? I didn't Sir, the other three stepped backwards"
Posted
Full Member
Still, nice work. This is inspiring me to get back to my own autocoach project
Posted
Full Member
I remember your autocoach project Brendan and good luck with that. I also have a clerestory version in mind myself using old Triang stock.
Bill
Last edit: by Longchap
At 6'4'', Bill is a tall chap, then again, when horizontal he is rather long and people often used to trip over him! . . . and so a nickname was born :)
Posted
Full Member
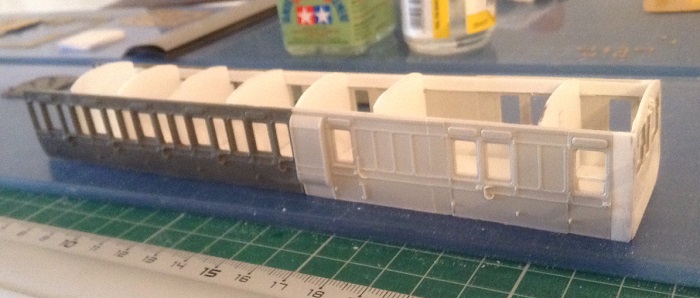
I trial fitted the roof with every partition to ensure the body shell retained its correct width. This is not normally a big issue with a straightforward kit build, but since the sides are an amalgam of several panels, it’s essential to keep them on the straight and narrow!
I need to find some blue-tac in the morning to hold two really tiny brackets in place though fixing holes in the rear panel while I glue them from behind, then I can fit the end and give the body a careful wash, ready for primer.
Oh and we had our hottest day of the year so far and enjoyed a lovely lunch outside on the river bank of fresh asparagus, fish with baby spinach and strawberries. Roll on summer!
Cheers,
Bill
Last edit: by Longchap
At 6'4'', Bill is a tall chap, then again, when horizontal he is rather long and people often used to trip over him! . . . and so a nickname was born :)
Posted

Full Member
My apologies for not commenting before. One could rightly say I was speechless….
 I am so impressed with your patience and attention to detail.
It will look splendid and of course quite unique……..it makes my out of the box autocoaches look very run of the mill.
Not sure if I am quite so impressed with your description of lunch……its rather wet here
Best wishes
John
Posted
Full Member
Posted
Full Member
I got some fine filler into some body gaps today, attached the brass rear end and prepared the underside of the floor for the front buffer, also a brass etch. Once these are fixed, it will be time for primer.
I did notice however, that the 3rd Class seating is a little tight for space and that the glazing will take a while to fit, as there are 17 separate pieces to fit and I better use Glue and Glaze.
The paint and glazing may however take a little while longer though Brendan, as I need to do more work away next week. I just hope the weather’s good enough for exterior decorating!
Bill
Last edit: by Longchap
At 6'4'', Bill is a tall chap, then again, when horizontal he is rather long and people often used to trip over him! . . . and so a nickname was born :)
Posted
Full Member
I fished out some packs of the old Ratio seat extrusions and smiled at the price tag from a few years back!
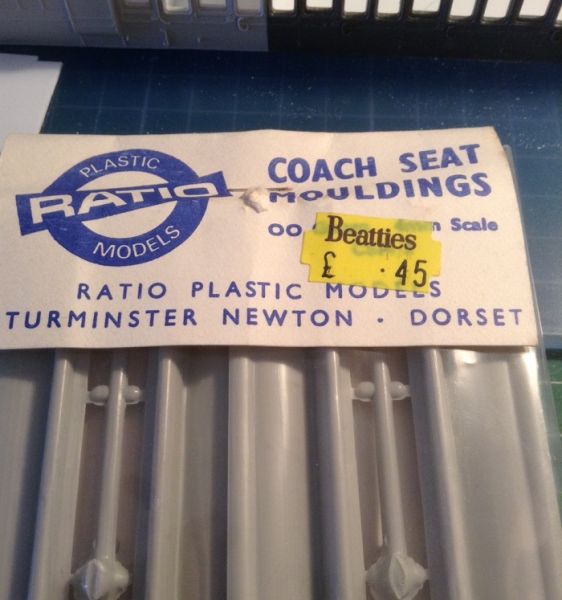
This is where a mitre block is the essential assistant to Mr Jack the Razor, to avoid ill-fitting seats. I commented yesterday on the cosiness of GWR 3rd Class accommodation, well this is where those seats need to undergo liposuction, the half millimetre per seat giving a valuable extra 3†between kneecaps in the cheap seats, although the real reason for reducing the thickness is to prevent seeing too much of the backrest through the windows and particularly the space behind the curvature of the seat back showing.
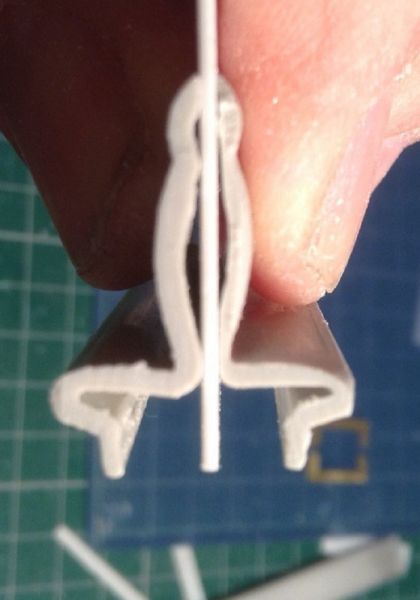
The left hand seat is straight from the pack, while the one on the right is in post-operative care. With ten seats to cut, file, shape and notch round the coach reinforcing strips, it takes a good ten minutes a seat, so like ballasting, it’s best to do it in more than one session!
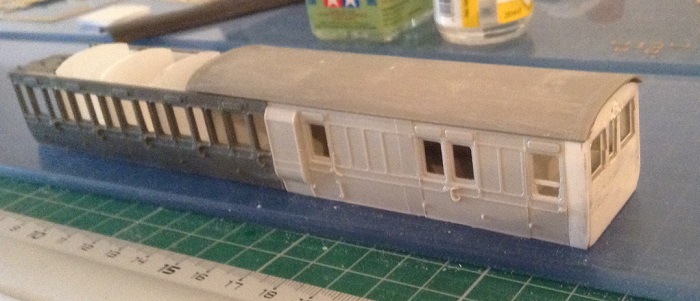
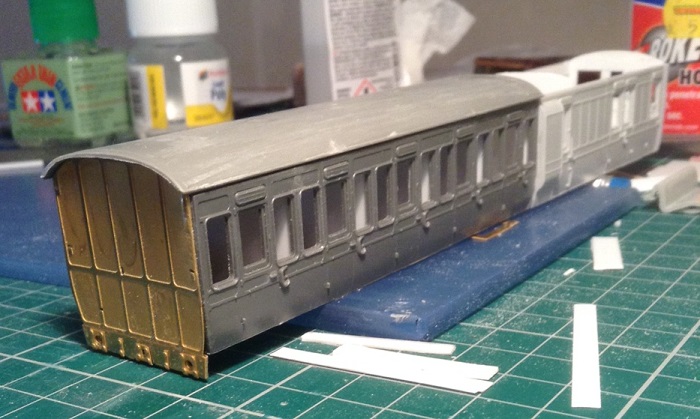
In finishing, here’s a photo from yesterday, with the rear end firmly attached, detailing to be added later.
I'll finish the seats tomorrow, but am heading north for a couple of days on Wednesday, so may be unable to post until the weekend.
Cheers,
Bill
Last edit: by Longchap
At 6'4'', Bill is a tall chap, then again, when horizontal he is rather long and people often used to trip over him! . . . and so a nickname was born :)
Posted
Full Member
Moving on, I’ve started on the fragile emergency brake gear to the rear end of the coach. I lost one and broke two of four tiny brass brackets holding the high horizontal bar in place, so with one successfully fixed to the coach, I’ll attach one of the damaged brackets to the rod etch, modify the vertical section to fit and then glue the whole thing into place, supported with strategically place blu-tac as temporary support. Someone at Shirescenes thoughtfully provided extra brackets on the etch!
That will be the task for tomorrow, as my eyes have had enough close work for today, so fingers crossed and I’ll hopefully have a photo to show by the end of the weekend.
Cheers,
Bill
At 6'4'', Bill is a tall chap, then again, when horizontal he is rather long and people often used to trip over him! . . . and so a nickname was born :)
Posted
Full Member

I've customised some more steps for the front and will fix these, lamp irons and vacuum pipes before priming. The two roofs were chopped and joined into one and very loosely posed together with the buffer beam, less the buffers, as they don't go in until I have the correct oval heads, hopefully delivered soon.
I opened the 'new old stock' K's bogies which need to be fixed soon and was unimpressed with their crudeness, so will revisit a pair of 3D prints in the parts bin and then make a decision, as I need them fitted to set the ride height.
More soon,
Bill
At 6'4'', Bill is a tall chap, then again, when horizontal he is rather long and people often used to trip over him! . . . and so a nickname was born :)
Posted

Full Member
'Petermac
Posted

Full Member
Staying on the thread Kevin.
Posted
Full Member
Yes, there are bogies Kevin, as mentioned in my last post above and if you have the time to read through the thread, you'll see how this driving trailer is produced from a couple of Ratio 4 wheelers. There is also a matching intermediate trailer and is a much simpler build.
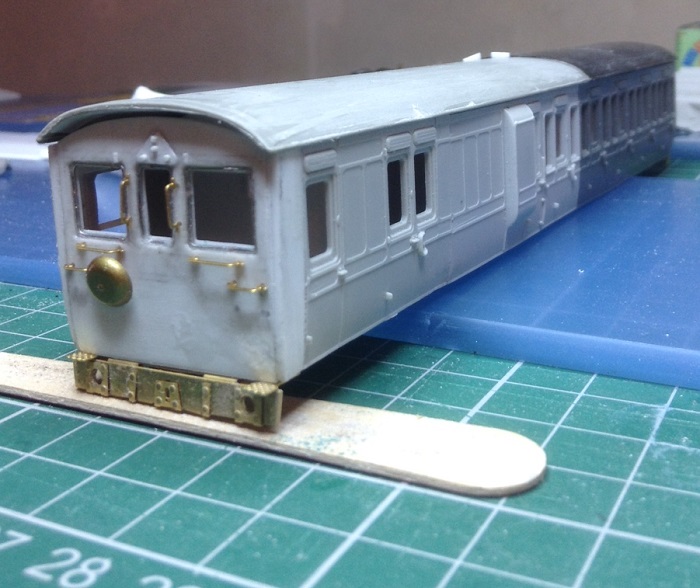
Here's a photo of the Dean bogies.
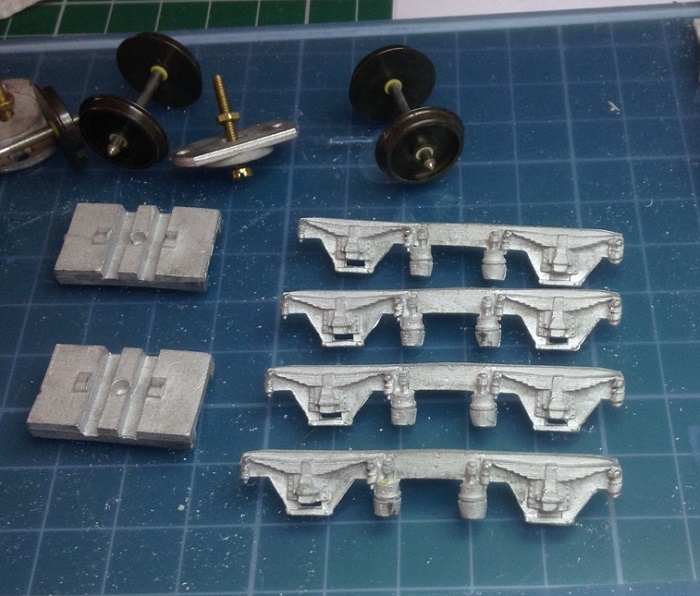
They don't have step boards yet and I'm not sure whether to use them or a set from a 3D print. The bogies are bolted through the floor, while the solebars are added, together with vacuum gear, brake linkages, etc to the underside.
Today I fitted the gas lamps and as this set will be in the 1930's simplified livery, I fitted the later two pipe system for gas and pilot lights.

The pipes are fed up to the roof from the guard's compartment via the off centre cover made by removing the lamp top from the white metal casting.

Then came the rather tedious process of the pipe clamps, holding the pipework to the roof. I made these from microstrip which is well over 30 years old and had an anoying habit of breaking once solvent was introduced and even a small amount of pressure applied, so many replacements were necessary. The eagle eyed will notice some pipe clamps still need fixing down on one side. Gluing each clamp in a two-stage process seemed more successful against snapping, but took much longer.
Just rain strips to add and after some cleaning up with 1000 grade abrasive paper, a coat of primer will greatly improve the scrappy appearance.
Bill
Last edit: by Longchap
At 6'4'', Bill is a tall chap, then again, when horizontal he is rather long and people often used to trip over him! . . . and so a nickname was born :)
Posted
Full Member
Staying on the thread Kevin.
1 guest and 0 members have just viewed this.