Clifton Downs Auto Set from Ratio coach kits
Posted

Full Member
Fun with a razor saw
Well I get myself into a tizz sometimes with trying to set high standards. It is a good thing to raise our individual bars.John
John

Posted

Full Member
After pouring over the various prototype photos in Russell and Harris, I've only just spotted what appears to be a smoke deflector on the end of the trailer car next to the loco. It takes the shape of a slim curved upstand above the roof at the end, so will be added in due course.
Bill
 Last edit: by Longchap
At 6'4'', Bill is a tall chap, then again, when horizontal he is rather long and people often used to trip over him! . . . and so a nickname was born :)
Posted
Full Member
John
John
Posted
Full Member
The Mk2 version is a vast improvement on Mk1 and will progress to the next round!
Meanwhile, while the drying commenced, I started gluing the side panels together and cut new front leading panels from 40 thou styrene to represent the steel plating which covered the driving end and the two side panels either side of it.
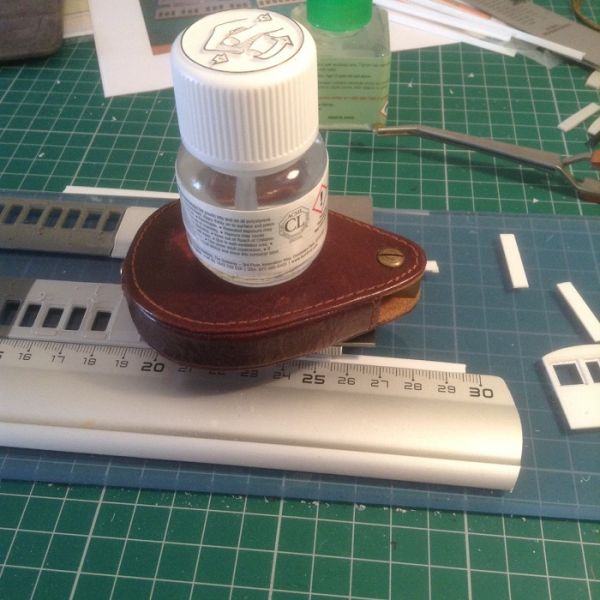
After my concerns with the rigidity of the floor, I've decided to thicken it and replace the angle sections with ‘I’ beams, which should arrive via Ebay on Friday and hopefully a few other goodies I found on line.
More soon, hopefully a bit more of more next time.
Bill
Last edit: by Longchap
At 6'4'', Bill is a tall chap, then again, when horizontal he is rather long and people often used to trip over him! . . . and so a nickname was born :)
Posted
Full Member
Hi tech modelling this isn’t!
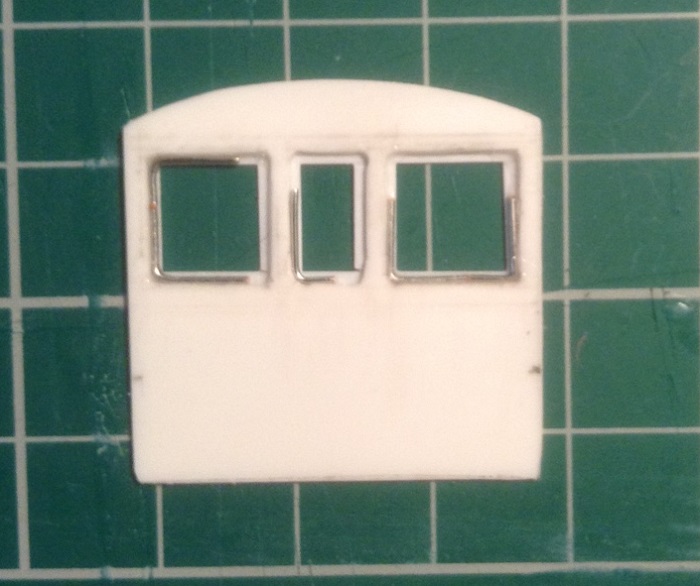
It seems to have taken an age to get the sides glued up, but I think I’ve the panels all in the right order! There are two 30thou reinforcement strips glued top and bottom to keep everything in place while handling. I thought I’d model the driving compartment with the driver’s window open. In fact, I was originally going to have several windows open throughout the carriage, but having spent at least an hour, well probably two on this single window, I’ll only run the set in cold weather!
I tried to be careful when cutting and fettling all the panels in an attempt to have both sides the same length and they finished up within 1mm. However, the end panel looks a tad wide, so I must consult reference photos again and re-fettle as necessary.
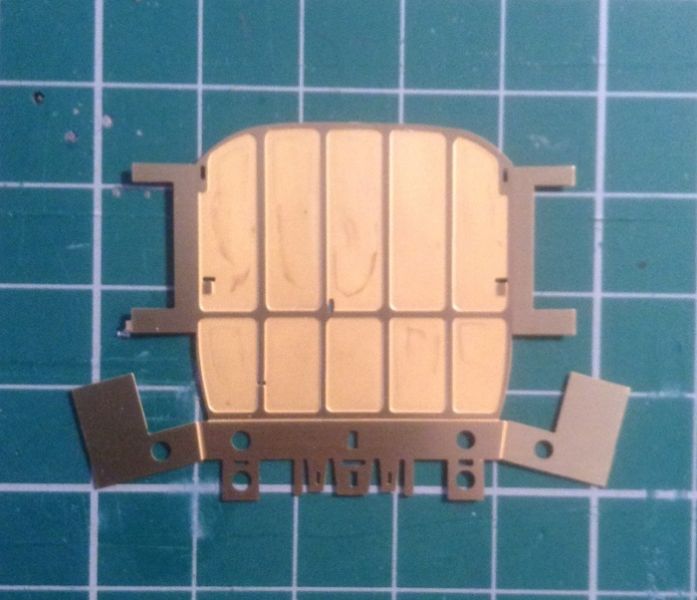
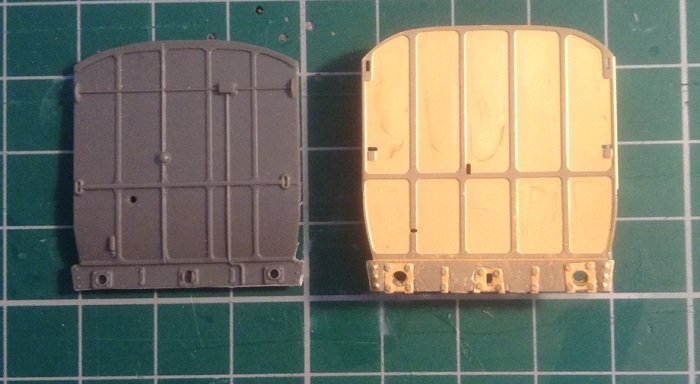
I’ve removed the rain strips and gas lamps from both donor roofs and sanded everything down, ready for cutting, but this will only be done when I’ve assembled and braced the body, to ensure the roof will be cut to the appropriate length.
After collecting a few goodies from the post box today in the form of cast gas lamps (I did remove all moulded plastic ones intact, but wanted a little more definition), etches for varies length grab rails and two pair of buffer beams, oh and April’s Railway Modeller, I remembered that I’ve a set of etched brass ends for the Ratio 4 wheelers in the parts bin. That’s just two ends and I need three for both trailers, so I think another order to Dart Castings will be required. Just as well I’m working away next week, as the extra ends may be here when I get home next Friday.
I don’t think I’ll get too much done over the weekend, but if I can find a few hours, I’d like to fit the end window bolections. They’re very fiddly, but 10 Amp fuse wire looks much better than the 5 Amp and will be easier to accomplish. ‘Easier’ by the way, is a relative term, as it will be a pain and I need to start it early in the day, before the close work makes the old eyes tired!
Enjoy the weekend everyone,
Bill
Last edit: by Longchap
At 6'4'', Bill is a tall chap, then again, when horizontal he is rather long and people often used to trip over him! . . . and so a nickname was born :)
Posted
Full Member
Looking great Bill. :thumbs Really enjoying this thread.
Terry
Posted
Full Member
Parts ordered from Dart Castings though, so next weekend should be productive.
Bill
Last edit: by Longchap
At 6'4'', Bill is a tall chap, then again, when horizontal he is rather long and people often used to trip over him! . . . and so a nickname was born :)
Posted

Full Member
Posted
Full Member
I've been putting off the window bolections for a while, but want to get them done now, with a some other basic detail so I can assemble the body, so . . .
The fuse wire is bent up an superglued, first with a blob of super thick CA in the corner to stop it behaving like a shopping trolley with a broken wheel, then super thin and runny stuff to fix it well and good. I'm very pleased with the results so far and you can hardly see the join. I'll finish them just as soon as and get the shell assembled.
I've received notification from Hattons that my replacement Dean Goods has been dispatched together with a pre-ordered Collet Goods and they'll make a contrasting pair over my two modelling time periods.
Regarding the Clifton Downs set though, I rather fancy the weathered shirt-button 48xx will look the job.
More soon,
Bill
Last edit: by Longchap
At 6'4'', Bill is a tall chap, then again, when horizontal he is rather long and people often used to trip over him! . . . and so a nickname was born :)
Posted
Full Member
Regarding the motive power for these sets, I can only recall seeing photos with them coupled to a 64xx pannier. I'd be interested to see evidence of a 48xx in use with these as I would like to have some basis to run mine sandwiched between the Clifton Downs and the A30 Autocoach but I'm thinking it would be stretching credibility a little.
Posted
Full Member
Yes, they are fiddly, but I'll not be defeated, as I have plenty of fuse wire and patience.
Cheers,
Bill
Last edit: by Longchap
At 6'4'', Bill is a tall chap, then again, when horizontal he is rather long and people often used to trip over him! . . . and so a nickname was born :)
Posted
Full Member
A great improvement on the Ratio version. It has emergency brake rodding and lamp irons to add, although the instructions for the brake rodding is at best vague, although I have some decent photos to follow.
The window bolections at the other end are almost there and hopefully will be finished during the next session.
More soon, à bientôt,
Bill
Last edit: by Longchap
At 6'4'', Bill is a tall chap, then again, when horizontal he is rather long and people often used to trip over him! . . . and so a nickname was born :)
Posted
Full Member

There's a couple of spots needing a little tidying with a tad of filler, plus a windscreen wiper will distract from the fix to the big gap above the driver's window.
I also managed to fold up a buffer beam and then spent an hour and more on the net, trying to find some Dean oval coach buffers, but they seem to be a rare beast in 4mm, so I'll just have to cheat.
A bit more detail to both ends, then it'll begin to look more like a carriage as the bodywork gets joined together.
Bill
Last edit: by Longchap
At 6'4'', Bill is a tall chap, then again, when horizontal he is rather long and people often used to trip over him! . . . and so a nickname was born :)
Posted

Full Member
I have some Dean loco buffers (Kean Maygib), not what you need (round head). Try emardee.org.uk if they are still in business, they have GWR Dean long tapered coach buffers (die 1244). Contact is hubert@emardee.org.uk
Nigel
©Nigel C. Phillips
Posted
Full Member
Thanks for your post and I was looking at the Emardee website the other day. Unfortunately, die 1244 appears to have round heads, as when you click through to the detail panel, it talks of these buffers been used universally on Clerestory types and also with oval heads for some later coaches.
However, when searching yesterday, I found and ordered a packet of 20 etch oval overlays with Peters Spares and also some 24" GWR coach buffers from Dart Castings to take them. I hope they'll pass muster.
Fortunately, Dart post to France at moderate cost, although the same cannot be said for Peters Spares, so my chum Brian is bringing them out in a week or so when he comes to visit.
Plenty to do in the meantime though, including our winter maintenance schedule, just started. Fortunately, I have help with most of the heavy work!
Thanks as usual,
Bill
At 6'4'', Bill is a tall chap, then again, when horizontal he is rather long and people often used to trip over him! . . . and so a nickname was born :)
Posted
Full Member
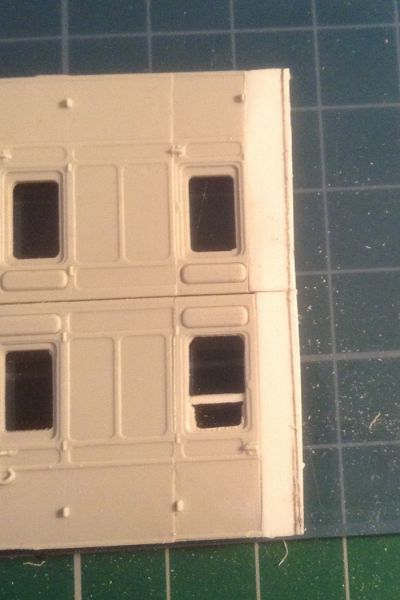
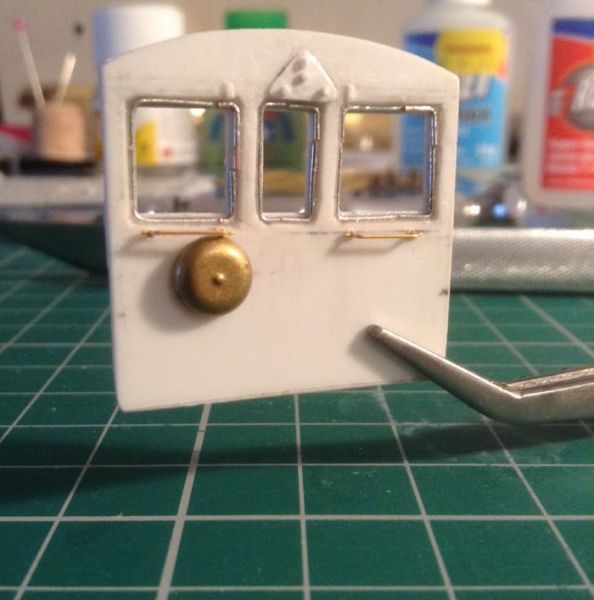
Regulator plate, gong and destination board brackets added to the driver's end:

The gong is removable for painting the bodywork, but will be later glued in place. Again, looking at these enlarged photos shows all the mistakes and I really should replace a couple of rivets half a gnat's whisker to the right!
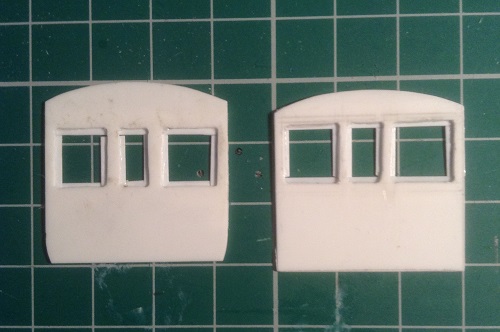
Having built one half of the ATC gear from scraps, I checked my prototype photo to see that it wasn't fitted to my chosen trailer! So, except for drilling fixing holes for steps, lamp irons and grab handles and forming the tumblehome, the end is ready for joining to the sides.
Next time; body assembly.
Bill
Last edit: by Longchap
At 6'4'', Bill is a tall chap, then again, when horizontal he is rather long and people often used to trip over him! . . . and so a nickname was born :)
Posted
Full Member
Yes, almost there, but I needed to drill those holes and trial fit grab rails, etc, so have done so and as I have to go wine tasting this afternoon to a small vineyard I can see from the window, run by a new couple (all work here as usual), then work permitting, I'll start gluing the body together tomorrow.
Here's a snatched pic from earlier this morning:
There's now additional rails below those above and between the windows and I'll straighten everything up when I glue them in.
Speak soon,
Bill
Last edit: by Longchap
At 6'4'', Bill is a tall chap, then again, when horizontal he is rather long and people often used to trip over him! . . . and so a nickname was born :)
Posted
Full Member
Hello again Nick,bolections looking good so far Bill. The tricky bit is getting the other half cut to the right lengths so that there is no gaps, but I'm sure you'll do just fine.
Regarding the motive power for these sets, I can only recall seeing photos with them coupled to a 64xx pannier. I'd be interested to see evidence of a 48xx in use with these as I would like to have some basis to run mine sandwiched between the Clifton Downs and the A30 Autocoach but I'm thinking it would be stretching credibility a little.
I looked through my books and have not found specific reference to these sets being coupled to 48xx locos, despite me wanting to find it so! I have plenty of photos with the 0-4-2 Class 517 tanks and I'm aware of the use of the 64xx. As the 64xx was only introduced in 1936, I may need a metro tank for my 1920s service.
I seem to recall an Airfix/Hornby 14xx bashed into a 517 tank somewhere, so will investigate further, plus of course, I'll now need to acquire a 64xx in appropriate livery!
If anyone can shed further light on motive power for these sets, I'd be curious to hear more.
Cheers,
Bill
Edit: found the 517 conversion here http://www.gwr.org.uk/pro517.html
It will be essential to have really good photos, but it looks like a fun project, although maybe easier with a DJM loco.
Last edit: by Longchap
At 6'4'', Bill is a tall chap, then again, when horizontal he is rather long and people often used to trip over him! . . . and so a nickname was born :)
Posted
Full Member
Shapeways has closed and open cabs. Not so much fun as bashing an old Airfix or Hornby body. The bash or 3D print is I think a tad longer than it should be. The alternative is an old K's white metal kit which is almost the right length. I was going to convert the one I have, never got around to it.
Nigel
©Nigel C. Phillips
Posted
Full Member
Pheonix Precision also do a 455/3500 Metro tank 2-4-0 at:
https://www.phoenix-paints.co.uk/products/deansidings/deansidings-gwrkits/ds453a
I'm not too sure on resin bodies yet, but having seen a line drawing of a 517 overlaid on a 14xx, the differences (late rebuild) are minimal enough to make me want to have a bash, so one of my pair of Airfix 14xxs is in the queue for surgery!
See post 14 at: http://www.rmweb.co.uk/community/index.php?/topic/92797-george-armstrongs-masterpiece/for the above mentioned drawing.
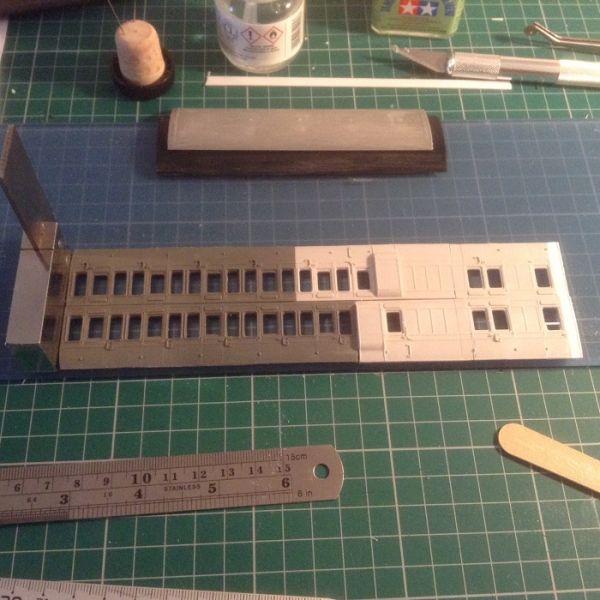
Back to the Clifton Downs set and I cut an additional floor laminate and the partitions this morning and will next fit the floor to strengthen the shell and then start on the chassis.

Above was the commencement of the shell assembly yesterday.
More soon,
Bill
Last edit: by Longchap
At 6'4'', Bill is a tall chap, then again, when horizontal he is rather long and people often used to trip over him! . . . and so a nickname was born :)
1 guest and 0 members have just viewed this.