My new layout
Posted

Full Member
On30 - again
Wow Nigel, you nailed it, that really is a great view from your spray booth. Who needs television eh?Bill
At 6'4'', Bill is a tall chap, then again, when horizontal he is rather long and people often used to trip over him! . . . and so a nickname was born :)

Posted

Inactive Member
Max
Port Elderley
Port Elderley
Posted

Full Member
One of the joys of being 14 floors up and in a heavily wooded urban environment. Technically we live in a Northern Virginia deciduous forest. The wall on this side of the apartment is glass - 36x8 feet, so we don't need to go outside to enjoy the view. Plus being able to get outside and spray in the middle of November compensates for the lack of a basement or shed.
Nigel
©Nigel C. Phillips
Posted
Full Member
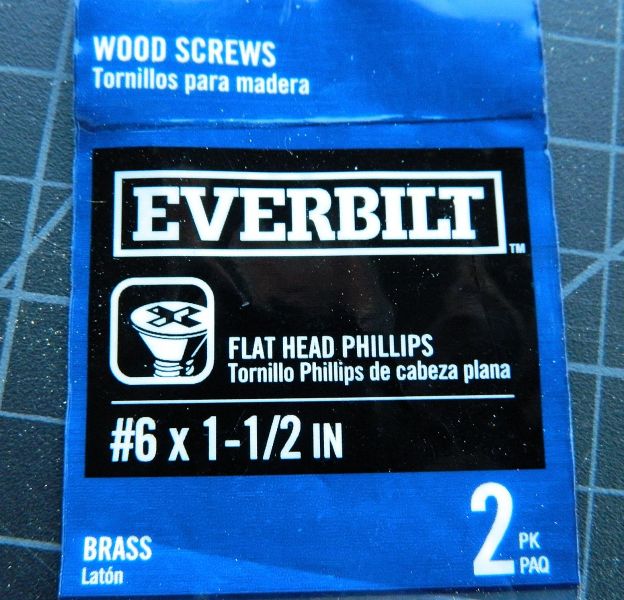
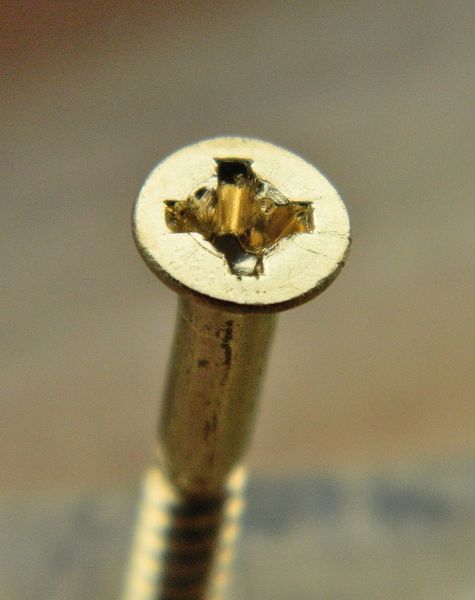
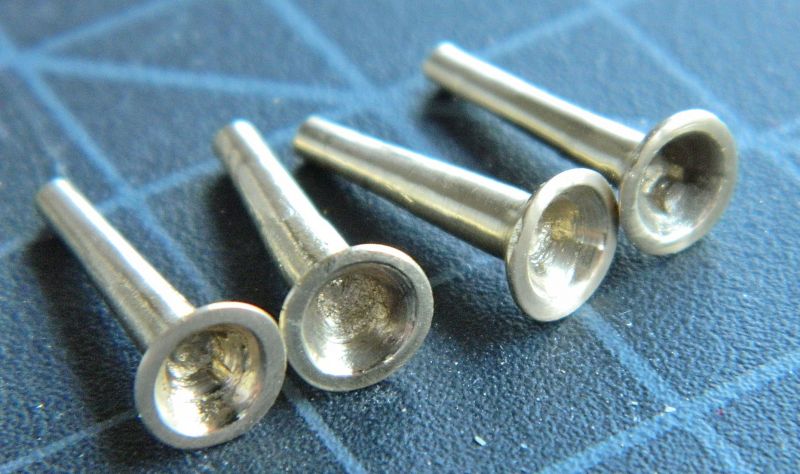
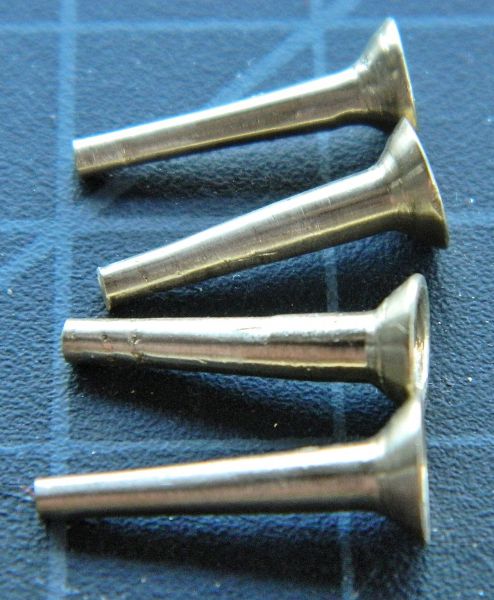
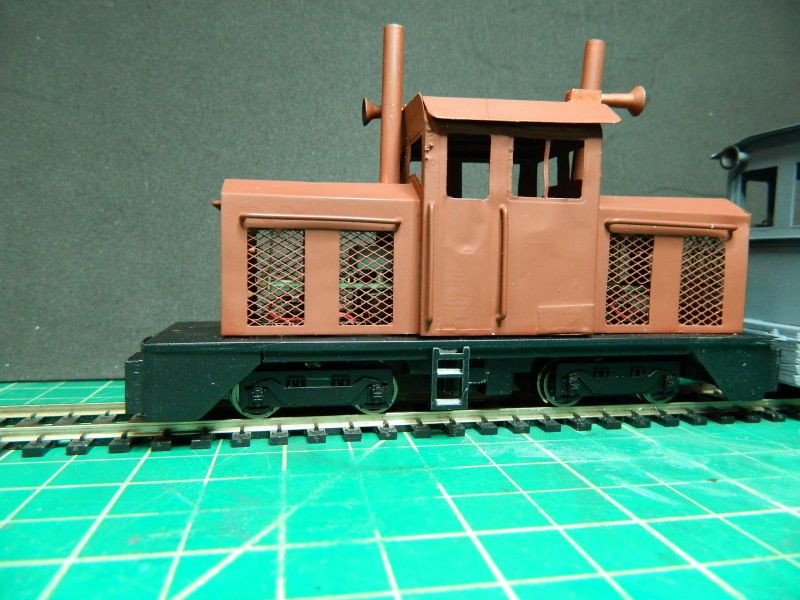
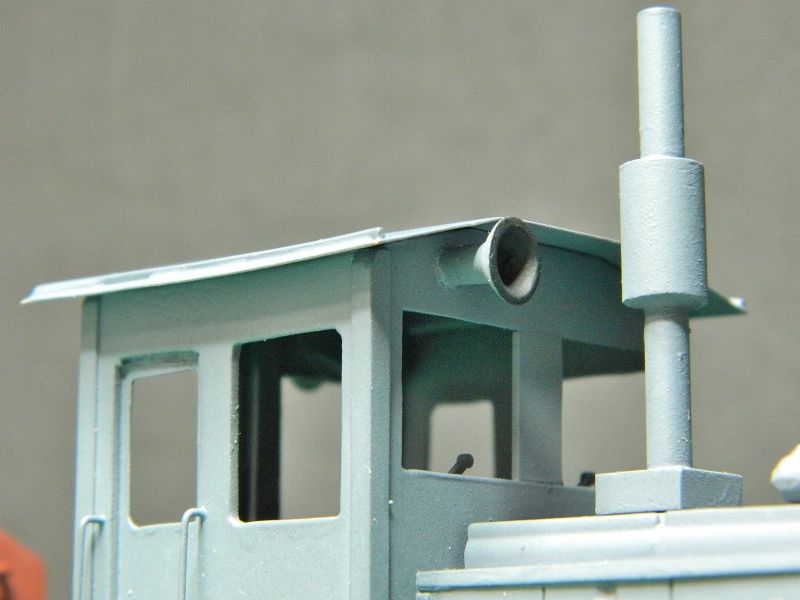
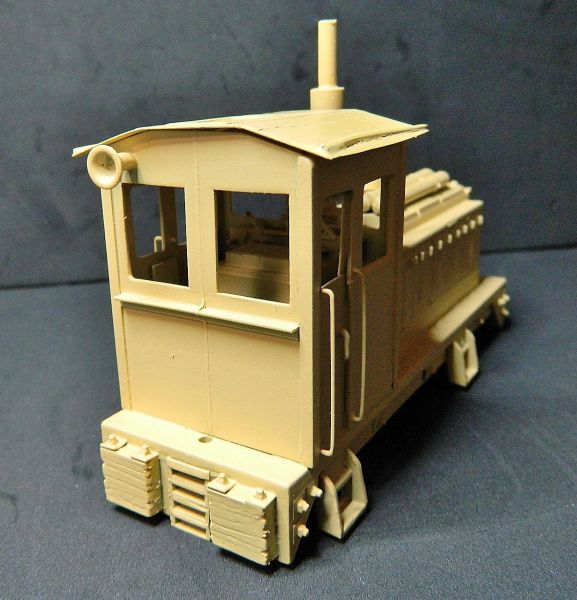
A date with the Dremel this afternoon - I tried Max's method of making horns. Starting material was some brass flat head Phillips wood screws - #6 x 1.5". These have a nice smooth shank that minimizes thread removal (around 7.5mm was removed in this case). For those in metric land this is a M3.5 screw. I used a series of small carbide bits (round/conical/cylindrical) to take out the cross-head to approximately the slope of the exterior of the head, after first screwing them into a block of wood. All eyeball "measurements" of course. I then put the screw in the Dremel pointy end first and reduced the diameter of the shank and thread with files (flat and curved) so that it was smooth (ish). Final finish with some #800 wet and dry. They're around 15-16mm long after cutting off with the pliers. Precision work this is definitely not, but they do look the part, and they will meet the "6-foot" standard. Thanks to Max for the tip.
I used brass as they will be soldered to mounts on the roof of the two cabs - one horn pointing forwards, the other backwards. Forty five minutes work for the 4, cost $2.60 for 4 screws (compared with around $5 each for some rough brass castings). I was thinking as I was doing it, this would have been 5 minutes set-up and 15 minutes work with a lathe and some brass rod stock. Might just have enough room in my daughter's garage for a small hobby lathe/mill. Something to ponder as On30 modeling needs a lot more lathe/mill work than HO/OO or O.
Bilingual labeling down here - English and Spanish.
Pictures below.
Nigel


©Nigel C. Phillips
Posted

Site staff
Ron
NCE DCC ; 00 scale UK outline.
NCE DCC ; 00 scale UK outline.
Posted
Inactive Member

They will do the job.
Max
Port Elderley
Port Elderley
Posted

Full Member
Brass screws seem a bit more expensive over your side. I wonder why?
Shaun.
Posted
Full Member
Thanks for the comments.
Brass is expensive. $1.39 for a packet of 2 was a lot cheaper than castings, and my time us free. It's only with the long screws that there is that long, smooth shank. Much cheaper by the box of 50, but I don't need that many. Steel ones are a lot cheaper still ($1.39 for a packet of 8) and easier to work with as well. I tried a couple of #6 1.5" steel screws before deciding on brass. Would have been better with a lathe and rod, but they will be fine from 6 feet away.
Nigel
©Nigel C. Phillips
Posted
Full Member
Another detailing hour this afternoon. Horns attached, exhausts made for the red 'un (which I don't like, brass will be better and more durable than the styrene tubes I used), 1mm height added to the body of the grey 'un. Needs some rails on the red 'un at the ends. Waiting on some rivet decals/transfers, coat of shiny acrylic to stick the rivets on, then onto the final coats of paint and some weathering.
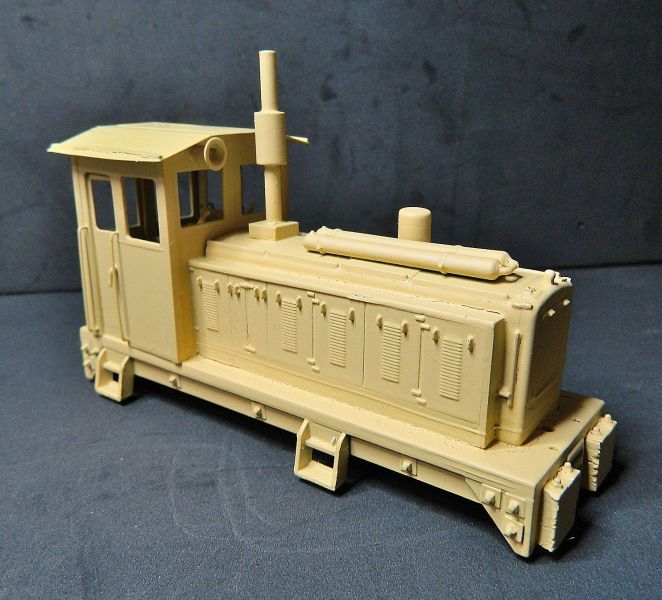
Have to start planning the next one.I have a general idea about using a Bachmann 2-6-2 chassis (ex GWR Mogul) to make a 4-6-4 Forney, I have to see what bits I will need for the body (domes, chimney).
Nigel


©Nigel C. Phillips
Posted

Full Member
John
John
Posted
Full Member
Thanks, the important thing is that I'm having some fun and along the way getting into areas that RTR normally keeps people away from. Being limited for space is actually focusing what I do (and can't do!). Amazing what you can do in a 3' x 2' work space.
Nigel
©Nigel C. Phillips
Posted
Full Member
Today saw both a coat of red oxide on the chassis of the red 'un, and both models given a coat of gloss acrylic in preparation for the rivet decals. No photos - it's just paint drying. I can supply if there is sufficient interest.
Change of plans regarding lighting. I was going to use the Bachmann LEDs as supplied, but they have an awful orange glimmer. So I bit the bullet, and I have 2 Soundtraxx Tsunami TSU 1000 decoders coming with 6 cylinder diesel switcher sound suites. Full function decoders, not the limited function Econami ones. I'll wire in some decent white LEDs. It also means I can get rid of the current boards/decoders and make some space for speakers. The decoders were $64 each. Scoooorrr!!!
Nigel
©Nigel C. Phillips
Posted

Full Member
Keep it coming,
Marty
Posted
Full Member
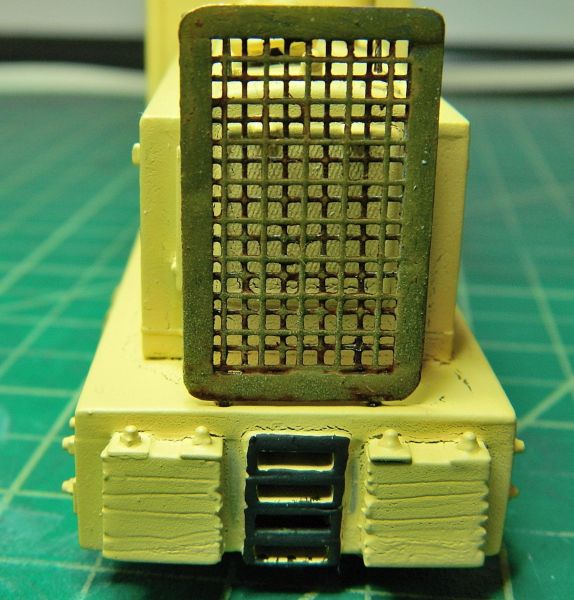
Blame Blodgit and Fudgit, those good-for nothing maintenance layabouts. They have a tendency to make repairs with what comes handy, in this case some 8" diameter drain pipe. Unlike the rest of the clunker there are at least no dents or rust. Yet. That lack of back pressure makes those 2 big V8 diesels run…interestingly.
It's only a tad out of scale (the ones on the grey 'un are 6" diameter, and are a bit under scale). .Matches those horns that would pass as fog horn, ship, for the use of. Blodgit and Fudgit recon they'll help get the sound out when those decoders arrive. "What about all that mesh" I say. "Cobblers" they reply, " everybody knows sound rises. Just listen to the exhaust. Plus they add a bit of weight". And they're somewhat reluctant to tackle the copious amounts of solder and nuts and bolts holding them in place.
And that leads me onto a "paint drying moment photo!". The exhausts got chopped since the last post, so they actually look better than those previous dreadnought smokestacks. Give it 24 hours and I can start decaling the rivets. And add some door handles. Which I completely forgot about.
On a serious note, the proportions of this model meet no known prototype. It was designed to fit a particular chassis, the Bachmann 70 tonner. The exhausts could have been placed at the front (I could have simply turned the hoods 180°), I chose to put them at the back. In hindsight a good decision as the hoods could do with being a bit longer. I had contemplated making one long hood from the 2 short hoods,and making a new cab. I have reviewed many photo's of small diesels at work in far-off places to get a sense of proportions, the diameter of the exhausts is actually not out of place. I have seen bigger. Plus photo's of oil barrels being used for the same function. And this is On30, the land of the critters…where anything goes, and there is always a prototype for it.
Nigel

©Nigel C. Phillips
Posted
Site staff
That sentence says it all …... And this is On30, the land of the critters…where anything goes, and there is always a prototype for it.
Nigel
 and if one cannot find a prototype photo in the Internet,etc, doesn't mean that one doesn't exist in the real world…. Rule #1 applies.
Ron
NCE DCC ; 00 scale UK outline.
NCE DCC ; 00 scale UK outline.
Posted
Full Member
Thanks. I came across some recently with what were at least 12" square exhausts. And all sense of proportion goes out of the window if a large spark arrestor gets plonked on top.This one is a bit of "try it and see modeling", hence the bashing around of a perfectly good brass etching, so no real concerns about slavish adherence to any given prototype. Same for the grey 'un. I actually liked the Dreadnought style smokestacks, but had to reduce them in height for clearance issues. This is supposed to be a diesel mechanical (or hydraulic), so those drive wheels should all be cranked or have cardan shaft drives. And they're too small anyway. And should really be 2' gauge, not 2'6". Compromises, compromises…
Nigel
©Nigel C. Phillips
Posted
Full Member
Marty
Posted
Full Member
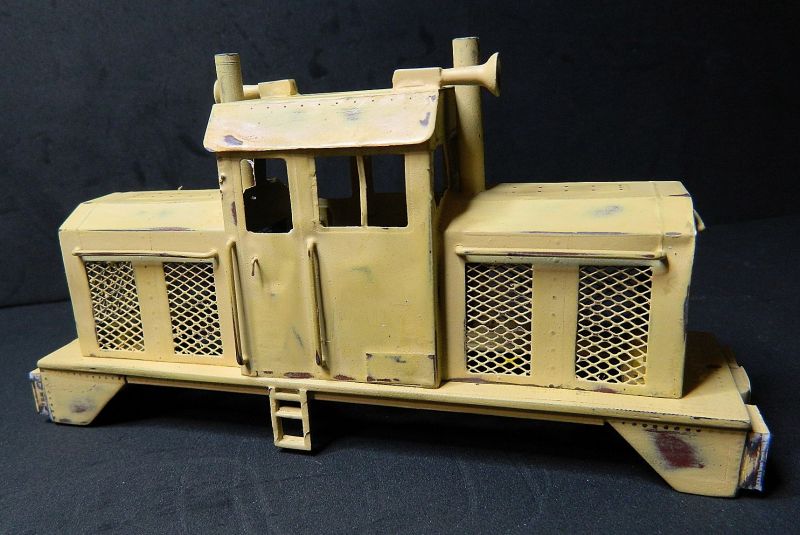
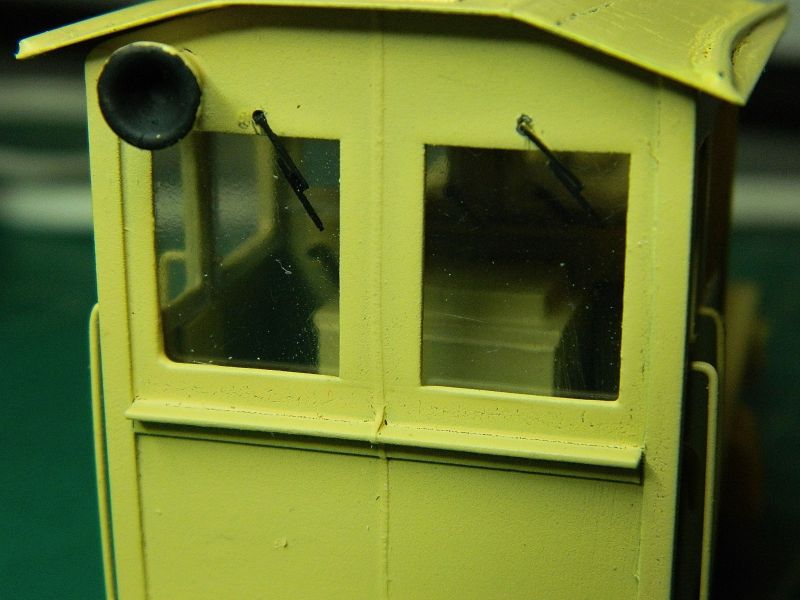
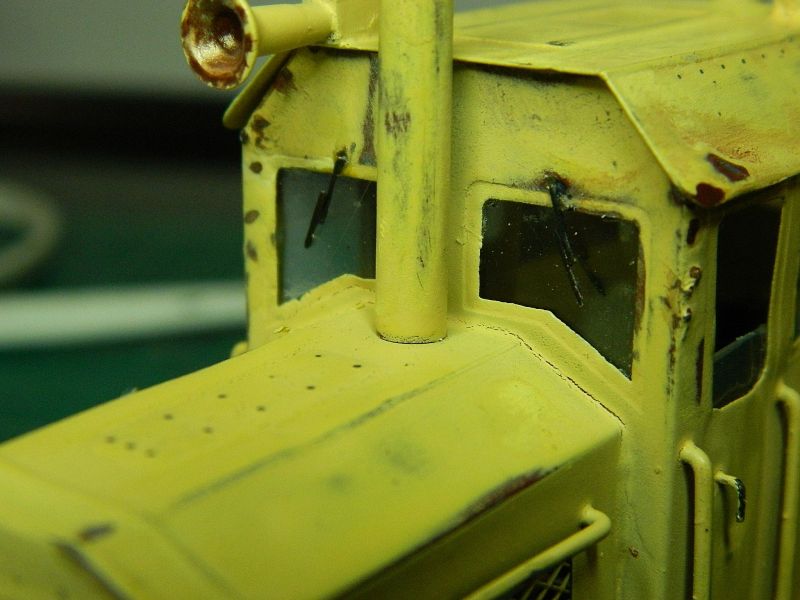
Couple of coats of "chalky autumn wheat" to give a sun-bleached yellow color, and a gentle rub down of parts of the old red 'un with #800 wet and dry to reveal the red undercoat ("rust"). The windscreen wiper etch came yesterday, as did the sound decoders. Powder weathering (light) to come on both. Then the only thing left will be some lights. Which I may have to do myself as I haven't found anything suitable.
The brass shell of the center cab one was attached to the frame with styrene blocks and 2-56 screws (one at each end and one each side in the cab). Plus some CA.
Nigel

©Nigel C. Phillips
Posted
Inactive Member
Max
Port Elderley
Port Elderley
Posted
Full Member
Max - thanks.
Not much progress this week, windscreen wipers added, and glazing for the windows, plus a start on weathering with the protective grill on the gray 'un. (Perhaps another name as they're both chalky yellow! End-cab and Center-cab it is from now on). I also played around a bit with some Valejo rust and black to get a "bronzy/black" for the coupler mounts. More rust and a touch of oily black are required I think. Work in progress, serious weathering later next week as I'm battling an article deadline and the mini-lathe just arrived. Plus I need to make a start on wiring the decoders and speakers. And lamps. Close-ups are cruel.
Nigel


©Nigel C. Phillips
1 guest and 0 members have just viewed this.