My new layout
Posted

Full Member
On30 - again
Hi All,Some more progress on the 2-6-0 Rogers mogul over the weekend.
1. More metal removal to allow wiring to and from the tender (complete strip down of the chassis).
2. New spark-arrestor chimney sourced (balloon type). This came as a spare with the 4-4-0 I got last year.
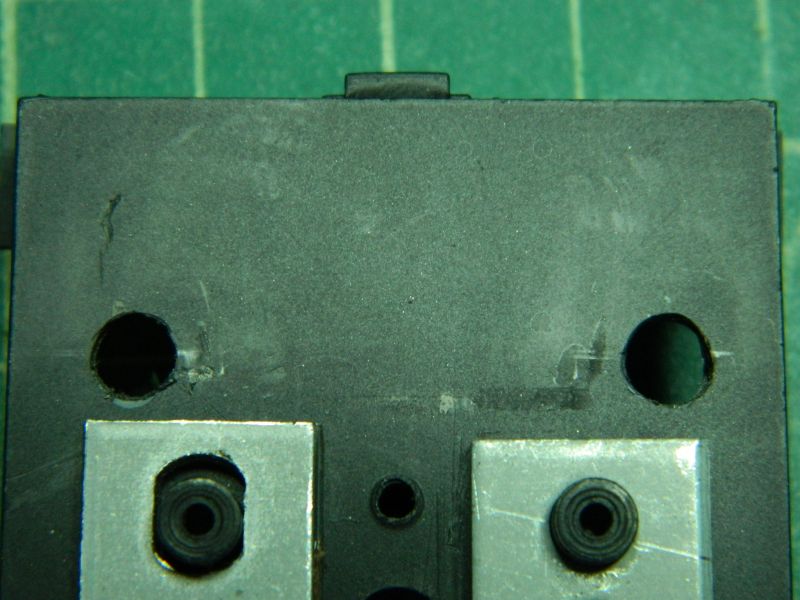
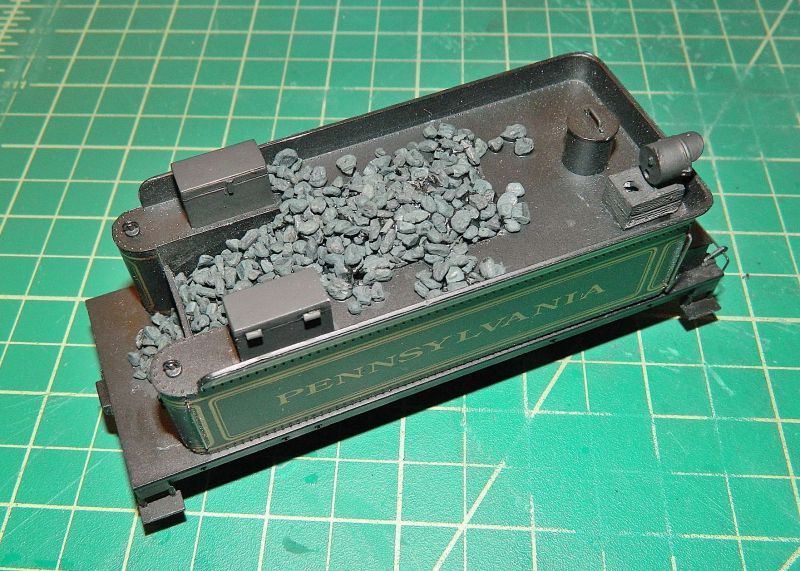
3. Hole previously drilled in tender coal board (presumably for the DCC wiring until theprevious owner decided it was not DCC-doable) filled and painted. I also plated the large holes in the tender floor that the previous owner had cut for the speaker, I like my sound to go up through the coal (after a few holes are drilled of course).
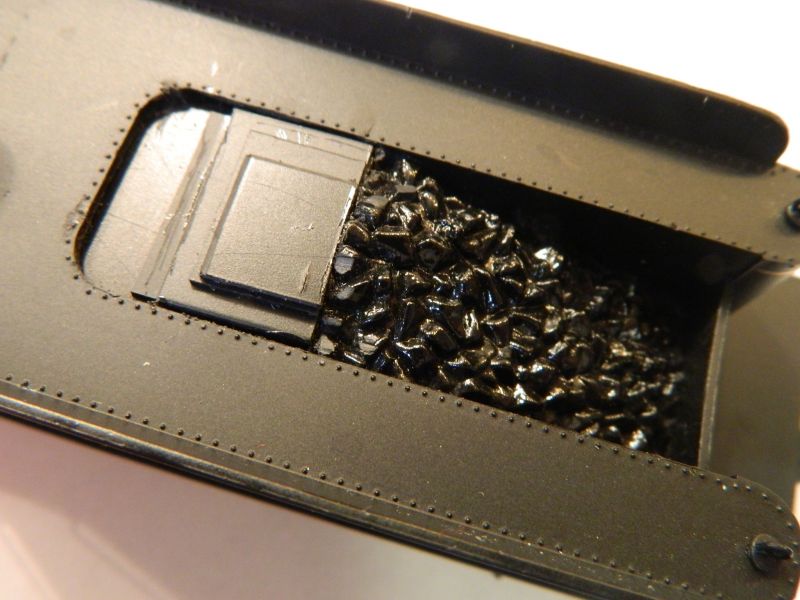
4. New coal heap configured to give some more space inside the tender for the decoder/speaker. The "coal" was around 7.5mm thick. Found the coal to go on the tender bunker. Although I also found a bag of some Javis "coal" that looks just as good as the real stuff. Anything would be better than Bachmann's idea of coal. Wet mouse droppings.
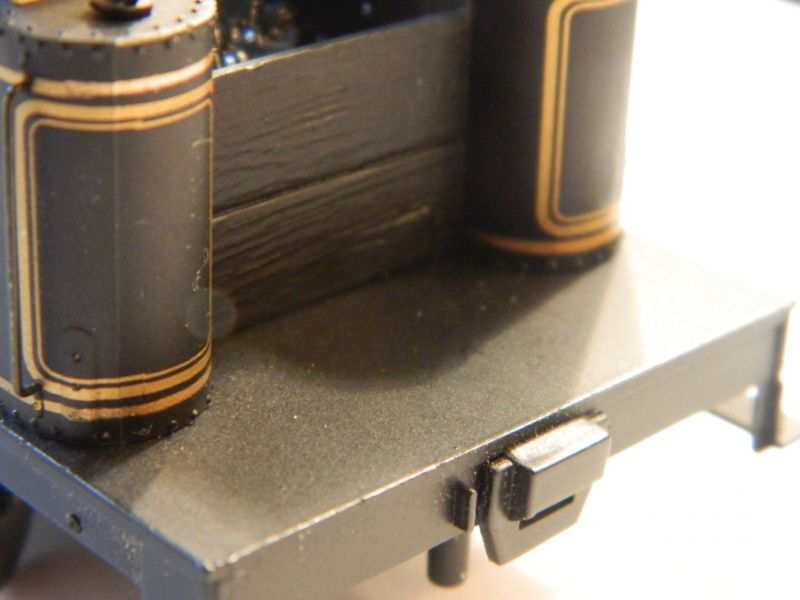
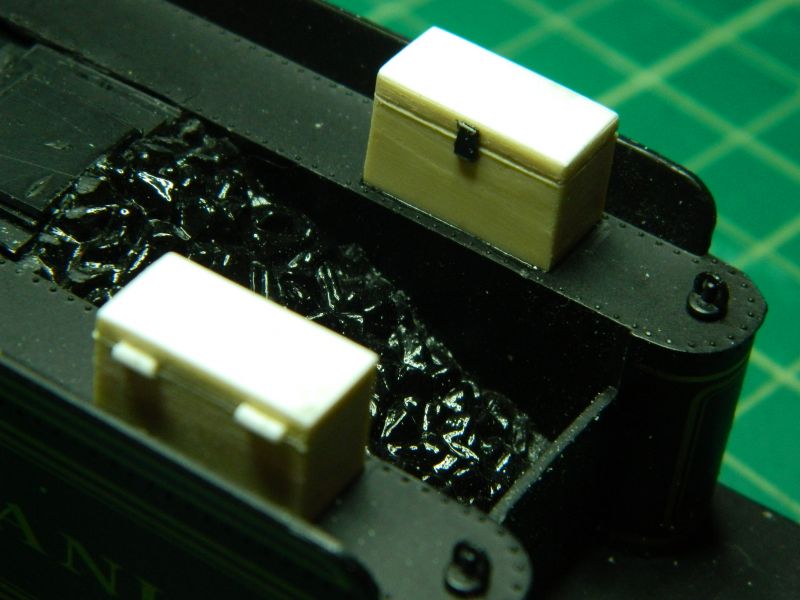
5. Two tool boxes made from those nice plastic engineering blocks and some styrene rod and strip, and installed on the tender top as per the prototype..
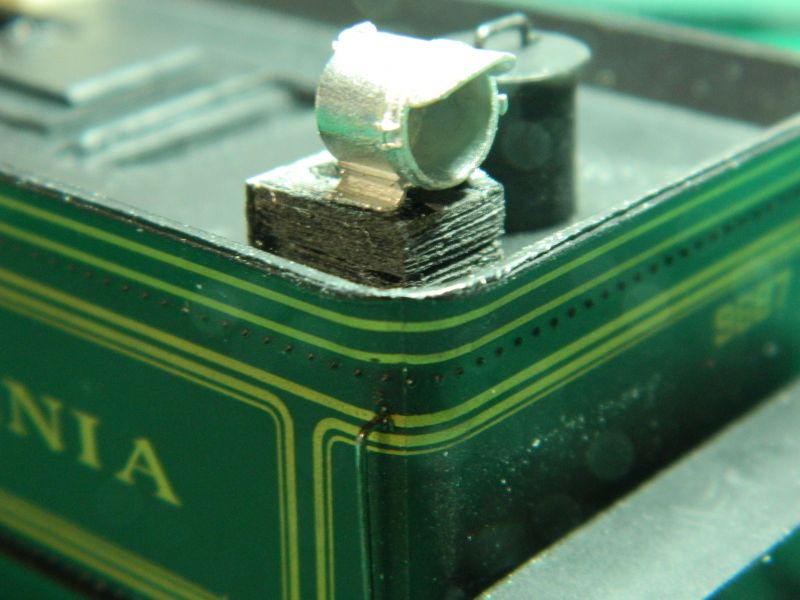
6. Rear light (pewter by the feel and weight) sourced and added. Support box made from one of those blocks, and grained to look like wood using the needle saw. Holes drilled for the light source. I'll probably use fiber optic cable with the light inside the tender.
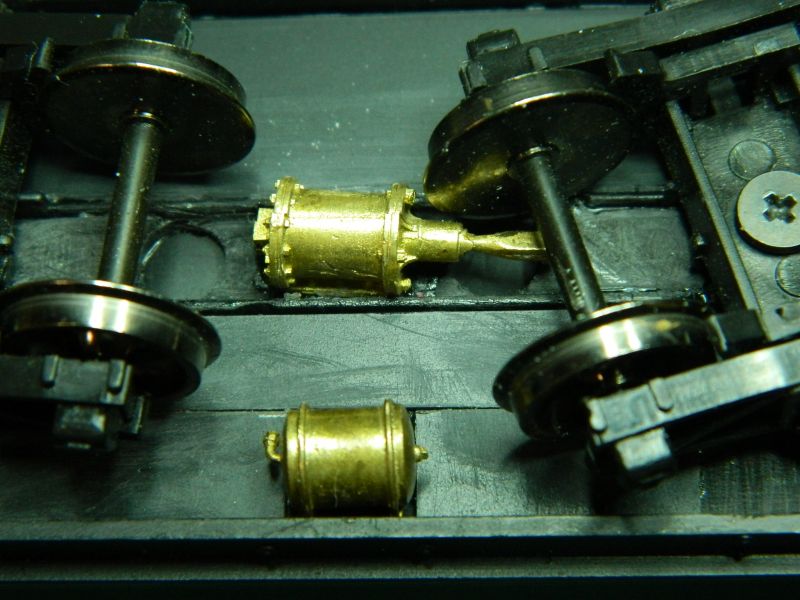
7. Brake cylinder and air tank (both brass) sourced and fixed underneath. The angle is deliberate. Need to source a 3-way valve. Forget about the pipes, rods, and levers, not enough space unless I replace the two bogies (trucks) and ran it on 60" curves..
8. Holes drilled underneath the curved sections of the tender front (which in real life housed the water feed valve rods) for the wiring (power in, DCC, lights and speaker wiring out).
Need to source a UK-style brake stand with the arm and handle on the top. I found a diagram of a Rogers tender around 1899, it had those tool boxes and the brake standard, not a brake wheel. Space is really tight underneath, so just an impression of the brake gear.
Those plastic blocks really take the effort out of making 90° edges, and glue up nicely.
Pictures show the progress.
Nigel


©Nigel C. Phillips

Posted
Full Member
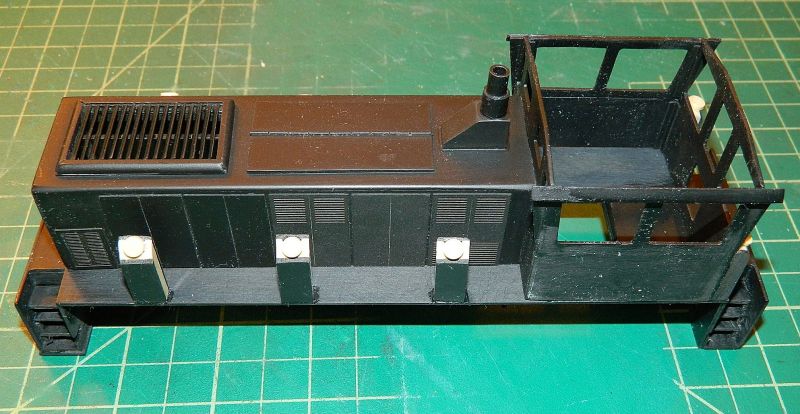
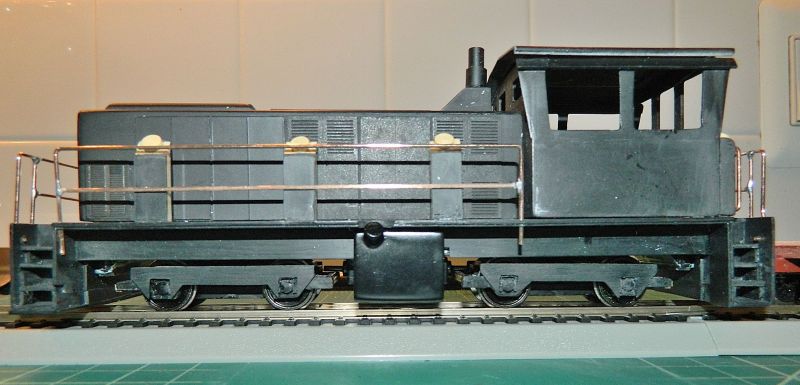
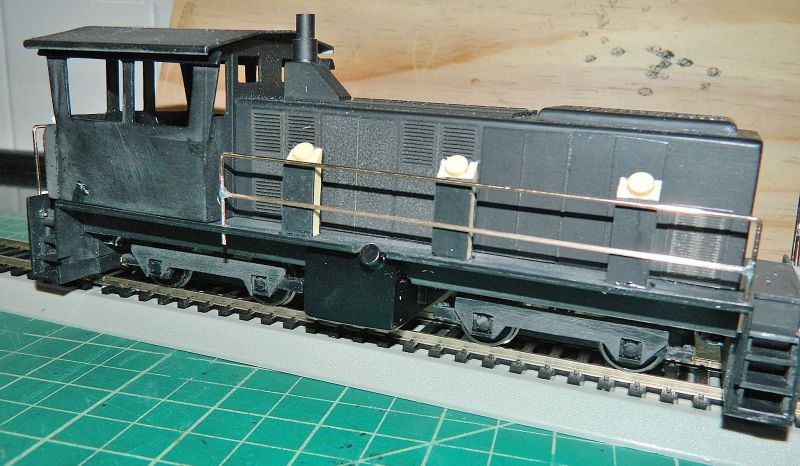
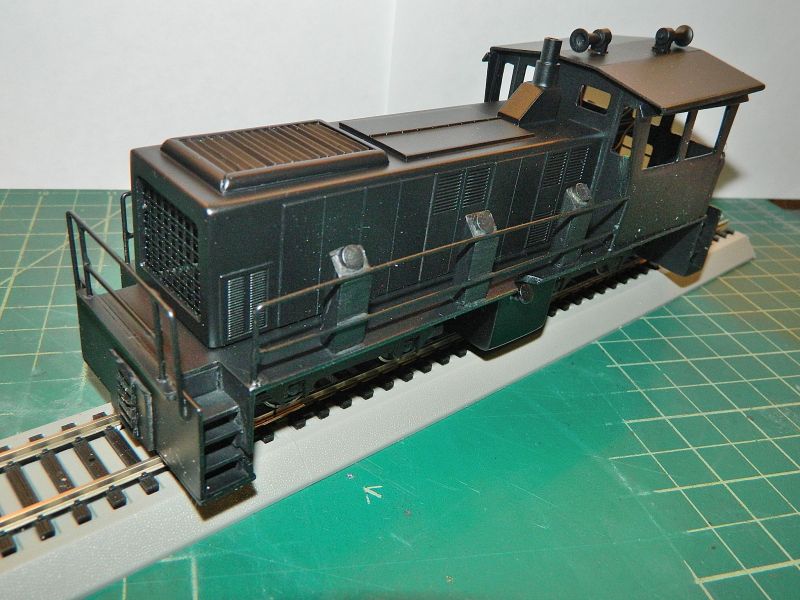
While the glue was setting/out-gassing on the Rogers Mogul I made the sand bins for the narrow gauge Class 94 diesel look-alike*. Plastic bricks, 1mm styrene sheet, 3 bins on each side and 2 on the back - all driving wheels get sand pipes. Back ones are already glued in place, side ones just placed for the photo. Recon I should name the locomotive "Bassett" .
I need to adjust the spacing as the length of the body is compressed to fit the Bachmann class 20 chassis. Body is not on straight either (not glued in place yet, no panic). Sanding not yet completed. The side rails will be fun. Handles on the doors first though. The sand bins are an interesting detail on this narrow gauge locomotive. Technically the prototype class was a narrow gauge to an even narrower gauge conversion. Lots of variants in the conversions, so plenty of leeway for a bit of what-if, and this is On30 anyway.
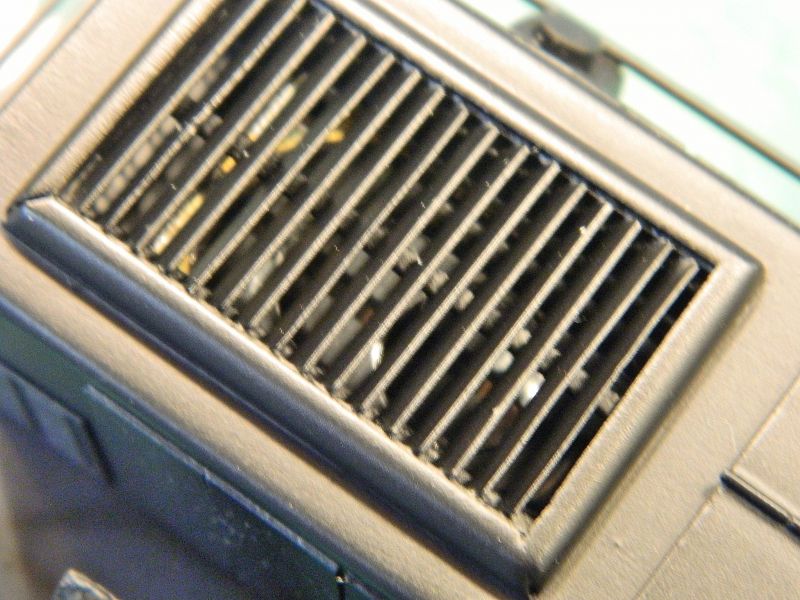
The ESU Loksound 8-socket wiring harnesses came today, so I can make a start rewiring the motor and the decoder on the Bachmann class 20 chassis. The original was one of those DCC-unfriendly models that had a plug but almost no room for a decoder and no allowance for a speaker. The On30 body has plenty of room for both, hence those big grills at the front and top for a decent sized speaker.
Nigel
* I have 3 "bashes" on the go at the moment, I am still waiting for some materials for the Forney look-alike, which is on the back-burner.

©Nigel C. Phillips
Posted
Inactive Member
Loved the photo of the view from your balcony. The scenery in Virginia is absolutely stunning. :)
Posted
Full Member
Thanks. Everything on hold until we get the kitchen back to rights after the flood. I should be able to make a start next week on finishing up the work in progress.
Nigel
©Nigel C. Phillips
Posted

Full Member
Sorry to hear you've had flood damage and I hope life is not too bad right now. All the best with drying out and redecorating.
Bill
At 6'4'', Bill is a tall chap, then again, when horizontal he is rather long and people often used to trip over him! . . . and so a nickname was born :)
Posted
Full Member
Hi Bill, thanks. Finally, a chance to do a bit of modeling! (as opposed to making big holes in the walls and listening to the drone of the fans and dehumidifiers, along with planning a remodeling of the kitchen as the current dishwasher, fridge-freezer and kitchen cabinets are toast).
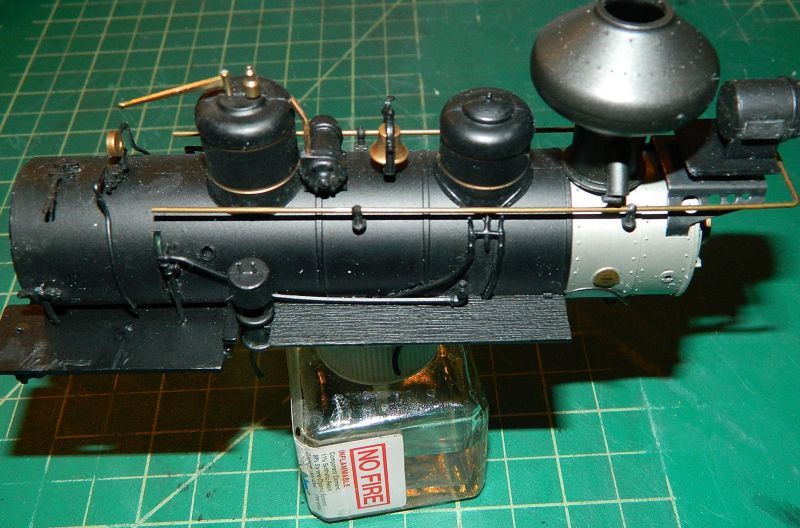
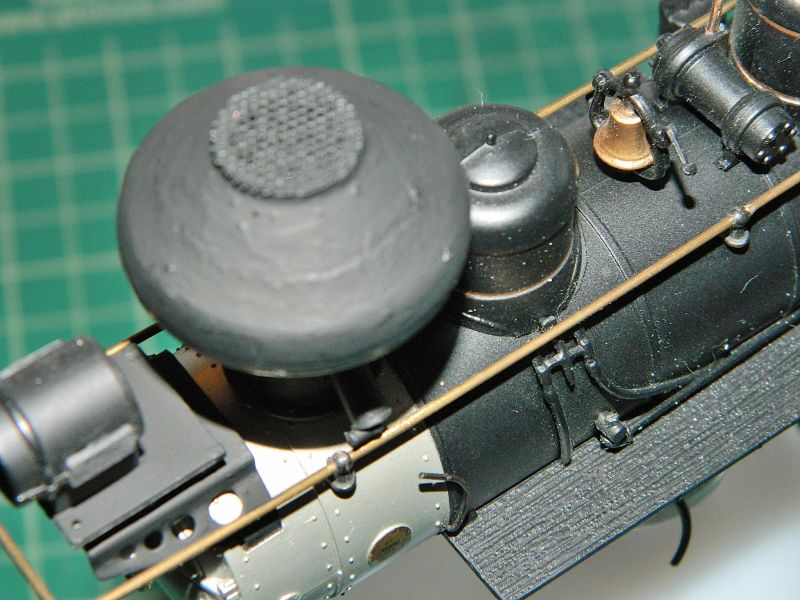
I managed to get a couple of small jobs done this evening, nice big spark-arresting smoke stack on the mogul, which still needs some mesh on the top. And time for a bit of critical evaluation. That whistle looks like it should be replaced by something that looks like a whistle, and that steam turbine generator should probably be replaced with a decent brass one, with some pipes from and to the steam dome. For those wondering about the dome nearest the smoke stack, it's for sand, the idea being that the boiler heat kept the sand dry and flowing through the valves to the wheels. New sand valves? I also tried out the lights in the clerestory coaches that came with the mogul - I will definitely need light bars. Pathetic doesn't do them justice. I like the ones from Rapido, small lithium battery with a reed switch that is activated by a magnetic wand from the outside. No wiring required.
I also added all those sand boxes on the diesel footplate. The diesel prototype I'm basing the model on has one sand box per axle, 3 on each side and a pair on the back of the cab (just visible in the photo, which is where I had got to before being rudely interrupted by a hot water supply pipe under 80 psi to the heat exchanger/fan unit bursting). I also made a start on the fuel tank for the diesel, (lottsa Lego), more on that when the glue drys and I can put a radius on the bottom edges. DCC wiring and hand rails next while I wait for the brass bits and pieces to come..
An enjoyable hour.
Nigel
©Nigel C. Phillips
Posted
Full Member
Not enough time today for the wiring (which looks to be at least a couple of hours fiddling), so instead some quick bits and pieces.
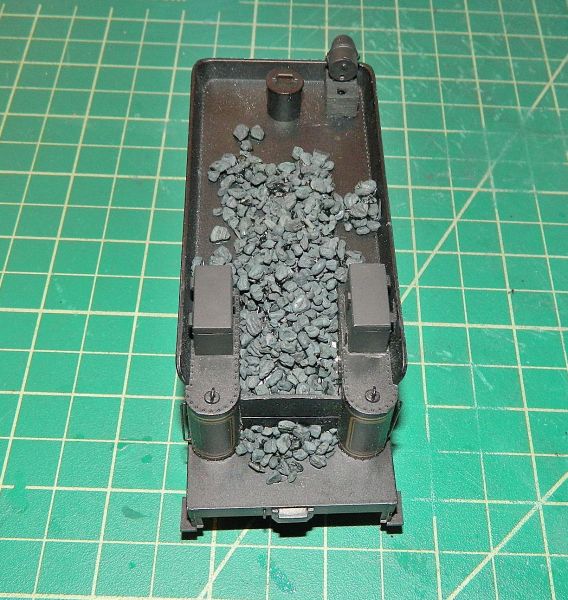
First up was the tender. The toolboxes and rear light were painted with matt black acrylic, and some coal added to the rebuilt bunker and over the original Bachmann mouse droppings. This is Javis "coal", to my eye it has a better look than that of anthracite chips, which are very shiny. I see there a few places I missed, I'll add a bit more "coal" when the first layer has dried. The glue was PVA white glue /water/99% IPA (50:25:25 by volume) with a few drops of matt black acrylic. I'll finish off with some real coal dust and black/grey weathering powder (real coal at $25,000 a ton is something I'm going really easy on, although the Javis material is probably more expensive than that!).
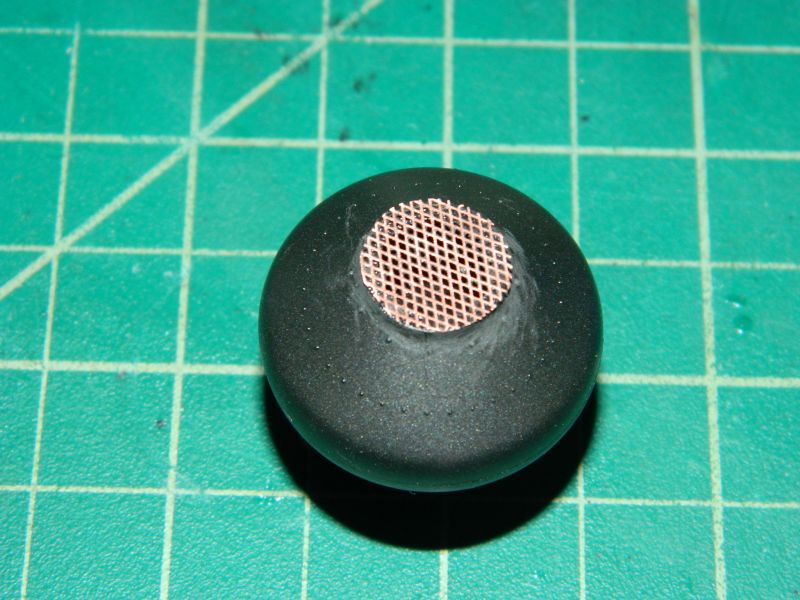
Next up was the mesh screen for the smoke stack. I found a scrap of used fine brass mesh in the "brass spares" drawer, trimmed to size and fixed to the top with plastic friendly CA. I ground up a small piece of Javis "coal" and dabbed a paint-loaded brush into the dust, which was then used to paint the dome of the smoke stack in a circular motion. This will provide the surface "bubbles" for the yet to come rust streaks to run down from.
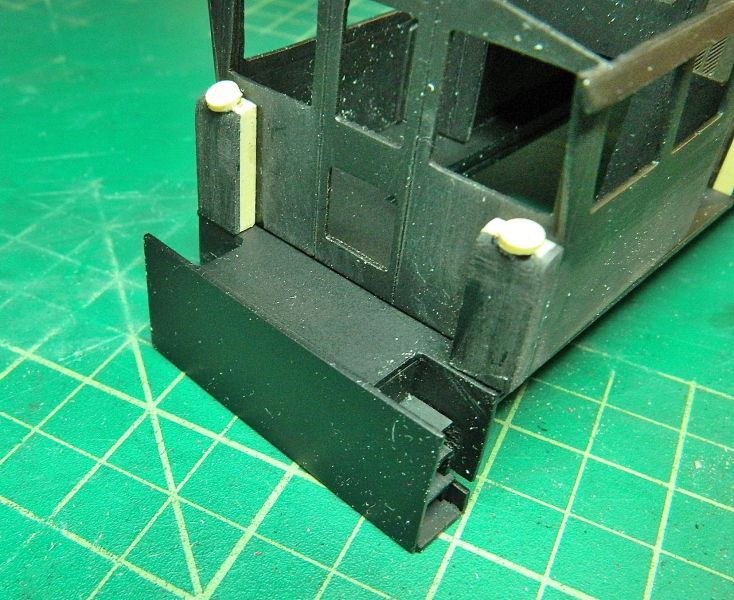
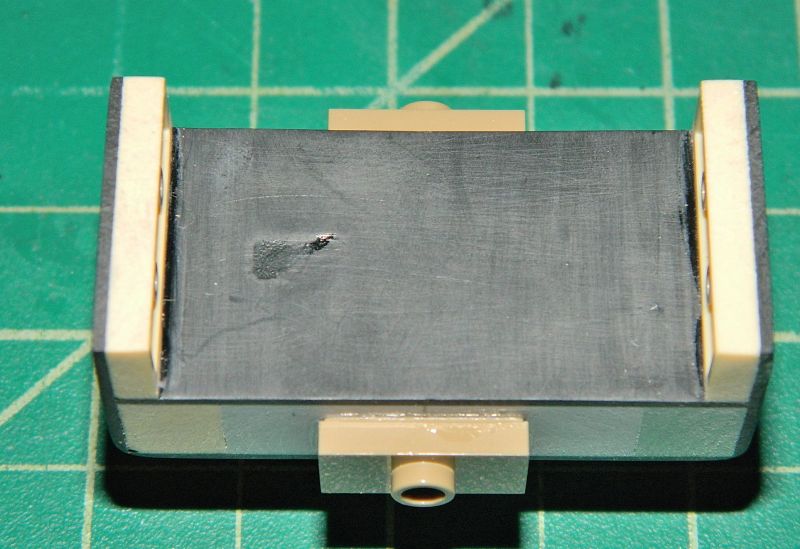
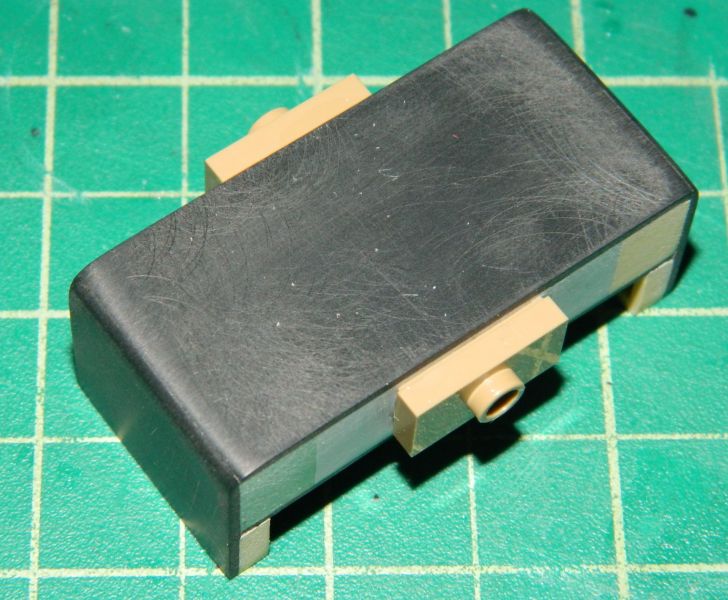
Last job was the diesel fuel tank. LEGO bricks with a skin of black styrene sheet (essentially scraps from previous work) were the materials used. A representation of the hydraulic gear box and cardan shafts to the inner axles was another convenient LEGO piece. The fuel tank is absolutely square in 3 dimensions. Radii were made on the bottom edge with the big fine file and 800 grit wet and dry. It's now ready to paint once the outside temperature gets above 55°F. I might have to take a bit off the bogie frame and/or the shaft depending on what the ruling track radius is. I'm leaning towards attaching the fuel tank to the chassis with some screws after drilling and tapping. There is enough space on the chassis to drill through into the fuel tank, and I have some nylon 2-56 machine screws around somewhere. Fuel filler! Nearly forgot.
Nigel
©Nigel C. Phillips
Posted
Full Member
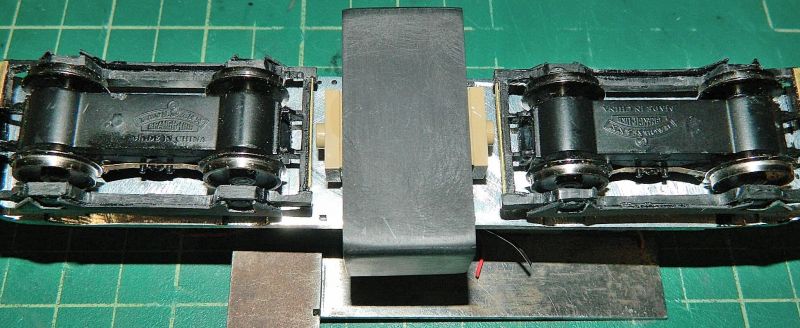
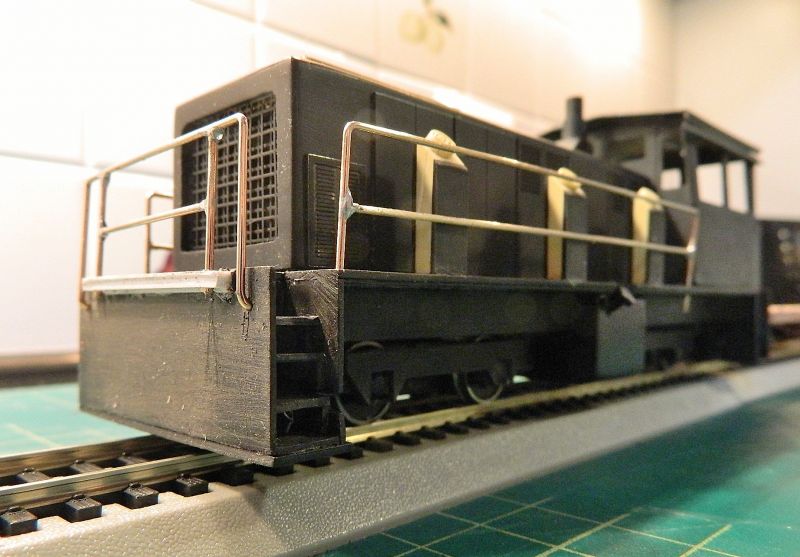
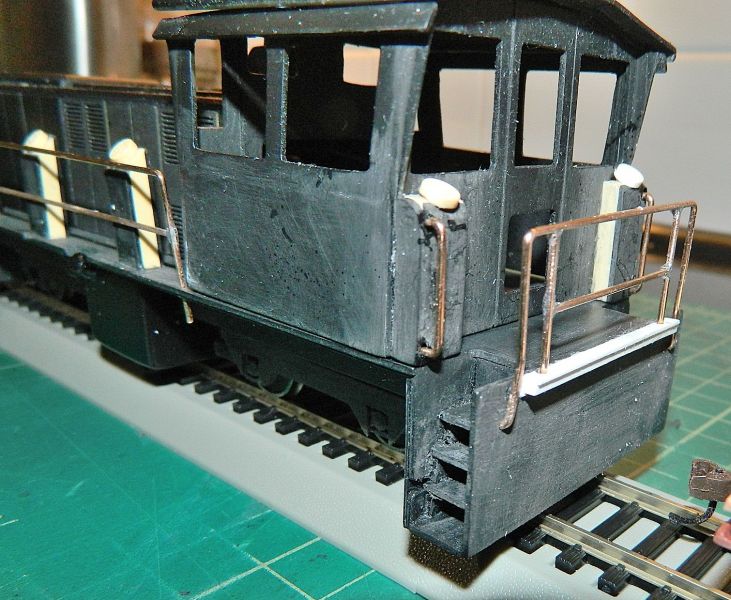
Couple of hours today, started on the railings (40 thou' P/B wire from Tichy Train Group), and finished off and attached the fuel tank (bathroom silicone sealant instead of the planned 2-56 bolts, good bond yet easy to separate in case of repairs). The railings need a bit of fettling before final fixing, with that the external body is almost complete. Needs some couplers to haul the freight stock around, as well as some sand lines to the wheels from the boxes. Plus a few areas of the body around the stairwells need a bit of attention. I have a plan for the couplers (involving more Lego, what else?).
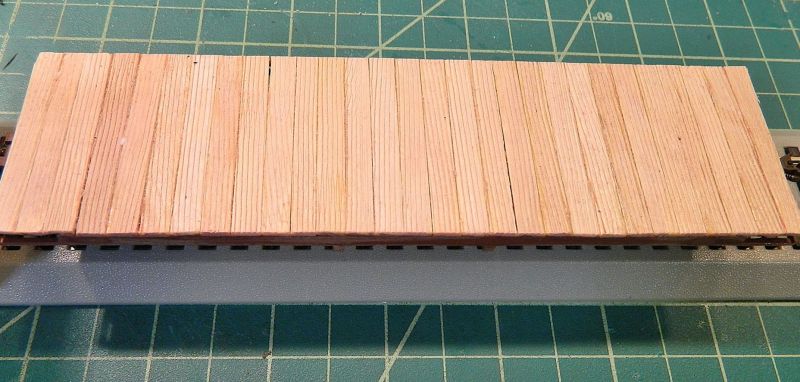
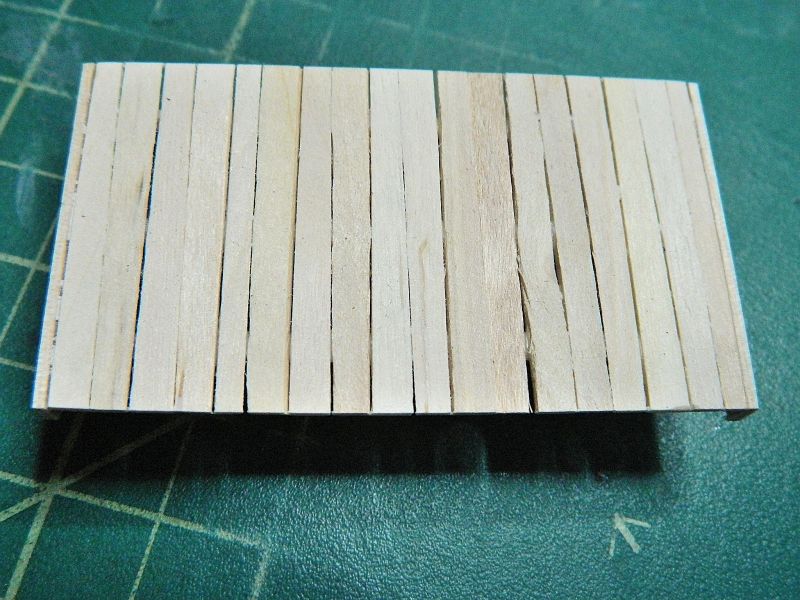
I also made a start on a flat car, wood planks thanks to Starbucks stirrers, wood grain courtesy of the blunt hacksaw blade, chassis and trucks from Bachmann, 26" diameter ribbed wheels from Kadee.The chassis is meant for a freight car, it's an easy job to use them for flatcars. I'll be building a few of these for various jobs around the layout (traveling crane, molasses tanker, sugar cane transporters, sugar bags, rum barrels). Much cheaper to buy the chassis and wheels and add the wood planks rather than buy a RTR flatcar, especially as I don't need the stakes, just the pockets.(around $25 each for the scratch build versus $50 or more for the RTR models, and the scratch version is longer, another bonus).
Nigel
©Nigel C. Phillips
Posted
Full Member
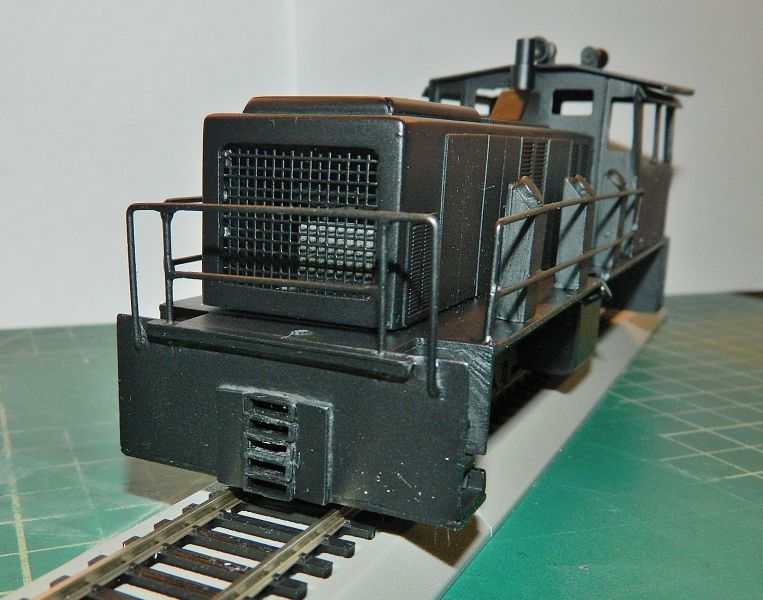
Some more work on the big diesel:
Chassis: I wired the chassis for DCC operation, an 8-pin socket and wiring harness to the pick-ups and motor, and an ESU Loksound V4 decoder with a large speaker to the socket. The rectangular speaker sits directly underneath the big grill at the end of the hood. I tested the running and sound, runs fine and is very noisy (the speaker not the chassis). I've covered this wiring approach in previous posts with other chassis. I keep the wire lengths as is, that way there is room to work on the various components if necessary without cutting. Bit messy underneath, small price to pay for accessibility.
Body: Two multilevel coupler pockets were made from a quantity of spare Kadee pockets (5 pockets per end), and slots made in the front and back beams with a razor saw. The coupler pockets were inserted and glued up. The plan called for a couple of bits of right-angle LEGO with one coupler pocket/height, I scrapped that idea as the stock will have various coupler heights..I covered how to make this functional multi-height couoler earlier in this topic when I did the 2 yellow diesels.
Horns. I found 2 Lionel O-scale horns at the local train show recently (2 for a $1.00, not bad), drilled a couple of holes in the roof, spot of styrene glue and they're in!
Paint: Today was the first day it got above rattle can spraying temperature outside in almost a month, so 3 coats of matt black paint (primer and top coat in one) while the sun shone this afternoon. It may yet get stripy beams in either yellow or black, chevrons if the mood takes me.
Nearing the end on this one, just a few more details to add, tidy-up the wiring, some light weathering, headlights and a rotating mars light on the roof.. Famous last words. X hours spent on the chassis and body means 5X on the details. Where's that list???
The foliage is from IKEA, less than $5 gets a large quantity of artificial greenery that is ideal for plants, ground cover, bushes, etc. Michaels, my local arts and crafts store, has some interesting artificial foliage that passes muster as sugar cane stalks after harvest.
Now If I can convince my wife that a couple of weeks in in the Caribbean is just what we need after the winter. Sand, sun, some tempting cuisine, sugar cane plantations, mills, rum distilleries, old railway history.
Next couple of weeks will be on the actual layout.
Nigel

©Nigel C. Phillips
Posted

Inactive Member
Max
Port Elderley
Port Elderley
Posted

Full Member

Posted
Full Member
Hearty congratulations :doublethumb
Bill
At 6'4'', Bill is a tall chap, then again, when horizontal he is rather long and people often used to trip over him! . . . and so a nickname was born :)
Posted

Site staff
Cheers
Matt
Wasnie me, a big boy did it and ran away
"Why did you volunteer ? I didn't Sir, the other three stepped backwards"
"Why did you volunteer ? I didn't Sir, the other three stepped backwards"
Posted
Full Member
Thanks for the comments. I'm happy with the result, at least that Class 20 lives on in another guise. Total cost of the materials was $20 excluding the Class 20 and the decoder/ speaker. Shame it is way too big for the home layout. There are some modular meets coming up so it should get a run out. Fun build though. I have to finish the Rogers mogul, bash the Forney from the Bachmann prairie, and there is one more small B-B diesel to do using an Atlas-Roco chassis. The body kit I got for that is problematic as it is way too fragile for my mitts, so it looks like another bash in styrene and LEGO.
Brendan - layout wiring? DCC, so two bus wires and track leads, no electric switch motors, no signals, no blocks or power sectors. Often live frogs with no wiring as well. KISS is the motto of the BCDR railroad. I'm more concerned about track and turnouts, building of. More on that later in the yet to come layout topic.
©Nigel C. Phillips
Posted
Full Member
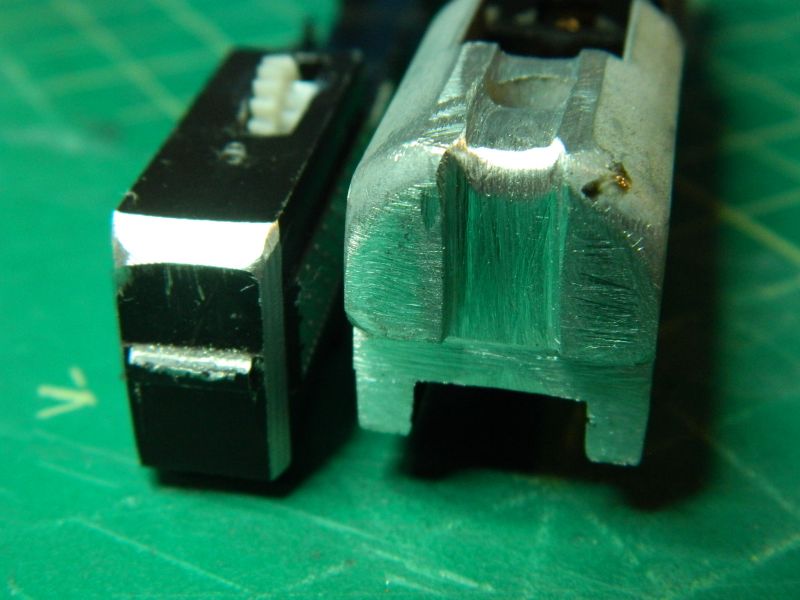
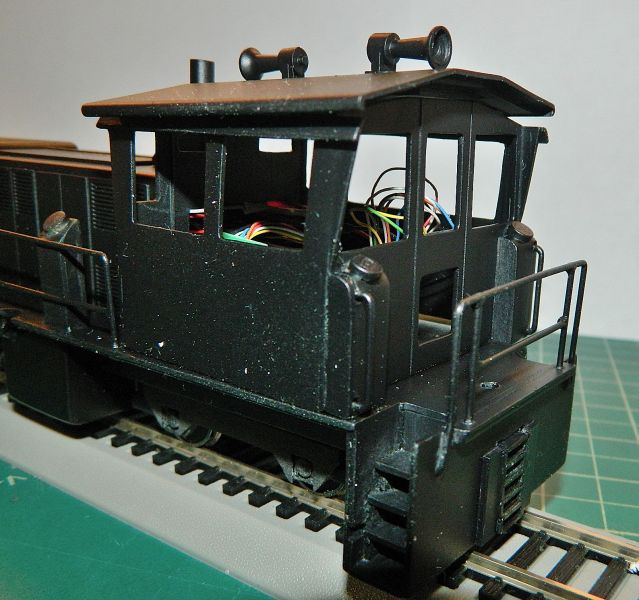
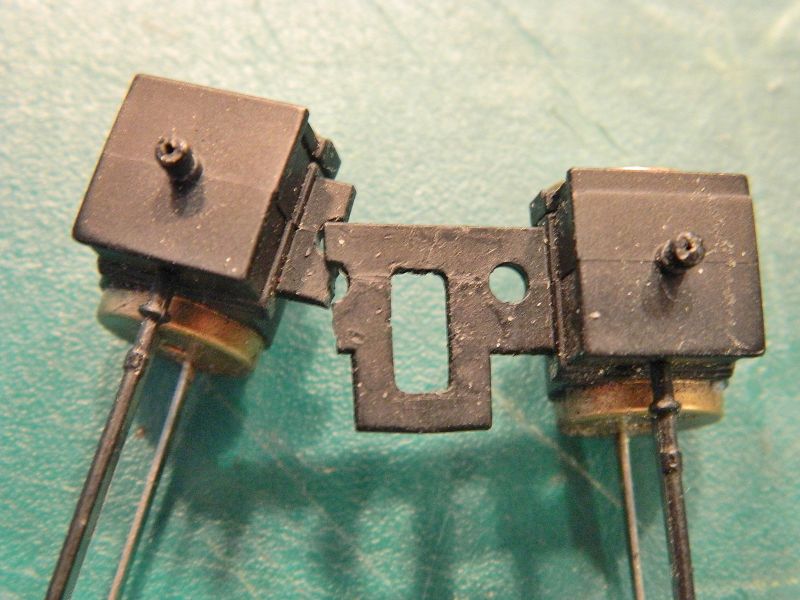
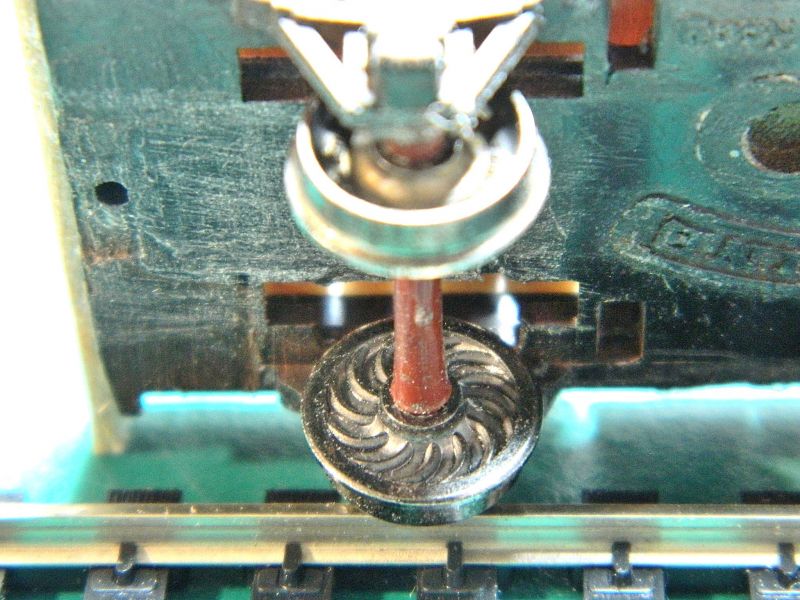
I made a start on wiring the On30 2-6-0 Rogers Mogul for DCC this afternoon. Wired the motor and the pick-up wires from the wheels to the 8-pin socket harness, plus the white and blue wires for the front headlight, test-fitted them all in the grooves at the back of the chassis where they will go to the tender, looking good, on a roll here, test-fitted the body shell, and….crack. "Well I never", or words to that effect. The saddle between the cylinders decided that it had had enough and broke into two pieces as I was pressing down on the shell to get it to click in the small ratchet on the chassis..Plastic this old gets brittle (I recon this model was made in the mid-1990's to at best the early 2000's) and needs to be treated gently, definitely not so flexible as new. I think a bit of selective metal removal from the chassis to make a slightly looser fit for the body shell is called for.
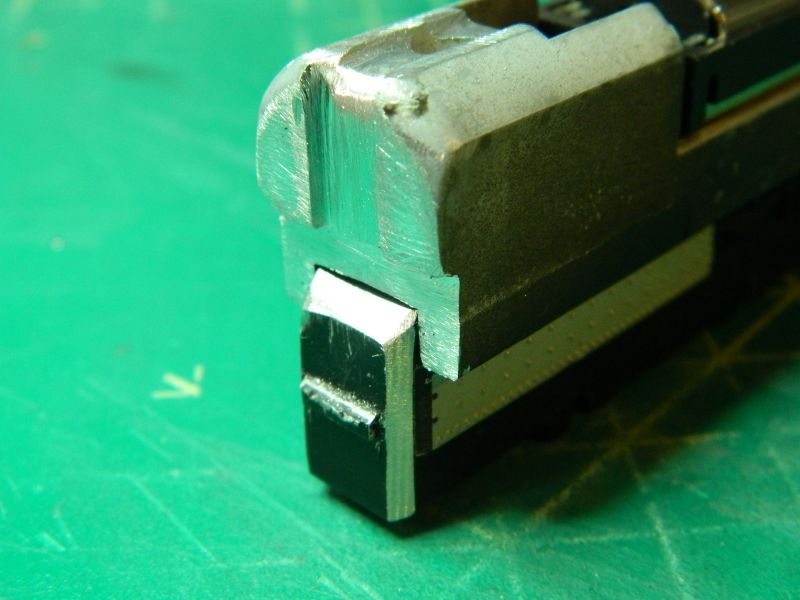
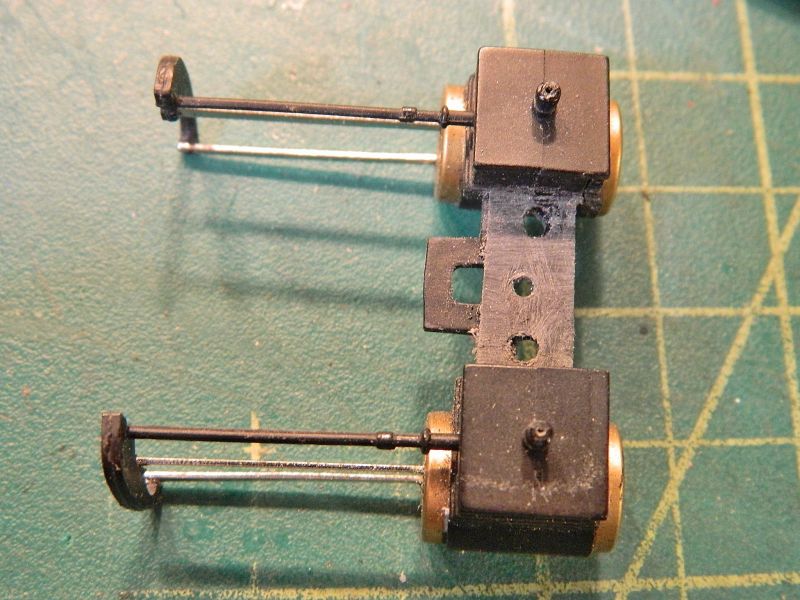
The spare cylinders/saddle at the Bachmann spares store is $13.20 + postage (which will bring it to around $18.00, more than I paid for the locomotive), so I used some CA to stick the two pieces together, and had a cup of tea. After the CA was set I used a small piece of new plastic and more CA to reinforce the repair. Slightly thicker than the original and more "meat" to the saddle, but now a much tighter (and better) fit in the wheel sub-chassis. Phew! Panic over. If it goes again I'll use brass sheet.
Nigel
Before…
After…
©Nigel C. Phillips
Posted
Full Member
Posted
Full Member
Bill
At 6'4'', Bill is a tall chap, then again, when horizontal he is rather long and people often used to trip over him! . . . and so a nickname was born :)
Posted
Full Member
Thanks, I thought for a minute I might be looking at an inside -cylinder narrow gauge locomotive (rare, but not unheard of, Manning Wardle did a few). The repair works, little if any shear force.
Nigel
©Nigel C. Phillips
Posted
Full Member
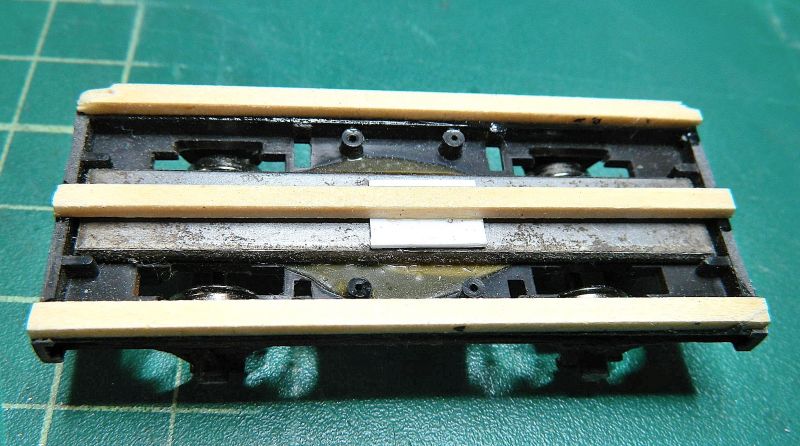
A couple of small project I have been putting off are some wagons for moving cut sugar cane around. m
Many small sugar cane operations used small wagons with metal or wood ends and moved the cut canes around by piling them across the bed of the wagon so they hing down at the sides. I'll be doing a few of those, as well as some that will have a "Rugga" curved chassis (from my )n14 days).
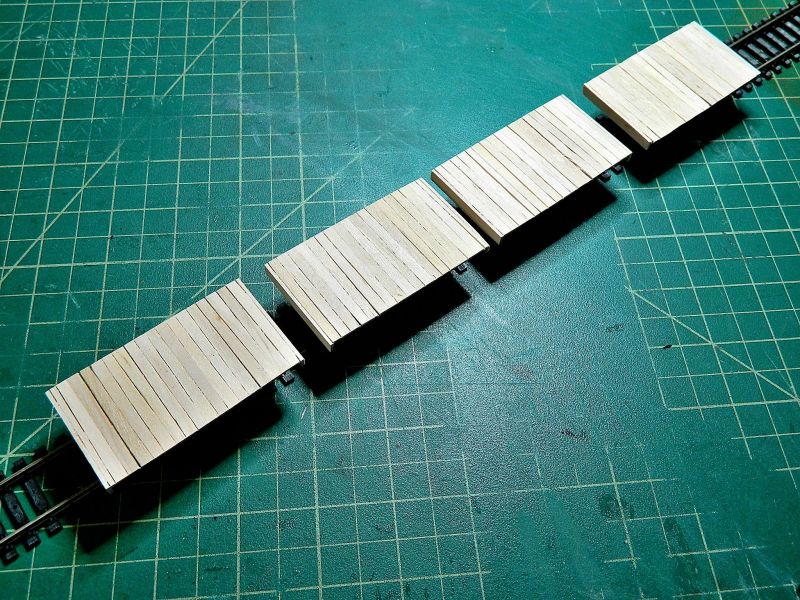
First up are some flat tops using essentially bits and pieces and spares.
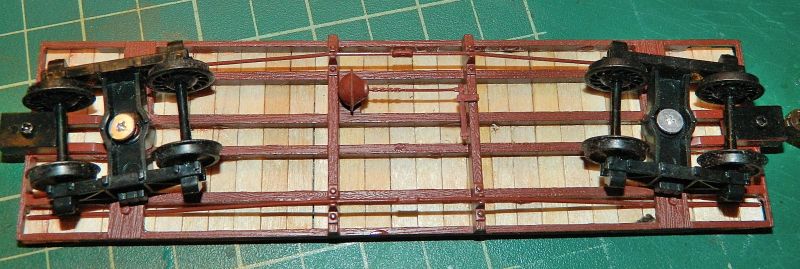
I used 4 coal wagons left over from the OO modeling days, 3 Mainline (those old CWS coal wagons) and 1 Dapol, so the tops were removed and binned. The hand-brake was cut off and trimmed up a bit. The wheels were removed, and replaced with some HO 33" diameter ribbed back wheels lying around from HO freight car kit builds. These have a diameter of 16" in 1:48 (American O scale). A wooden sub-frame (HO wood ties/sleepers) was glued to the top of the underframe using CA, and wooden flat tops glued on using wood craft strips cut to an appropriate length. The ends were made from coffee/tea stirrers (ex Starbucks, and yes I do need 4 to stir that large cup of tea) and attached using CA.. I just need to add some KD couplers, and stain the wood deck light grey. Then it's on to the metal ends (bent rail was commonly used, I have lots of code 75 doing nothing.
That will be about it for this week, I'll be traveling and in the UK from Wednesday on, so perhaps a chance to get a few more OO coal wagons, although shows near where I will be (Banbury) are a bit far away.
Nigel

©Nigel C. Phillips
1 guest and 0 members have just viewed this.