My new layout
Posted
#229783
(In Topic #12564)

Full Member
On30 - again
Hi All,Had a big clear-out recently, where I sold most of the 4mm/OO stock and the HO stock at a local show where I had booked a stall for for the weekend. So onto the new layout, which will be On30, rolling stock first. It's a mixture of steam and diesel, and I decided that the first rolling stock build would be a diesel gopher using a 3D print shell and a Bachmann (US) donor chassis that was going spare as the old body does not fit the new chassis. I've yet to do a 3D print build, so I'll be learning as I go on this one (and given the issues so far it may well be the last one).
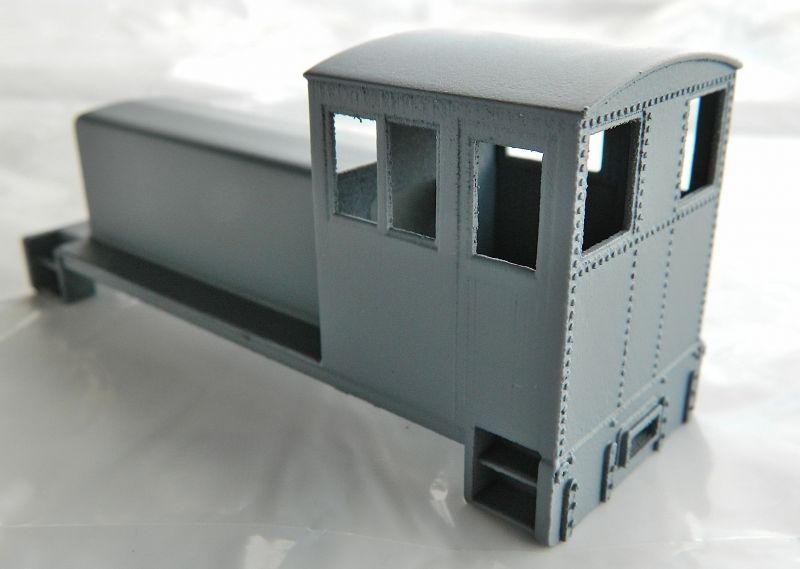
The shell is in nylon ("tough, flexible", I like the sound of that), with most of the surface print layers removed by a process whereby the surface is "matt with a grainy feel". (Translation? Fuzzy. I don't like the sound of that). The print was done vertically (I didn't know that, live and learn), and the combination of surface treatment and vertical orientation of the layers has meant that the louver detail on the sides is not that great (I'm being very generous here). An afternoon with the grit family (they all turned up, 80, 150, 320 and 400, and it was a real PITA, 3 cuppa session) removed most of the louver details and doors. It's still visible under a certain light, but I've got plans for addressing that.
The body shell is designed to take the Bachmann GE 44 tonner diesel switcher (bo-bo ). Unfortunately the 3D print was designed for the old DC twin motor model, the new one that I have (single motor, DCC on board) has issues fitting into the shell. It's a bit longer and not so high as the old one. Removing a bit of material from inside the shell sorted out the fit, but the shallower design meant that the body sat on the rails with the KD trip arm banging against the rails. Not ideal. [Note to self, check what model was used for the chassis if buying a 3D print in the future. And ask for a photo of the actual print. No more guinea pig beta-testing].
Fitting inside the shell was resolved, but the screw holes through the fuel tank met air, not shell. The solution was 2 pieces of styrene cut to size that sit on the underside of the shell and raise it off the chassis so that the KDs are at the correct height, and there is now some material for the screws to go in. Next job is attaching those styrene strips to the nylon shell. Now nylon is pretty inert when it comes to adhesives, and has a very low surface energy (no charge), and repels almost everything. It seems a 2-part CA (surface activator and CA) or a 2-part epoxy specifically designed for plastics are apparently what's required (both from Loctite). Not regular CA or epoxy, both of which involve the use of some pretty exotic surface treatments such as plasma or corona jets to generate a surface charge. I definitely don't have either of those bits of kit in the tool box. I have to cut a few holes in the body shell, so some experimentation on the removed bits with the 2 adhesives will be up next before I start gluing.
My impression re the 3D print so far - scratch building aid at best given the amount of work required. As I expected, not exactly ready for prime time. I've ordered a brass kit and a white metal kit to put me in a better mood. Bit of soldering should do the trick.
Pictures tell the story so far.
Nigel
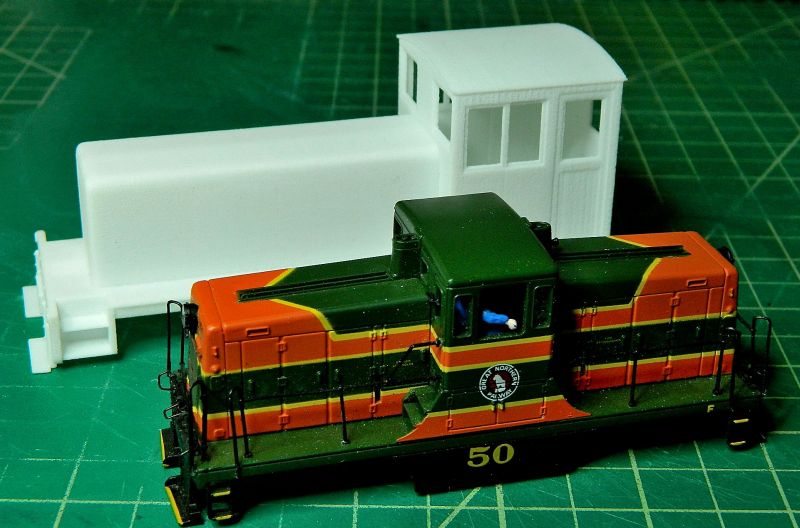
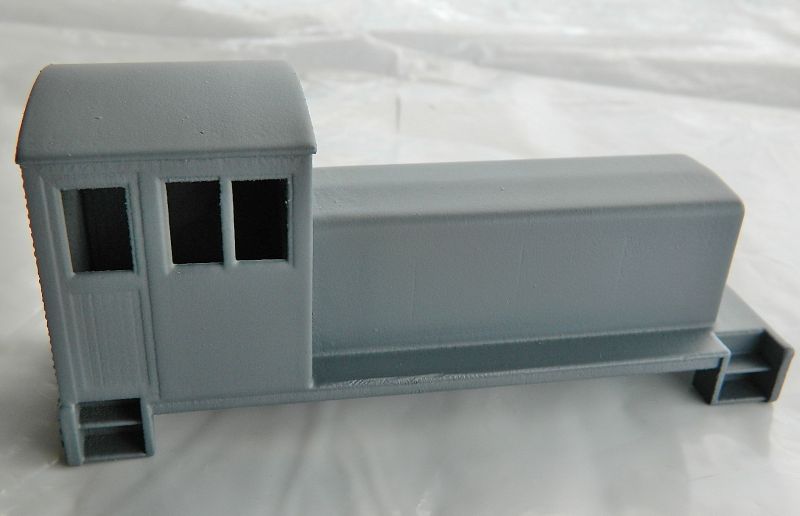
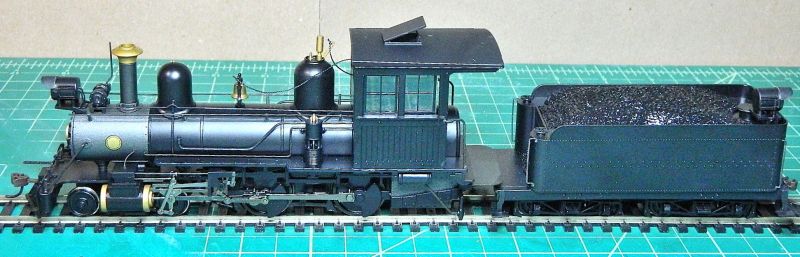
Bachmann GE 44 tonner (the Great Northern little 'un) and 3D body shell (Frosty the big 'un, sort of a generic Baldwin/Hunslett cross). That roof is fixed, attaching the window glazing and cab details will be interesting. That roof may have to come off. May? Ha! Who am I kidding.
Bachmann 44 tonner chassis, DCC installed. The top of the fuel tank (the bit with the holes for the screws between the trucks/bogies) and those ledges above the trucks/bogies are where the body shell is supposed to rest.

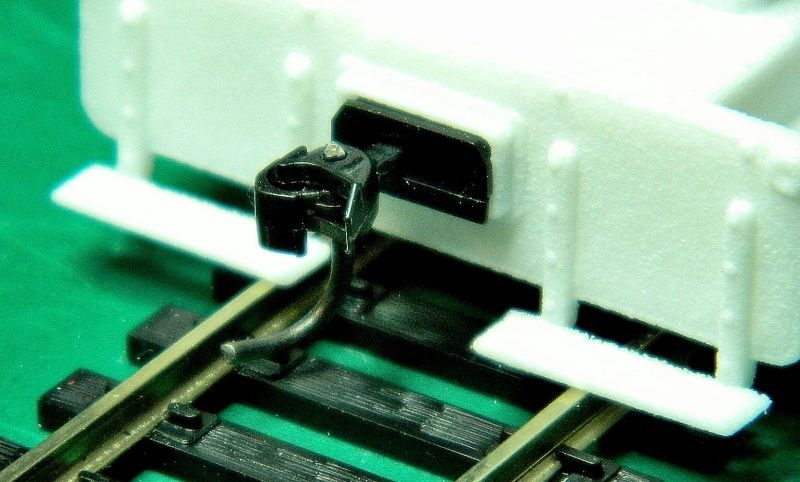
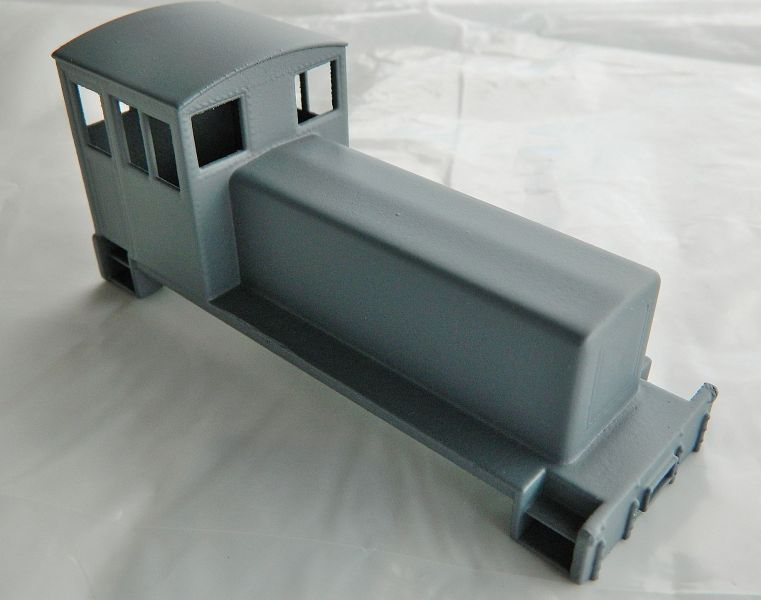
Body shell on chassis - a "dear oh dear' moment, something is not right here! Front step platforms are on the rails, and the KD pin is hitting the rail (and it's higher than it should be anyway).
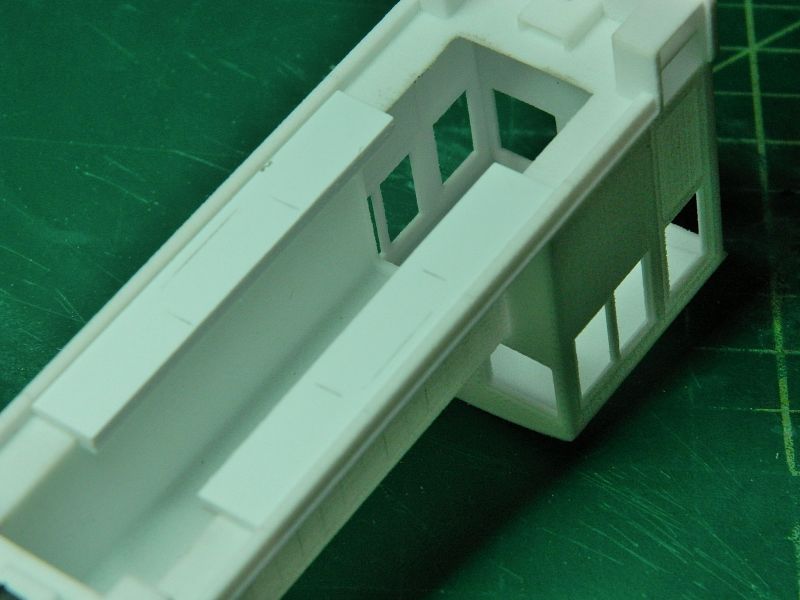
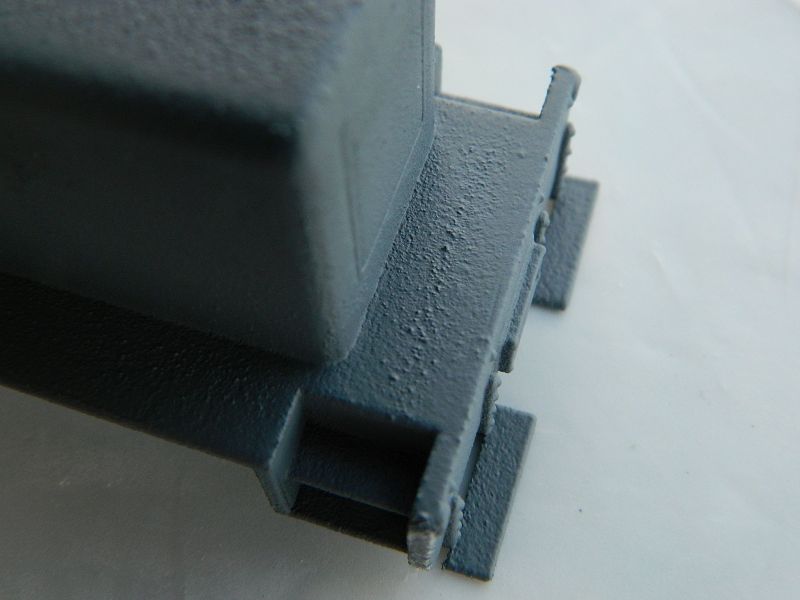
The solution? Styrene inserts to raise the body shell and provide some anchorage for the screws that go through the fuel tank. The inserts are L shaped, and an almost exact fit for the chassis.The pencil lines are where the fuel tank rests.
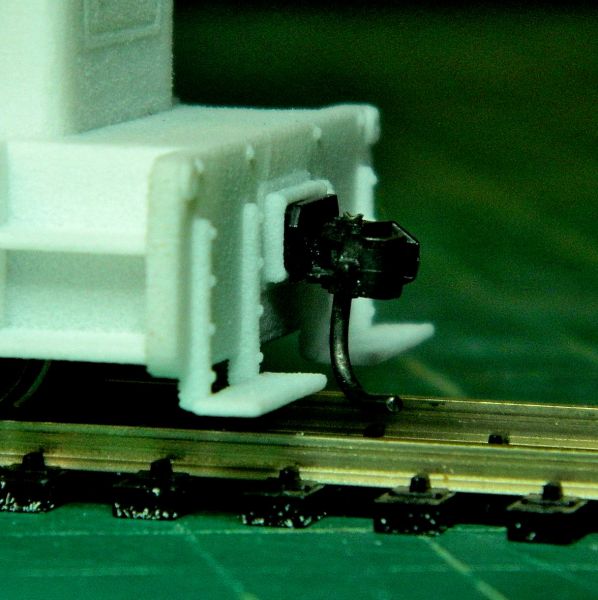
Much better. KD coupler is at the correct height, the pin does not bang into the rail (which would mean a derailment at the first turnout)
Save
©Nigel C. Phillips

Posted

Full Member
The steps struck a chord and I think I'd be tempted to replace then with styrene and brass strip suitably drilled and pinned. That's just me though.
Are those 0 gauge Kadees? I have some for my coaches (they will pass for buckeyes) and I'm quite impressed.
John
John
Posted
Full Member
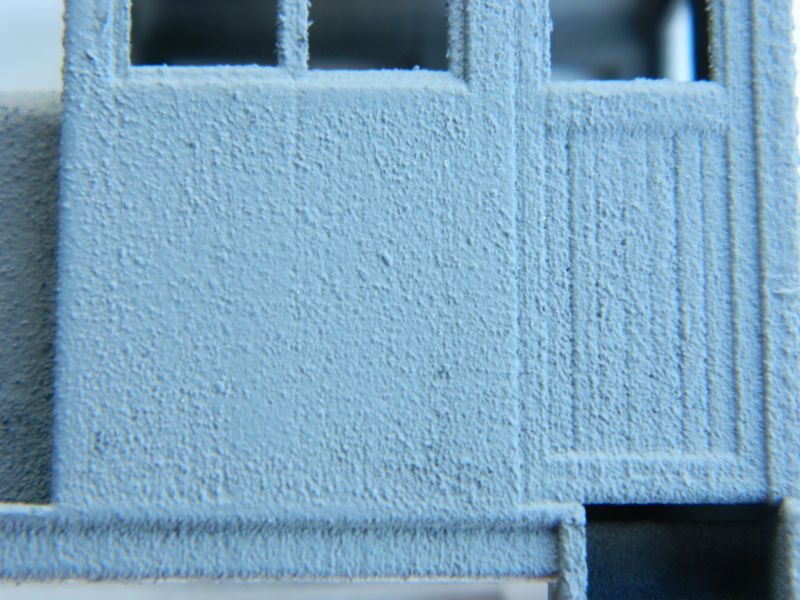
I suspect filling primer will be necessary. This afternoon looks fair, so a light coat of regular primer just to see how much work there is. Even with #400 grit (used wet) the surface still feels like short flock. I am not optimistic that going to #800 or even #1000 will give a smooth surface and get rid of the striations. Looking at some photos of completed models shows a definite fluffiness to the painted finish.
I agree totally with your comment re the steps. Both front and aft steps and supports will be going, the prototypes I'm using as reference have slab fronts and backs with a hook and pin coupler. Rivet detail will be done using O-scale decals from Archer when the front is reasonably smooth and an appropriate coupler mount added (epoxy and pins or even screws). I suspect I'll be cutting new plates from brass and attaching them with epoxy and screws just to get a decent surface. The coupler currently on is a regular HO one, just not one from KD. Bachmann I think which is a big chunky affair.
Reading through the manufacturer's website it's clear that developers are expected to design items so it's printed as a whole, no sub-assemblies due to the (acknowledged) issues of gluing them together. Hence the cab roof not being a separate item. Not what we're used to in the brass and white metal world (or even resins), where the approach is to build the sub-assemblies and then combine them to give the final model. How you can effectively sand out the layer striations in a complex steam locomotive print with compound curves beats me. Sand-blasting? It's bad enough with the slab sided one I'm working on. It would have been better to leave the rivet detail off to give a decent flat surface to finish. Same goes for louvers (decals are available in O, making life a bit easier). The site also discusses glues, CA and epoxy are the only 2 that work, just not well enough to be used for anything that is subject to stress. Like pulling wagons or holding a chassis in place. "Ere, 'old on mate, that's wot I'm doin'".
If I'm being candid (and that will be something new :roll:) this may well be the first and last 3D print model that I'll do. This is rapidly turning into quite an exercise for the bodgitt and fixitt crew. "Not wot we expected guv. Down tools lads and 'ave a cuppa while we negotiate a better rate (or a better model)". Yes, yes, I cry it's in hand…
I really would like to hear from anybody working with 3D print models to see if they have the same issues, and if so how they were addressed. I'm glad I tried a model before going the whole hog and buying a printer.
Nigel
Save
©Nigel C. Phillips
Posted
Full Member
You may not be able to remove the roof without destroying it but it shouldn't be difficult to substitute plastic or brass, assuming you figure out a suitable fixing medium.
If your coupler is H0 and looks OK for 0 gauge, it must be chunky indeed. Mind you the scale is 1/48 isn't it, somewhat smaller than 1/43.
You may want to raise a thread on this on RMWeb, I've always had a lot of help when I've had a question. Maybe there's a NA forum that can help.
John
John
Posted
Full Member
I had a quick trawl on RM, I'm still a member so I'll leave a post. Two coats of Krylon grey primer this afternoon. I'll let the unadulterated pictures tell the story. Short flock indeed. In the spirit of Eric (Morecombe) and Ernie (Wise) - "what do you think of it so far? (…Rubbish)". It's OK in (a very few) parts.
One more go with the grit family and then I'll call it a day. I hold no great hopes of any improvement. Brass kit arrived in the mail today. :doublethumb
Nigel

SaveSaveSave
©Nigel C. Phillips
Posted
Full Member
 Perhaps time to try another prototype. :cool wink You could build this from plastic card. There don't look to be any particularly difficult bits.
 John
John
Posted

Inactive Member
There is a French bloke on the O scale forum who is building superb detailed models using 3D.
SUPERLINER | O Gauge Railroading On Line Forum
The quality of his printer's work is excellent.
Cheers
Max
Port Elderley
Port Elderley
Posted
Full Member
Inspirational. Close up shows the granular surface is still there, not so pronounced as mine. Wonder which orientation it was printed in? And what thermoplastic and definition?
I've looked at a lot of painted 3D print models. The orange peel paint finish is very common.
The higher definition plastics are approximately 125% more than nylon. Which means a $125 body shell. Brass etch is about $20 for a similar model. Highly detailed body for a steam locomotive in white metal is about $100. RTR On30 steam locomotive new is around $60-$120 (with DCC) depending on the model.
Light sand tonight to knock the highlights down, more primer (filling type), Repeat. Looks like it will be heavily weathered.
Nigel
©Nigel C. Phillips
Posted
Full Member
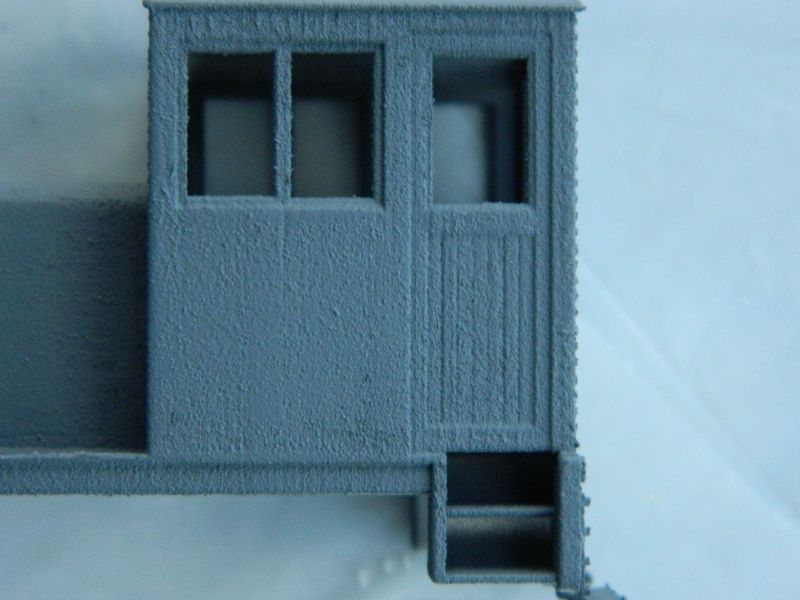
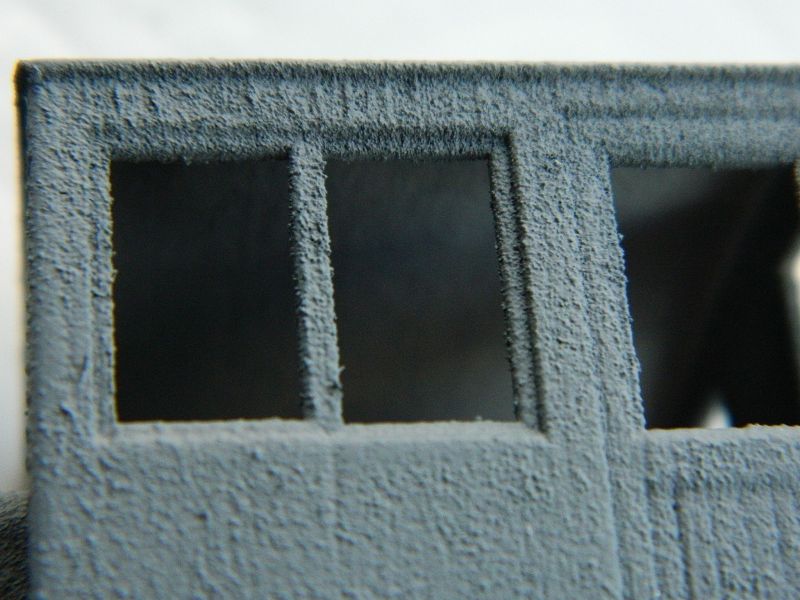
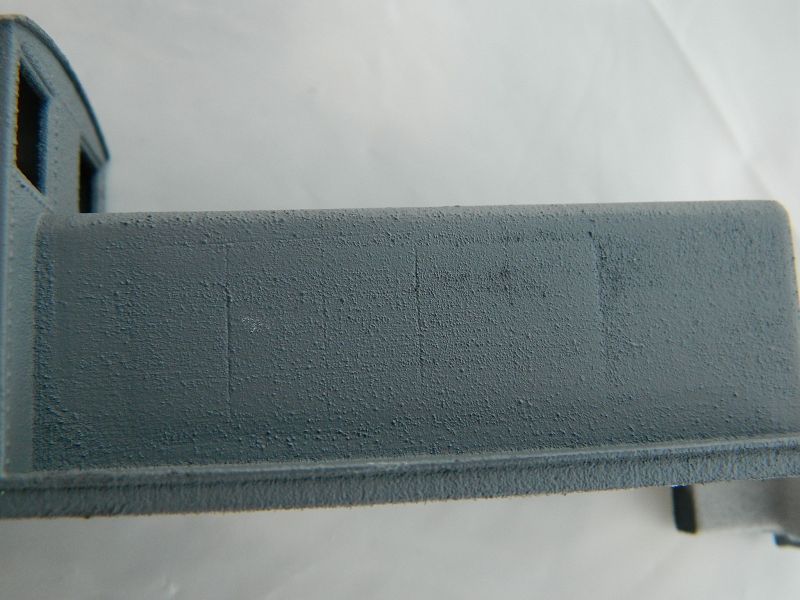
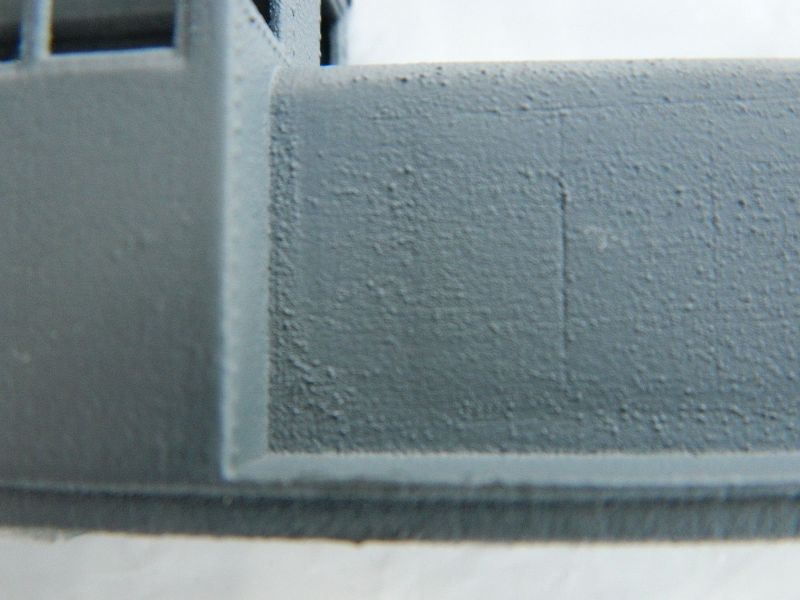
Finally got rid of 95% of the "orange peel" finish. Still a bit of crud around the window frames, No barnacles present (thank you John, excellent description). Wet and dry (#800, wet), grey primer, repeat for a total of 4 times. Stopped there as the rivet detail was getting a bit blurry.That makes a total of nearly 8 hours work in total, not including drying time. "When do I get the kitchen sink back then?" was an inducement to getting it done. Good job I'm paying myself, got enough for another one.
Took off the steps at the front and back, the riveted bars will go when the new coupler mounts go on. I'm looking for some On30 couplers that take pins and bars. Found some at the 3D print store, brass would be nicer.Bit more research. Please, let there be brass ones out there!
Next step - glue those chassis supports on, add ventilation grilles and louvers. On order, they should be here next week (grilles in brass, louvers in decals).
Pictures show the results of the extra effort. It will have a final rub-down prior to painting. Lesson from all of this? - It takes a lot of work to get the print striations so they are barely noticeable, and get rid of the flock finish. And yes John, it would be easier to build a shell from scratch using styrene or even brass. Faster and cheaper as well. And I have found a site with lots of diagrams and dimensions of the prototypes I would like on the layout.
3D prints - love 'em or hate 'em.
Nigel

SaveSave
©Nigel C. Phillips
Posted
Inactive Member
Max
Port Elderley
Port Elderley
Posted
Full Member
John
John
Posted
Full Member
Max, John, thanks for the comments. A lot more work that I expected. and it still needs another rub down prior to the final color coats. I'll be drilling some holes in the body once the primer hardens off in a few days. One for a decent radiator grill at the front, one on each side behind the front to allow all that hot air to escape.
Bit more progress tonight - glued the support inserts for the chassis to the inside of the frame. Went for the 2 part cyanoacrylate from Loctite after some experiments on a bit of nylon sheet (found in the spares box) and scraps of styrene sheet. Interesting stuff, the styrene, not the joint, failed when I tested one hour later. The Loctite kit is not an instantaneous bond, needs 30 seconds with pressure to cure. Those inserts seem to be there for the long haul, I probably don't need screws or pins.That said, braces and belts, braces and belts…
Nigel
©Nigel C. Phillips
Posted
Full Member
John
John
Posted

Site staff
You've a lot more patience than me Nigel, I would have given up.
Ed
Posted
Full Member
Hi John,Watching this with interest Nigel. CA does have a tendency to bond bl##dy well, particularly when I discover I've made a mistake and need to reposition the part. :roll: There's a real possibility of destruction.
John
Subjective impression only, but I think this CA is a lot stronger than regular CA. When I tried to pry it off this morning the body shell flexed. An acrylic 3D print would have shattered. It's expensive stuff, about 10 times more than the CA we normally use for modeling, one part is an activator that presumably etches into and gets a charge on what is essentially polymeric paraffin wax, the other part seems to be industrial strength CA. I can see why it recommends gloves. (I masked and gowned up as usual when working with chemicals. And I didn't glue the kettle to the counter).
At least with the slow set (around 10 seconds, although it says pressure for 30 seconds) there is an opportunity to act on that "no, No, NO, that's not right" thought. First one I've used that actually works well on styrene. Nylon (Nylon 12 to be exact) is a new material for me.
Nigel
Save
©Nigel C. Phillips
Posted
Full Member
Hi Ed,What a difference, brilliant :thumbs
You've a lot more patience than me Nigel, I would have given up.
Ed
Thanks. Not often I decide to throw the towel in. I was sorely tempted with this one to see whether it would fly (I was spraying it on the balcony). We're 14 stories up, that would have really tested the claims of "tough, flexible". There have been quite a few "oh, dear oh dear" and "well I never" moments so far. Along with "what did you just say?" from my wife. I expect there will be more (from both of us)..
It's unfortunate that the physical properties of nylon 12 ( specifically it's low melt temperature around 180°C) are ideal for low cost 3D printing (that's a relative term, this one was $50), while it's chemical properties (it's pretty well inert) are not really suitable for a lot of the things we get up to in modeling. Sanding seems to generate a fluffy surface, probably due to the formation of fibers attached to the surface. Where's the electron microscope when I need it! Plus those printing layer striation issues. One interesting thing I noticed is that the striations are on a slight bias, and in a certain light they are still visible. Means the print was not absolutely vertical. One result is that he radiator detail is actually to one side (and not square). Plus the end of the hood is not quite vertical but slopes in. Ho hum.
Nigel
Save
©Nigel C. Phillips
Posted
Full Member
John
John
Posted
Full Member
This came in the mail this morning:
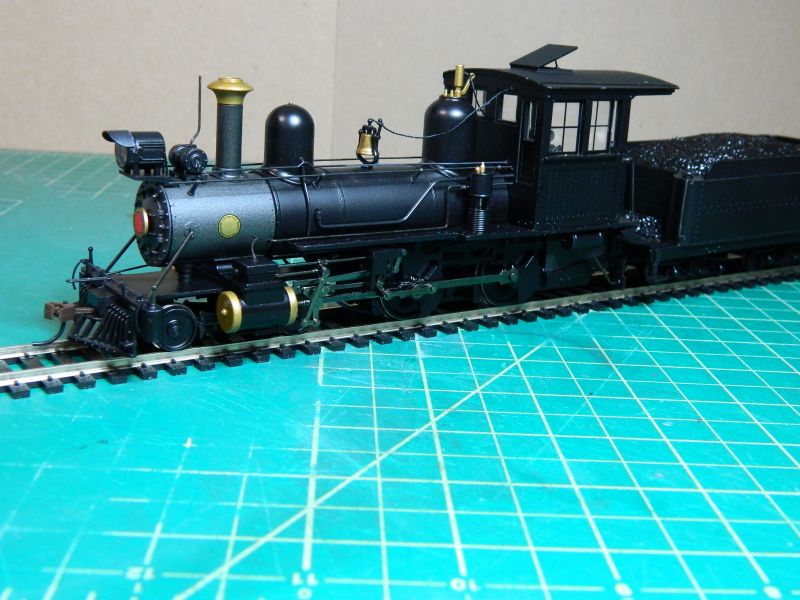
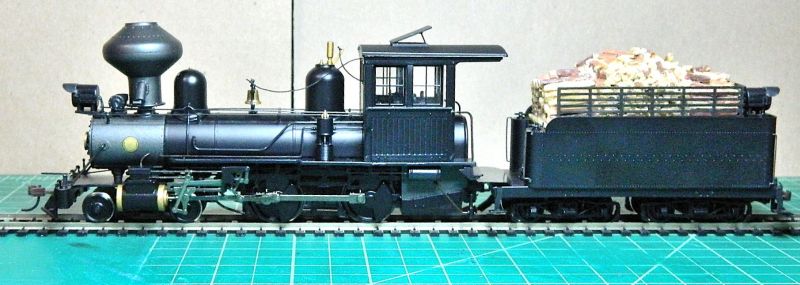
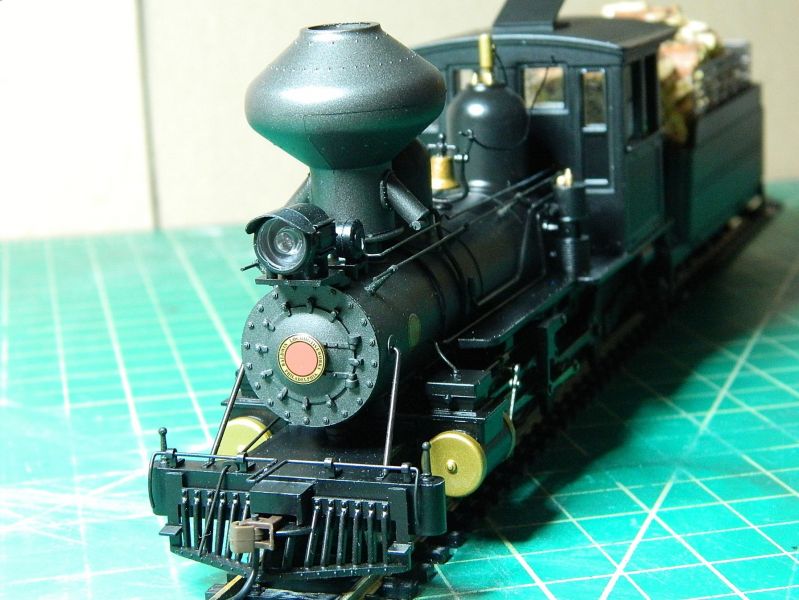
Bachmann On30, DCC on board, 3 smoke stacks (coal, oil, wood), 3 tender loads (coal, oil, wood), bag of coal for weathering, sundry other bits and pieces. $59.99 brand new, unopened (RSP $399). Which was $9.99 more than that diesel shell. Might just order another one with a steel cab. Although their 2-6-6-2 articulated looks tasty at $99.99 (RSP $460). Or even better a Baldwin 4-6-0 with sound at $119.99. Choices, choices.
Better get cracking the trackwork. Hold on aminute, I need a track plan first. Or do I? Maybe I should go organic and let it grow like the real ones did depending on demand and geography.
Nigel
SaveSave
©Nigel C. Phillips
Posted
Full Member
Hi John,I haven't tried the two part CA. My CA of choice is Zap A Gap medium. It has served me well and still retains its bonding strength over time. I have noticed the bottle I'm using has thickened up and takes quite a while to set. It's probably well past its sell by date.
John
The number one enemy of CA is moisture . Best kept unopened in the 'fridge in the dark (as long as it's a frost-free 'fridge the relatively humidity is very low). After opening store at room temperature in air-tight container (with some blue silica gel crystals in the bottom) as any moisture inside the bottle will condense once you put it in the 'fridge, and will start polymerization. If it's gone thick it's polymerized and is less effective as a glue. Once it's opened it's shelf life is a few months.Time to get some more. Buy in small quantities unless you use it a lot, it's more cost effective than throwing away half a big bottle.. I like ZAP A Gap as well, great for bridging those gaps.
Nigel
©Nigel C. Phillips
Posted
Inactive Member
How does it run? Bachmann stuff is usually pretty good when its new.
Max
Port Elderley
Port Elderley
1 guest and 0 members have just viewed this.