Going large - building large layouts
Posted

Full Member


Posted

Full Member
Staying on the thread Kevin.
Posted

Full Member
Almost inevitably, the question came up of whether I could actually get 24ft x 16ft - a debate driven by a number of properties offering slightly smaller areas (the house it was going to happen in didn't materialise). So what if I had less space - what was the minimum space I could get away with?
The answer was, of course, a much smaller space but I wanted what I wanted - it was really a question of how small could I make the system without losing its character?
Strangely, what with one thing and another, a new design emerged that removed the two-level aspect of the old plan and kept everything level.

You will see that I am still working to a 24ft x 14ft area and would prefer 16ft width to increase the walkways. The duck-under problem has gone away as has the question of train lengths and the ability of locomotives to pull their trains up from the low level storarge areas. The system can still accommodate 50 trains. [The plan has changed since I made this image - the Yarslow yard has been redesigned to allow access to the goods loop via a a slip crossing when reversing out of the UP platform - the point providing the link between the yard and the UP line has had to move.]
It is still DC, Peco Code 75 and designed for single-handed operation.
Known originally as "Plan C" it then became known as the "Large Layout Project". Plan B was a 18ft x 8ft garage scheme that challenged me to go back to small spaces again and was designed to test my real ability to build something less enourmous - I failed! I resorted to 20ft x 12ft and designed something along the lines of Arthur Whitehead's "Just Supposing" from the 1970's Railway Modeller series. These were LMS schemes that never were but developed by Arthur up to believable layouts with names, places and trains as inspiration.
The new system has a redesigned main station (Yarslow) and could now avoid the return loop across the middle of the room by staying on one level. Trinity Square survives and has its own storage sidings at the front of the storage area. The loco shed area is a "scenic storage" zone - I wil put in ash ballast, coal stages and water cranes but essentially, this is part of the storage area. The turntable will be hand-operated. Note the cartridge bay on the left for the occasional trains (engineering, pigeon specials etc).
The branch line is changing daily. The traverser exists already (linked to another layout) and I have started building Long Dyke although it only 4ft long - it is my nod in the direction of a "plank" - albeit with a 4ft traverser on each end. I am very much inspired by Chris Nevard (hence the "Lesser Nevard" station) and plan to use this little station to up my game on the scenery front. I am happy with my latest tree-making efforts but will treat myself to a decent static grass applicator. The signals will work and I will use SEEP point motors in place of the Peco ones on the present layout.
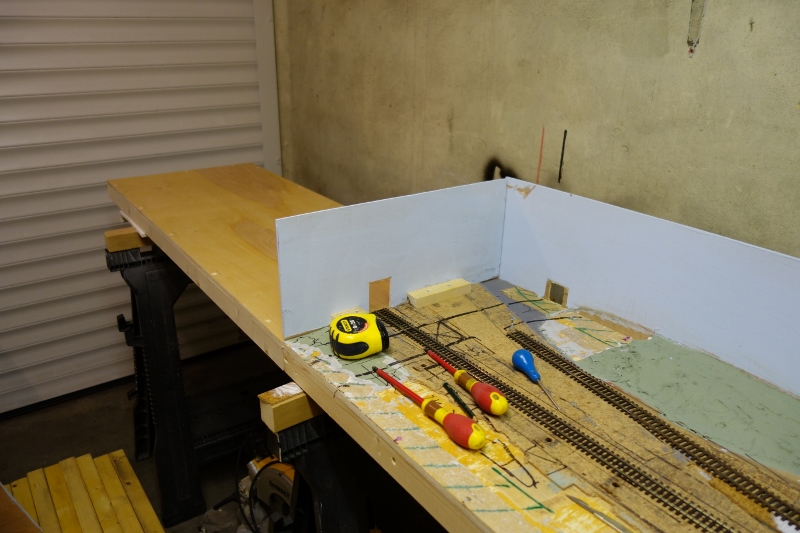
I did start to build a portable layout called Baffle Road (an anagram of AFFORDABLE) to see how little I had to spend to build a decent model terminus - 12ft x 15in on 3 x 4ft boards, one of which was a traverser. The project got somewhat de-railed by my starting to use it to experiment - SEEP motors, baseboard connectors, different switches, walkabout controllers etc etc. In the end, I stripped it all out again and now have the boards and a traverser as above.
Hopefully I will start track laying on Long Dyke this week - at least I can then say that I have started on the new layout, now entitled "The Great Northern Railway" bearing in mind that we currently reside south of Watford and are hoping to move very much north of here in the foreseeable future.
I will post other developments and maybe some stuff on system designs/operational designs etc over the next couple of weeks.
Watch this space!!
Barry
Shed dweller, Softie Southerner and Meglomaniac
Posted

Site staff

Ed
Posted
Full Member
I stripped back one of the boards of the ill-fated Baffle Road layout and removed all of the track, ballast, polystyrene and filler. I had point motors and wiring and switched and connectors aplenty!
A half hour playing with the pointwork revealed that I could get a large Peco Y point under the roadbridge and a L/H "medium" (36 inch) radius point at the start of the only siding to create a "blind" siding for safety. The main line would then curve back to the straight and produce enough room for a platform and a level crossing. There would be one siding.
By mid-afternoon I had the track wired and section switches rigged up for testing. Then came the SEEP point motors and Gaugemaster Capacitor Discharge unit. A panel-mounted power input for the 16v AC supply and a 9-pin DIN for the Gaugemaster walk-about completed the panel. The yard section switched is a simple on-off whilst the main section is a on-off-on as it will eventually allow control of the line to be switched to another (Yarslow main) controller. This will allow the Yarslow controller to drive a train off the branch and into the station - I have always wired my layouts to ensure that the train is under the command of the recieving controller - its easier to keep an eye on things.
The traverser came from Baffle Road although I had to "convert" it to allow operation from the other side - an easy task by removing the tall "frontscene" that originally blocked viewing access and re-marking the sidings/switch positions to be readable from the other side.
As dark fell, I had my J36 shunting some wagons around - section switching and point control working as it should.
Scenic wise, this is a chance to ipgrade my artistic efforts and try to get a lot closer to Chris Nevard than I have with my Yarslow layout. I have a good supply of plans and plastic sheeting in stock so a platform and station building are planned along with the ubiquitous pub.
I will post some pics soon.
 Last edit: by Barry Miltenburg
Shed dweller, Softie Southerner and Meglomaniac
Posted

Full Member
Don't suppose you'd be interested in popping over here for a half day would you ? We could build a layout before the coffee break and go wine tasting afterwards ……………. You could sort out the Brexit mess whilst waiting for the flight back …………. :cheers
Looking forward to the pictures ………. :thumbs
'Petermac
Posted

Legacy Member
I started life not to far from where you are St Albans my fathers family were all from Watford i did work in Watford for a while myself.
Brian
OO gauge DCC ECOS Itrain 4 computer control system
Posted
Full Member
This photo is actually sideways!!
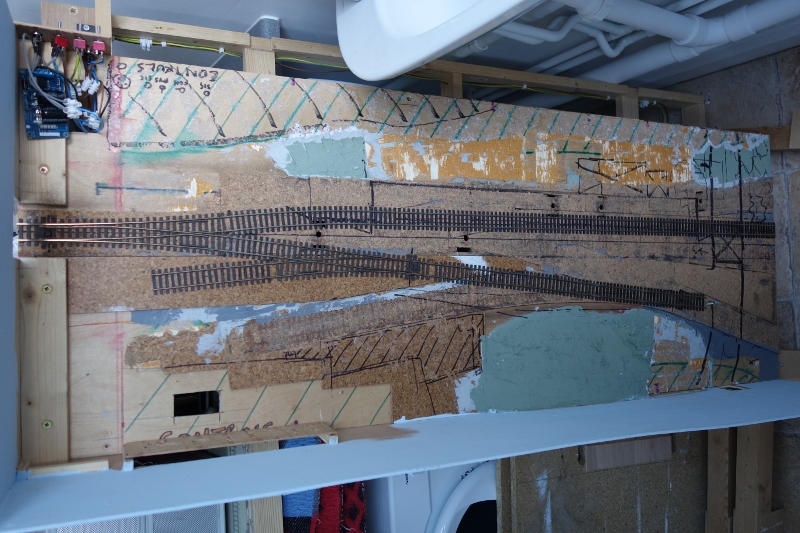
Here is Long Dyke propped up in the laundry room. The traverser fits on the left-hand end and the road overbridge will cover the exit and the control panel top left. I have to make another traverser for the right hand end. Note the capacitor discharge unit. The platform will fit above the main line where I have drawn in black marker. The top here is the front/operating side. You can see the proposed route of the lane into the station yard which comprises just one siding. The various holes in the backscene and baseboard will, of course, be filled. The cross-hatching, lower left, is a hang-over from Baffle Road so ignore this. The area will be scenery.
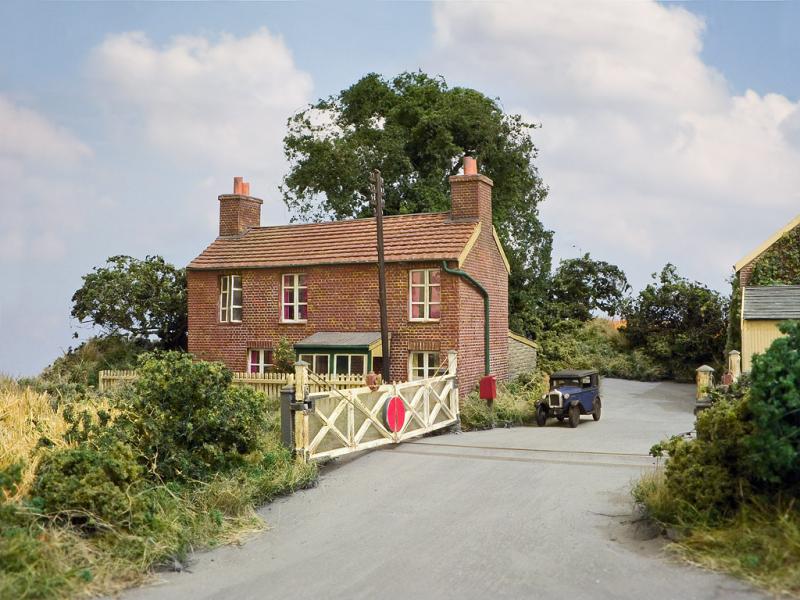
This photo (from his own webpage) gives an idea of the work of Chris Nevard - check his work out on the web and YouTube. I will only get half-way close to this but this is my aim. His work is superb.
Last edit: by Barry Miltenburg
Shed dweller, Softie Southerner and Meglomaniac
Posted
Full Member
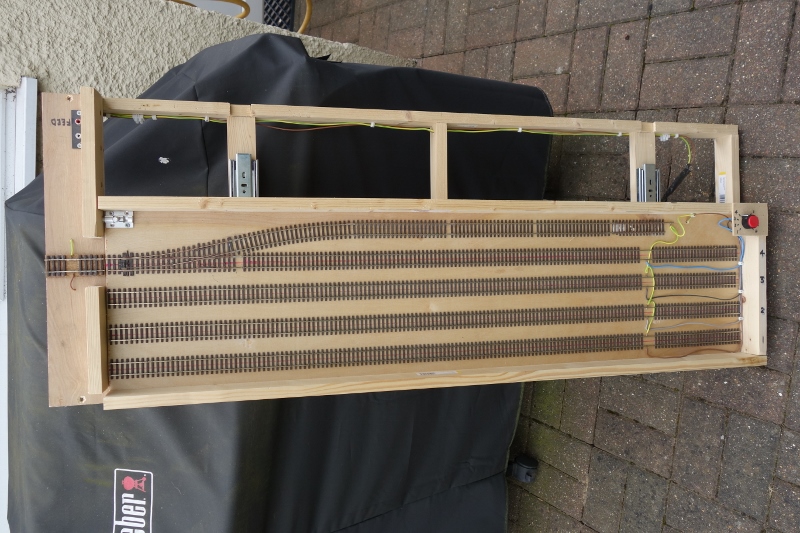
Here is another sideways photo of the traverser modified from the previous project as described. Entrance is from the left so the rotary control for track selection is now in the back corner instead of at the front but thats no problem. Track 4 is split for engineer trains. This traverser represents Highmarsh on the Great Northern Railway.
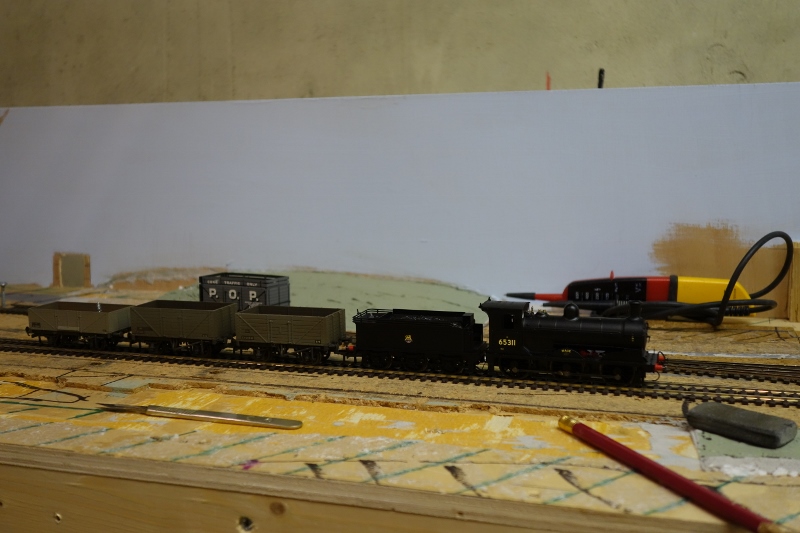
Track laid and wired and J36 65311 on a test train standing in the platform.

Beyond the overbridge is the traverser - this is part of the old layout just re-vamped but with new wiring etc. Note the small control panel. The walkabout controller will remain with Long Dyke now and be used on the new system. The input into the panel top right is the 16v AC transformer.
The big leap forward today was the construction of the board that will become Lesser Nevard on the Great Northern Railway. Here it is just blank but will be occupied by an industrial scene (no passenger platform other than, perhaps, a works halt). I do not have room in the garage for another fiddle yard on the end so Lesser Nevard can act as fiddle yard for Long Dyke and then I will remove the traverser, add a sector plate and use Long Dyke as the fiddle yard when running Lesser Nevard.
Confused?
More pics when more progress is made.
Barry
Last edit: by Barry Miltenburg
Shed dweller, Softie Southerner and Meglomaniac
Posted
Full Member
Had a good running session today to test everything and then put in the basic polystyrene blocks which will give me some scenic base.
Hopefully a bit of ballasting this week.
Barry
Shed dweller, Softie Southerner and Meglomaniac
Posted
Full Member
I discovered a structural integrity issue with the shed which houses the current Yarslow layout and as a result had to move most of the free-standing contents out so that I could investigate properly. That led to a an opportunity to take a good look at the draw-fulls of "stuff" I have accumulated - you know - those bits that "might come in handy one day".
End result was a dustbin full of discarded rubbish and the discovery of lots of kits that I have bought for the new layout but forgotten about.
The upshot of this was that the hours I have managed to spend in the shed have seen the construction of a Wills small signal cabin kit, a lineside hut that came free with the Railway Modeller yonks ago, a grounded van body kit from the same source, about 3 dozen telegraph poles and a Wills small platform/halt kit that will do nicely for the next board on the Highmarsh branch for the works Halt.
The burst of activity came from the knowledge that whilst the old shed seems to have acquired a distinct "sunken" section, nothing is actually moving and the floor timbers all appear quite solid. In fact I think that the baseboards and the internal boarding might be supporting the shed at that point!! The baseboard remains quite level and its just the lower sections that have sunk so the only downside is that my workbench is now on a slight slope!!
I will post some pictures when I can but in the meantime, as I start another non-modelling related project, I am only getting a bit of spare time each evening so have started on the timetable for the line. I will write progress up for that next.
Barry
Shed dweller, Softie Southerner and Meglomaniac
Posted
Full Member
Having re-trained from being a city desk walla to be an electrician in my 50's, (about 6 or 7 exams and then two 3-hour written papers) ,I fancy my chances at learning a much smaller rule book and being successful at this!!
I will let you know how I get on over the summer and would encourage anyone who has not tried it to give bowls a go - great fun and very sociable!!
Barry
Shed dweller, Softie Southerner and Meglomaniac
Posted

Full Member
I spent a coule of hours weeding our 'boules terrain' this afternoon in readyness for the summer season. The rule book is somwhat shorter over here, but the matches are certainly lively affairs.
Have fun,
Bill
At 6'4'', Bill is a tall chap, then again, when horizontal he is rather long and people often used to trip over him! . . . and so a nickname was born :)
Posted
Full Member
We have a chap at our (indoor) club who has moved to the UK and is trying his hand at bowling. He has, as you would expect, taken to it quickly.
There is talk of using a spare piece of ground as a boules terrain at the club so we could invite other clubs to play. Lets hope!!
Barry
Shed dweller, Softie Southerner and Meglomaniac
Posted
Full Member
Trying to get some space to work on the new Long Dyke/branch halt layout is very difficult at present owing to the continual occupation of the garage by my wife's car and the need to keep the dining room clear for guests etc (I couldn't see the issue with a railway layout in the middle of the dining room….)
I have therefore decided that as the shed was upside down trying to sort out the floor, I would have a good sort out and find some space to erect the layout in there. As a result I have turfed out about 20 or 30 old 4mm kit built wagons that was all that remained of my old MR 1920's layout from when I was a wee nipper. They were all past their sell-by date and the coaches were no better than passable so I took the plunge and they have all gone to the storage sidings in the sky (local tip).
Likewise a load of stuff that, for some reason, started living in my shed.
Now I had some space at the end of the shed so Long Dyke has a new home!!

Whilst I can't run a train beyond the end of the baseboard, I can start on the point rodding, ballast and scenery - you can see that I have started with some polystyrene lumps already.
My journey towards Chris Nevard-esque-ness (is that even a word?) began with a small Wills Halt kit that I thought I would build for the next station along the branch and then weather using Chris's recommendation - pastal weathering powders using a limited range of tones.
So my journey starts with a halt…
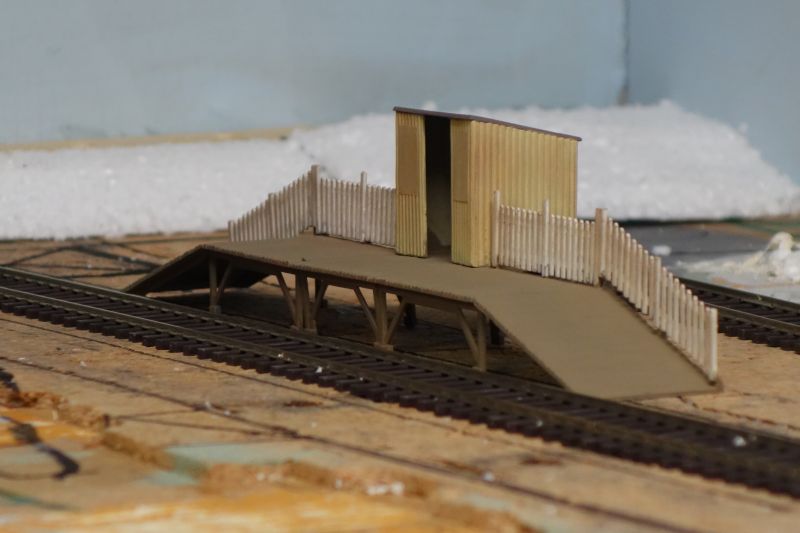
Here it is plonked on the Long Dyke board. I am convincing myself it will look better when there is some scenery around it - but it's a start. As an aside, although it is the only fit-option that worked, I am less than happy with the fencing on the ramps. They seem to be very high and much higher than the rest. I can see the razor saw coming out and some modifications taking place.
The next station along the branch will be just a siding for Roe Boxes, a rail-served factory. The halt will be for their workmen - the 6.41am Highmarsh-Yarslow and 8.10am Yarslow-Highmarsh passenger trains call at Roe Halt to set down only. In the evening, there are return workings at 5.05 and 6.43 to get the workers home again. Given that this is the early 1960's, I do not suppose many workers actually come by train anymore anyway.
Shed dweller, Softie Southerner and Meglomaniac
Posted
Full Member

Using baseplates of 1/4" x 1/4" 10 thou plastic card I put together the run I needed. Note that there are 2 rods - the point on the running line and the point lock. There are no signals here the station is not a block post.
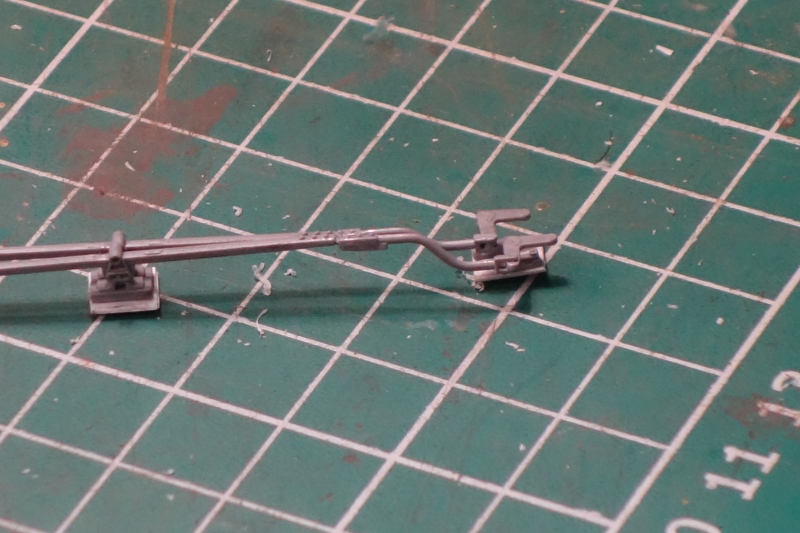
The cranks at each end are the trickiest bit but with a bit of patience, this is achieved.
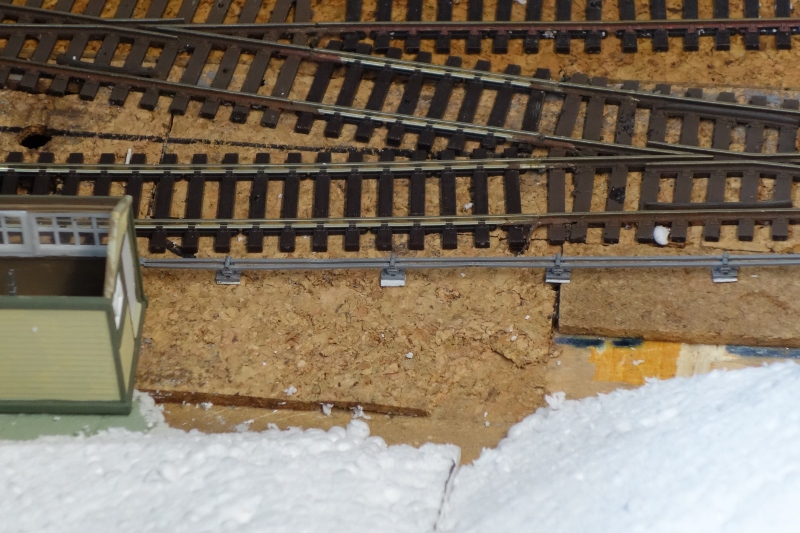
Here is the rod laid on the baseboard to work out the position of the ground frame hut (another Wills kit).
A useful hour spent and another job done. Next comes some ballast and scenery.
Barry
Shed dweller, Softie Southerner and Meglomaniac
Posted
Full Member
Up to 8 metres long!!!!!!!!!!!
Shed dweller, Softie Southerner and Meglomaniac
Posted
Full Member
In the meantime, I am going to post a series of YouTube vids discussing the design process that I have gone through to get to my final plan. I am not advocating that mine is the only way nor the right way, its just the way I took and I am happy to share some of the bumps and mistakes along the way so that others don't fall down the same holes.
The focus will be on large layouts rather than planks and little layouts. The Great Northern Railway project will occupy a large area, have 4 stations, 2 storage areas and feature over 50 trains - definitely not a plank!
Hopefully the design processes will be of some use to someone somewhere, even if they choose to see what I have done and then do it entirely differently!!
In other news, the layout has benefitted from another burst of "preparation" - a £30 Bachmann B1 "Wildebeeste" bought cheap because it has wobbly wheels - a quick fix making it 5 x B1's on the roster. I am happy to take on such challenges when I know how to fix a problem. I rarely buy anything listed as "a non-runner but looks OK" for fear of ending up with another scrapper.
My next focus is on coaching stock having finalised the timetable and tallied up the number of coaches now required. All this will be covered in the Design videos mentioned above.
Over and Out for a while - the Women's World Cup (soccer) in Nice, France and the World Cup Netball in Liverpool UK will consume my summer so modelling opportunities will be rare birds.
Barry
Shed dweller, Softie Southerner and Meglomaniac
Posted

Full Member
What was the problem/fix? Split stub axle?
Nigel
©Nigel C. Phillips
Posted
Full Member
These old Mainline/Bachmann chassis are split and therefore have two stub wheels with short axles, having a square section on the inner end. They fit into a nylon "axle" which has square holes in the end. That is not the real issue although they can work loose and need a bit of cyno to hold them in place.
The metal driving wheels comprise a back and a rim and have no real spoke detail (although they do have spokes if that makes sense) - this is provided by a plastic insert that fits into the wheel from the front. The coupling rods fit into the plastic insert using a 1.5mm hex bolt that secures into the back of the metal wheel. All that is great but the plastic has a tendancy to warp out of shape and as it is enclosed inside the metal rim, the only was it can expand is to bulge outwards, interfering with the coupling rod.
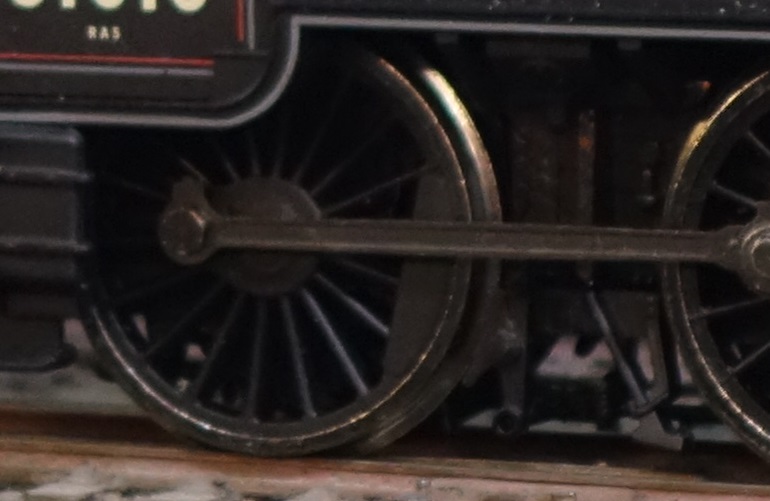
Here is a close-up of the driving wheel showing the metal rim (weathered silver), the hex bolt securing the coupling rod and the plastic insert (the black bit). The plastic insert was warped outwards with obvious consequences for the rotation of the coupling rod.
The fix is quite simple but a bit of a fiddle. Remove the chassis from the loco (easy) and the keeper plate (easy) then remove the hex bolt using a nut driver (easy). Run superglue down between the spokes (and so between the plastic insert and the metal wheel) (with care) and use a clamp to squeeze the plastic insert back into the wheel (OK). Leave to dry overnight making sure that the clamp is both tight and not glued to the wheel!!!
In the morning you should have a flat, solid wheel/insert. If you get this wrong and have glued the insert without getting it flat, you have to remove the insert completely (VERY carefully), clean it off and have another go. Guess how I know that!
Now replace the wheelset (easy), refit the hex bolt (total PITA as they are much smaller than my fingers) and rebuild the chassis (easy).
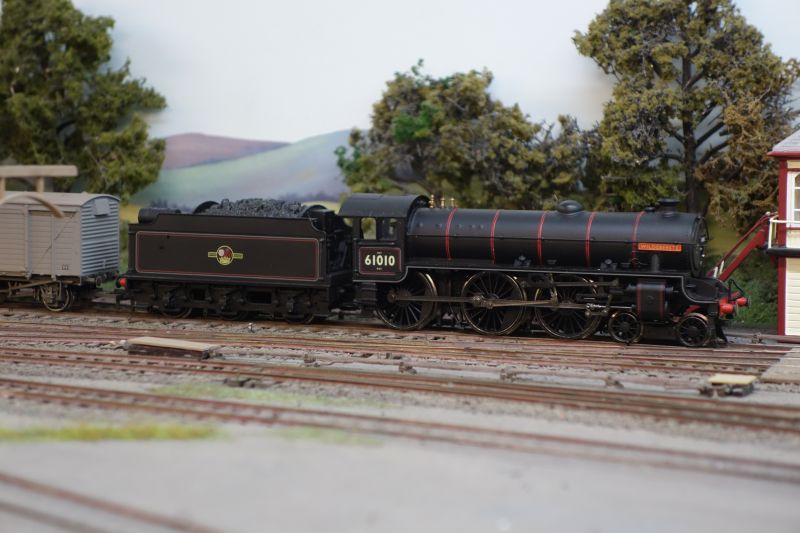
I have done 3 of these now - 2 on Lord Burleigh alone - and have successfully returned both locos to full working order. Wildebeeste, the latest purchase, cost £30 on eBay. Repair costs - nothing!!
Happy days
Barry
Last edit: by Barry Miltenburg
Shed dweller, Softie Southerner and Meglomaniac
1 guest and 0 members have just viewed this.