Bagnall 0-4-0 Saddle Tank Quarry locomotive
Posted

Full Member
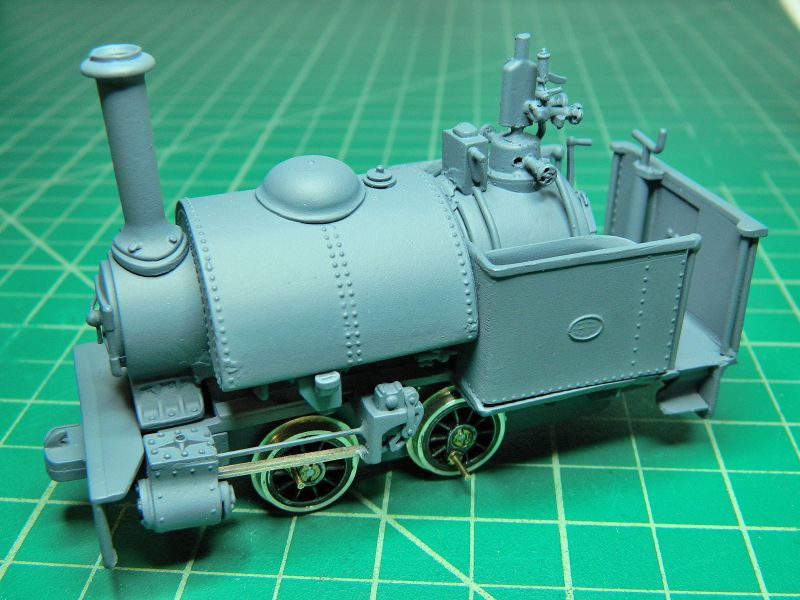
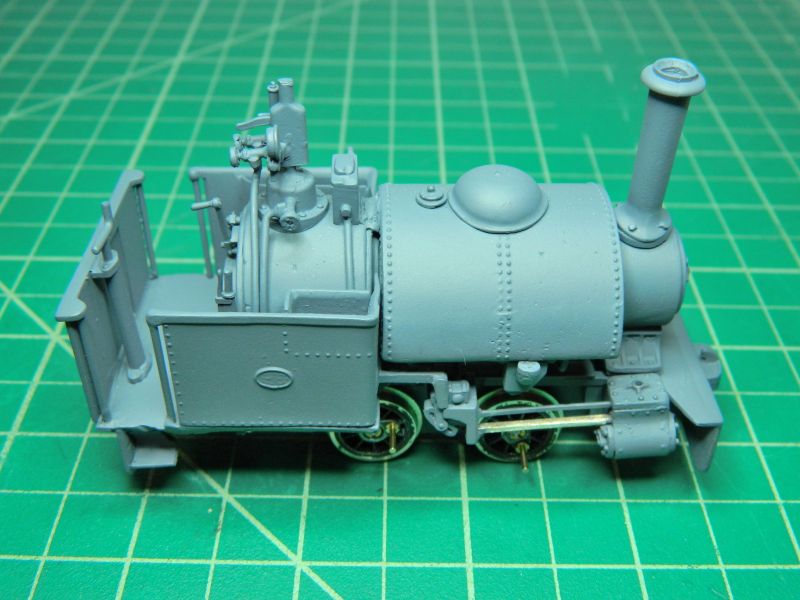
Wrightlines 7mm Narrow Gauge White Metal Kit rebuild
This is looking great Nigel. A successful build keeps the creative juices flowing. Agree that the backhead shouldn't be hidden.I just agreed to buy a second hand part built Slaters MR 1F, whatever was I thinking! :shock:
John
John

Posted

Full Member
Thanks. Bit more fettling than I expected, but it should look like a battered Bagnell in the 1950's when it's done.
I'd forgotten how nice it is to work in 7mm scale. I have no track whatsoever apart from regular 16.5mm HO/OO, so I should start on an industrial line after the loco build.
Looks like I'll be looking out for some 7mm narrow gauge kits to bash around. I fancy a diesel/petrol one next.
Nigel
©Nigel C. Phillips
Posted
Full Member
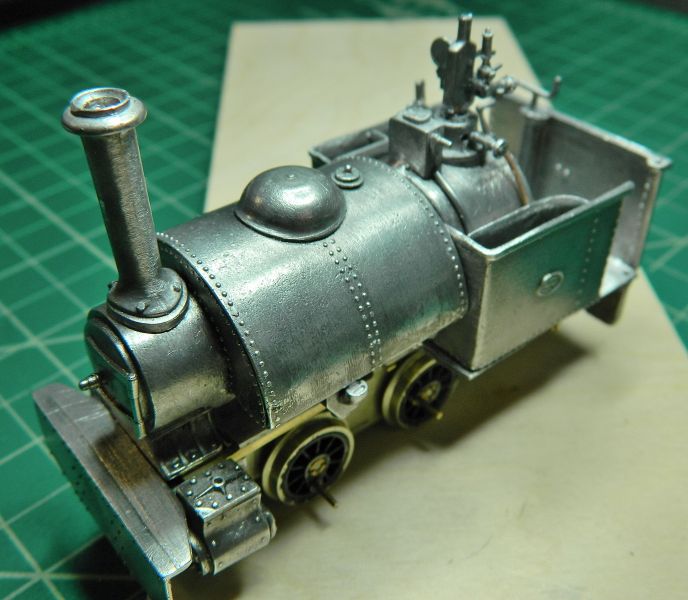
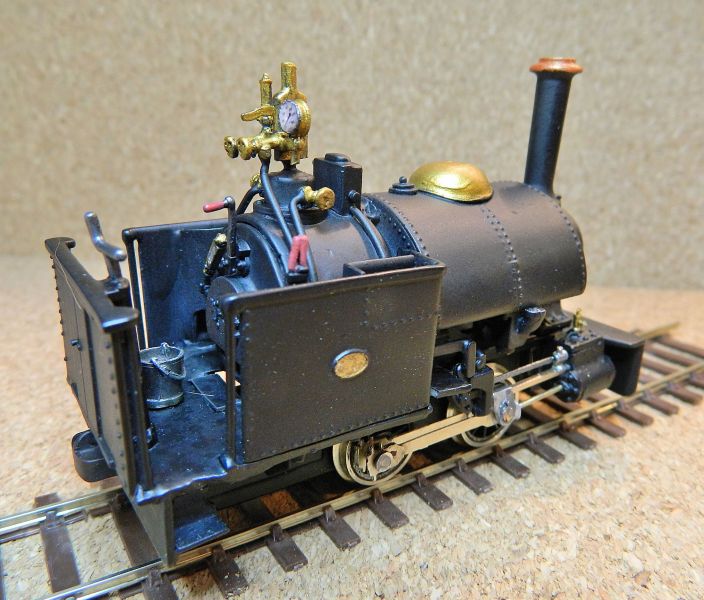
Finished nearly all of the the body detailing this morning, primarily the backhead and "Christmas Tree" valve gear. Had to fabricate a new balance pipe from 40 thou' P/B. The one in the box was too short. Pipework is a combination of 186° solder and P/B wire. Fiddly soldering, than goodness for the new iron and fine tip.
The box in front of the Christmas Tree is the rear wheel sand box.
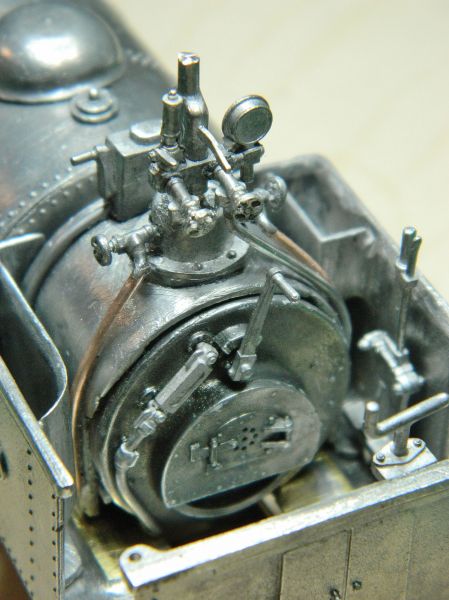
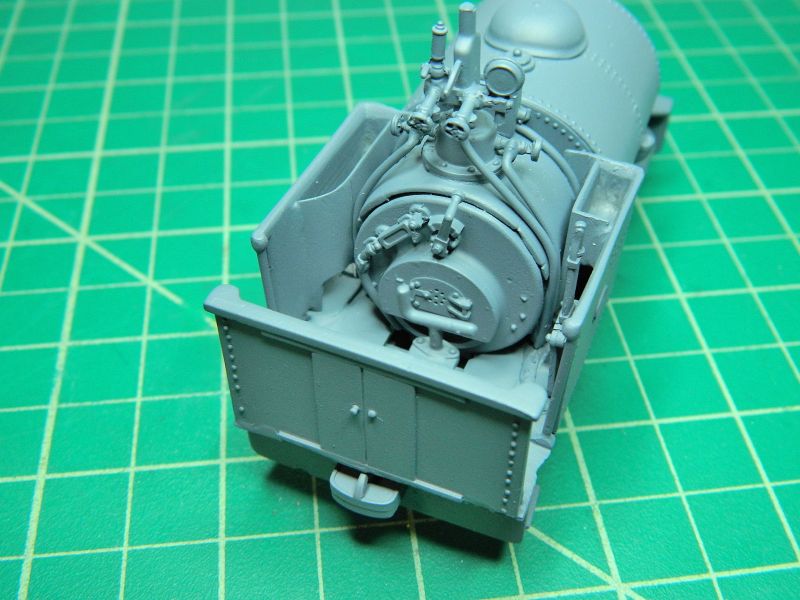
Backhead view. Boiler water gauge and regulator, I will need to draw up a pressure dial and water gauge and print them out. Roche has some nice ones in O scale.

Backhead and Christmas Tree close-up.

Motion and valve gear up next, then a prime and paint of the dismantled parts. There is room in the boiler for a small decoder, so I also need to get that motor mount sorted. Most of these locomotives ran with big blocks of wood as buffers and a simple hook between. Kadee couplers? Got to think about how they're going to be attached. If I go for a cable manufacturer then I'll need long couplng rods and hooks because of the diameter of the cable wheels on the small trucks.
Now where is that coal? I know I have a small bag of the stuff somewhere. Plus a match truck for the extra. And some footplates. One thing missing from the "box o' bits" is some brake gear. May have to scratch build that or cannibalize it from an OO locomotive part.
Nigel
Save
©Nigel C. Phillips
Posted
Full Member
I was just reading MRJ 251 and thought of you. There are some photos of a Talyllyn point and an article on GWR narrow gauge track.
John
John
Posted

Inactive Member
Max
Port Elderley
Port Elderley
Posted
Full Member
Thanks for the comments. Good job I was going for the battered and used look rather than a show piece.
I was going to go for some stub points for a change, rather than blades.
Nigel
©Nigel C. Phillips
Posted
Full Member
Some more progress today.
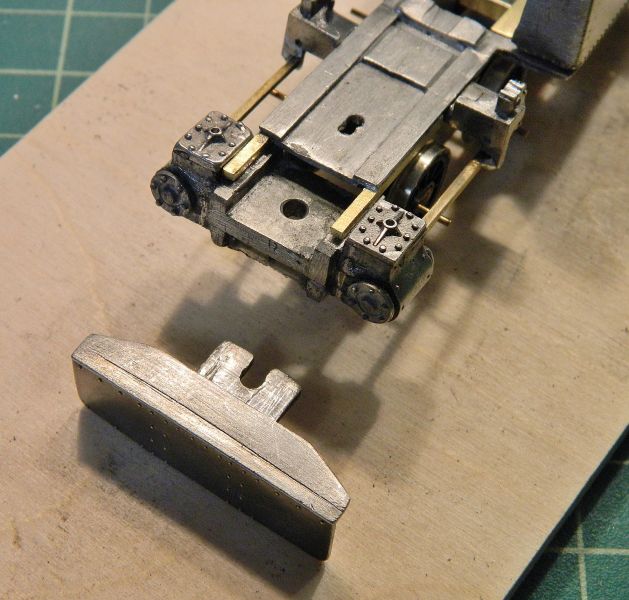
First off, I was soldering the slide rails in after soldering up the bridge piece with the 2 sets of valve gear (dummy casting) at the ends, when CLUNK, the front buffer and footplate assembly dropped off. An "Oh, well I never!" moment. I covered why you shouldn't use epoxy for this sort of thing in a separate posting, you really have to take care to make sure the metal is bright, clean and grease-free (no fingers after cleaning, otherwise it will have 'uman oil" on it.
I cleaned everything up (I had to use the Dremel with a grinding bit to get rid of the epoxy) and took the opportunity to solder the front coupler mounting on the front buffer plate. Then the whole shebang was soldered to the frame and cylinder saddle. Cab steps were also cleaned and soldered up (previously epoxy). I found an O-scale bucket and oil can in the spares (actually found a bag of Wrightlines bits for 7mm narrow gauge, probably another locomotive in there) to sit up front.
Motion tomorrow. Could be fun, these are old Romfords and require the rods to be kept in place with a bit of solder. No spacers in the box. I should have some screw ones somewhere with spacers (in fact I think I have some more modern wheels for this model).
Nigel
That "Oh well I never!" moment.
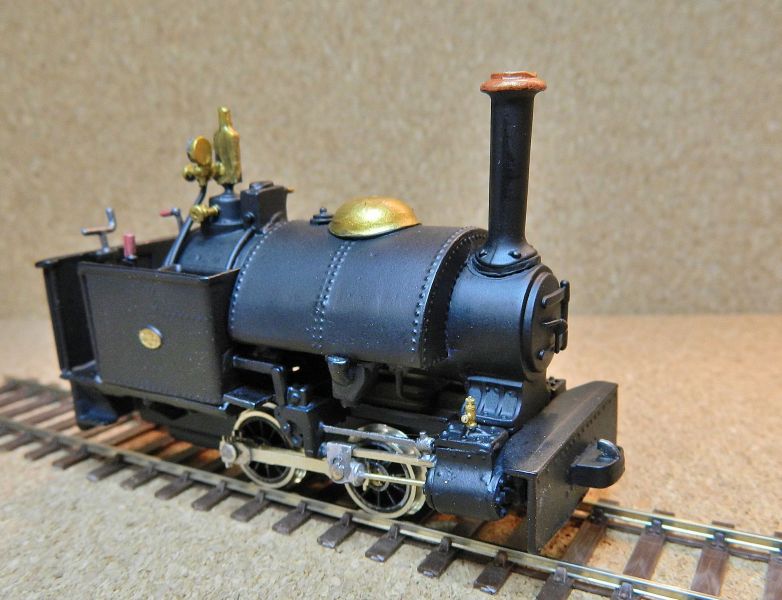
And then an "I can do it…" moment. Smokebox dart is off while I fettle some handles from P/B rod. Yes, held in place with epoxy.
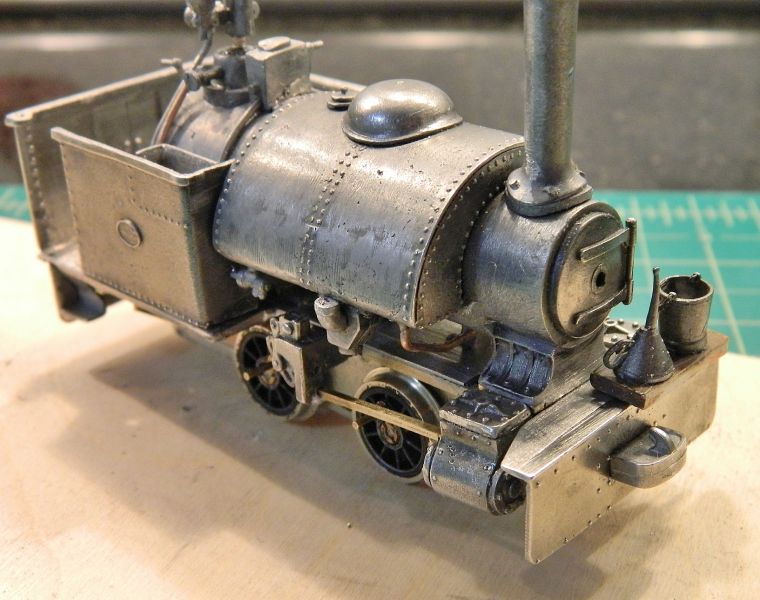
Slide bar (only 1) per cross-head and "valve gear?" in place. Need to add some sand pipes. Every time I pick this model up I give it another ding or dent. That dome looks a bit too pristine for 50 years work.

SaveSaveSave
©Nigel C. Phillips
Posted
Full Member
A bit more progress on the running gear.
No bushings or lock-nuts in the box, luckily I found a spare set of Wrightlines wheels with short and long bushings. I fabricated the valve arms from brass bar, soldered in place in the valve gear casting above the slide bars (also fabricated from brass rod), floating fit in the cylinders. Dry fit showed the previous effort had not opened up the holes in the rods, touch of the Dremel and a side milling bit solved that.
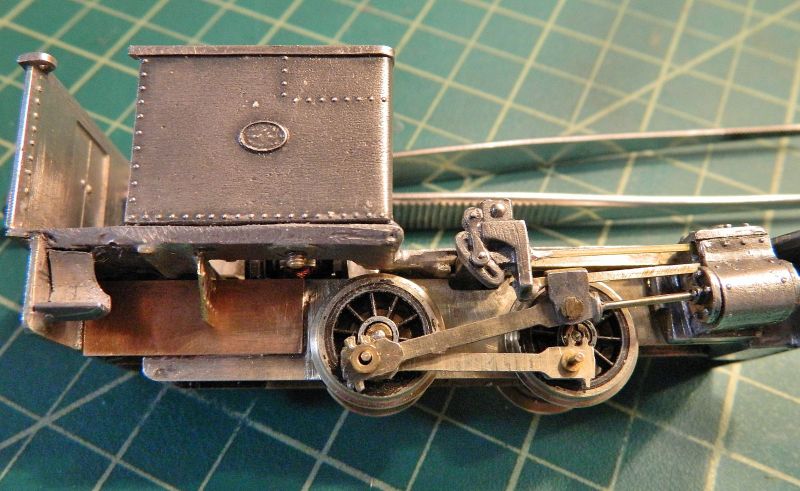
P/B cross rod for the valve gear soldered up. The motor/gear is a 50:1 reduction, so slow running shouldn't be a problem. The sharp-eyed will note that the cab sides are now soldered to the footplate. The nut that holds the footplate to the chassis bolt (far left) was held in place with (yes!) epoxy. The epoxy failed, so I had to strip the casting that holds the nut down, and then solder it up. Hopefully there is no more epoxy ready to fail.
I will need to add a rod from the reversing lever in the cab to the cross rod.
Next up will be the reversing lever rod, the reversing lever and hand brake, the cab hand grabs, and the diamond footplates over the wheels (hand scribed as I only have OO etches). Hopefully tomorrow will be warm enough for a coat of primer to the various sub-assemblies after a good wash and scrub with cream cleanser. I found a pair of nameplates in the "O" spares box, "Joan" she is. There is not much space underneath, I'll have to think about whether to use P/B wipers or plungers for the electrics.
Nigel
Save
©Nigel C. Phillips
Posted
Full Member
More progress today. Finished up adding the various bits - grab rails, brake lever, reversing lever including a scratch reversing lever link to the valve gear. The supplied one was in white metal, impossible to solder even at 200°, so I used some brass bar and solder rather than CA. Good wash and scrub with kitchen cream cleaner, rinse and dry and then 3 thin coats of primer (the weather was good, 10° above recommended minimum temperature for the rattle can). I used Krylon dark grey primer, works well with metal and plastic, and has a bit of an etch bite.
After a good scrub with kitchen cream cleaner (mildly abrasive, this one is based on calcium carbonate and contains an anionic detergent) and a toothbrush (new, I buy these in packs of 5, works out about $1.00 each).

And after 3 coats of primer.
I have a few more details to add - the valves on the valve covers, 4 sand pipes, and maybe some brakes - but I'll do those after the final paint and assembly. Nearly forgot the small footplates, they will go on after the frame and chassis are joined together.
Nigel
Save
©Nigel C. Phillips
Posted
Inactive Member
Max
Port Elderley
Port Elderley
Posted
Full Member
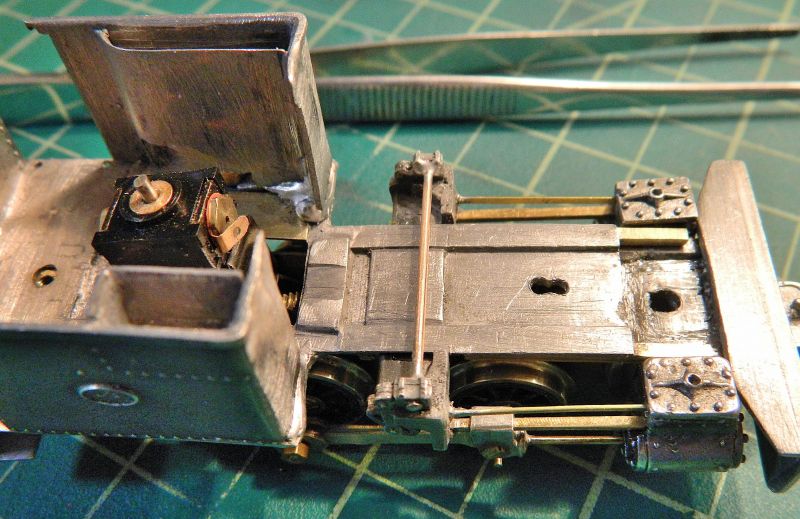
Test fit with the motor and new top-hat bearings. The old ones dropped out, should have checked this, poor as in no solder by the previous modeler. Looked to be held in place with black paint. Novel is all I can say. Bit of fettling with the motor worm and gear. Couple of thrust bearings and adjusting the position of the gear solved the "OK one direction, nothing the other" syndrome. Wonder if I use some bearing compound and give it an hour or so running in (worm/gear and axle bearings)?
I've decided on wiper pick-up and DC for the moment. There's enough room in the boiler for a fair-sized decoder. I'll just wire it up "DCC Friendly".
After all this work I'm not sure that I like the little beastie (or will progress with an O-16.5 cameo and even more kits). An interesting build.* Methinks eebygum or the upcoming "White Elephant" stand at my local NMRA Group's all day mini-conference is where Joan is going. After a paint job and some suitable weathering appropriate for a battered 50+ year-old locomotive ready to be replaced by a small diesel. Must put a few dings in the dome before final painting. Plus some sand pipes. Found some coal as well.
It's been a good opportunity to refresh white metal soldering techniques. I have a small collection of Wrightlines parts O-16.5 that I'll be selling, see the separate listing coming shortly in sales and wants. Useful for those who model O-16.5 or On30. I'll be coming to the UK in March/April, and will mail from there rather than from here. They'll also be going on eebygum.
Nigel
*See that white metal Wrightlines Bagnall kit lyin' over there?
The one with the missing parts and no instructions anywhere?
Somebody gotta do it,
(Somebody gotta do it),
Somebody gotta do it,
(Somebody gotta do it),
And that somebody aint me!
Apologies to Sam Lay and his band (Somebody Gotta Do It)..
Save
©Nigel C. Phillips
Posted
Full Member
John
John
Posted
Full Member
And a challenge it is. The end however is near. More a pig's purse than a silk purse. Not often I leave things not quite right (that cab side/footplate gap for example), but rather than try and fettle to pristine condition when the design is working against you it's sometimes advisable to build a decrepit end-of-life locomotive to match the weathering. Quarry locomotives (especially those working in slate galleries) were often hit by falling rocks and suffered from frequent derailments, rare was the locomotive with perfect bodywork or frames.
One thing anyone buying old kits (part-built or complete), especially white metal ones, should keep in mind is that the previous owner(s) may have done things that are highly questionable (in this case liberal use of epoxy, poor soldering, and CA in the wrong places) and that with part-completed kits there may be small details missing(in this case valve cover, smoke box darts), broken or damaged (in this case the firebox cover), or from another kit. Plus the kit may not be up to current standards regarding design, ease of build, fit of parts or motor/running gear. It's all about diminishing returns and knowing when to stop. I've almost reached that point. A running, weathered and battered locomotive is the goal.
The weather is nice this afternoon, coat of paint I think while the sun is shining and it's short-sleeve warm.
Nigel
©Nigel C. Phillips
Posted
Full Member
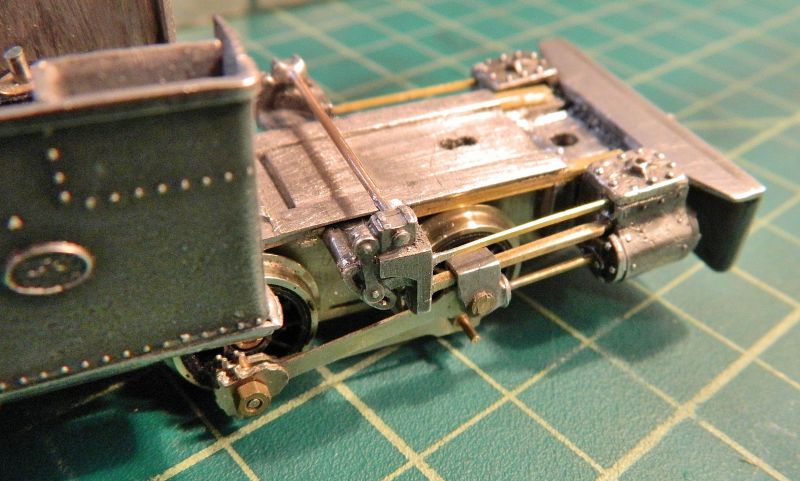
End of the line on the pigs purses from silk ears rebuild. There is a fundamental issue with the design of the beastie, the cross-heads/rods fouls the bottom of the motion bracket. Bit of digging in my paperwork reveals the following statement: "The cross head and motion rods may foul the motion brackets, some metal should be removed from the bottom". And it certainly does, even after I had upped the height and put it back as far as I could, it would still need around 3-4mm of metal removed from the bottom to ensure adequate clearance (and some thinning of the rods. Which would pretty much destroy the valve gear representation). It stays as is, a static non-runner model for the moment. At least it didn't end up in the white-metal weights box. I was very pleased with the white metal casting of the RHS valve cover when it was painted-up, looks pretty much like the original LHS one. No weathering yet, can't find the powders. Probably in storage.
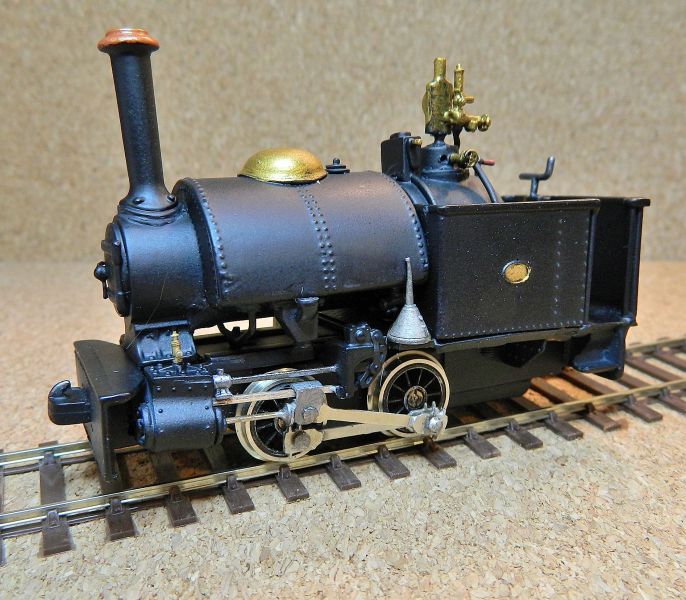

It was photographed on IKEA AVSKILD cork place mats, 42 x 32 cm, 3.3mm thick (16.5" x 12", 1/8" thick). Four for $4.00. Very useful for track underlay as it doesn't come in a roll (and doesn't need flattening and hence no cracks). One pack pretty much does a 4' x 15" module. Must get some more.
Metallic paints are Vallejo.
Enough of the vacation, back to doing some work on the HO shelf (and putting some decoders in the ALCO RS-1, GP-9 and SD-7).
Nigel
Save
©Nigel C. Phillips
Posted
Full Member
John
John
Posted
Full Member
Thanks. Wheels - Coarse. Romfords with solid brass journal pins. Which means desoldering to take it apart. It was a fun build, but from this point on it's diminishing returns as I'm not pursuing O-16.5 narrow gauge.
Nigel
©Nigel C. Phillips
Posted
Full Member
John
John
Posted

Site staff
Ron
NCE DCC ; 00 scale UK outline.
NCE DCC ; 00 scale UK outline.
Posted
Full Member
Thanks. One for the display shelf. "Bagnall Folly".
I looked hard at the design, getting those rods and cross-head not to hit the bottom of the valve gear representation would mean taking so much metal off that it would compromise the integrity of the slide bar solder joint and the rod/cross-head. I think this kit was originally designed for 14mm gauge (2-feet prototype), that would explain a lot. The design was changed considerably when the kit went to etched brass construction.
As John says it's another box ticked and it was saved from the white metal melting pot. I learned something as well - making your own silicone molds for those odd pieces in white metal (or resin/epoxy) turns out to be really easy.
Nigel
©Nigel C. Phillips
Posted

Full Member

1 guest and 0 members have just viewed this.