Rob P's Wagon Kit Bashing Workbench
Posted

Full Member
Wagons built from Kits
Nice job on that build, can't wait to see it painted

Posted

Full Member
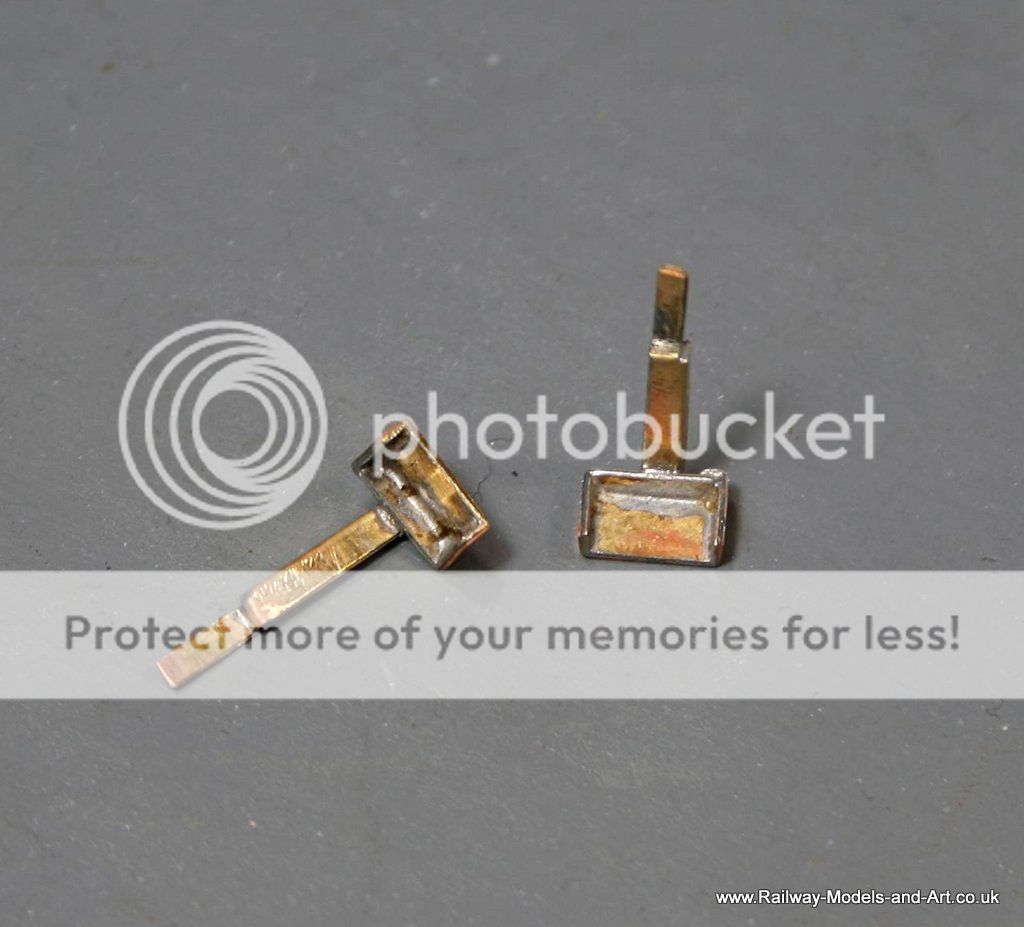
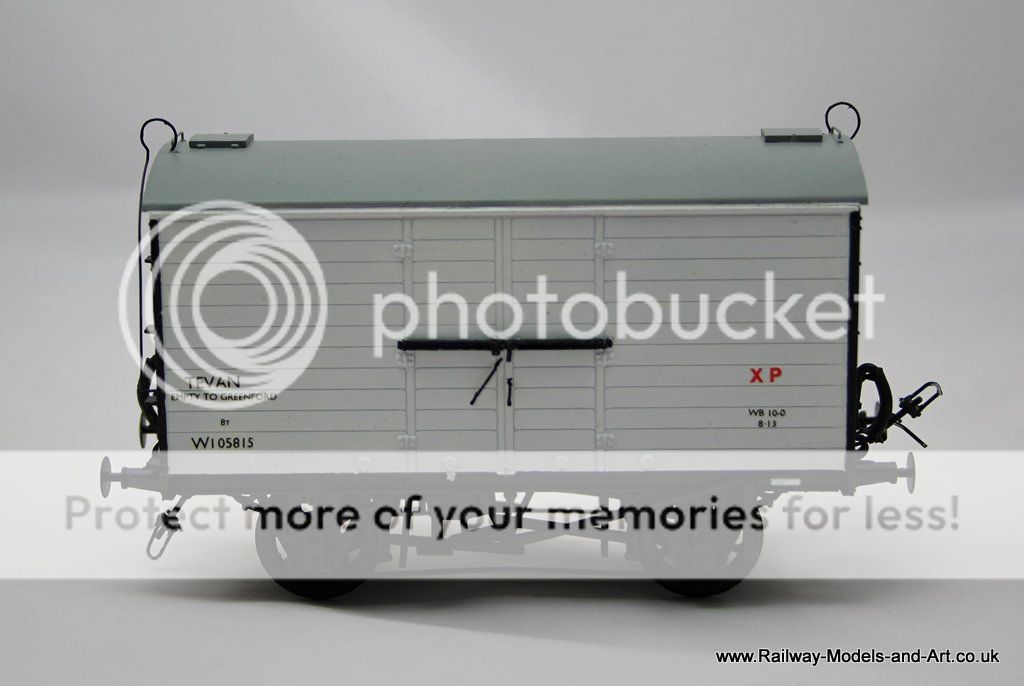
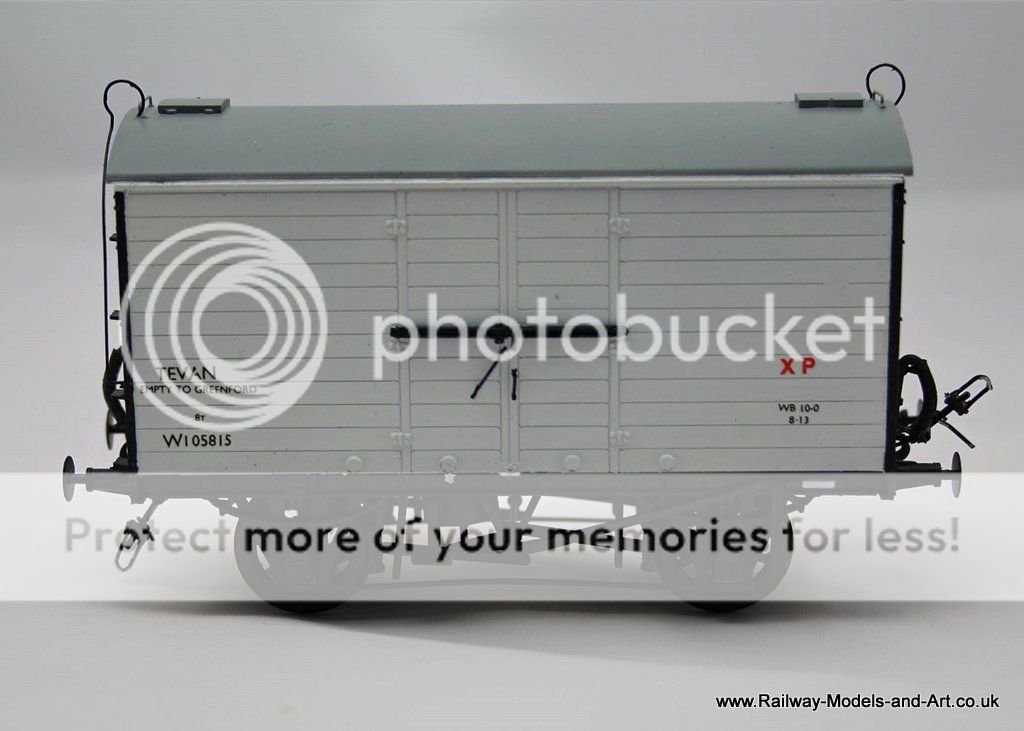
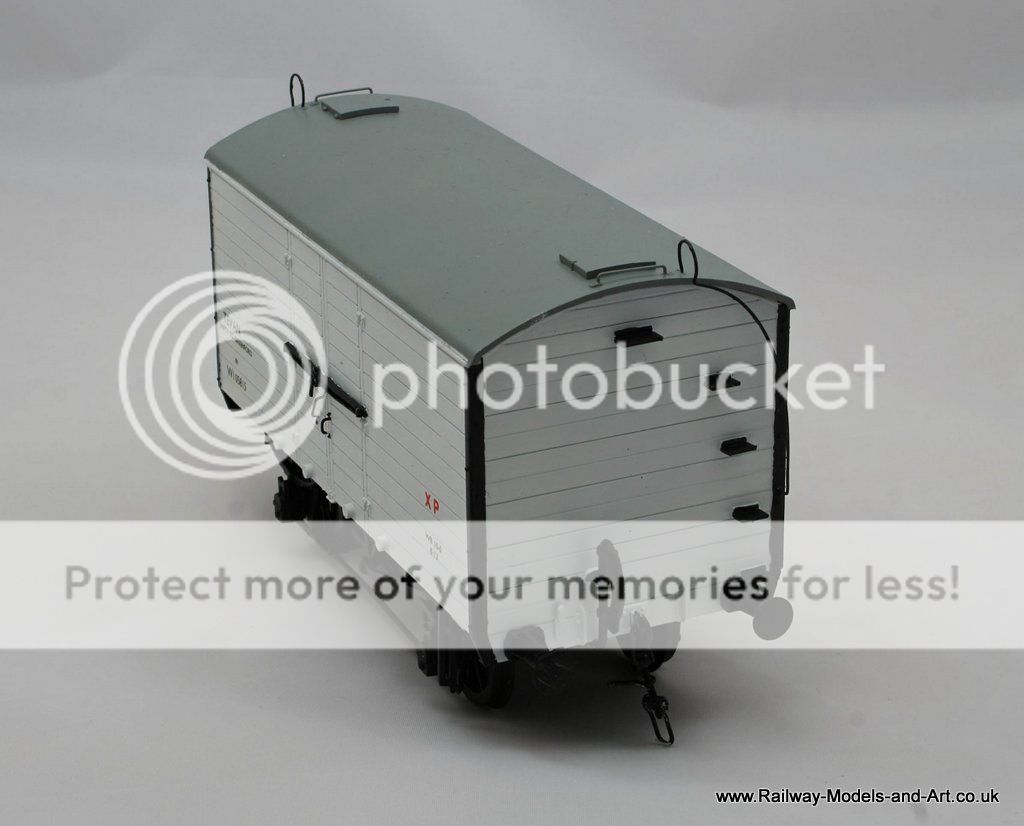
Last night saw more small steps - quite literally in that I made up the rather nifty etched steps for the Tevan
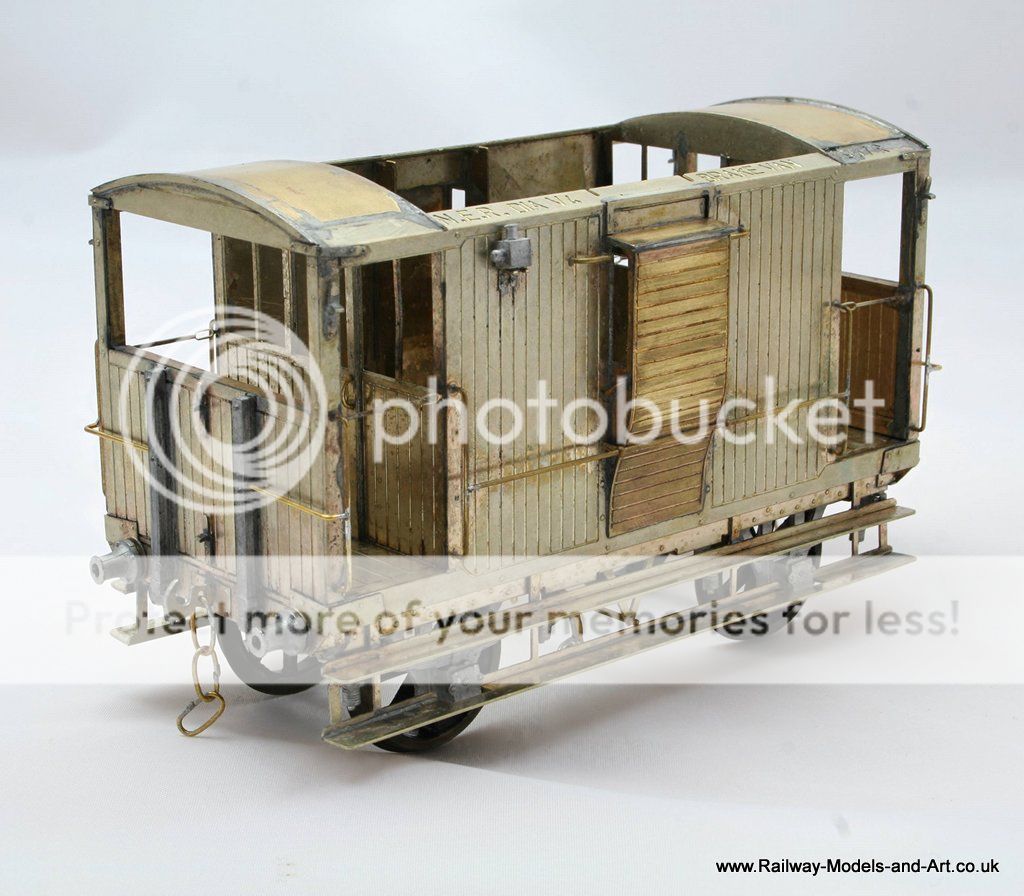
Then I did a bit more on the V4 brake van getting the floor cut and fitted ready for soldering in once I have fitted the brake gear etc. - I made the floor from a scrap etched part and I have yet to decide whether to fill the holes with rod or leave them. - There are only 5 and they are less than a mm in diameter and will they be seen with the roof on, I doubt it.
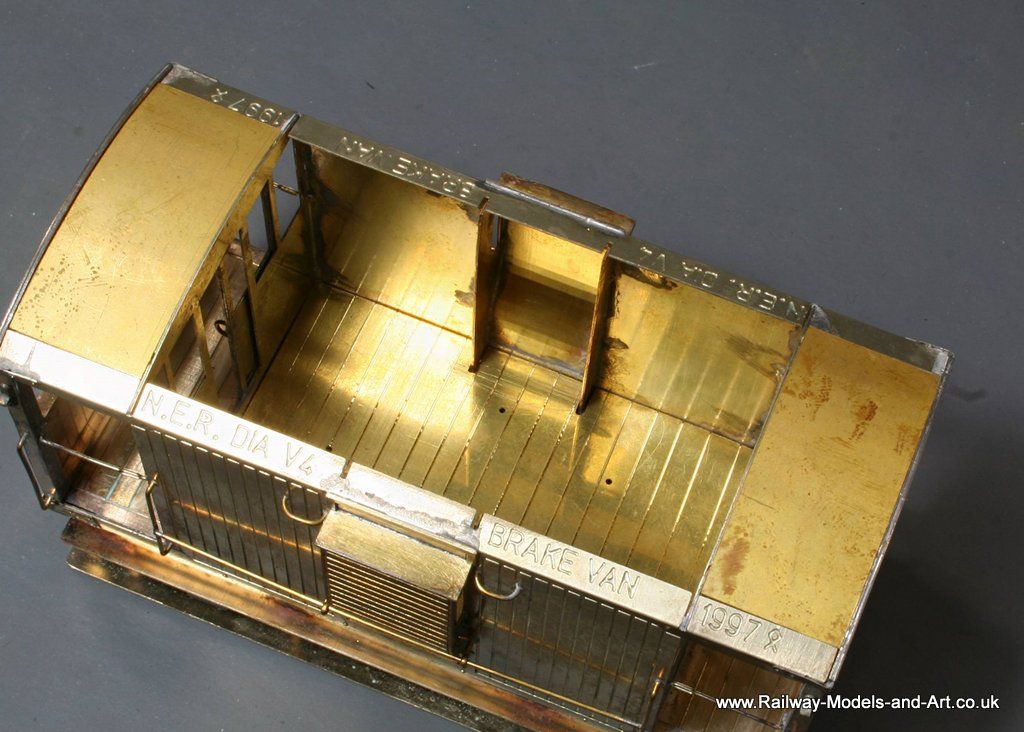
I also made a couple of inserts for above the veranda which once soldered in place will increase the gluing area for sticking the roof on once painted.
Regards Rob
Posted
Full Member
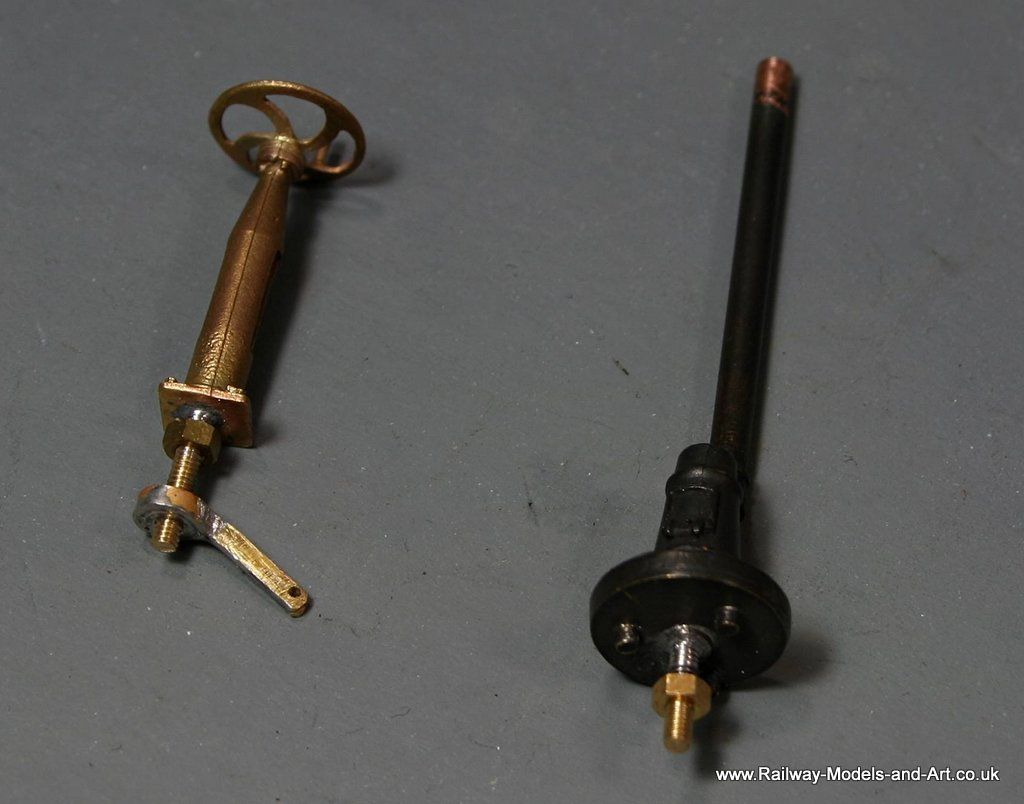
Being, by inclination and birth, a tight fisted Yorkshire man. I don't throw much away, and sometime ago I bought a thousand 10ba brass CS screws. The problem was that when I bought them they only had them in 1 1/2" lengths. This means that most of them that I have used so far, have needed cutting down. This has resulted in me having a few 1" lengths of 10ba studding.
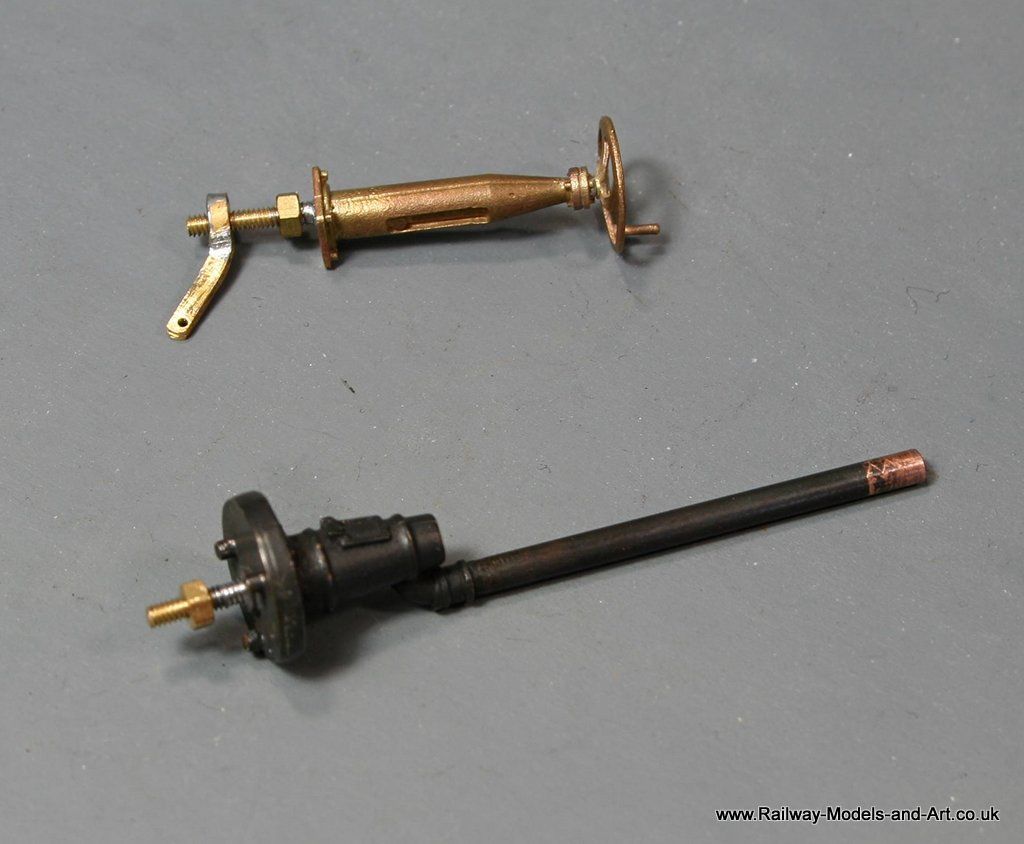
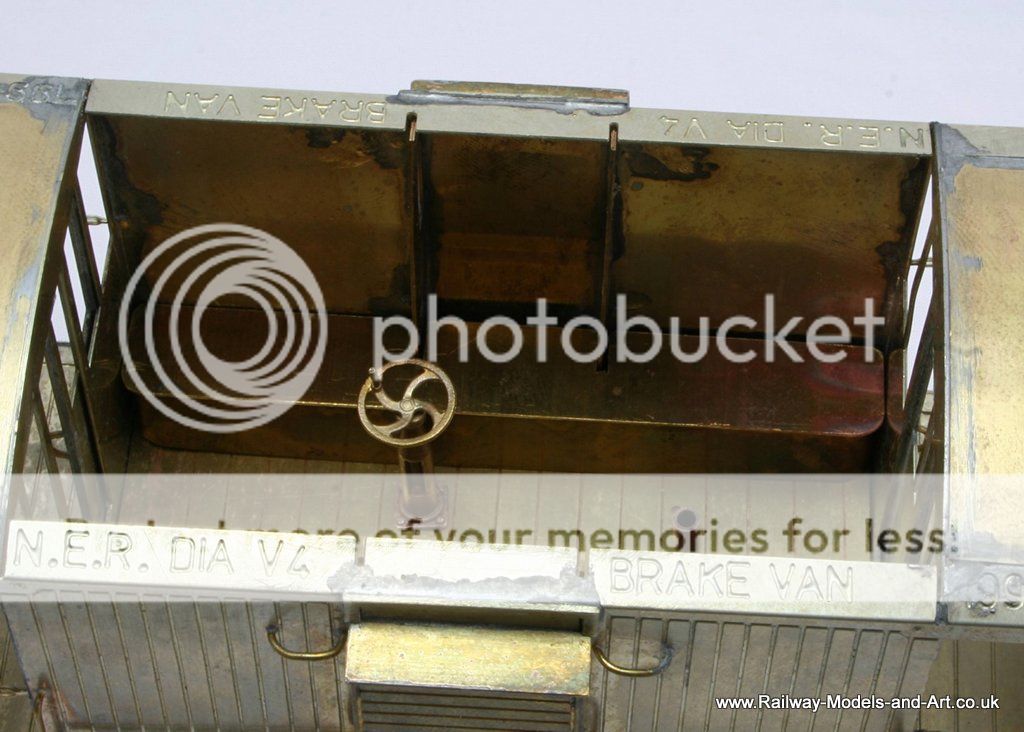
Fast forward to my cleaning up one of Slaters' very nice cast Brake Standards for the V4 and I clumsily broke off the the spigot for attaching it to the floor. At first I was just going to solder it to the brass floor and be done with it but then I thought that having the floor removable for as long as possible would help with painting the inside.
So I drilled out the base where the spigot had been and soldered in a length of the aforementioned stud. A little of the solder wicked up the thread but a quick run down the thread with a 10ba die soon sorted that.
I then thought that with a bit of filing I could use a 10ba nut with some scrap etch to represent the lever for the brake cross shaft and although turning the handle doesn't actuate the brakes it still looks the part.
It wasn't a great leap to think that I may as well do the same with the stove to make it removable too.
Regards Rob
Posted

Inactive Member
Proper modelling! :thumbs
Max
Port Elderley
Port Elderley
Posted

Full Member
Bill :)
At 6'4'', Bill is a tall chap, then again, when horizontal he is rather long and people often used to trip over him! . . . and so a nickname was born :)
Posted

Full Member
John
John
Posted
Full Member
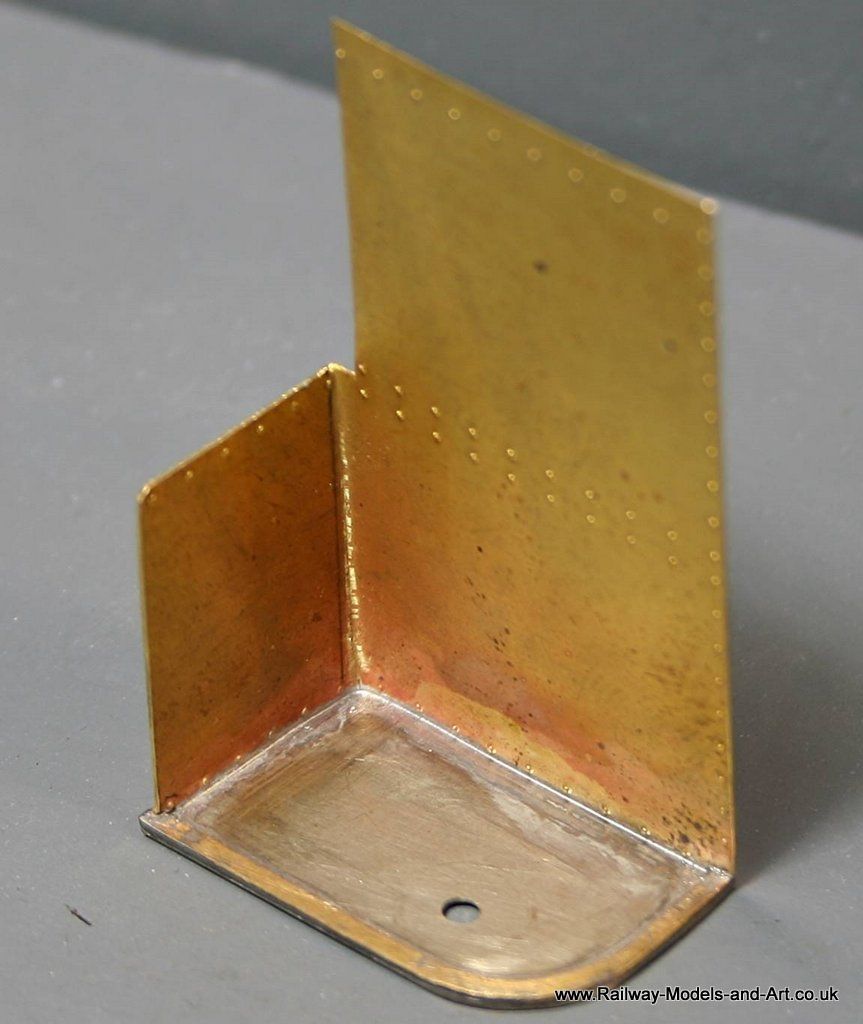
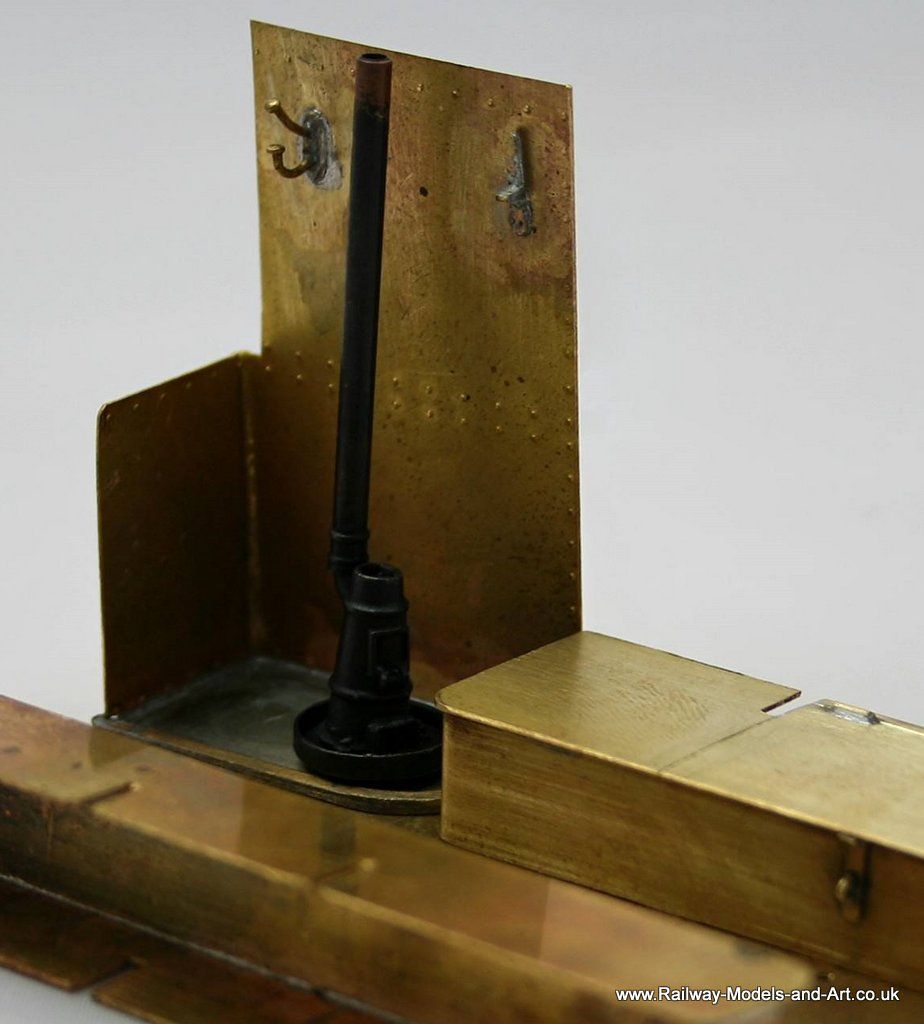
I have been fortunate to have been given a couple of GA's which show a hearth and heat shielding around the area where the stove sits.
A raid of the scrap etch box yielded this - the hole in the bottom it where the stove will bolt down.
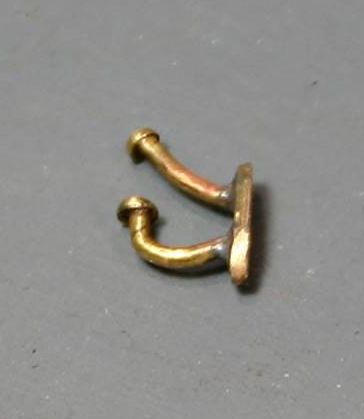
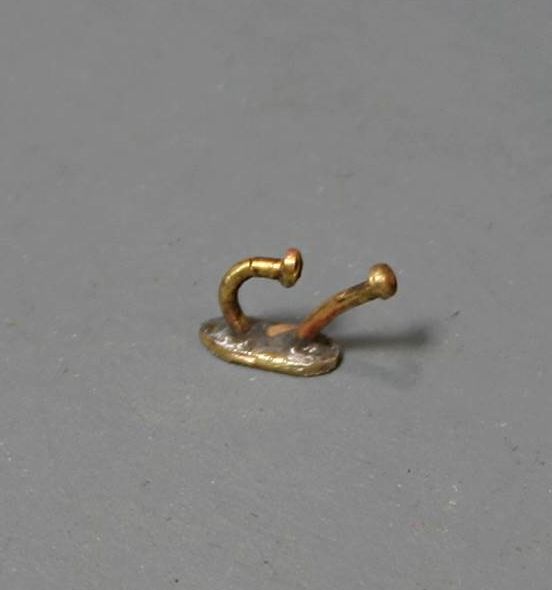
And me, being me couldn't resist making the coat hook to go with a lamp iron that hung to either side of the chimney.
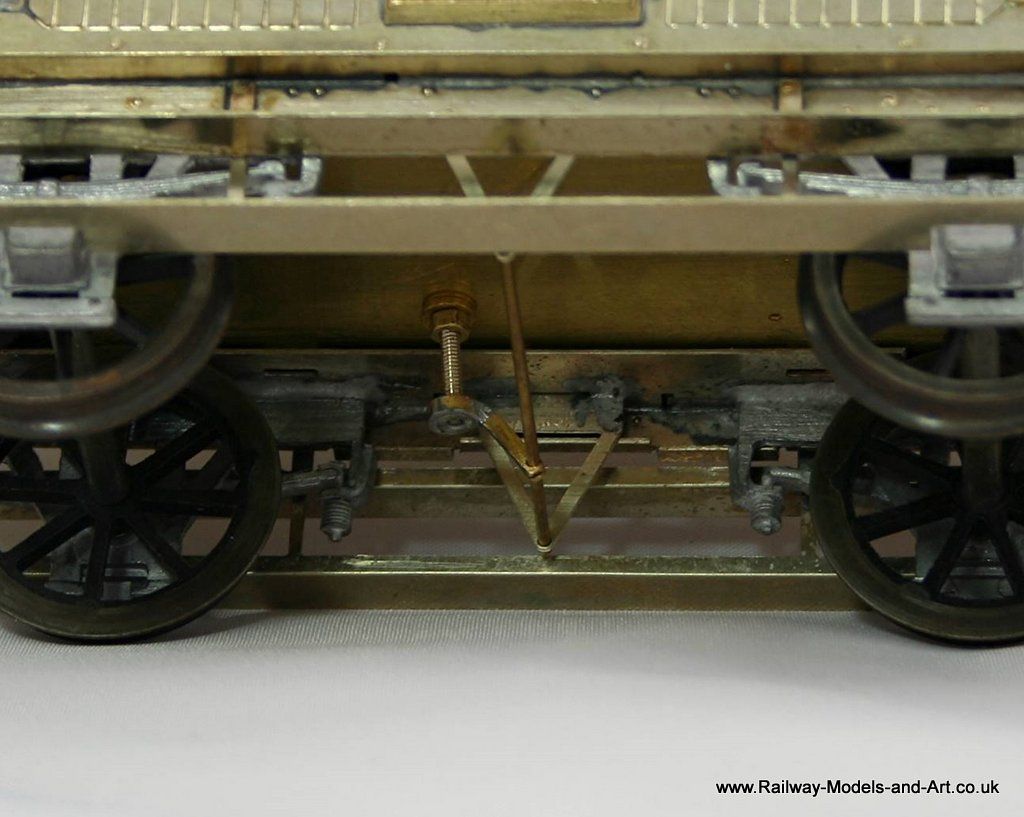
Now I mentioned that I have two GA's and this is where life gets a little odd. One of them shows 3'7" wheels which is what Jim recommends in the kit and the other shows 3'1" wheels. Even more odd is the fact that when trying to fit the 3'7" wheels they rub on the underside of the solebars. Plan B is to try some 3'1" wheels and check out the ride height.
Regards Rob
Posted
Full Member
Funny about the wheels, I would have thought they'd be 3' 7".
John
John
Posted
Inactive Member
Max
Port Elderley
Port Elderley
Posted
Full Member
John
John
Posted
Full Member
Hi John,Blast, raising the bar, and for stuff no one will see. :roll: I thought I was silly with my interiors..
Funny about the wheels, I would have thought they'd be 3' 7".
John
I think that I have got to the bottom of why the 3'7" wheels don't fit. Jim certainly did discover the error but what I had forgotten was that I wasn't using a production etch. Sometime ago when I planned the second Birdcage Van with side cotes I asked Jim if he had any scrap etches that contained the wooden duckets from the V4 kit. He duly let me have some and while making up the two V1/3 vans I idly cleaned and folded up the remainder of the etches that Jim has sent to which I added the missing bit's from my V4 kit not really thinking too much about why the etches had been scrap in the first place because there was nothing obvious to see. Upon checking last night, the production etches have cuts outs to clear the wheels.
Regards Rob
Posted
Full Member
Thanks MaxA coat hook? Marvellous! :thumbs
Brossard wrote:
Now, Rob, you'll have to make a hat and coat to go with it.
John
It's funny you should say that the very first 7mm scale build that I did was a CRT Kits LMS Period I BG and I scratch built an interior complete with coat hooks and coat…
I even scratch built the fire extinguisher.

(Click to enlarge)
 Last edit: by Rob Pulham
Regards Rob
Posted
Full Member
Glad you sussed the wheel thing. Cutting slots can't be too difficult.
John
Edit: the censor bot used a synonym for the word I wanted to use and I even inserted stars. :shock:
Last edit: by Brossard
John
Posted
Full Member
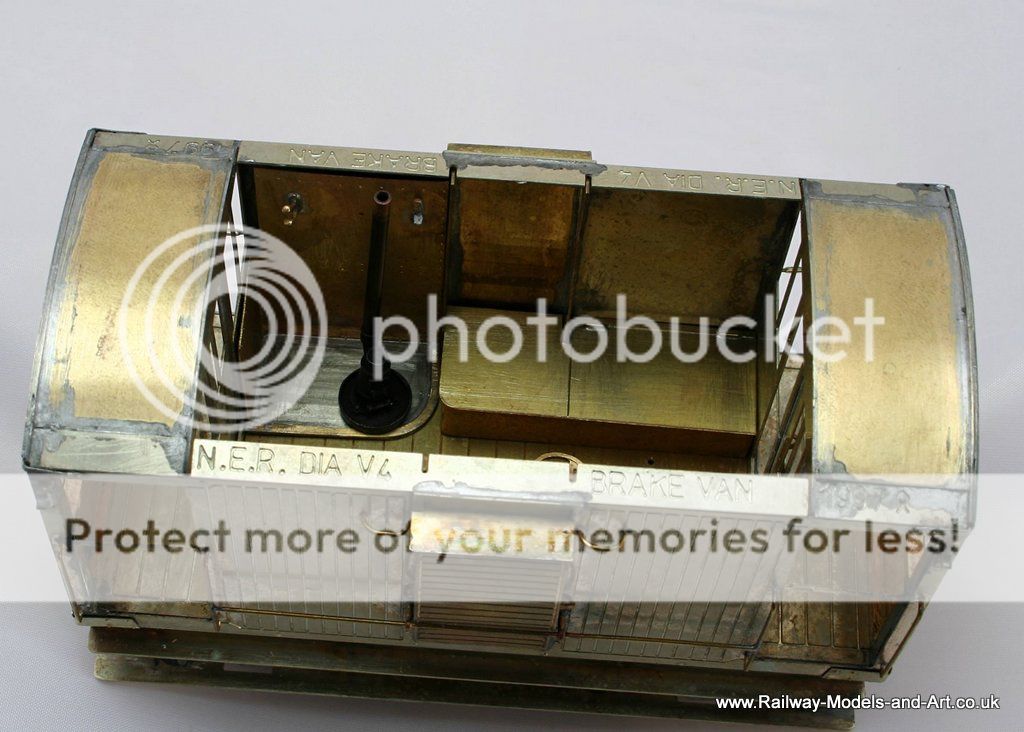
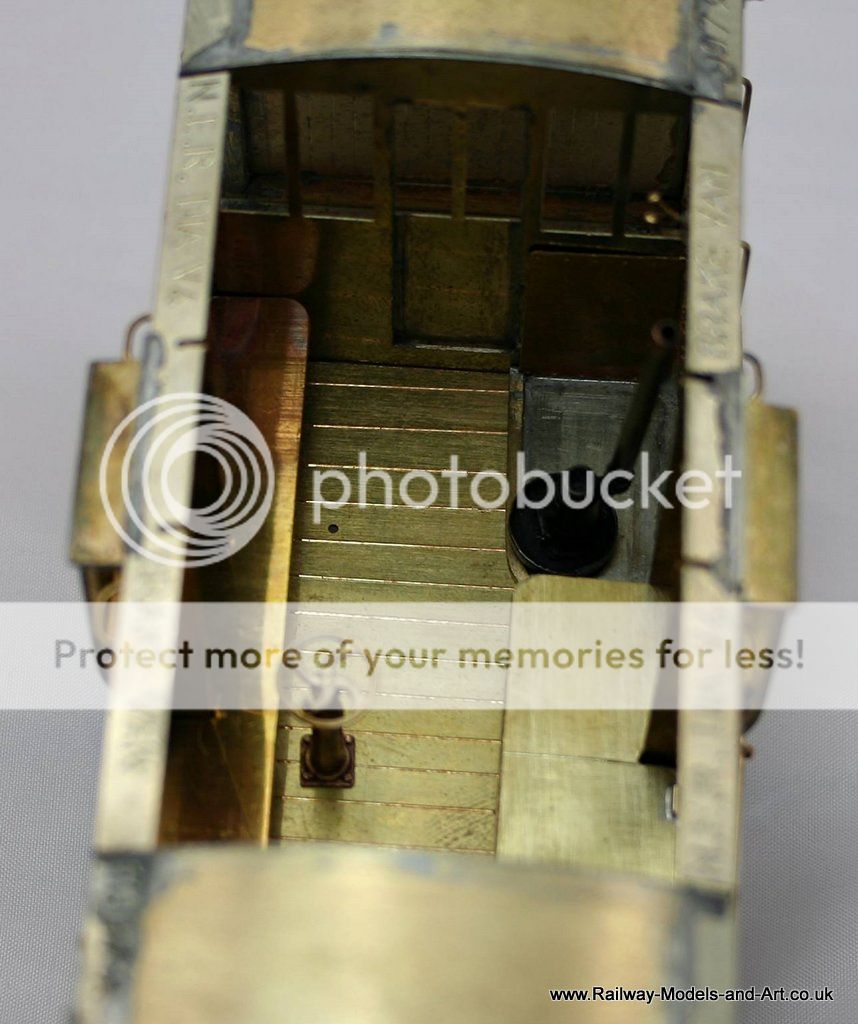
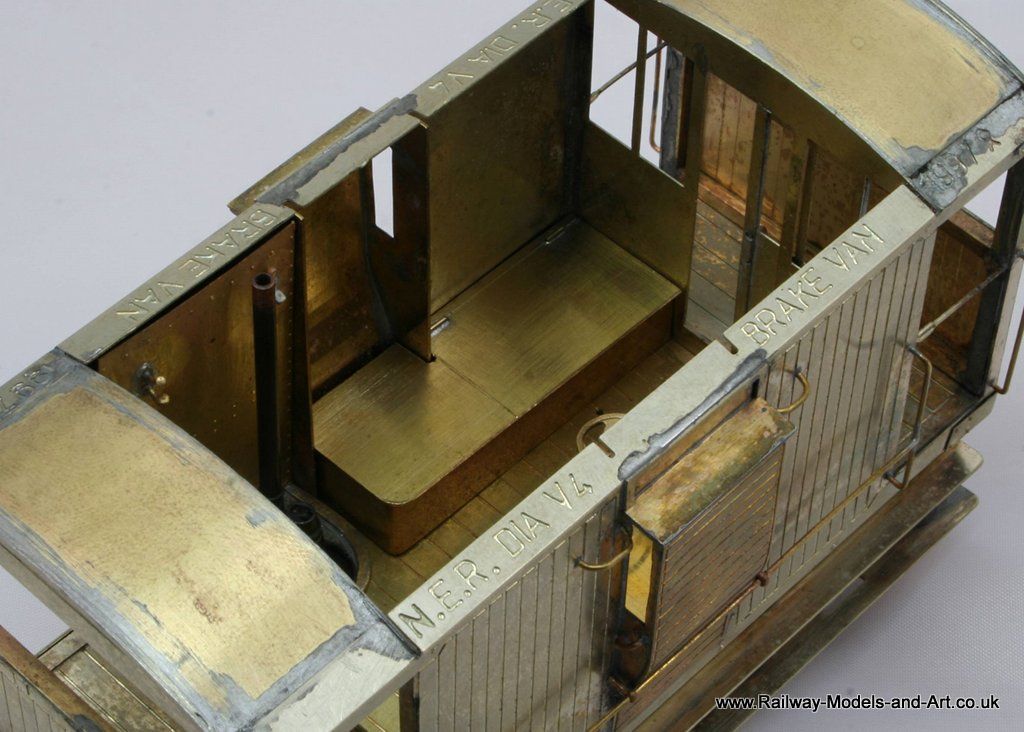
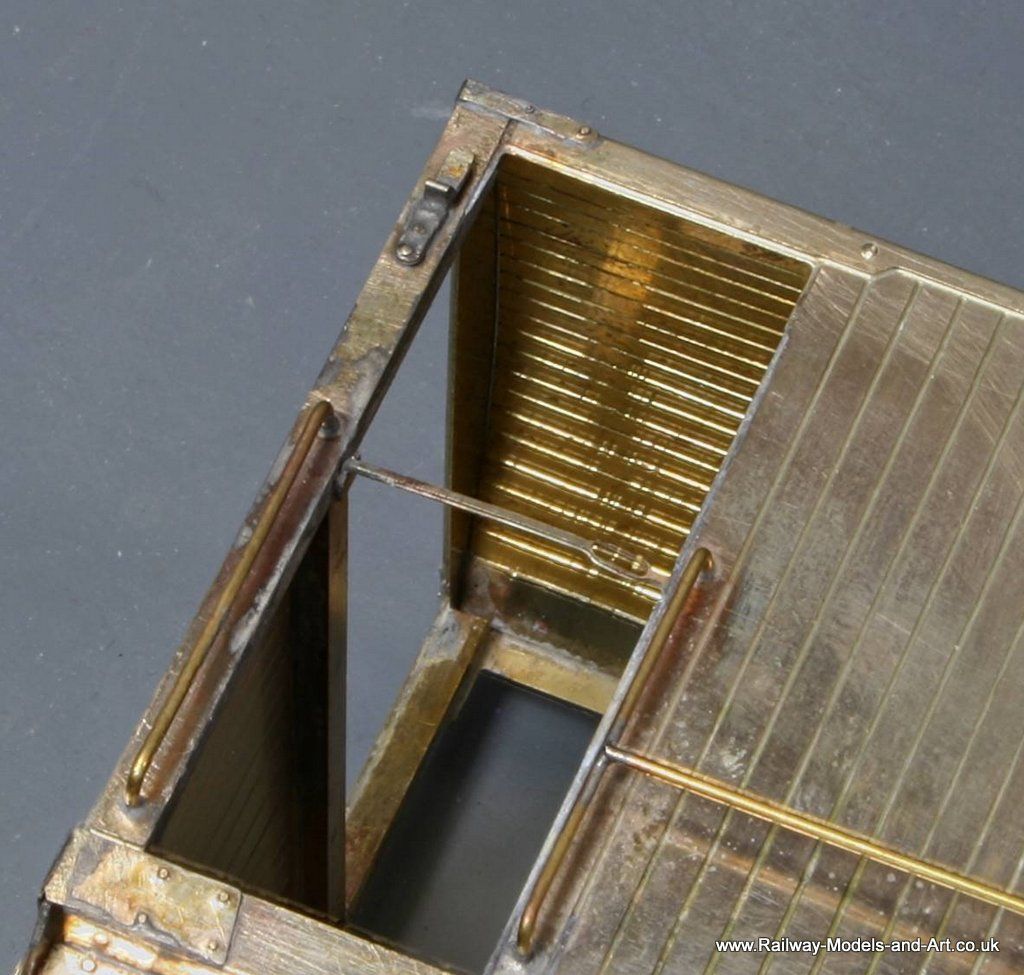
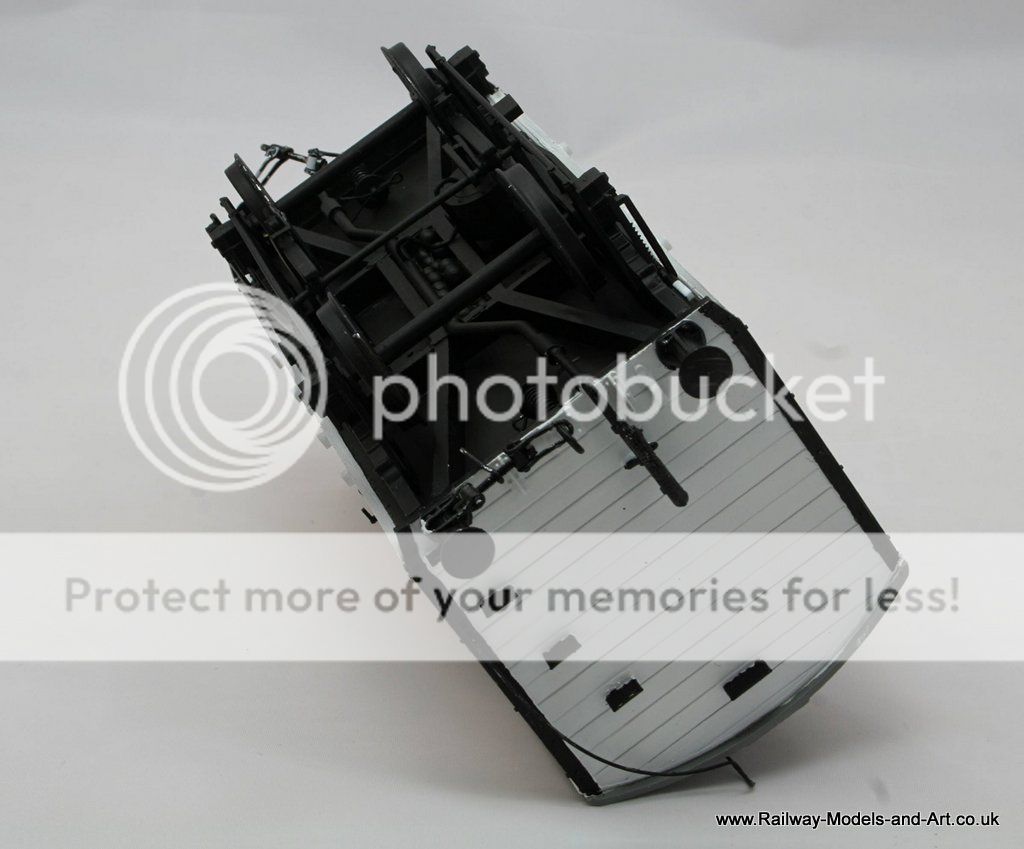
Having taken the photos above I realised that the screw for the brake column could really do with being a bit longer so I used the piece of studding left from shortening the screw to hold the seat/locker in.
Those that are still awake will note the hasp and staple fitted since the earlier photos

The long seat on one side is soldered in place, the one at the other side is screwed in from below allowing the floor and all the fittings to be fixed in after painting.
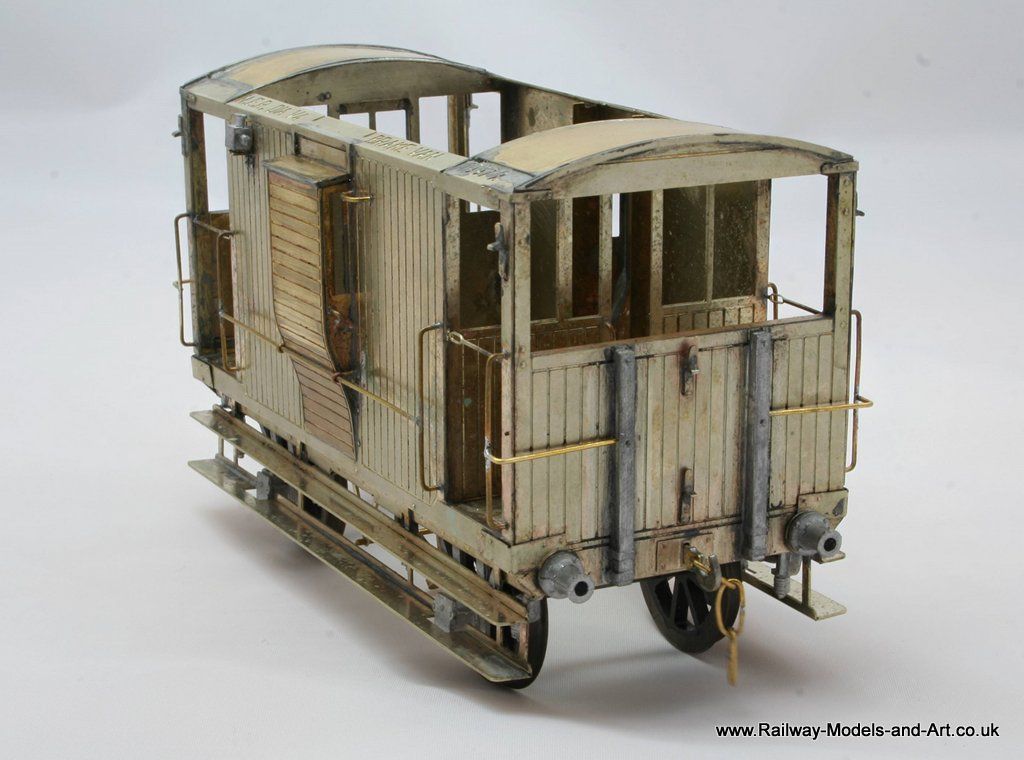
The only things left to fit are the brakes but sadly I think that I will need to temporarily remove one or both W Irons at one end because the wheel is rubbing and if I don't do it now it will only short when I try to run it.
Regards Rob
Posted
Full Member
I've started a Parkside SR 25T brake. I wonder Rob, if you have any info about the interior? I'm not sure whether to add a stove and brake wheel, but I want to at least do the furniture and get the colour close. I suspect it will be red with cream at the top (there's a good picture of the inside of one of Bluebells vans but I don't think it's the pillbox based on the end windows).
https://commons.wikimedia.org/wiki/File:Brake_van_(interior)_(9131593638).jpg
John
John
Posted
Full Member
Sorry, I don't have any info at all on the Southern. Looking at the guy who posted your image's other images it does look to be a Southern Pill box. Or at least he has a couple of photos of a pillbox van
The problem is that you never know what they do with them in preservation - there is a BR brake van at Locomotion (Shildon) that has been modified for taking more passengers for brake van rides until it no longer resembles any sort of recognisable brake van
Regards Rob
Posted
Full Member
I agree, it can be hazardous to use preserved stock as a guide.
The brake to which I linked is a Queen Mary: Bluebell Railway - SR bogie goods brake van 56290, again from the window location.
John
John
Posted
Full Member
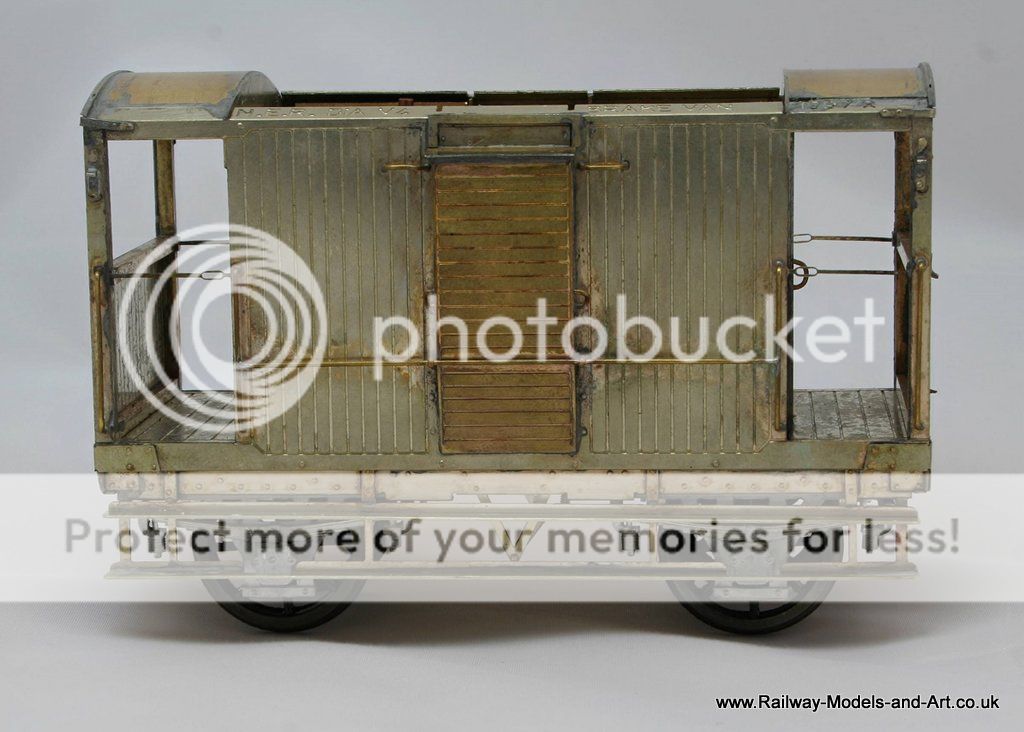
Here are some taster photos.

Regards Rob
Posted
Full Member
John
John
Posted
Full Member
It's just about to hit the small ads.
Regards Rob
1 guest and 0 members have just viewed this.