Rob P's Wagon Kit Bashing Workbench
Posted

Full Member
Wagons built from Kits
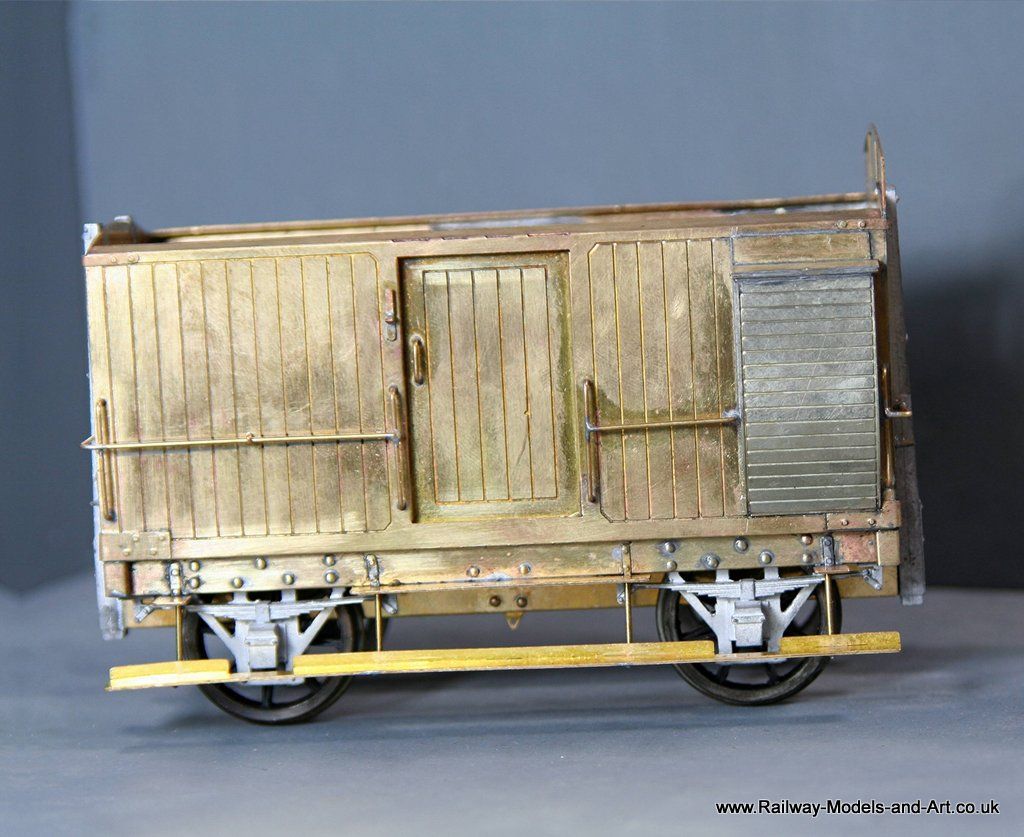
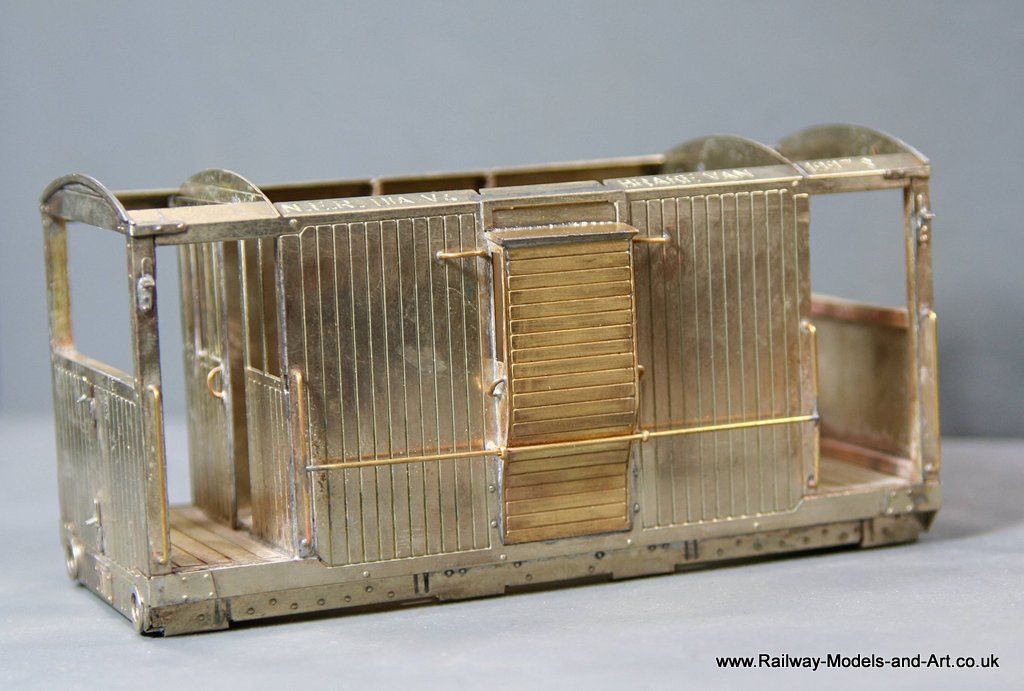
Brass does have a look about it, wonderful. I like the wooden floor. Strange how the brakes were so far away from the wheels, perhaps originally for coarse 0?I've been trying to represent wood floors in a couple of Dapol wagons along with general weathering. I'll post something soon.
John
John

Posted

Full Member
Hi John,Brass does have a look about it, wonderful. I like the wooden floor. Strange how the brakes were so far away from the wheels,
I hadn't thought of that. maybe. It's a shame because it detracted from what was otherwise a good kit. It does surprise me that the designer went with cast brake gear though when the rest of the etched parts are so good. Etched brake gear would have been so much better.
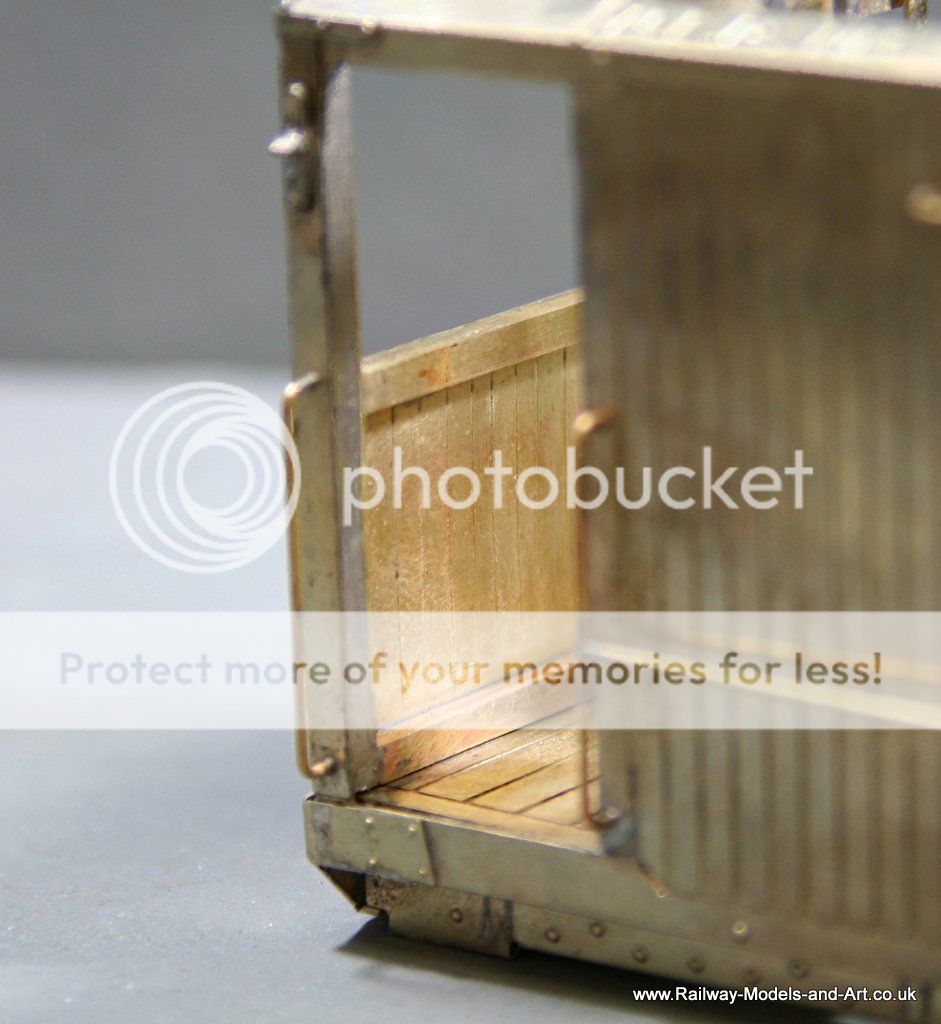
Since taking the photos I have noted that I haven't added the pins and chains for the drop doors something that I will have to remedy before painting.
 Last edit: by Rob Pulham
Regards Rob
Posted
Full Member
John
John
Posted
Full Member
Having had a look at what's on offer, you might also be interested in these from Modern Motive Power which are at a similar price but carry much more detail.
https://www.djparkins.com/product.php?productid=18284&cat=309&page=1
I have a few of David's LMS Wagon kit's in my stash they are very detailed.
Regards Rob
Posted
Full Member
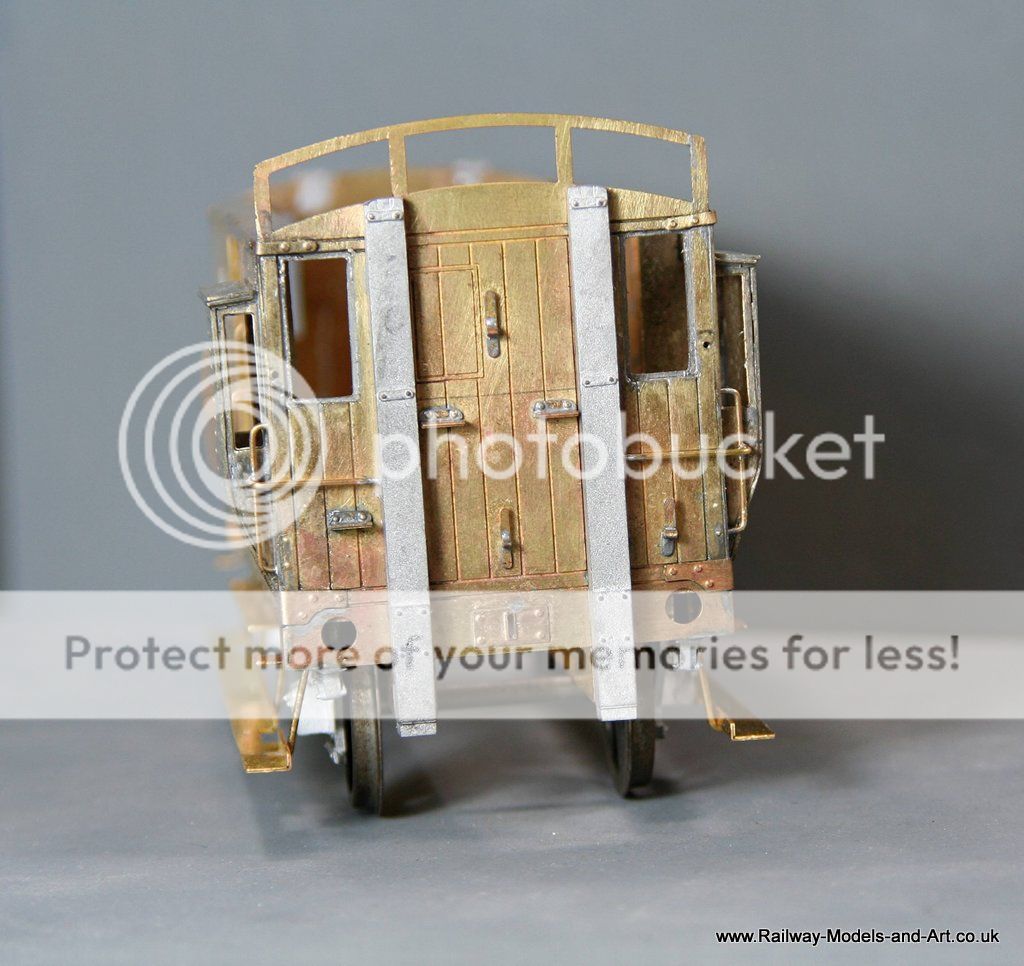
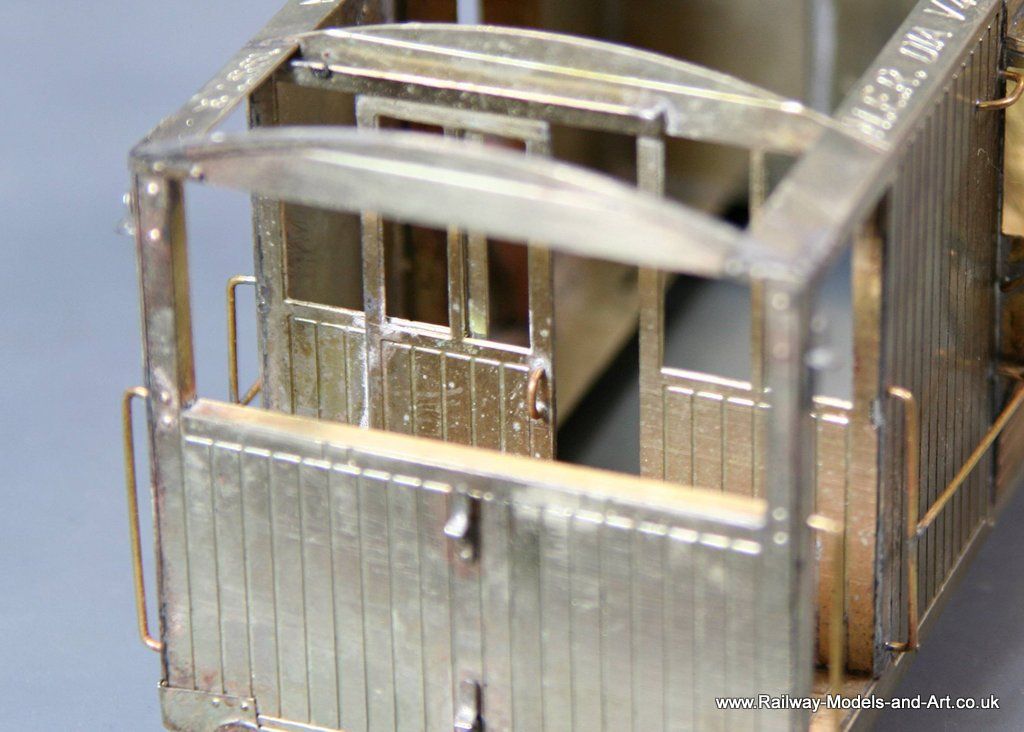
At the suggestion of John I looked at the photo to determine whether there were frames in the windows that I cut in the end.
There isn't a frame as such on the photo but I decided to try to replicate the etched frame that's etched in the other end.
Regards Rob
Posted
Full Member
I think the strategy has to be to complete the wagons I have on hand then move to the coaches.
John
John
Posted
Full Member
John
John
Posted
Full Member
I note that there are etched interior overlays suitable for Slaters kits.
Hi John,
There are, I have one amongst my shelf queens if you would like to see what they look like - it's up north so it will be another week or so before I can bring it back for a photo though.
I have the RCH underframe pack for the same wagon, I must get back to it.
You mention getting a couple of the steel minerals? You may want to opt to buy three because David does a deal on packs of three. Just make sure that you click on the right one when ordering. I once made the mistake of ordering an LMS steel mineral when I wanted a wooden one. The plan is to build it and sell it at some point because it's a bit late for the period that I model.
Regards Rob
Posted
Full Member
John
John
Posted
Full Member
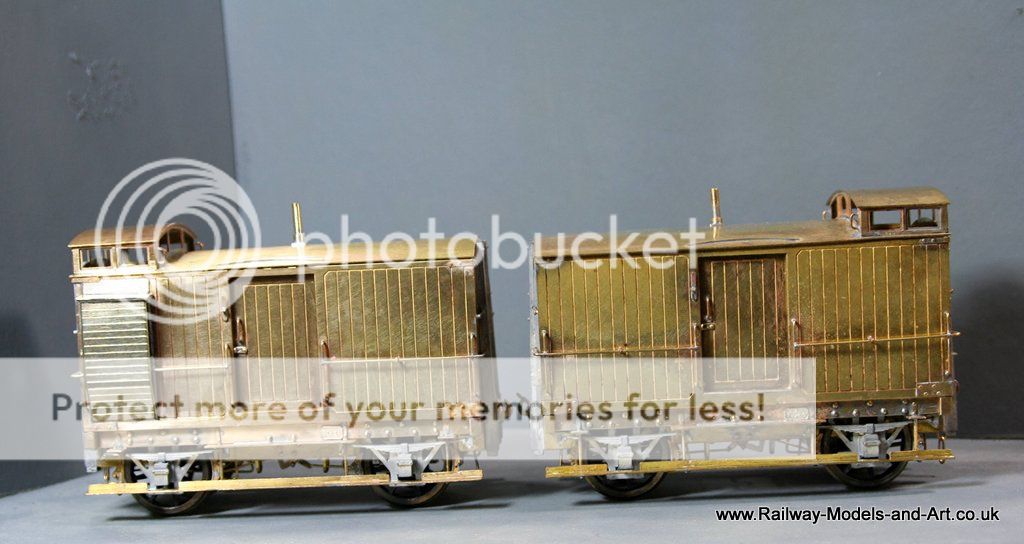
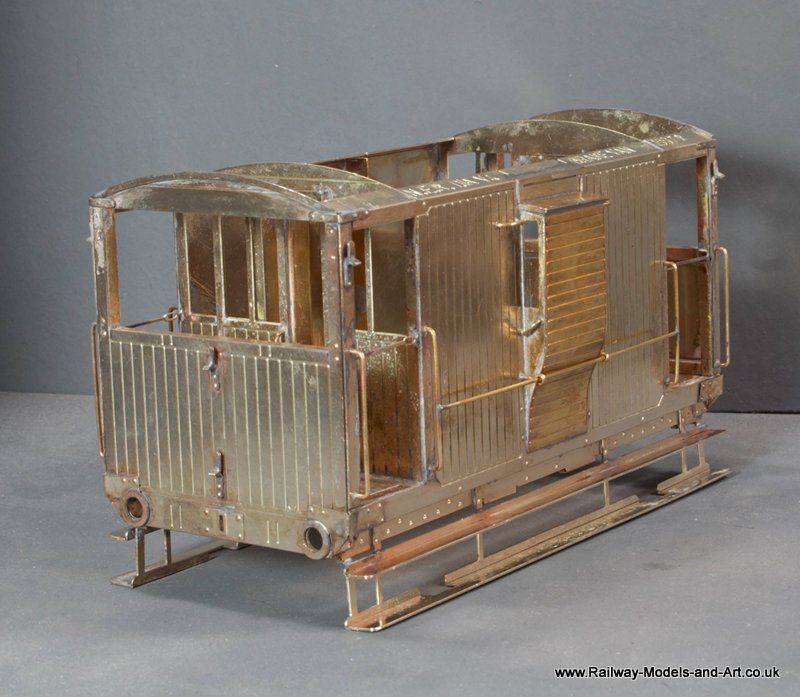
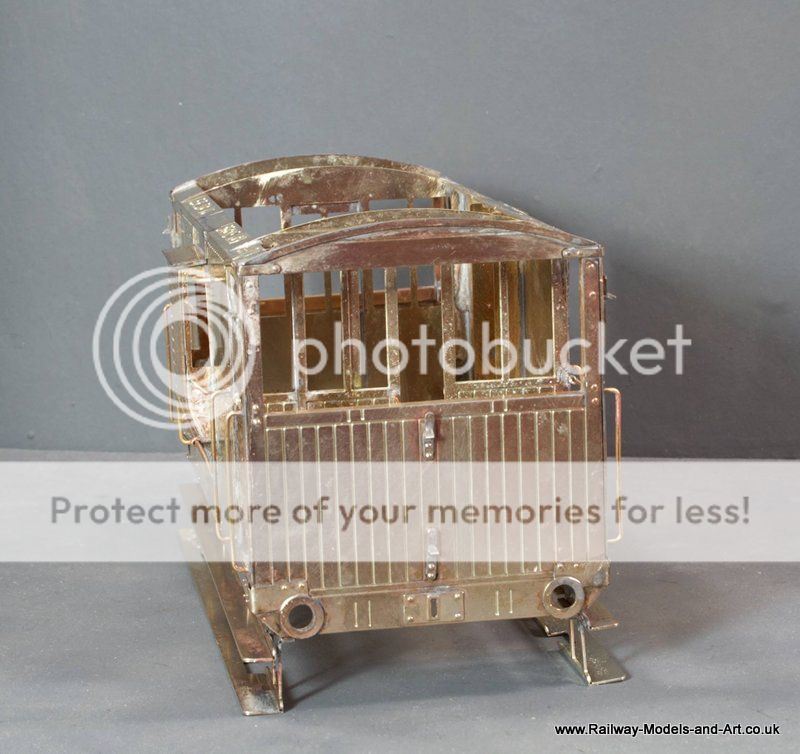
I got the second NER Birdcage brake to a similar state as the first one - just needing buffers and working out how best to fit the roof post painting.
And then something that came together almost as a surprise. As I was doing the two V1 vans I started to clean up and make the various folds in a V4 van and before I knew it, quite a bit was to was ready to solder up.
The doors are sliding doors and the way that Jim has portrayed them made leaving one of them partially open almost irresistible. It means that I will need to model an interior but that doesn't faze me.

Again it's a Connoisseur kit and to that I have added square brass rod to beef up the vertical and horizontal framing and some internal planking to the veranda ends.
It all needs a good clean up before I go much further with it.
Regards Rob
Posted
Full Member
The two birdcages have turned out well.
The new van is a Toad B isn't it? I've got some drawings if you need them.
John
John
Posted
Full Member
Excellent, you won't regret buying the MMP kits.I frequently find boo boos after I've taken the picture. Took your advice and ordered three steel minerals (1 ex LMS, 1 108/1 and 109/1) from Parkin.
The two birdcages have turned out well.
The new van is a Toad B isn't it? I've got some drawings if you need them.
John
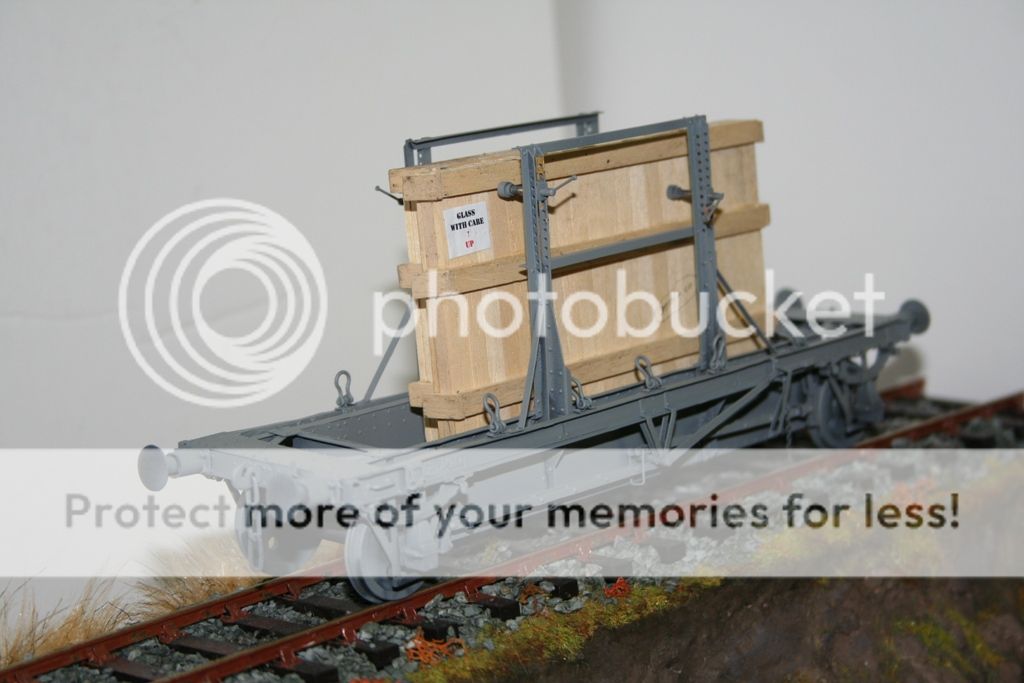
This is an MMP LMS Glass wagon that I built, since the photos were taken I have added transfers but haven't painted the bits that should be black. I have 3 wooden minerals, a steel mineral and an LMS roadstone wagon still to build. If I modelled BR I would be tempted by his mark one coaches too but they are too late for me.

Yes, the new van is a Toad B I have a Toad E to do too which might be next but my son bought me a Bill Bedford GCR 6 wheeled brake for Christmas which keeps beckoning to me too.
Yes please to the drawings.
Regards Rob
Posted
Full Member
I'll email the drawings.
John
John
Posted
Full Member
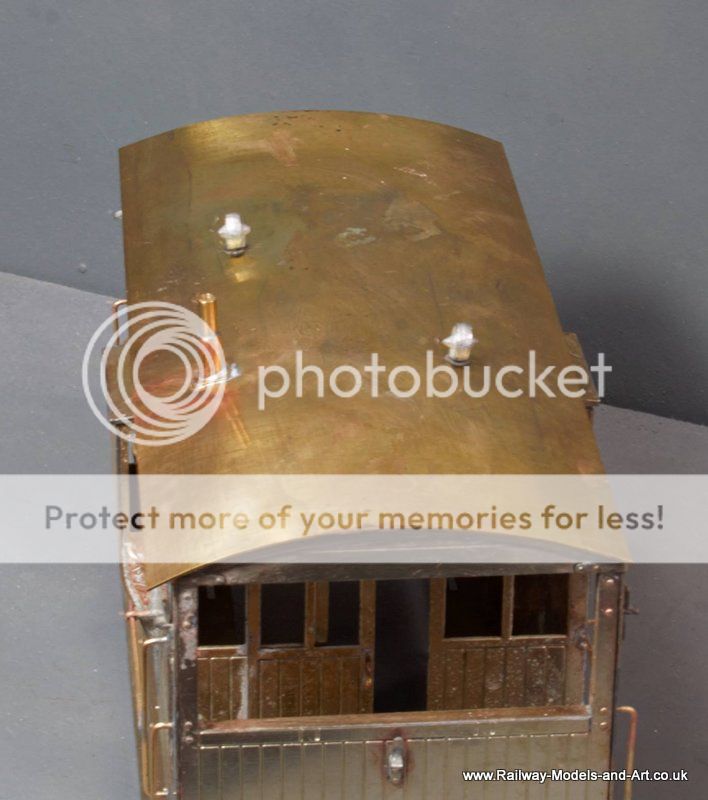
Last night I ventured forth and got stuck in with the NER V4 brake van again. I added the remaining corner patches, the guard irons across the door ways and added the foot boards. I had done the roof at the last session that I did but forgot to take any photos of it.
I think that apart from the brakes and remaining handrails that fit into the end posts all the brass work on the outside is complete so whitemetal fittings next.
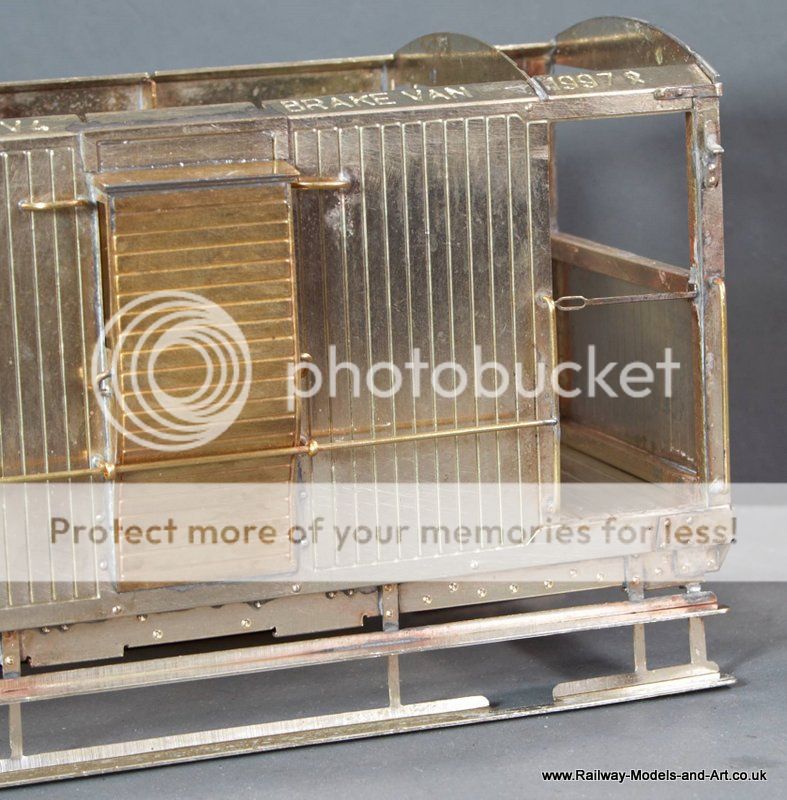
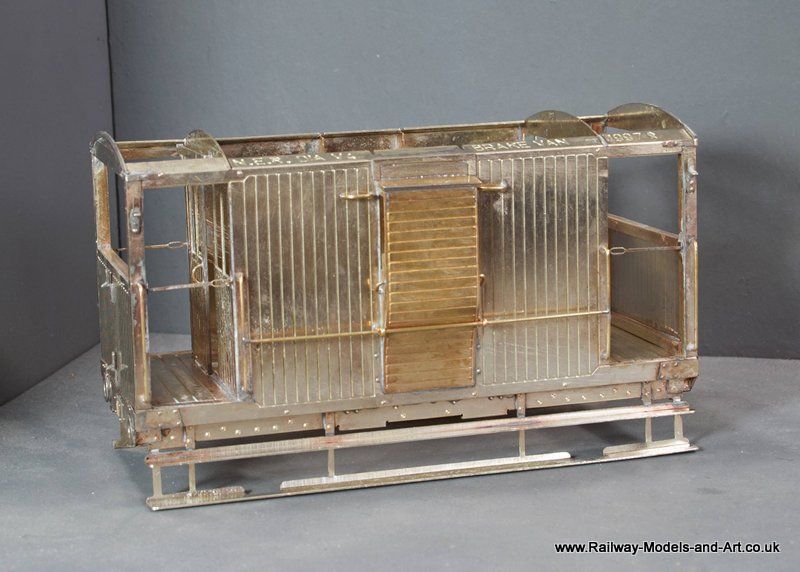
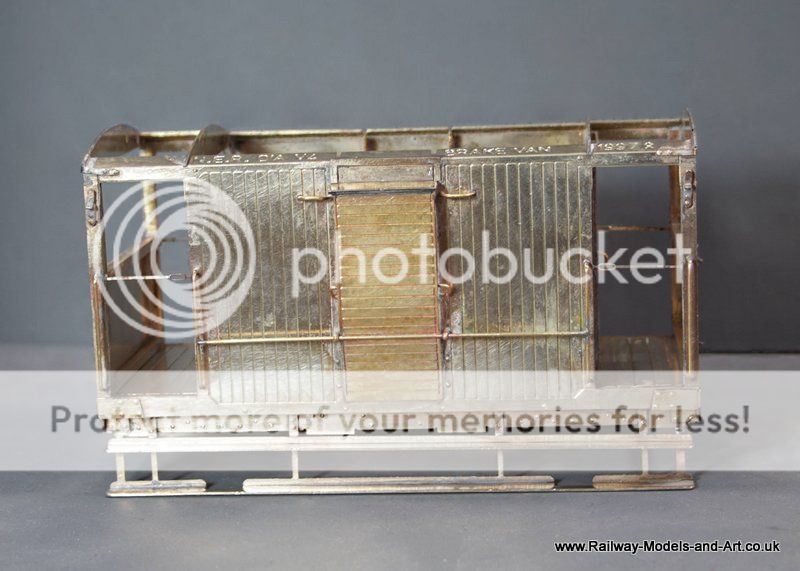
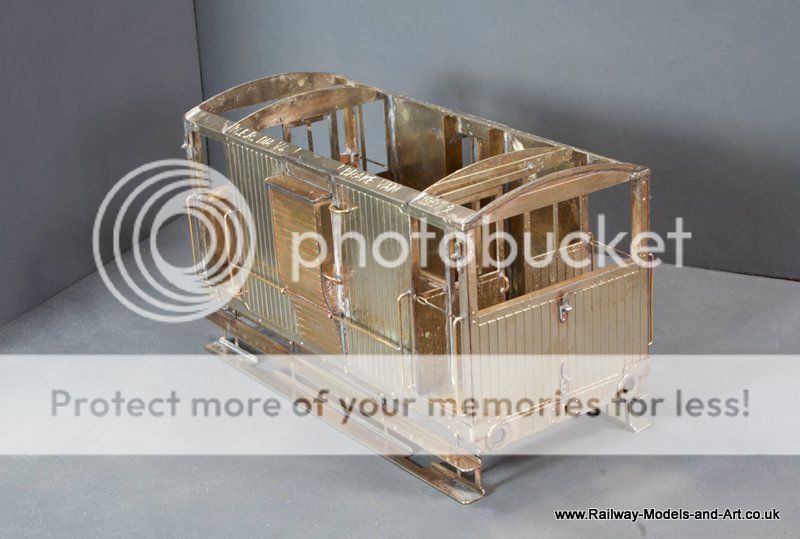
As on the other NER brake vans I made a replacement for the cast chimney from tube.

Regards Rob
Posted

Full Member

Posted
Full Member
I do like this van, the predecessor to the Toad E. I read something yesterday that said that the Toad E was this van with the wooden duckets replaced by steel.
I marvel at people who can fully assemble a model before painting. Painting, for example, the area between the inner and outer ends must be tricky.
John
John
Posted
Full Member
I hadn't realised that such a minor op would knock the stuffing out of me. The biggest problem was that it was to my toe and it will take up to 8 weeks to heal. The first 4 weeks I had quite substantial dressings on it which made it really uncomfortable and required lots of painkillers. Now I have what is essentially a big plaster which is much more comfortable and not taking as many pain killers has helped me regain the modelling mojo.
I hear you on painting the model in one piece. You don't really have much choice with soldered construction although I will leave the roof separate so that I can get into the veranda ends a bit easier - not that they will be easy of course.
Regards Rob
Posted
Full Member
John
John
Posted
Full Member
You have me sussed John, I like to solder where I can. I don't mind gluing plastic but I view solder as the only glue for metal.that doesn't sound like you though.
John
Regards Rob
Posted
Full Member
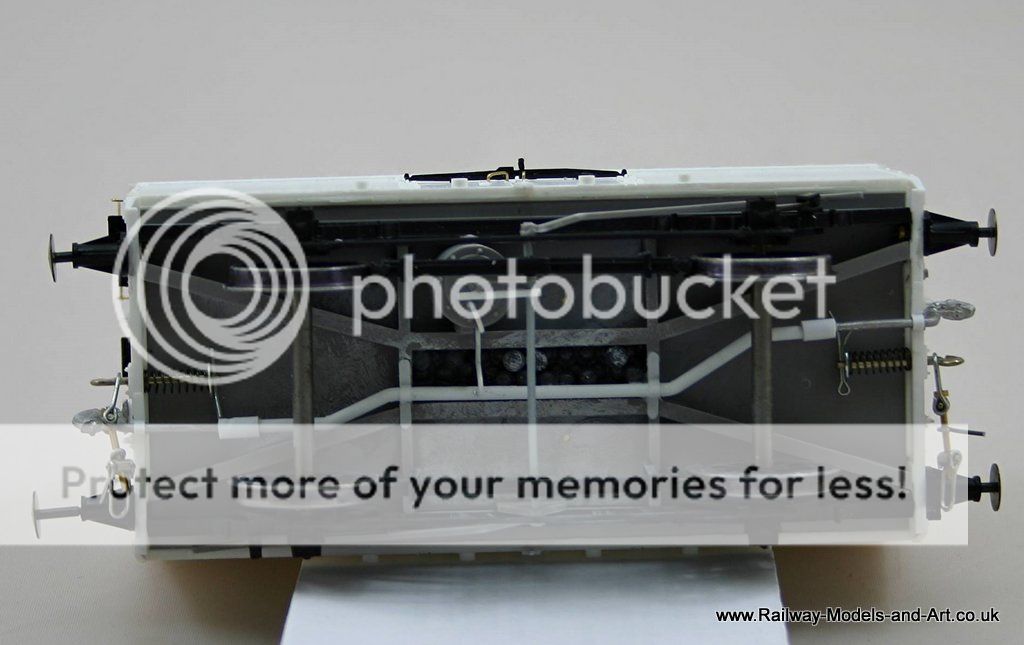
This one being a Parkside Kit for a GWR Tevan. Not being a GWR/WR modeller I have relied somewhat on the historical info in the kit and one photo that I found on the net of a preserved example.
Apparently these were converted in the late 1930's from Mica Insulated vans by removing the interior hoppers for Drikold refrigerant and the roof hatches from which they were accessed. The were then used for the conveyance of tea and coffee from the Lyons Depot at Greenford.
Having said that, apparently there is photographic evidence that at least one of them retained its roof hatches and, me being me, I chose to model the unusual one. - Helped along by the provision
At the minute the plan is to finish in BR WR livery as being the most attractive to prospective buyers.
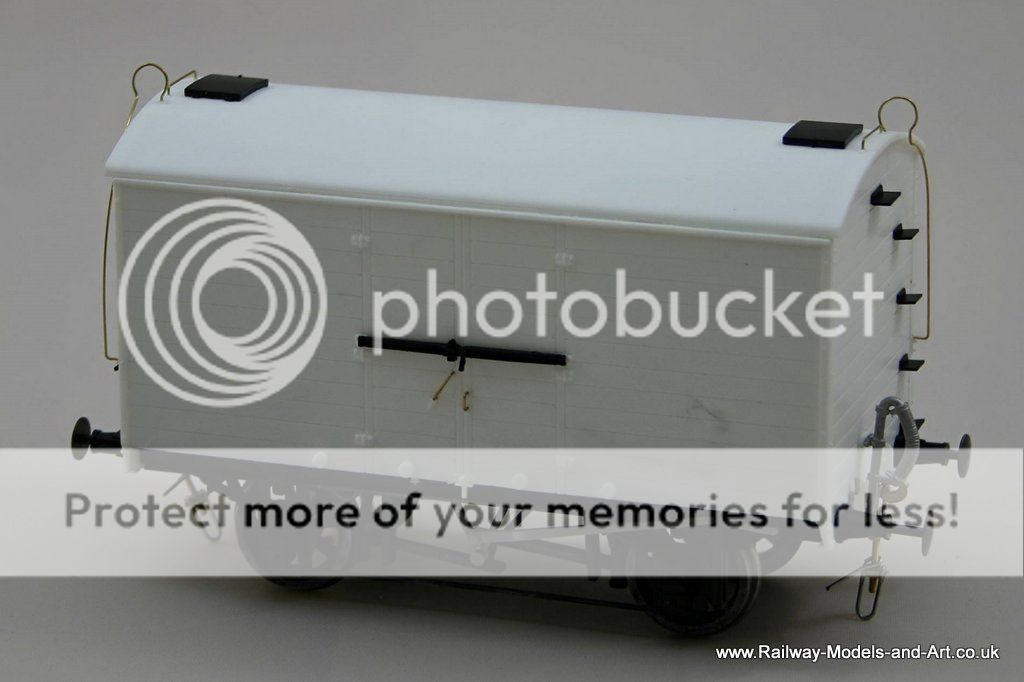
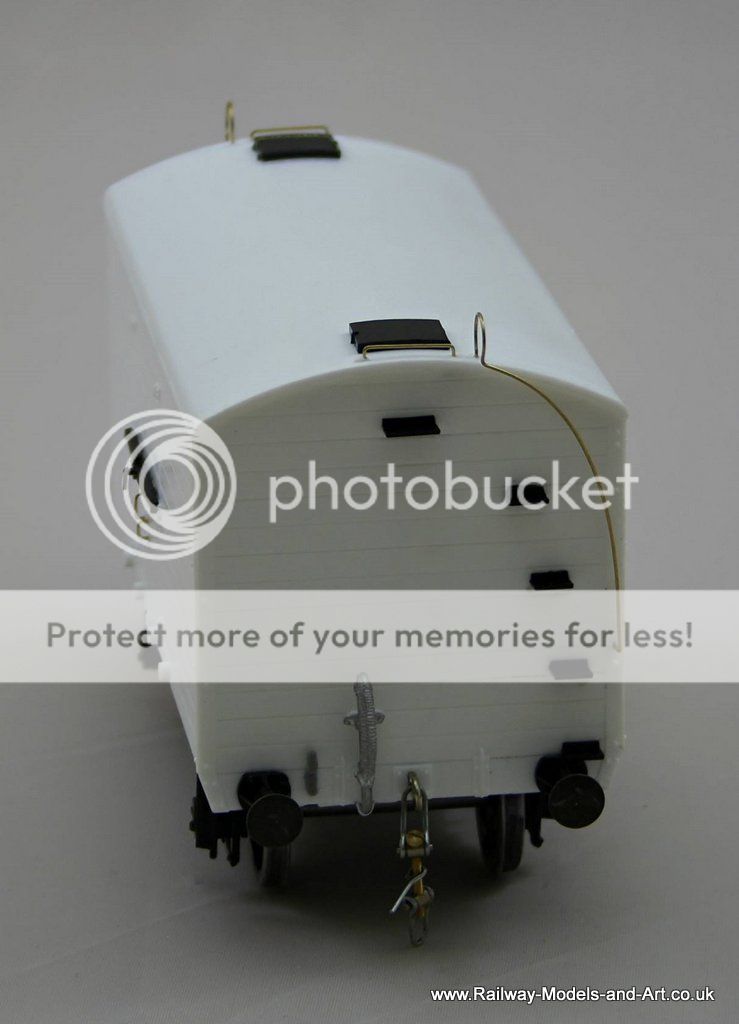
Although you can't see it unless, (and to quote Jim Snowden saying recently) "it falls off" I chose to add the vacuum pipe run under the floor and the smaller pipe to the vac cylinder.
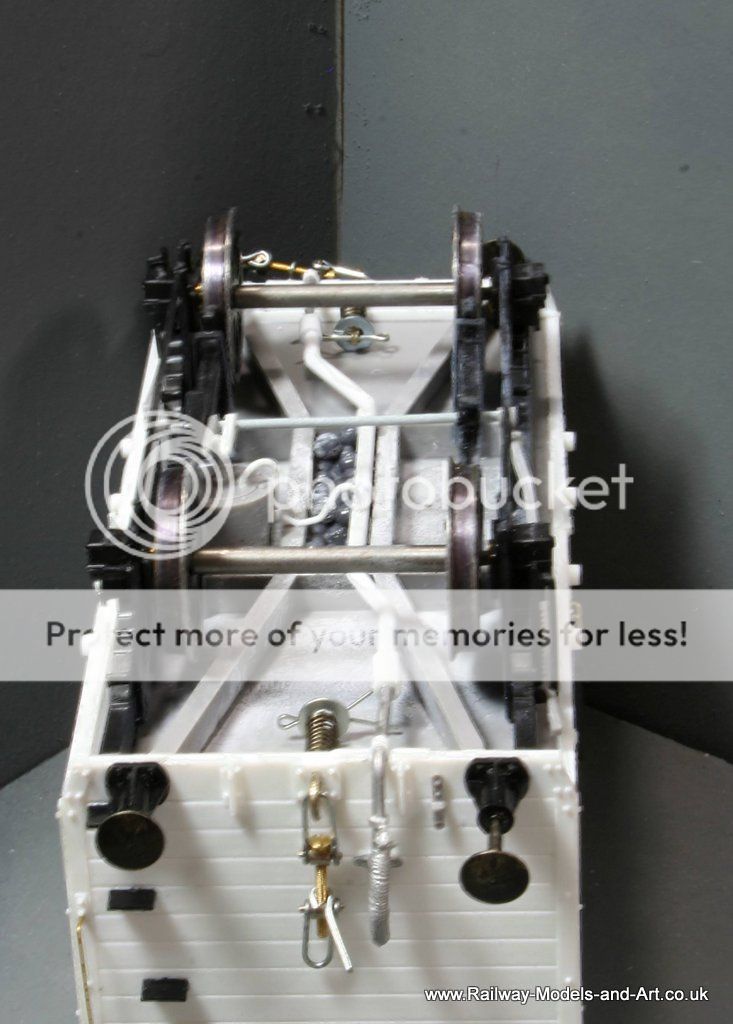
Apart from adding a pair of rather nice fold up etched steps it's ready for the paint shop.
Regards Rob
1 guest and 0 members have just viewed this.