Rob P's Wagon Kit Bashing Workbench
Posted

Full Member
Wagons built from Kits
Cracking good work on the Horsebox
Posted

Full Member
Alas, I can't take any credit for doing a speedy job in this instance because its very much a "here's one I did earlier" example.
This however is one that I started on Christmas day.
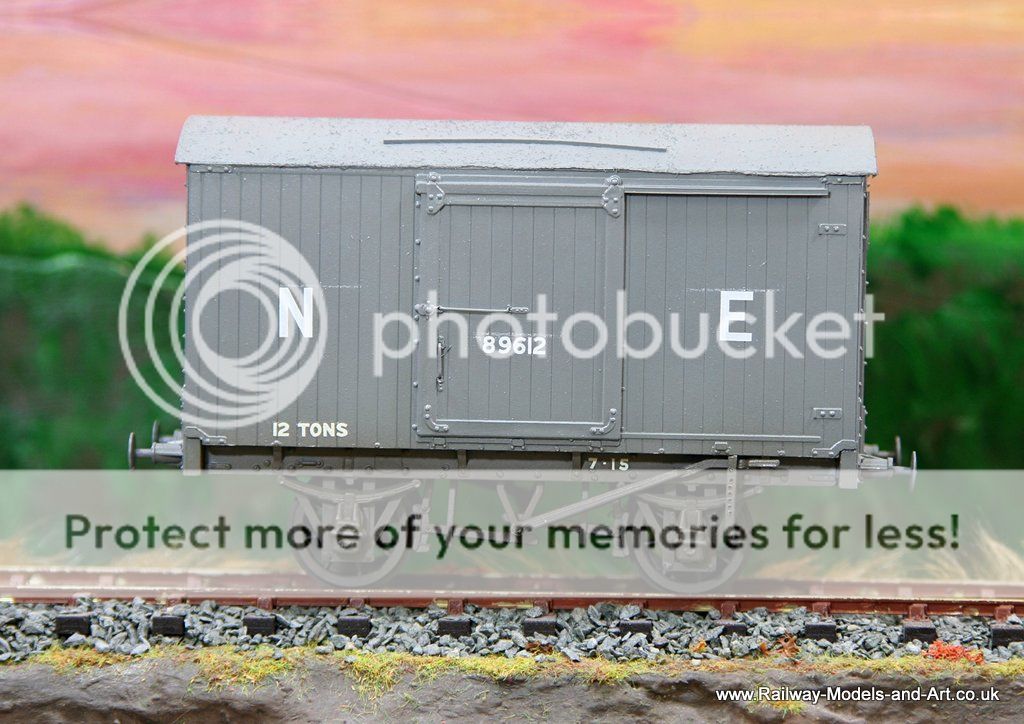
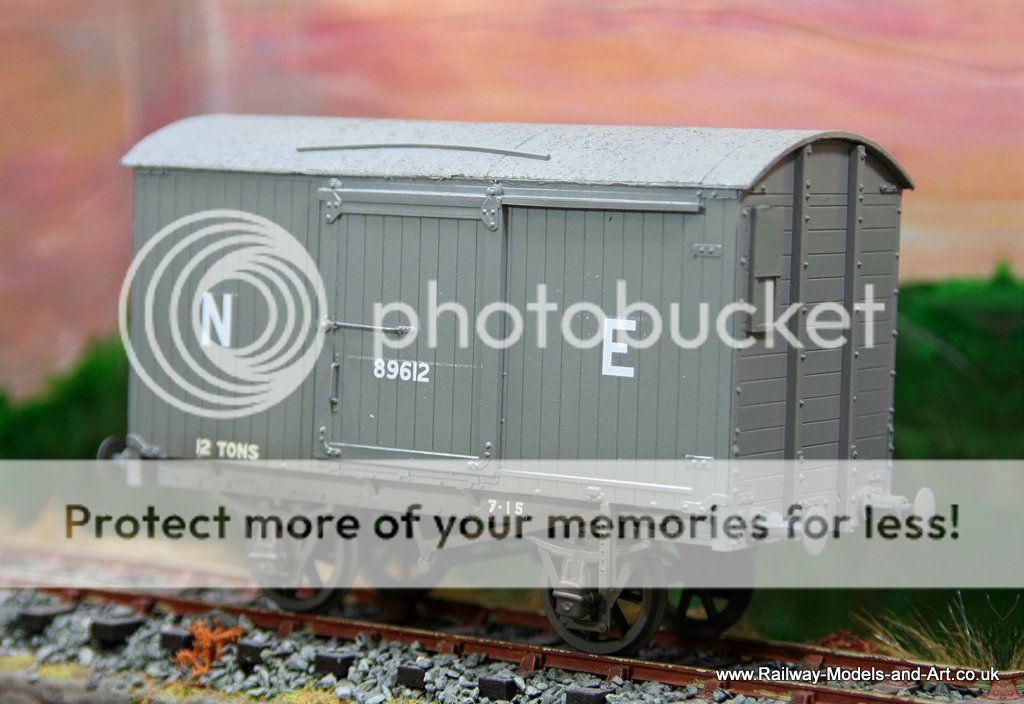
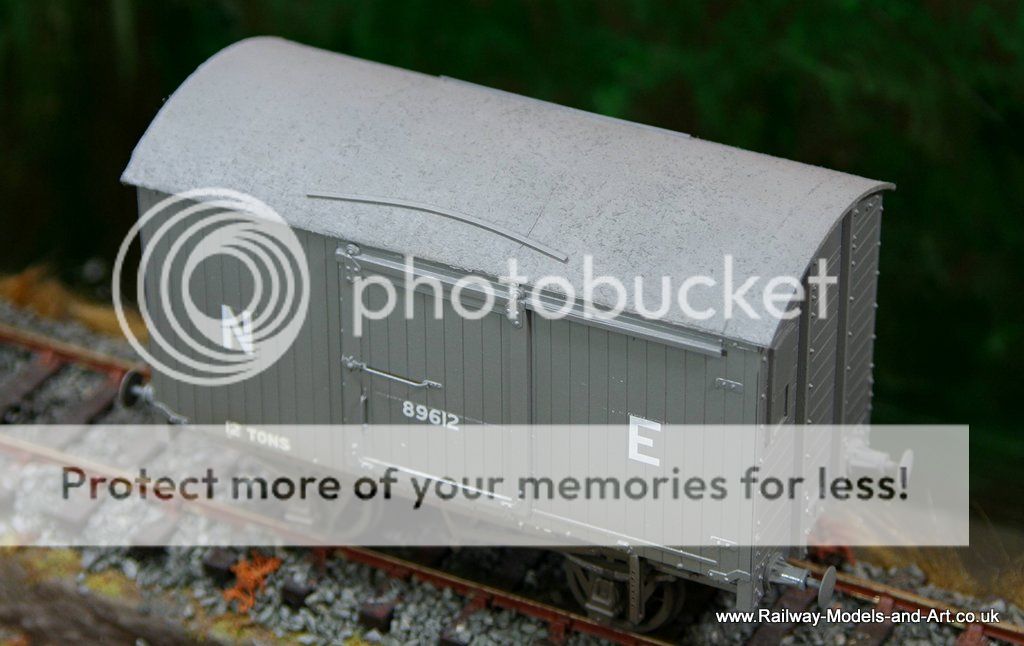
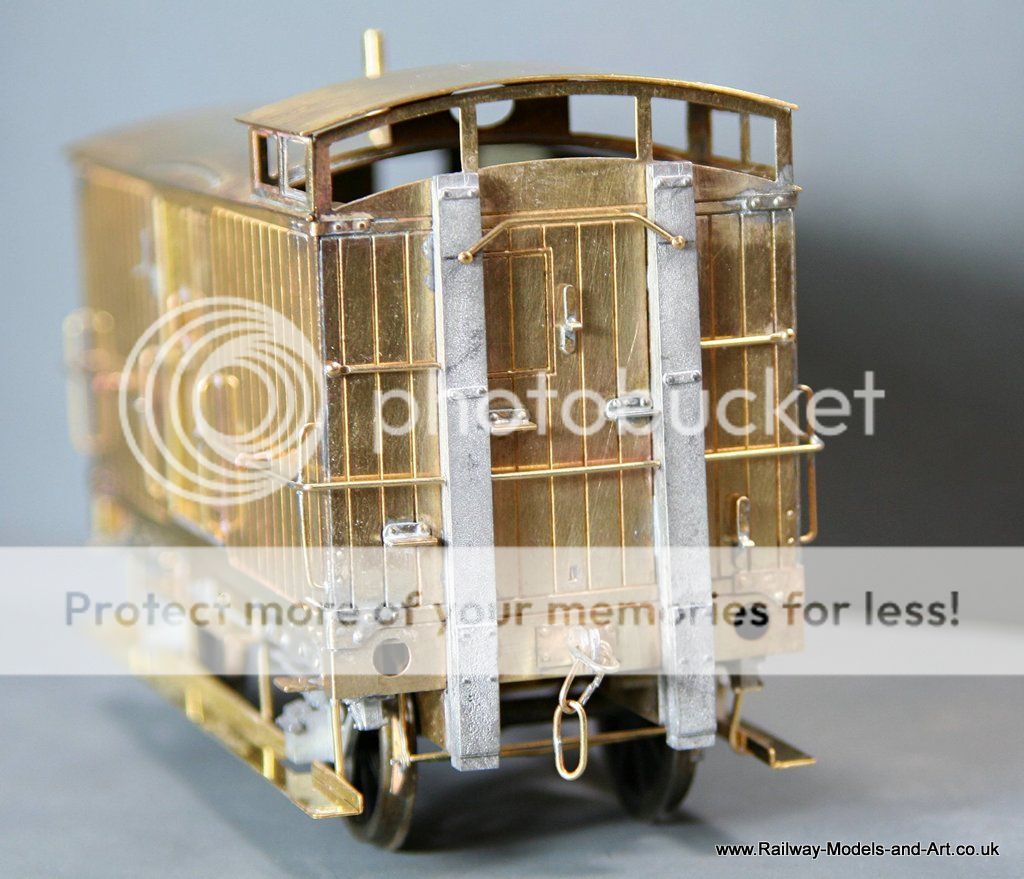
First a bit of preamble. Back in 2011 for Christmas Chris bought me a few of Jim McGeown's van kits. At the time I built an LNER Refrigerator van but didn't get to the others, which were an NER Birdcage Brake, a Perishables van, and a 6 wheeled brake coach.
Around the same time we were sat having lunch in a little cafe in the village of Rosedale Abbey on the North Yorkshire Moors when I saw a picture of one of the NER Birdcage brake van's at Rosedale but this one had "Side Cotes" (duckets to me and much of the world I suspect) as well as the birdcage on top. I decided that I would like to build one so a couple of years later at a show I bought a second kit and asked Jim if he by any chance had any duff etches that contained the duckets from his NER V4 brake van and he said that he did and duly sent me them.
Having been up north for Christmas we planned a week at home before I go back to work so I dug out both of the brake van kits and modified the sides on one to take the duckets. The ducket's were too tall to fit directly so I had to modify those too.
Here's where I got to the night before last.
Regards Rob
Posted

Full Member
Cheers
John
John
Posted
Full Member
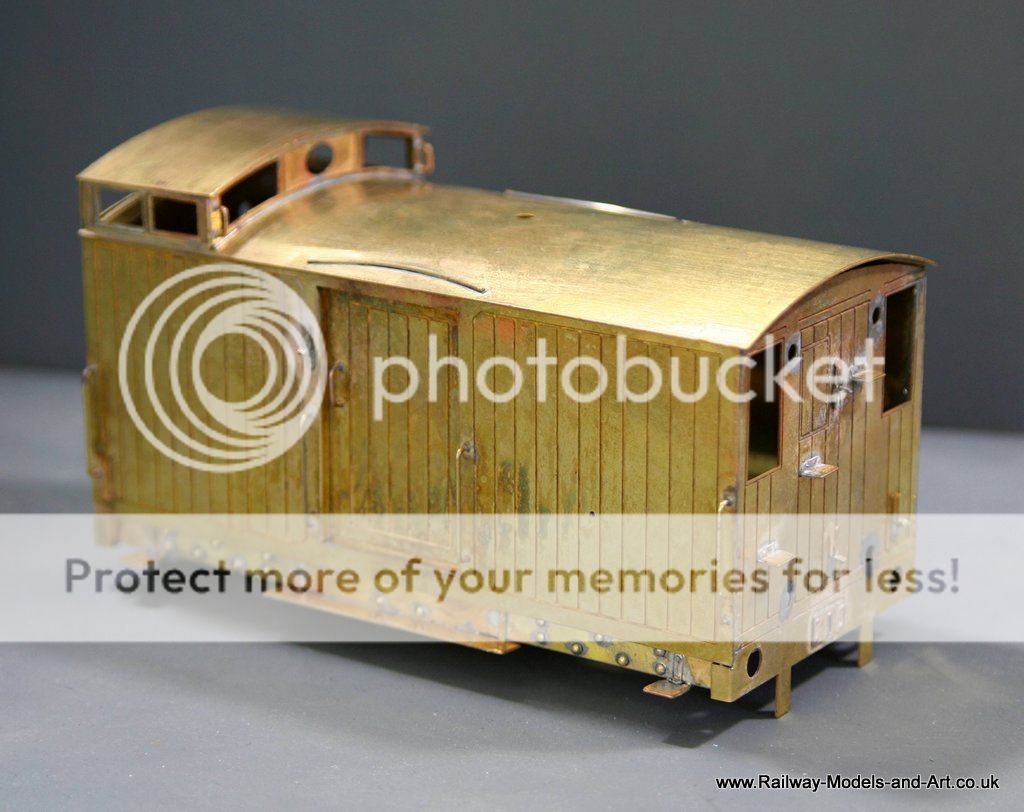
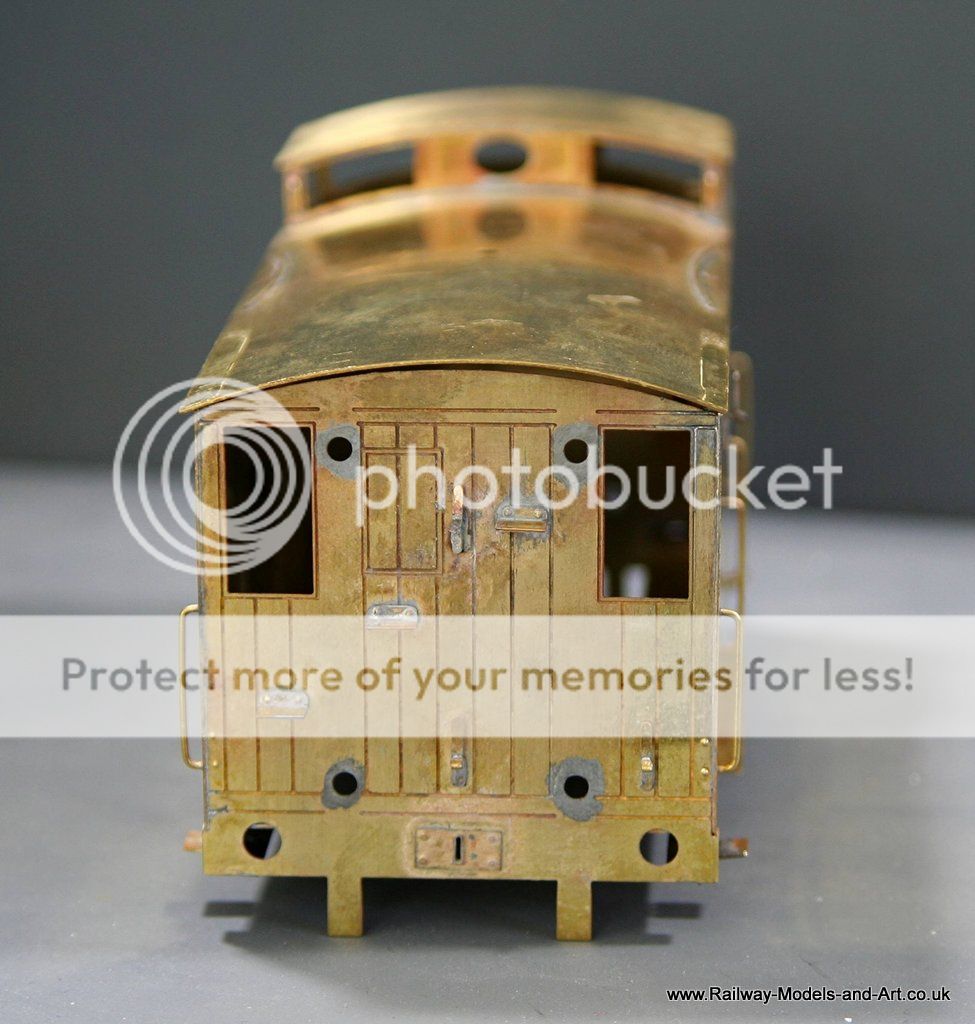
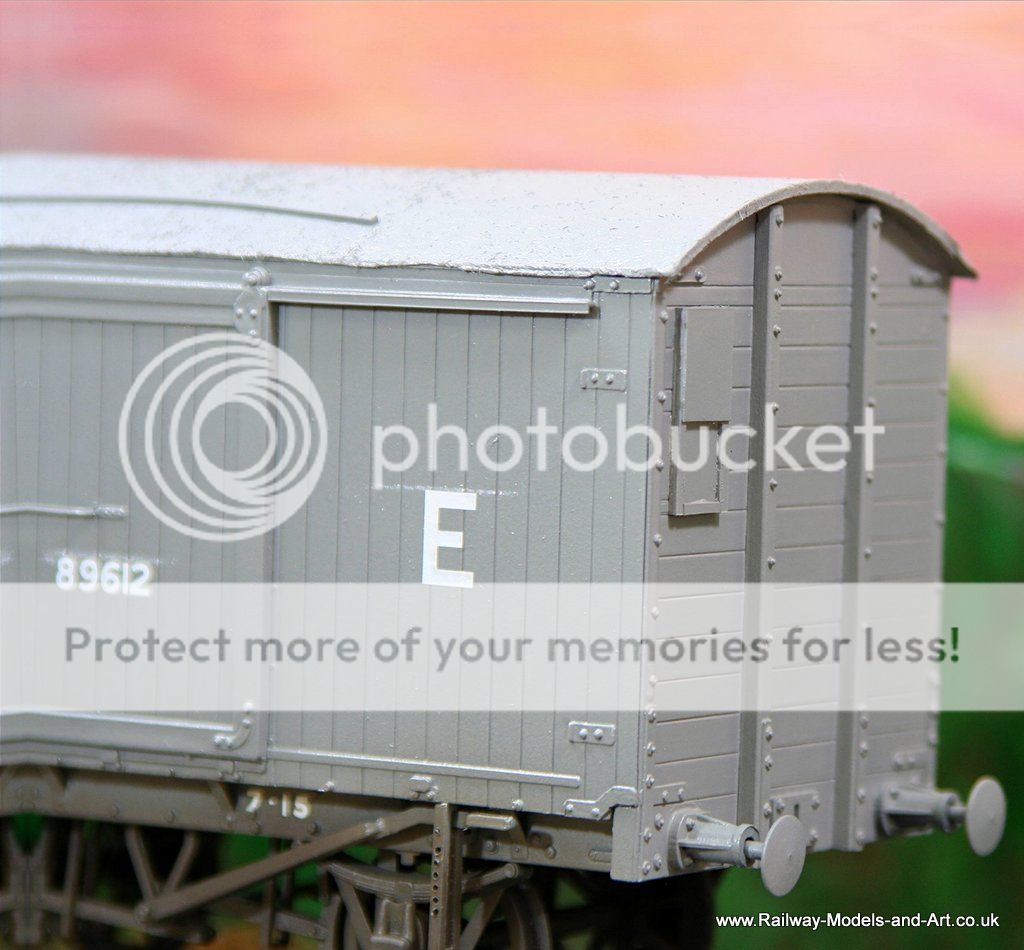
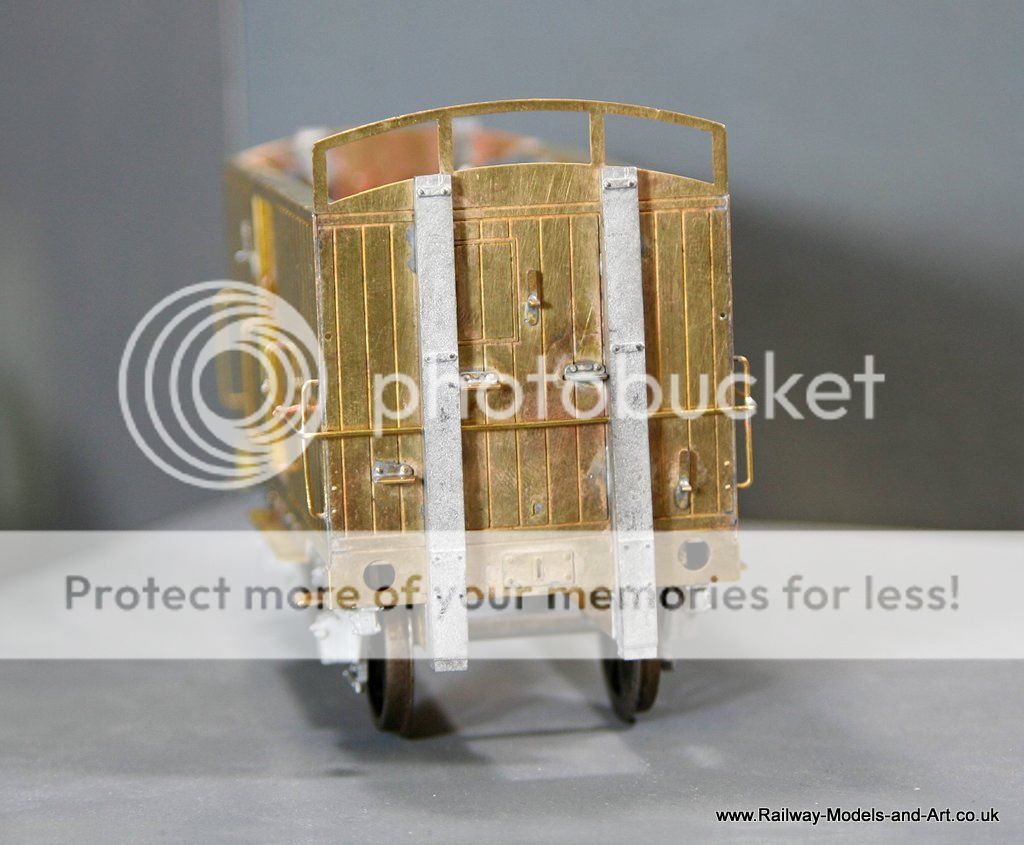
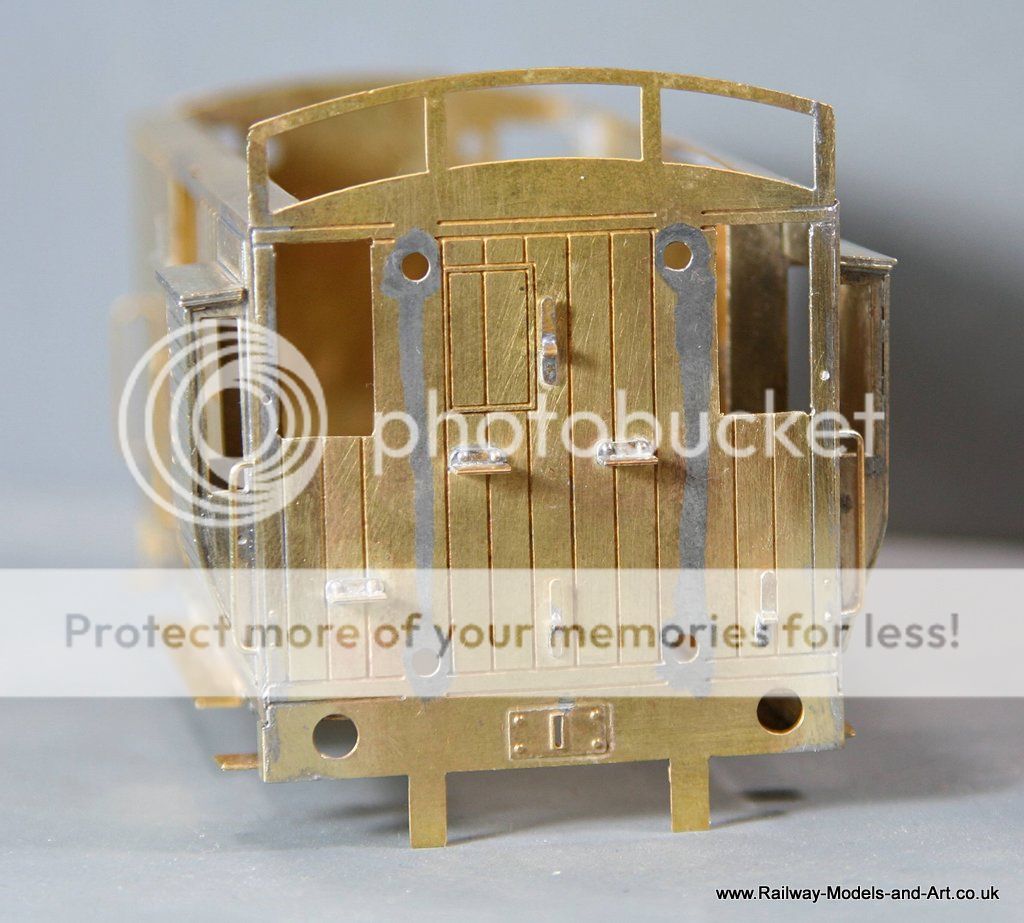
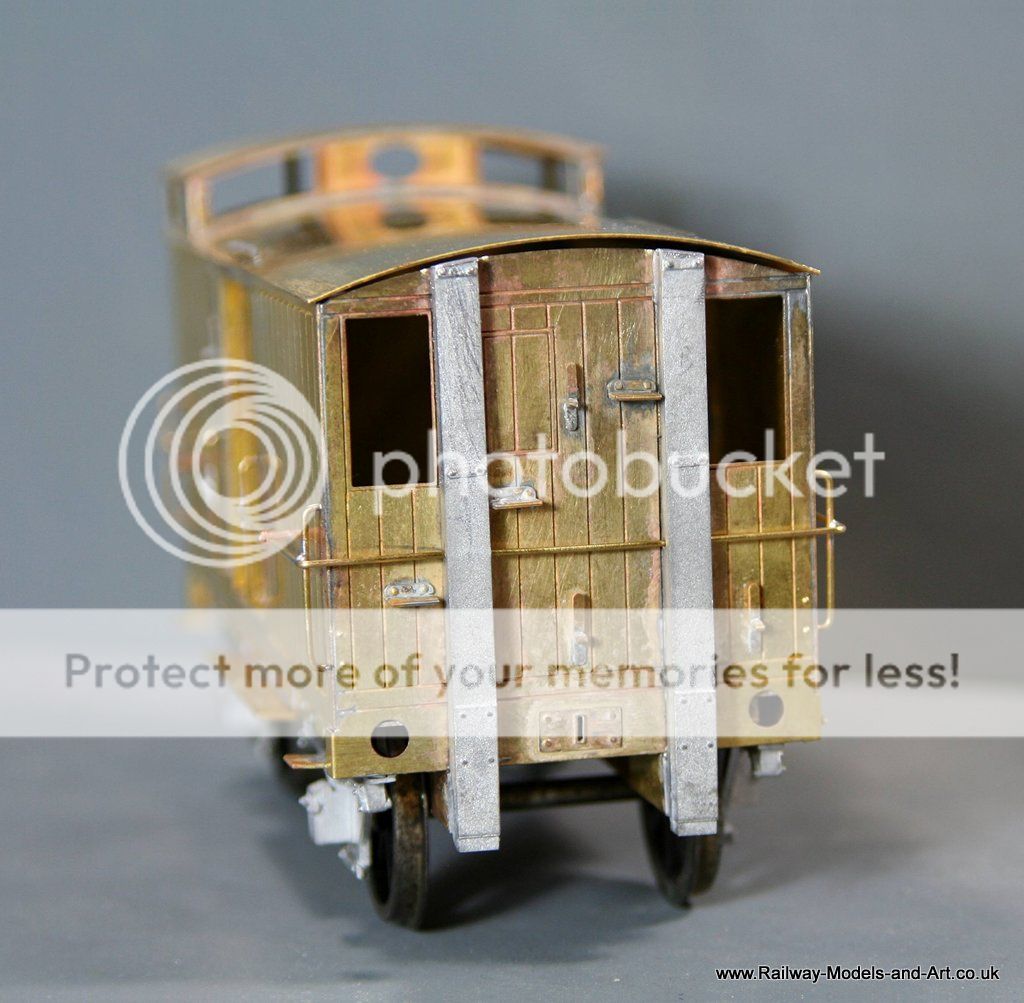
Connoisseur NER Birdcage Brake Vans continued.
A bit more done yesterday, fitting of all most of the small exterior items before assembling the main body parts.
alas nothing done today…

These being one of Jim's older kits the etch marks for the rivets/bolt heads to be pressed out are a bit on the big side making punching them centrally more difficult. I hope to get around this by drilling them out and inserting brass pins instead - the first of them in the last photo - as you can see they are a bit uneven, thats because I had tried to punch these initially and then decided to drill.
Just in case you are wondering what the solder is around the holes - it's tinning for soldering the white metal end posts later in the build.
Regards Rob
Posted
Full Member
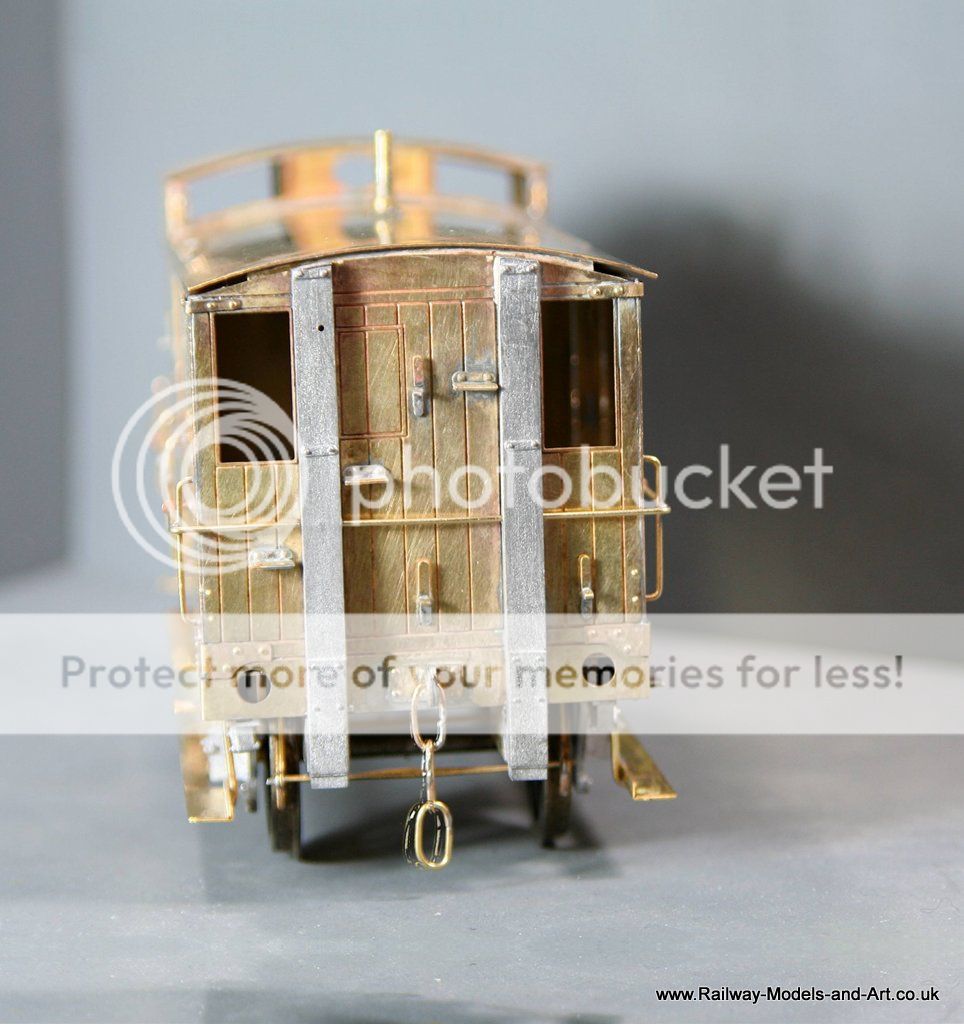
The roof is still loose. Jim recommends leaving it loose to glaze and making it clip on afterwards I need to explore how I can do this yet.
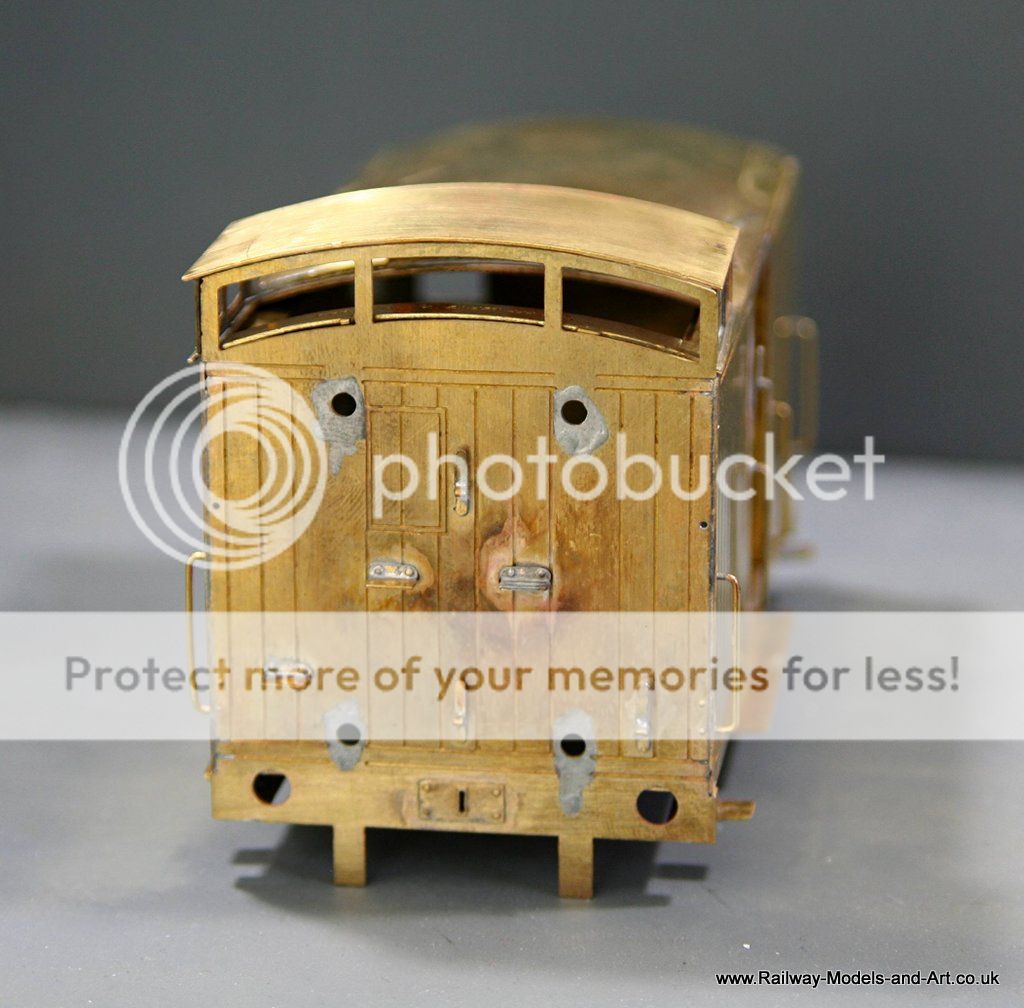
Although I have the birdcage for the second one assembled it's not soldered to the roof yet.
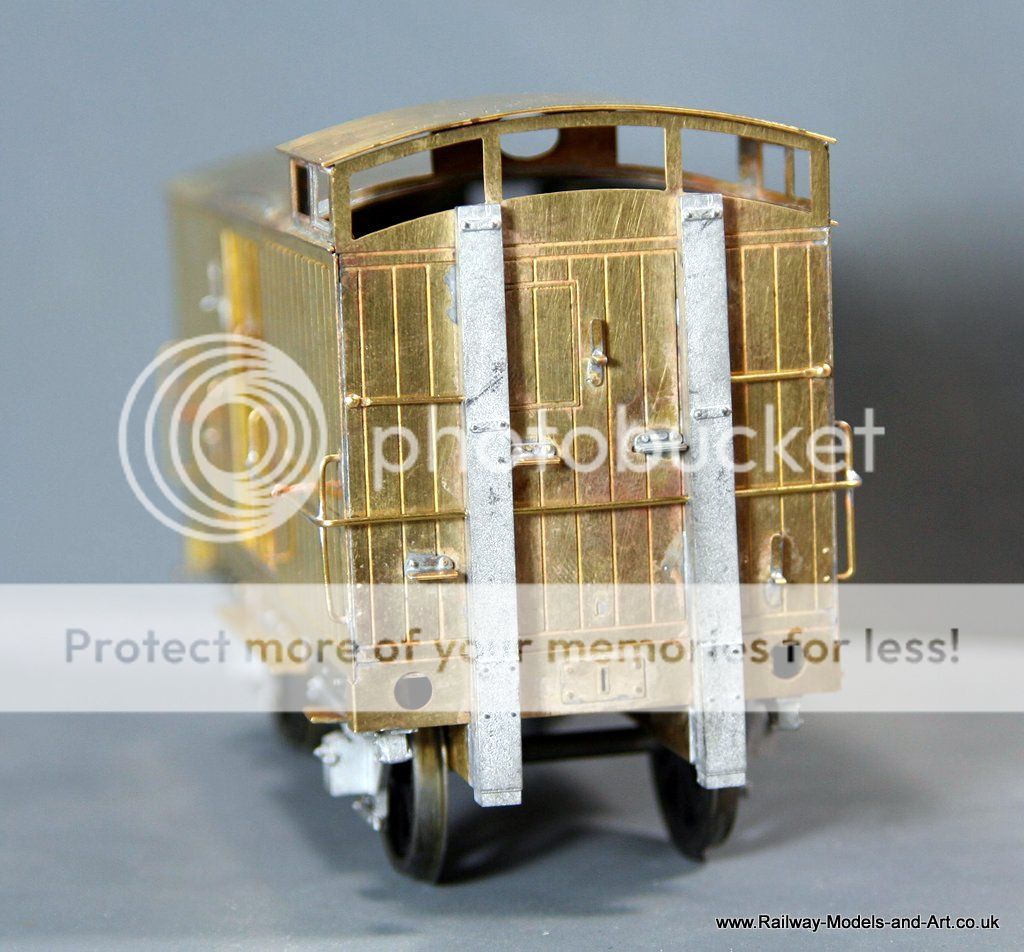
Paul Gallon over on RMweb kindly reminded me that the example that I am trying to reproduce with this one also had windows in the birdcage end.
In the photo above you can seem my error. I cut out the windows using those at the other end as a template but didn't think about the fact the the side duckets have sides which protrude into the van internally and that the sides nearest the end windows partially obscure it. - Why is it that you never notice these things until you have made nice job of soldering the body together, made much more difficult by the fact that on this end I couldn't get to the inside so I had to solder it from the outside and clean up.
Regards Rob
Posted
Full Member
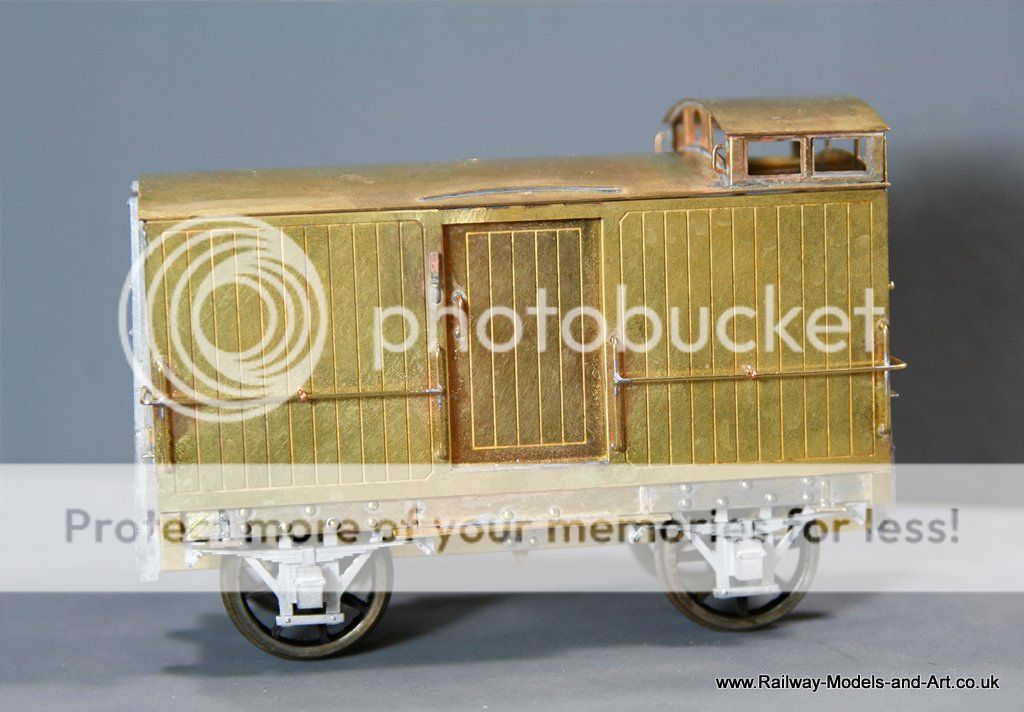
Starting with the LMS Beer Van.
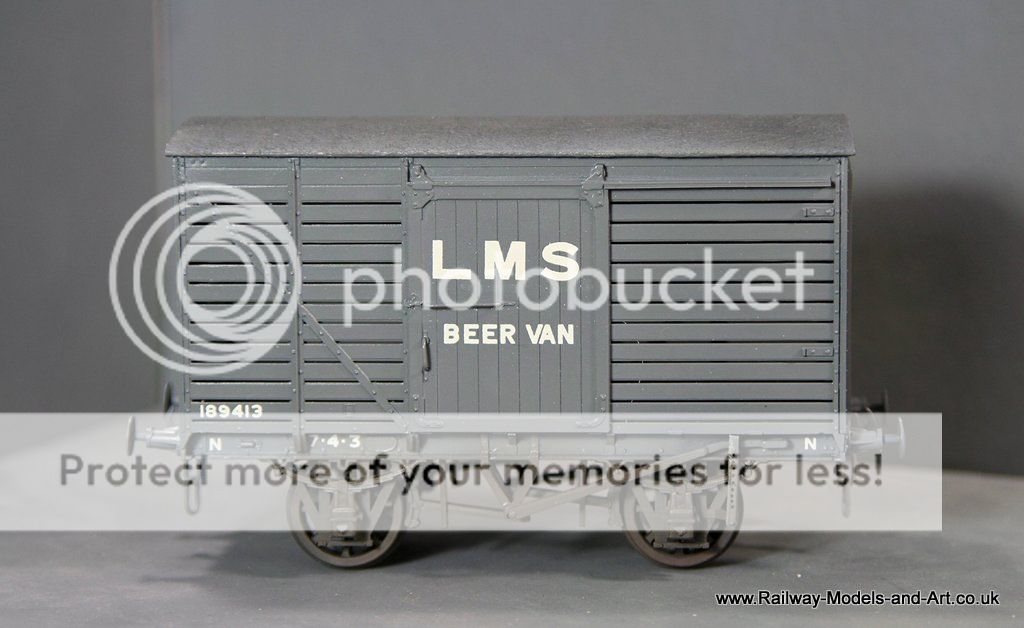
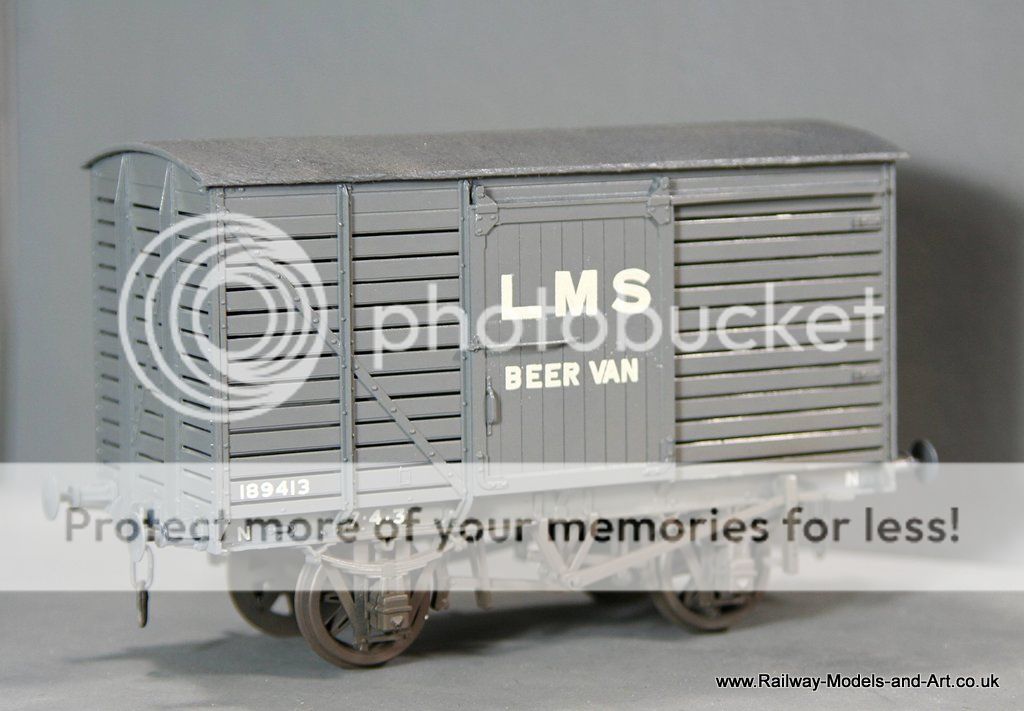

And finally an arty shot that was created by accident as I was preparing the photos
Regards Rob
Posted
Full Member
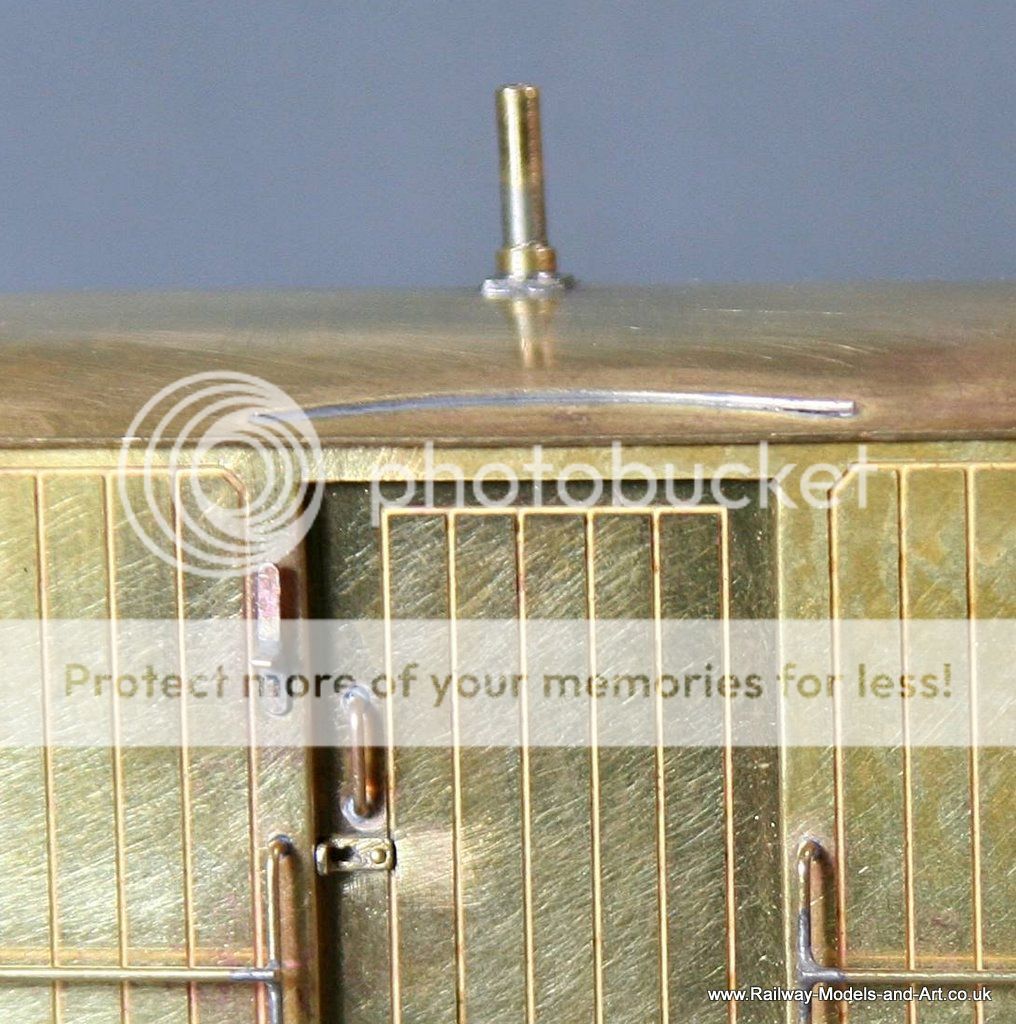
Monday saw some of the hand rails and the end posts fitted. - Chris bought me a Proxxon Mini Pillar drill and a Proxxon Bench Vice for Christmas and they have been invaluable in doing these especially drilling out the cast end posts for the handrails.

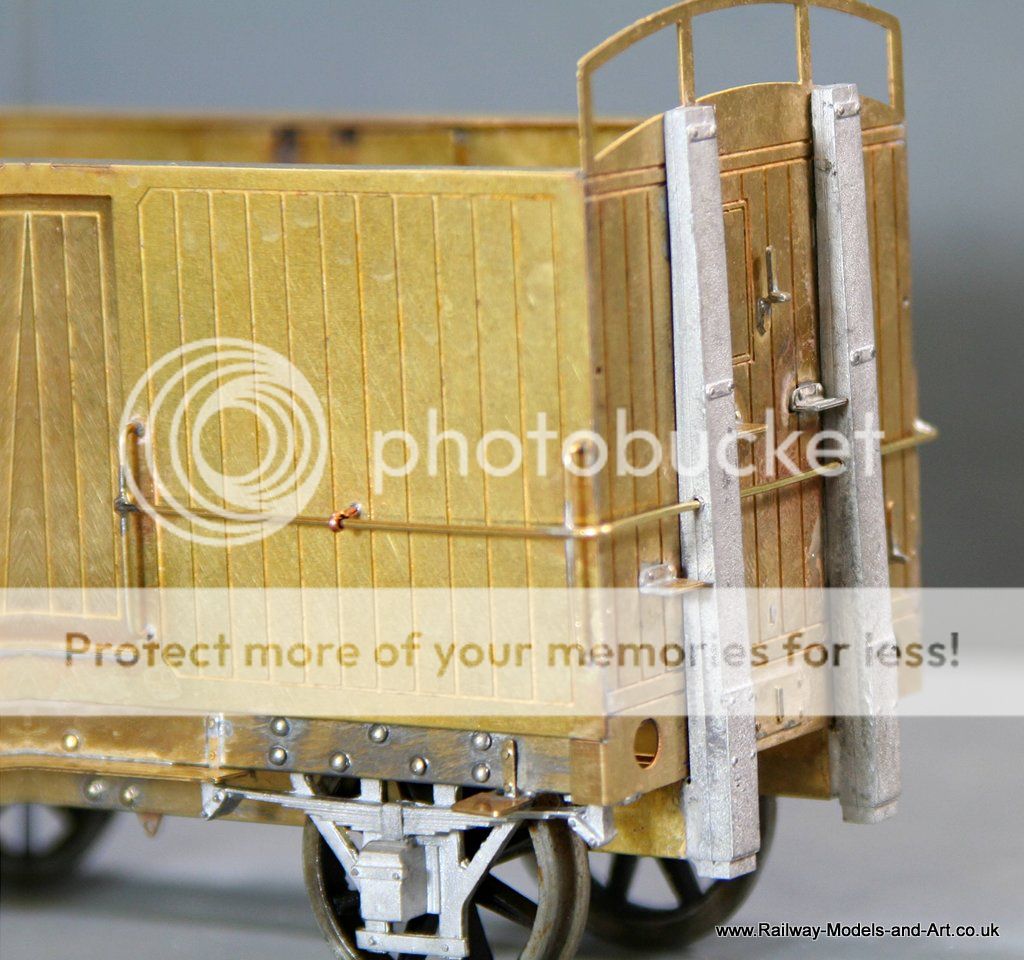
Then last night saw the remaining body side handrails fitted along with the upper ones on one end. The drawing and photo from the Sadler book that I am working from has a different layout of the hand rails on the end than Jim shows in his instructions with the end rails passing through the end posts rather than attaching to the outer face of them.
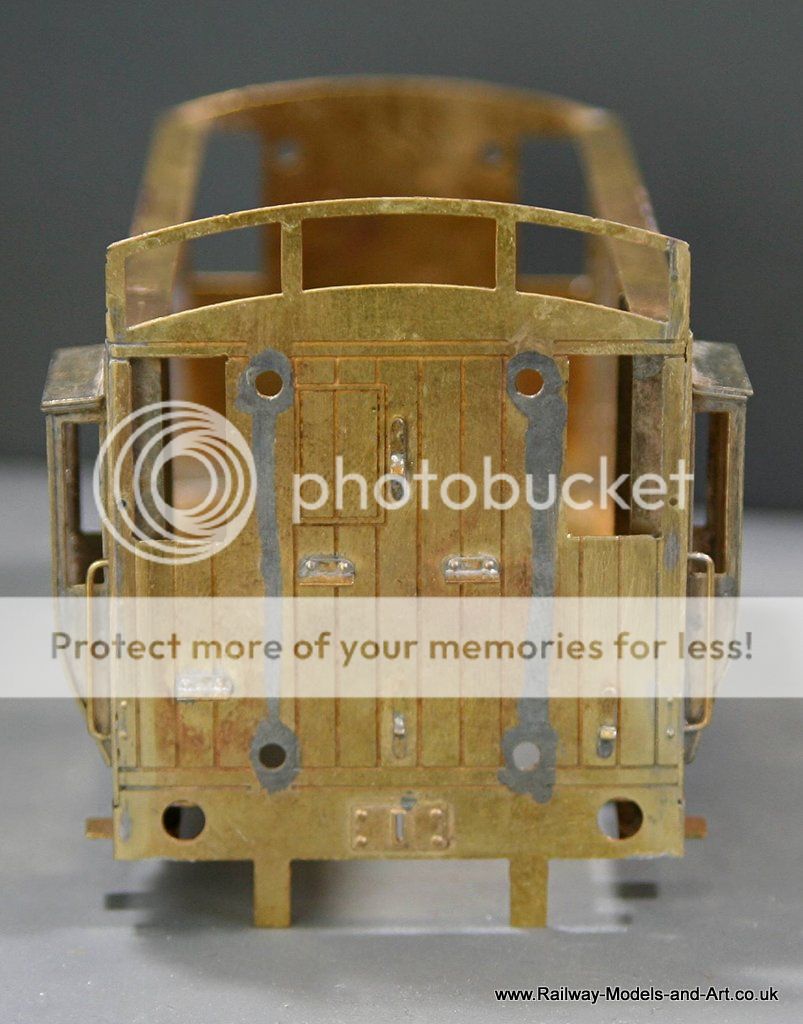
The interested may wonder why I am just working on this one at the moment. That because I think that the only way to be happy with the one with duckets is going to be to remove the end with the birdcage and then cut out the intrusive sides of the ducket and I am still building up the courage to have a go at it….
Regards Rob
Posted
Full Member
You will need to don your loin girds to do the ducket removal. :mrgreen:
John
John
Posted

Inactive Member
Max
Port Elderley
Port Elderley
Posted
Full Member
Hi John,Very interesting to see this Rob. I am curious about the end posts - they seem out of all proportion for a structural element. Is there another purpose for them?
You will need to don your loin girds to do the ducket removal. :mrgreen:
John
It seems that the design of end post was quite standard for NER Stock, the large wooden hopper wagons had similar end posts. I seem to recall reading that they passed below the buffer beam to allow shunting using something with dumb buffers.
When the LNER continued to build hopper wagons for the NE area they cut the end post off level with the buffer beam like most other stock.
Regards Rob
Posted
Full Member
Like a lot of things that you worry yourself about it was really quiet an easy job in the end.
Using a few aluminium hair grips and self locking tweezers as heat sinks for the steps and lamp irons I managed to get the end off, remove the offending bits of metal (with a combination of piercing saw/ rotary sanding drum and a cylindrical burr grinder in the dremel finished off with files) and subsequently soldered back on without anything coming adrift, Yeay!!!
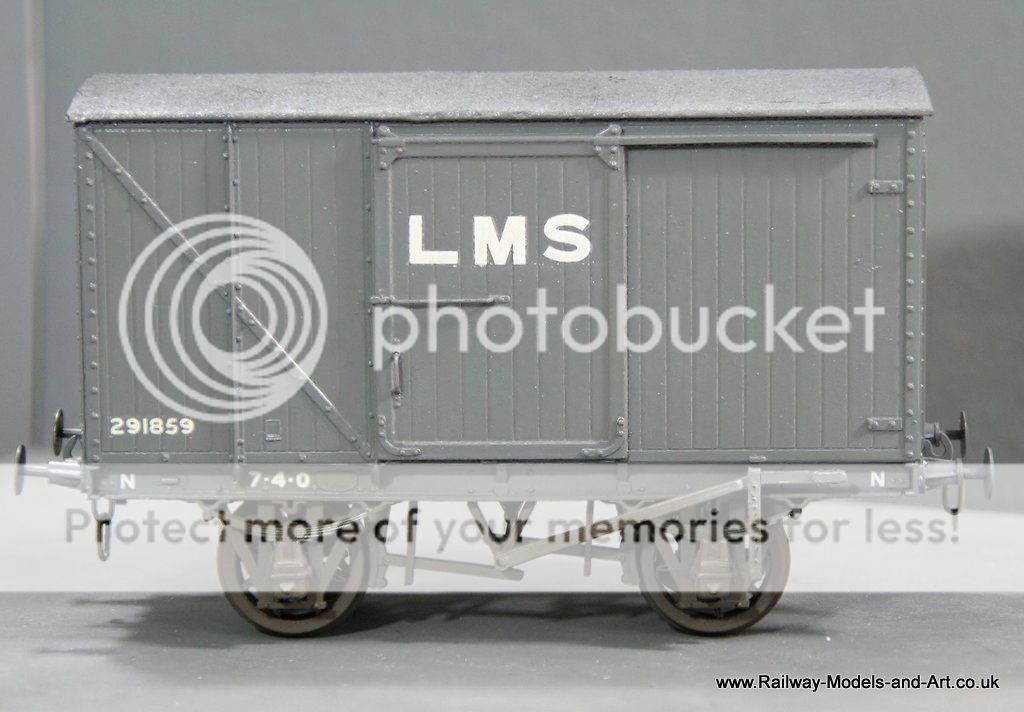
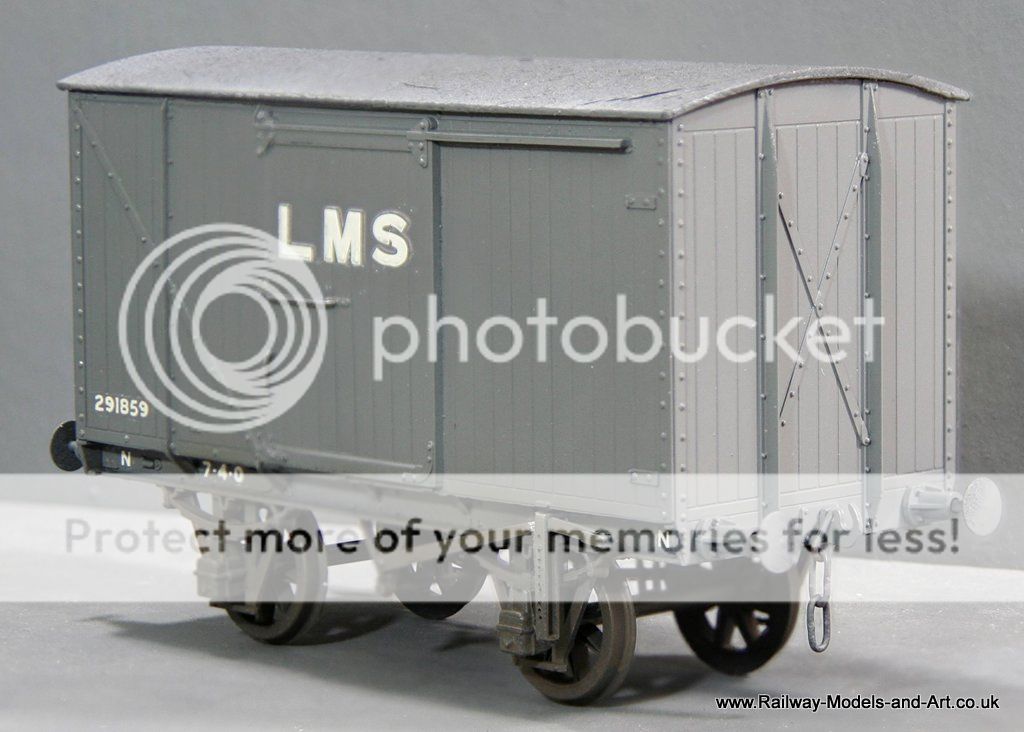
And for completeness these are the photos of progress on the other van that I forgot to post last night….
Regards Rob
Posted
Full Member
Looking at the windows you cut in the end, I'm wondering if you're up for adding some beading. :shock:
John
John
Posted
Full Member
You must be a mind reader, that something that crossed my mind. I will consult my photo and drawing again because I am not sure that the windows in the end actually had any.Ha, the right appliance, attitude and tools will see you right.
Looking at the windows you cut in the end, I'm wondering if you're up for adding some beading. :shock:
John
Regards Rob
Posted
Full Member
John
John
Posted
Full Member
I have consulted the photo and surprisingly there doesn't appear to be a frame. Most odd.
Not much modelling done over the weekend due to a combination of not feeling well on Saturday and a trip to Pontefract show on Sunday. Which was very enjoyable even if I did come back with etches for 4 Pullman coaches which Chris spotted and encouraged me to buy that I hadn't planned on…
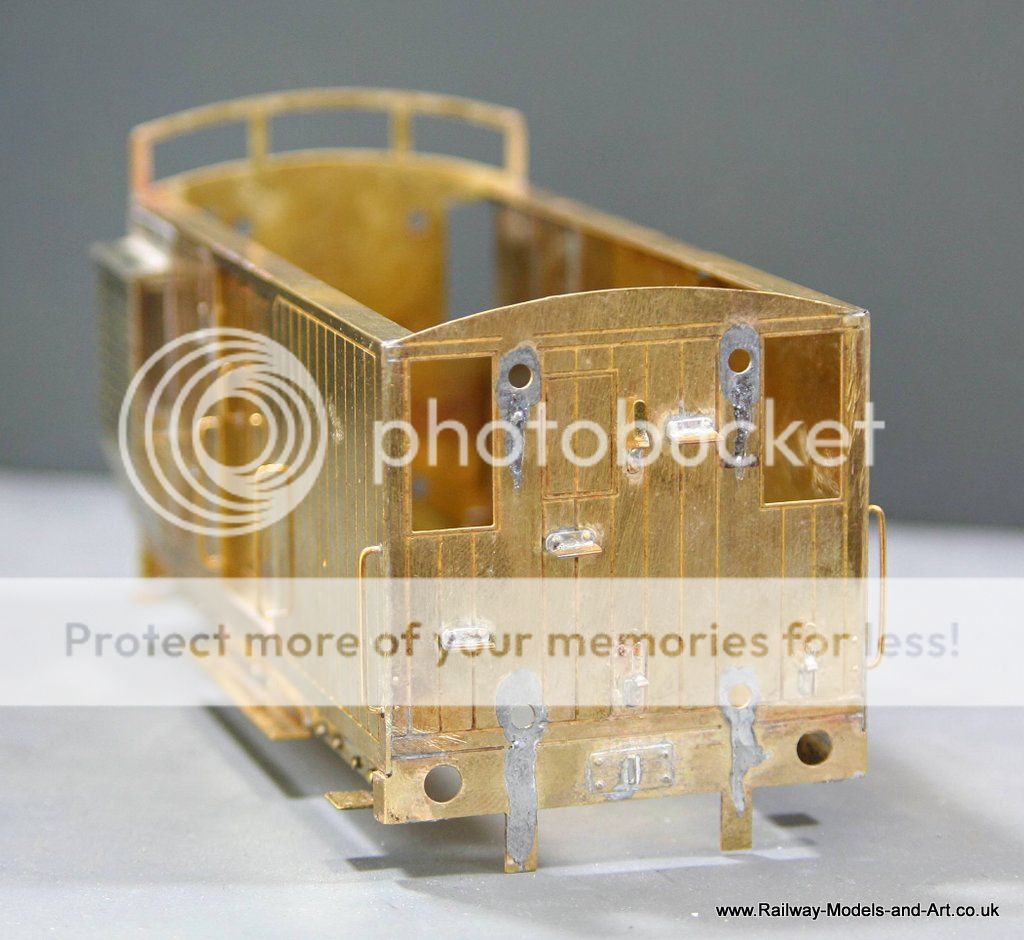
A few hours last night had the first van almost complete (I had thought it complete until I remembered that I hadn't fitted a couple of hand rails or any guard irons under the brake yokes.
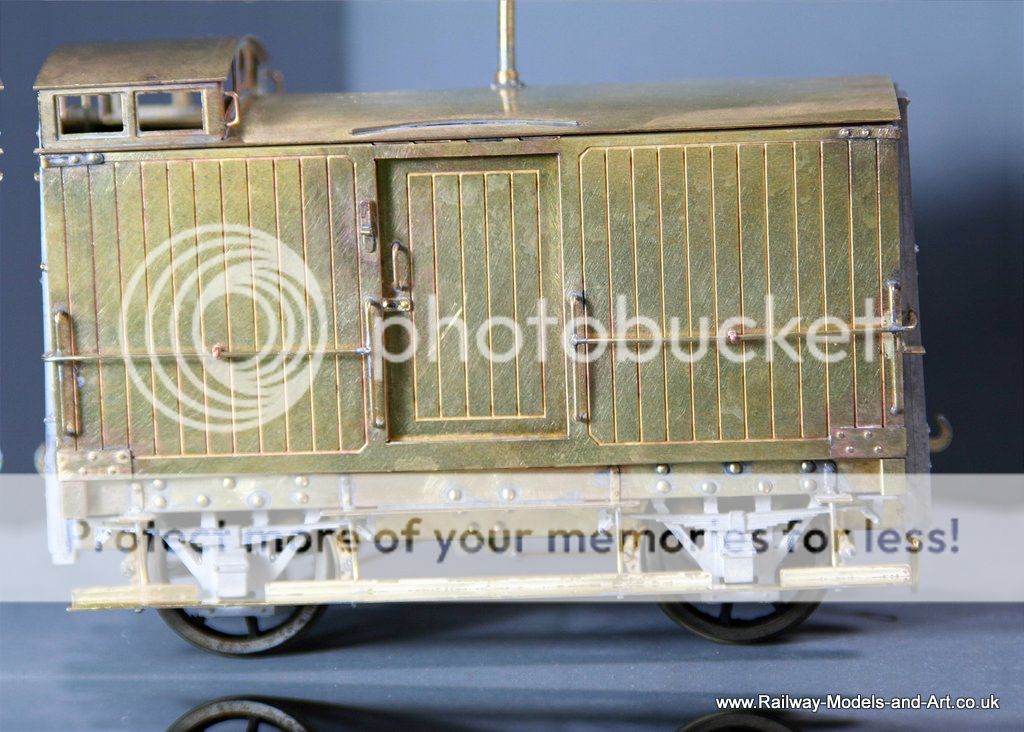
The hand rails that are missing are the two small ones above the wrap around rails in this view - the other end should have similar fitted about a quarter of the way up the windows.
I didn't fancy trying to drill out the rather nice cast chimney because it's very slender so I scratched a pair of replacements from telescoping tube and a cover plate from the spares box, completed them.
I also noted on the drawing that the sliding doors had a hasp so I made a couple from scrap etch.
Regards Rob
Posted
Full Member
John
John
Posted
Full Member
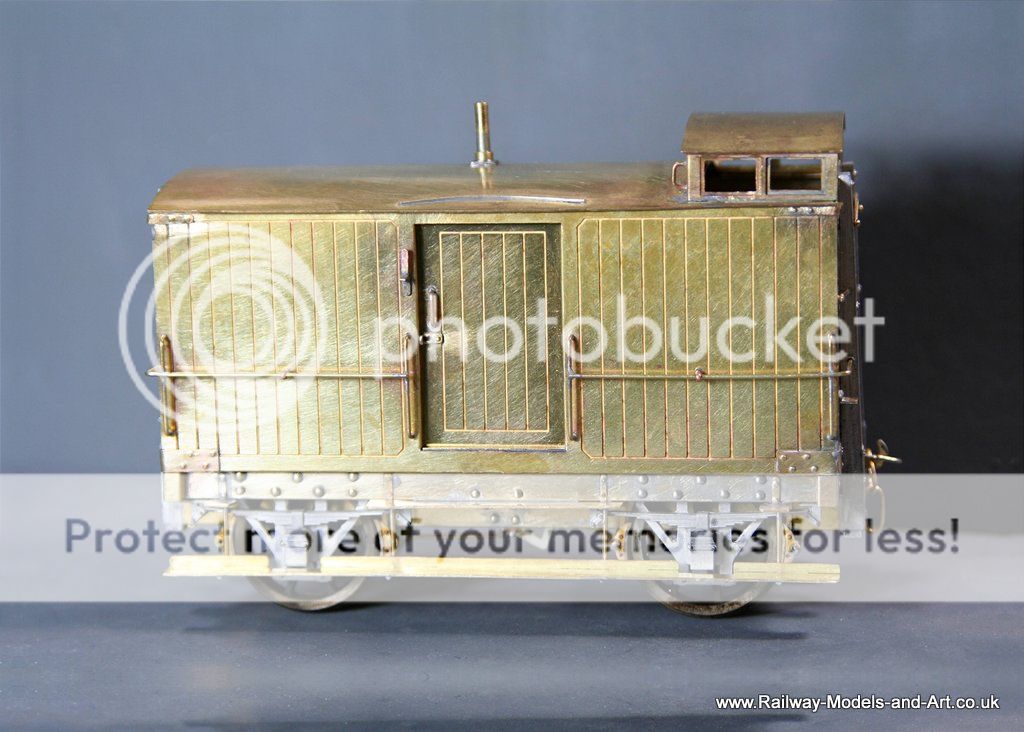
The roof is the last bit of the puzzle to work out - how to attach it. I may just glue it in place when it's all painted and glazed.
On Monday evening I managed to get the missing handrails fitted and the guard irons. I just need to fit the buffers and decide on how I plan to do the roof and it's ready to paint. - In a senior moment or two I have left some NER sprung buffers at the other house two weekends running which I want to try before fitting Jim's fixed ones if they won't work.
I do love adding extra details where I can and on some builds I almost use as much scrap etch as I do proper parts.
Regards Rob
Posted
Full Member
John
John
Posted

Site staff
Ron
NCE DCC ; 00 scale UK outline.
NCE DCC ; 00 scale UK outline.
Posted
Full Member
It proved a fairly straightforward build apart from the fact that the brake shoes were miles from the wheels so I had to split them and move them out towards the wheels. Then make a brass strip to represent the tumbler which I soldered to the rear of the castings after filing a slot. The only other changes were (after reviewing photos in Tatlow) to add some ex Connoisseur GER ratchet brake lever guides instead of the supplied hole/pin version.

Regards Rob
1 guest and 0 members have just viewed this.