Lima GWR diesel Railcar updating
Posted
#222450
(In Topic #12135)

Full Member
Installing DCC sound
Hi All,I needed a break from building turnouts and crossings, so how about a bit of DCC work? I have a Lima GWR diesel railcar in BR "speed whisker" green, a livery which only lasted for a few years (and Lima didn't do that many of this version). This was an early DCC conversion done soon after I started modeling, lots of enthusiasm and not a lot else , including common sense. It's definitely in need of an update with proper wiring, I have a custom sound suite on an ESU Loksound, the wheel set arrived from Ultrascale last week (5 month after ordering, not bad. My defense against "spending more money on model trains then?" was robust and for a change true - "it's been on order for months" sez oi), so off we go.
These models from the last century have a robust ringfield motor and gearing to match, and they actually run very nicely under DCC. The weak point is the electrical pick-up, front bogie one rail, back bogie the other. I have in the past wired all 8 wheels, the wiring looks like a cross between multicolored spaghetti and rat's tails. This time I'll be trying something different. The wheels are real "pizza cutters" and on the driving bogie have traction tires. Well, why not.
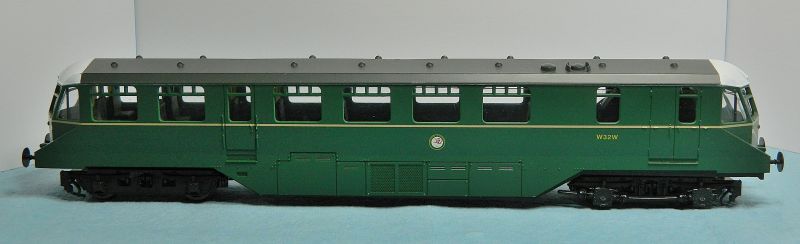
Lima's version of BR green with speed whiskers.
Driving bogie with traction tires.

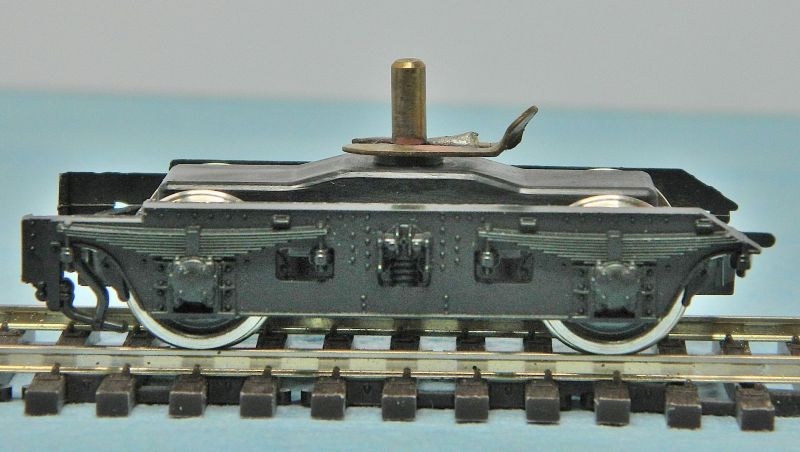
Trailing bogie.

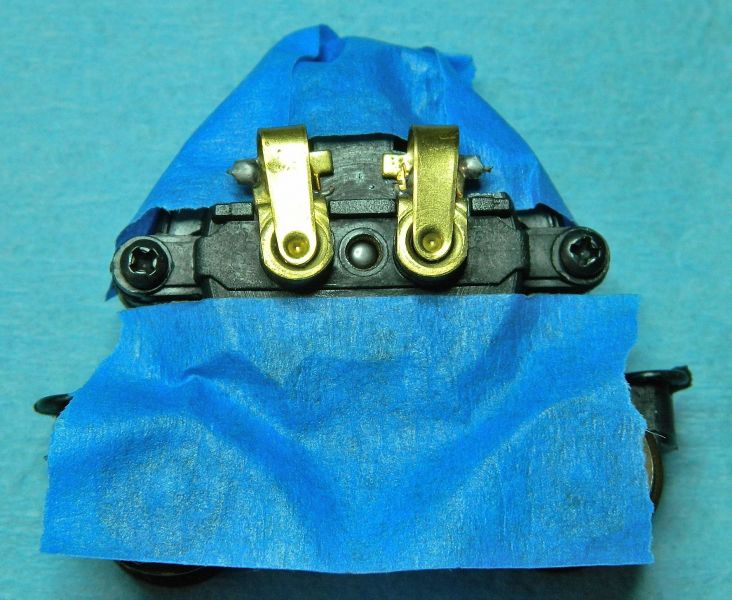
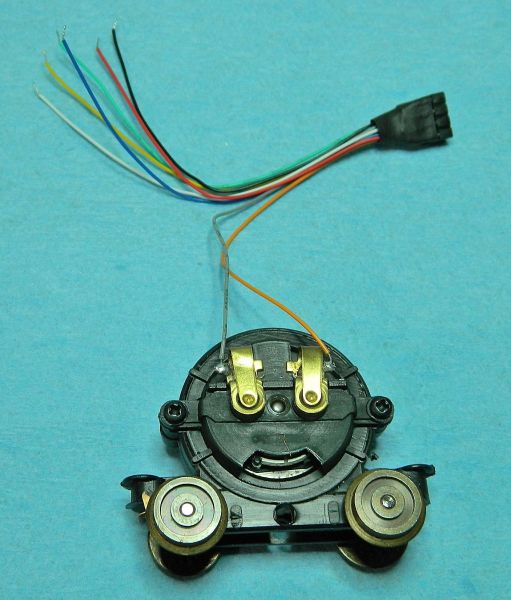
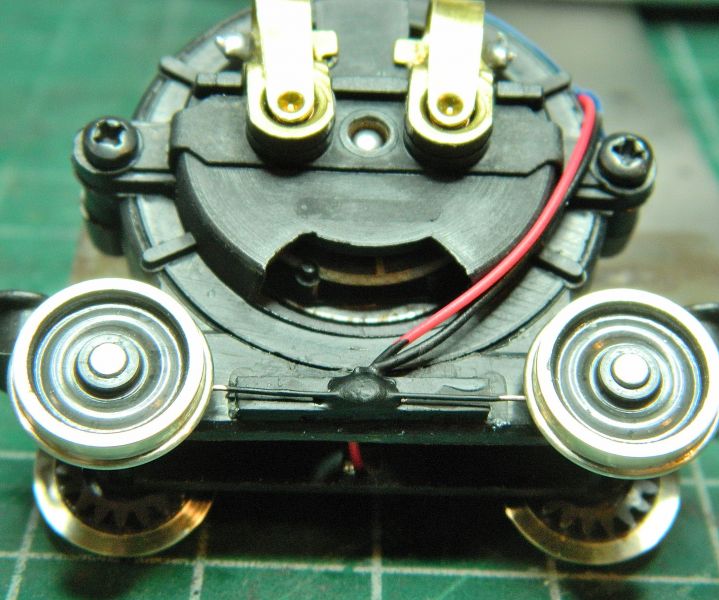
The innards and an early decoder wiring. "Now as I was young and easy under the apple boughs…" The motor doesn't draw that much current, so a Digitraxx N-scale decoder sufficed. Hard wired, that will have to be updated.

And the trailing bogie electrical connection. It works.

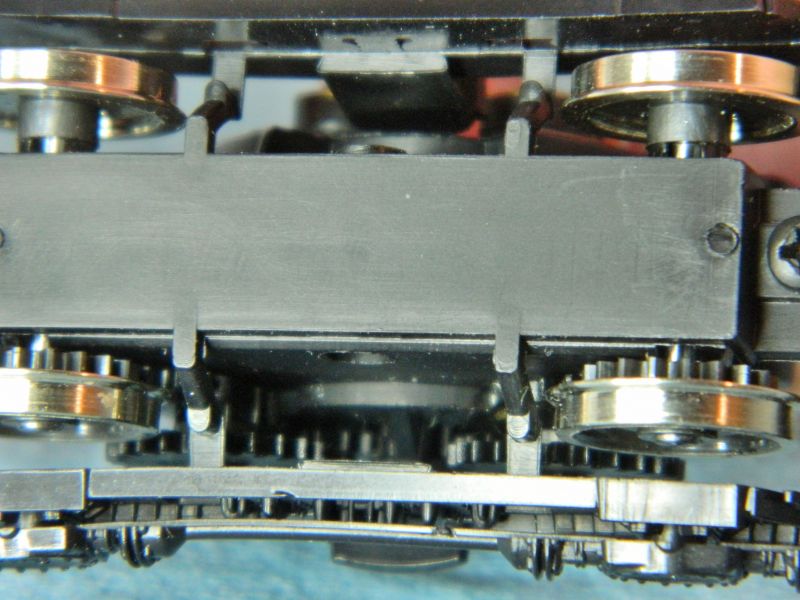
And out it all comes. Note that pick-up on the live axles.
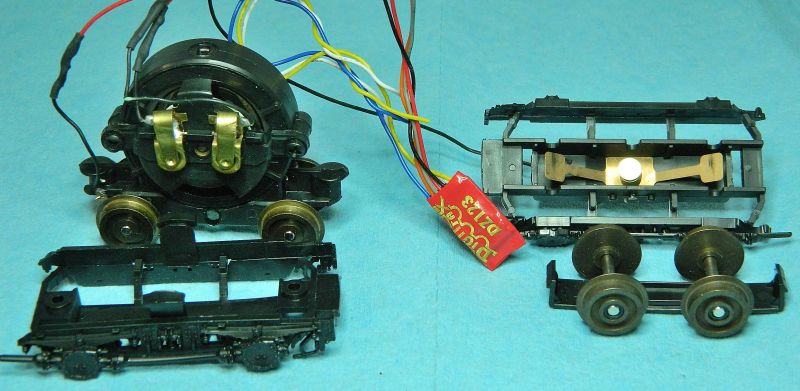
Same arrangement on the front driving bogie.
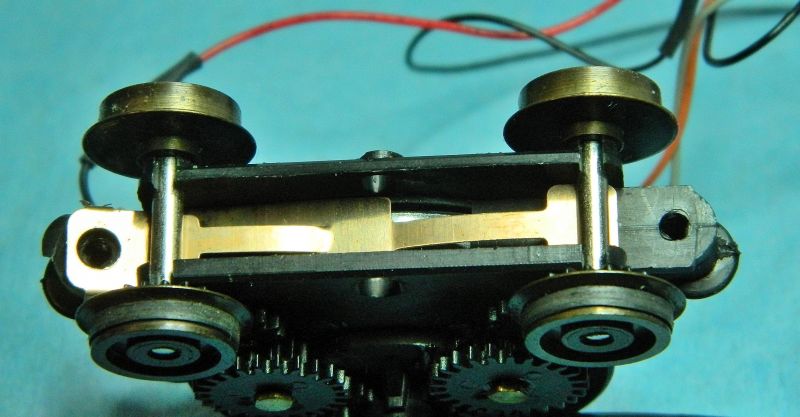
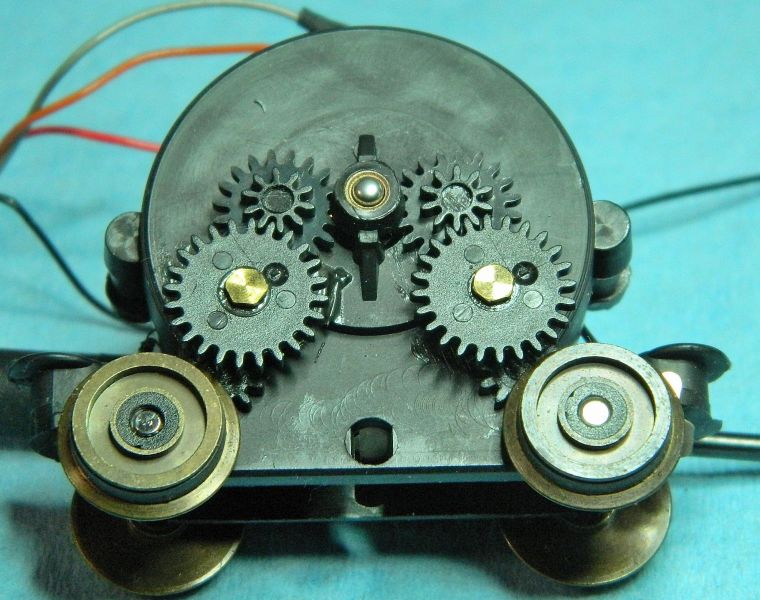
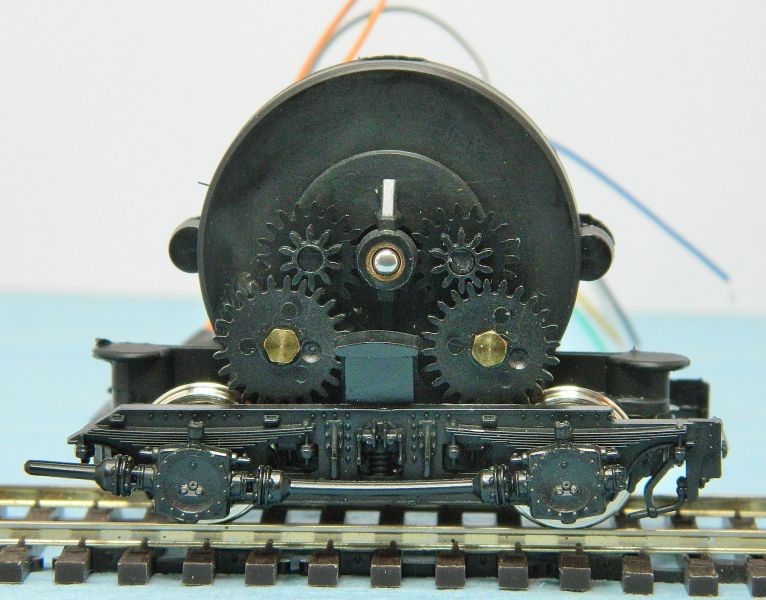
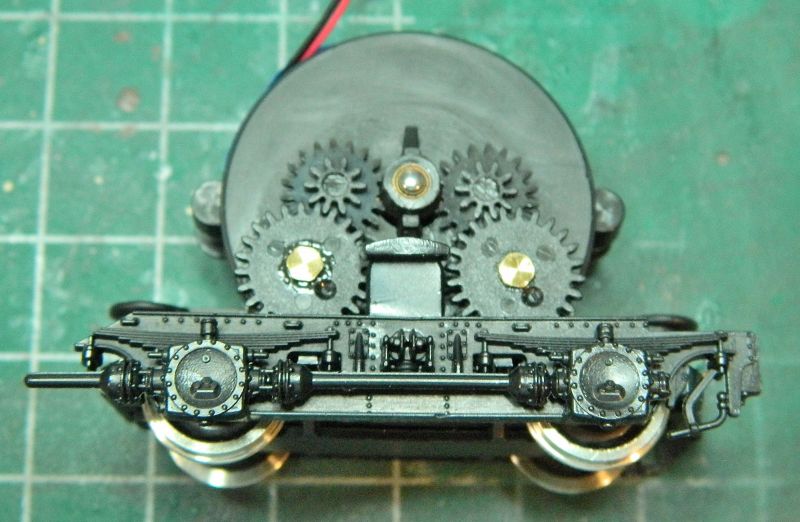
It's always worthwhile checking the gear train, in this case all is tight and the gears have all their teeth and very little wear.
I had already shorthed the body weight to get some space for the decoder. This will go, which leaves plenty of space for the new decoder, speaker and…no, you'll have to wait.

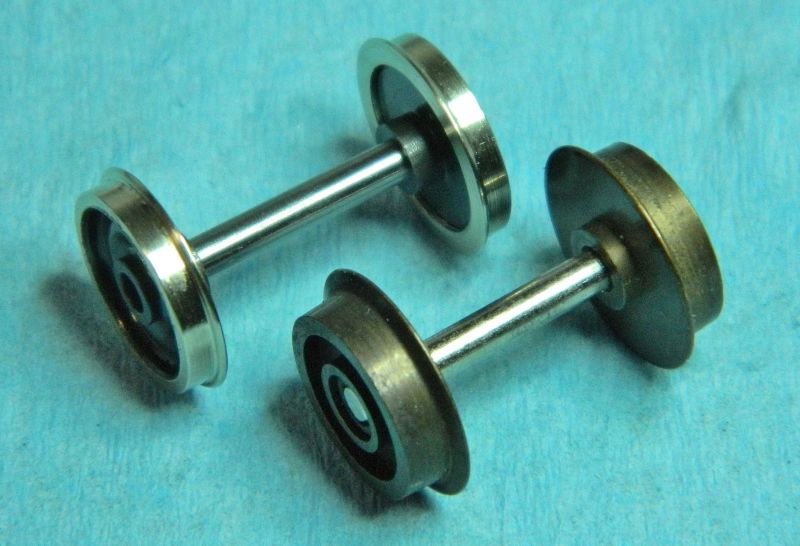
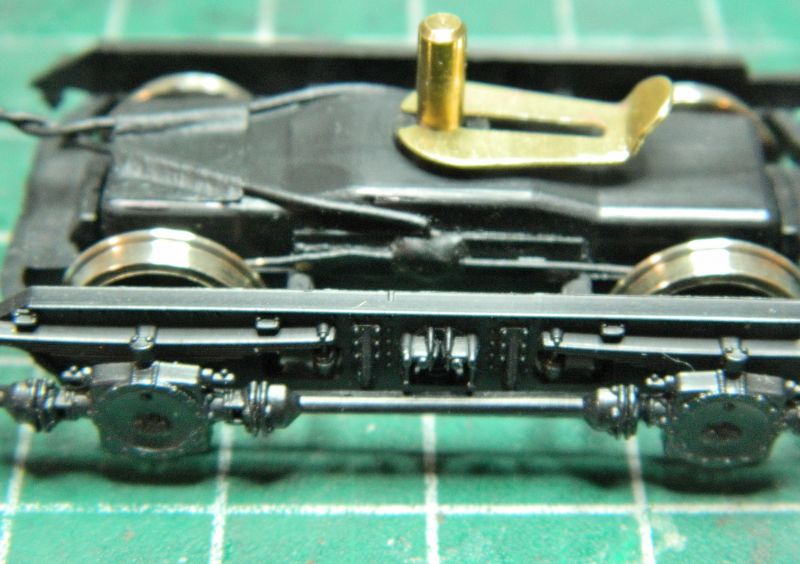
The new wheel set from Ultrascale. I have no idea which wheels are insulated, I'll need the meter for that.
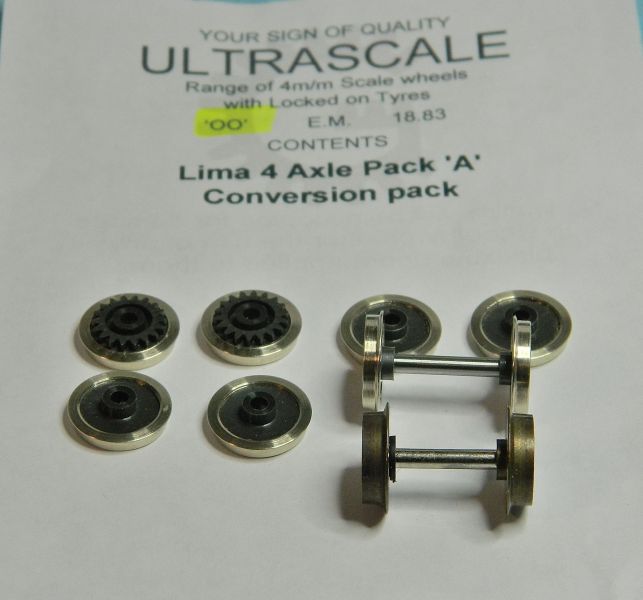
The Ultrascale wheels are a great improvement over the old brass pizza cutters.
That's it, more over the next few days.
Nigel
SaveSaveSave
©Nigel C. Phillips

Posted

Full Member
John
John
Posted

Full Member
Going to be following this one with great interest,
I have a Lima Class 117 which I picked up a year or two back, it was already converted to the correct compartment layout, I planned on repainting from BR Grey Blue to BR Blue and renumber it, But the pizza cutter wheels foul on the point work so the project never started, but looking at this it seems the same wheel swap-out maybe the way forward. Looks like a simple project too.
 Last edit: by new04db
Posted

Full Member
Bill
At 6'4'', Bill is a tall chap, then again, when horizontal he is rather long and people often used to trip over him! . . . and so a nickname was born :)
Posted
Full Member
Order now for a nice summer project I guess.I thought I might order the wheel sets before the rush commences. Hmm, seven month delivery is quoted on the manufacturer's website. Gosh!
Bill
Posted
Full Member
Bill
At 6'4'', Bill is a tall chap, then again, when horizontal he is rather long and people often used to trip over him! . . . and so a nickname was born :)
Posted

Full Member
Posted
Full Member
Hi Nick,Can someone please provide a link to where these wheels can be found on the Ultrascale website as I've searched to avail.
Here you go:
https://www.ultrascale.uk/eshop/products/CAT007#LDCP
Bill
At 6'4'', Bill is a tall chap, then again, when horizontal he is rather long and people often used to trip over him! . . . and so a nickname was born :)
Posted
Full Member
Thanks Bill, I assume it is the 4 axle pack "A"[user=401]pnwood[/user] wrote:Hi Nick,Can someone please provide a link to where these wheels can be found on the Ultrascale website as I've searched to avail.
Here you go:
https://www.ultrascale.uk/eshop/products/CAT007#LDCP
Bill
Posted
Full Member
Thanks for the comments and interest.
I can recommend Ultrascale products, wait time and postage notwithstanding. I always order several items, it's the same postage charge. Excellent warranty, if it goes wrong it gets replaced. None of this "no longer available" nonsense we get from Bachmann/Hornby. I ordered a wheel set for the Mainline Warship that's next for new wheels. This already has Ultrascale metal gears on the axles, the plastic ones are the Achilles heel of this model.
Order the Eco pack and put them together yourself. Most Lima offerings are covered, pack A and B for 4 wheel bogies.
Some sort of pick-up is required, they come insulated. Last time I did one of these I used Alan Gibson wipers for the geared wheels, I'll try something different this time as they are fiddly and require micrometric location. The plan was to use a LiPo battery and avoid wipers on all 8 wheels. Not easy with an ESU V4 (solder tabs on the board) so back to conventional wiring. Plenty of room, the cosmetic bogie frame is scaled for EM/P4. Rear bogie is straightforward. It's the driving bogie that's the issue. A look at the geared wheel and wiper location is next.
Nigel
©Nigel C. Phillips
Posted
Full Member
Spare 30 minutes this afternoon, so I wired up the motor for DCC. Pictures tell the story, along with some relevant comments.
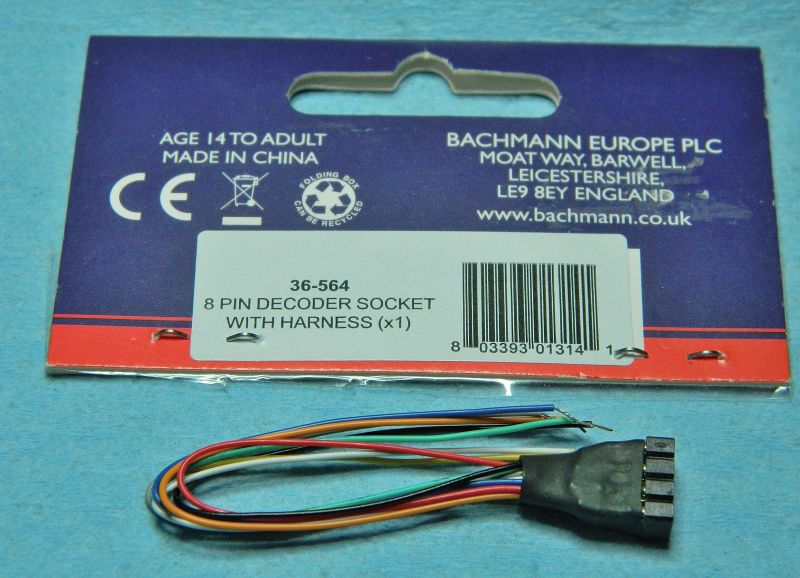
This is what I use for wiring all 8-pin decoders. This one is by Bachmann, ESU (and probably others) have the same. This one has 30 gauge wire (0.25mm diameter), which is a lot less than the old Lima wiring. These cost around £5-£6, cheaper by the 10, a small investment when a sound decoder is £100+. You can get 6 pin and 21 pin wired adapters as required. Hard wiring a decoder is just not necessary with these wired sockets.
The old connection to the axle pick-up. No longer required as the Ultrascale wheels are all insulated and will therefore require wipers.
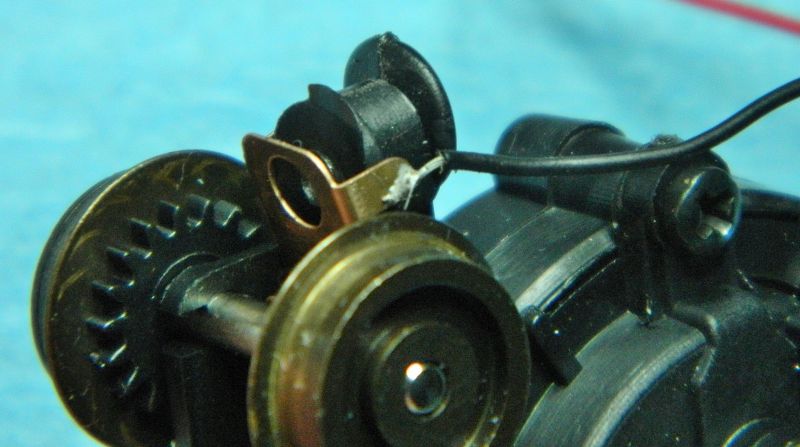
Old wires removed from the brush-holder springs, and the open ventilation segments underneath masked-off. The last place I want solder is inside the ringfield motor.
Iron at 25-30W, no residue/no clean organic flux, job done!

One Lima ringfield motor wired up and ready for the rest of the wiring. I'll test initially with a non-sound decoder, then swap out for the ESU Loksound V4. [Try doing that with a hard-wired decoder! Or using a blanking plug to run under DC].
Next up will be some wiper blades front and rear on all 8 axles. After I've had a think about the geared wheels.
Nigel
SaveSave
©Nigel C. Phillips
Posted

Inactive Member
That looks like a Digitrax Z scale decoder. Same as I used for my O scale forklift truck.
Max
Port Elderley
Port Elderley
Posted
Full Member
Useful decoders, plenty of power for the size (1A continuous, 2A peak) and price (less than $20.00). More than enough for the Lima ringfield (pancake) motor.
John (aka Nigel)
©Nigel C. Phillips
Posted
Inactive Member
Too many posts this Sunday morning. :shock:
Max
Port Elderley
Port Elderley
Posted
Full Member
Wheels on axles this evening, installed in bogie frames to see what space is available for electrical wipers.
First off, they look a lot better than the original wheels. And yes, that bend in the drive shaft needs correcting. The gear boxes and connecting shaft need fixing permanently to the bogie with some plastic-friendly CA (as supplied they're a press-fit).
It's all a bit tight re wiper space in the driving bogie, as the next 2 photos show. Those struts between the bottom of the cover and the outside frames don't help either. With the original internal pick-up out of the way there is a surprising amount of space available inside for pick-ups, so that's where they will go. Wipers (P-B) going through a slot in the sides and contacting the rims at 45° or so should work. Removing those struts would help as well. A similar approach for the rear non-driving bogie should be possible, although that central pivot needs to be retained (but not the pick-up).

That's it for today. Measurements tomorrow and a decision on where the wipers can go and if the struts actually need removing. I haven't discounted using the outside rim of the wheels as the contact surface. I have however discounted using the wheel treads as the contact surface, past experience shows it results in poor contact very quickly.
NigelSave
©Nigel C. Phillips
Posted
Full Member
John
John
Posted
Full Member
Blackening is the plan.
For those contemplating getting these wheels sets, the "Economy" pack comes with an all insulated wheel set. The regular pack has live axles. The "Economy" pack is half the cost of the regular pack, and DCC operation means making wipers anyway so that all wheels are conductive. Making wipers costs next to nothing.
Ultrascale makes it very clear: "The modeller will have to assemble wheels to axles, make their own arrangements to earth the required wheels to the axles and make arrangements for any other electrical pick-up required, fit the original drive gear to the axle where necessary and make any modifications to get the wheels to clear any obstructions."
I had a look at my previous effort with this model (red and cream one) in EM gauge, which has everything including the kitchen sink (live axles, wipers and plungers). Hmm. Different and more consistent approach this time I think.
Nigel
Edit 1: Had a look at the inside of the bogies this morning and whether I could get rid of those spring contacts and put the wiper supports inside. The answer is no, the axles ride in slots, the springs allow a bit of vertical movement to the axle sets. Lima thought this one out, the spring tension appears to match the down-force of the original steel weight that was used. That's Plan A and B gone, looks like I'm onto Plan C. There is just enough space on the outside of the bogie frame for the wipers. No lateral shear forces, so CA should be fine.
Edit 2. All warranties are off if the wheels are blackened, so it looks a paint or iron oxide dust job.
©Nigel C. Phillips
Posted
Full Member
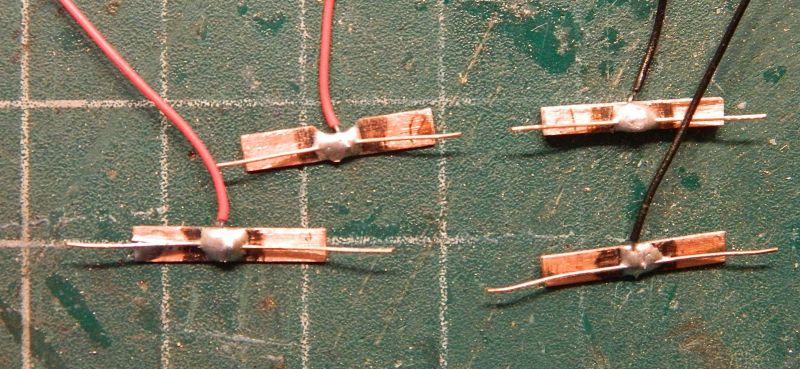
Looks like tried and trusted copper strip (0.010") and phosphor bronze wipers (0.015") will work fine. Only exception was the wiper for the non-geared wheels of the driving bogie, the bogie frame is a tad too far away. Here I used some 3mm copper-clad strip. I'll fix them later today with CA after everything has had a good clean with IPA. Wiring follows NMRA color code.
Copper strip and P-B wire pick-ups. The two top ones are for the driving bogie, the depression in the top left pick-up is to allow the wire to pass through the hole in the bogie frame, keeps it away from the gears. Top right is the copper-clad wiper. Black marks are the graphite used to contain the solder.
Test fit on non-driving bogie. The pickup is resting on the bogie side stringers.

Side on view - the bogie side hides the pick-up nicely. I'll use some black marker on the visible part of the wire.

Next up - clean the copper and P-B wire, blacken them, and fix to bogie frame with CA. Need a slot in the body to allow the wiring to go through, then I'll complete the wiring to the 8-socket wiring harness.
I had a look at a close-up photo of the real bogie after I took the last photo, Lima got it almost spot on. There are a few rivets missing, along with what I think are brake pipes and a junction box.
Nigel
Save
©Nigel C. Phillips
Posted
Inactive Member
Wipers are not easy.
Max
Port Elderley
Port Elderley
Posted
Full Member
Thanks. I find that working with P-B wire rather than P-B strip has made life a lot easier, multiple bends in 3-dimensions just take a few seconds. A few other small things seem to help - copper rather than brass for the backing strip, organic flux, and a graphite pencil to limit where the solder goes. I also solder up the backing strip, the wiper wire and the power wire in one go (I use small weights to keep it all in place, touch of flux, dab of solder on the iron set at 30W).
I finished off the wiper installation this afternoon. Wipers were attached with 5-15 second CA, this gives a bit of wiggle time while the wires are tucked behind the wheels.
Motor bogie. Gear side, the wire passes through the bogie frame and this keeps it away from all those cogs..
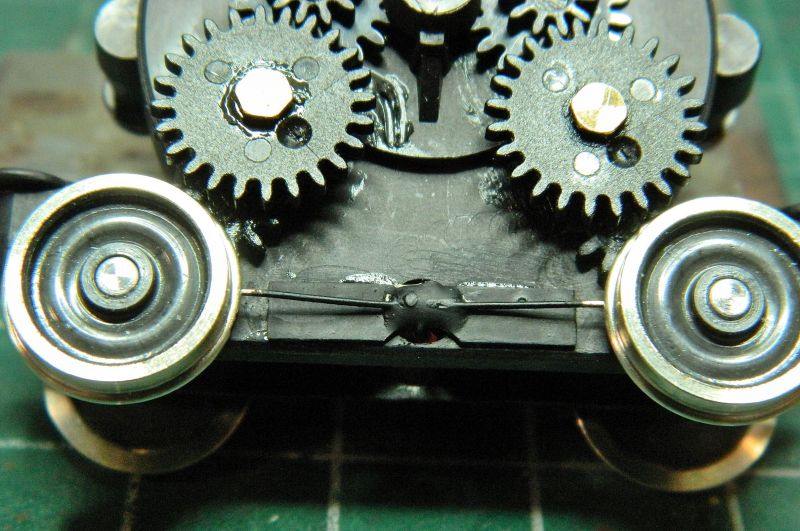
Underneath shot showing red wire going through frame, the short wipers on the geared wheels, and the 3mm thick copper-clad support on the other side.
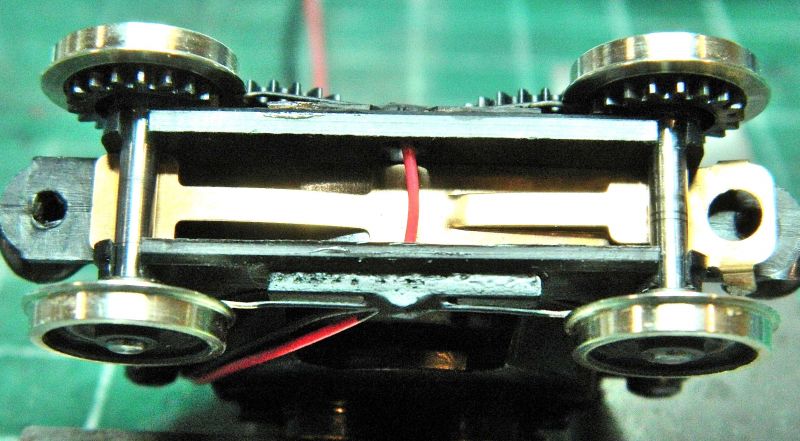
Both wires are run up the motor casing, and fixed at the side with tape. This way no strain is put on the soldered wiper connections. I removed the orange and grey brush wires while I was working on the wiper installation. I'll put these back on when the bogie is back in the frame.
Motor bogie with straightened gear shaft. "Wot wiring?".
The trailing bogie with wires taped to the top of the casing. The twisted pair of wires will go into the body. More on that in the next post.
Continuity between the wheels was tested with the multimeter to make sure there was adequate contact twixt wiper and rim. It's a delicate balance between good contact and too much pressure on the wheel, and often requires a bit of tweaking with the needle pliers. All good for the moment, it will need checking after a few hours running.
Next up - on with the wiring.
Nigel
Save
©Nigel C. Phillips
1 guest and 0 members have just viewed this.