Johns 7mm Coach Workbench
Posted

Full Member
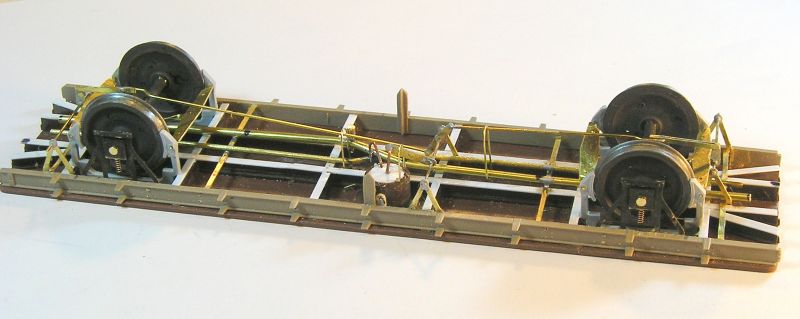
I removed the vacuum and steam pipes and made corrections. I kept the old vacuum pipe but bent it to crossover nearer the vacuum cylinder. I replaced the steam pipe with tube of the next larger OD and arranged it to have a low spot where I made up a drain valve.
The pipes did not run along the structure but were inset. I glued on brass strips similar to what the photos show and soldered the pipes to those.
I also noticed that the outer V hanger near the cylinder should be cranked outward so I did that. I also refined the cylinder itself and added a safety loop over the actuating crank.
John
John

Posted
Full Member
Got this today:
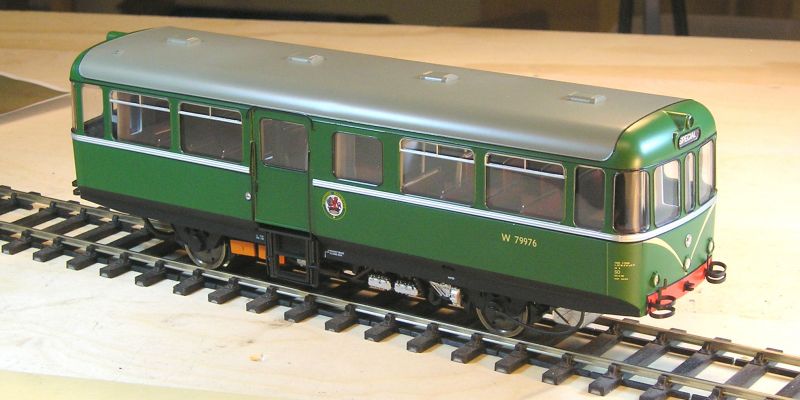
AC Railbus from Heljan. Lovely thing and surprisingly heavy. I gave it a quick run on DC and it goes nicely. I'll have to get a sound decoder but not yet, it's been a dear month.
Heljan maintain their reputation for bits falling off and I have a baggie with all the parts that were lying at the bottom of the box. No worries they'll easily go back on.
Completely wrong for my sort of Eastern themed layout, being WR, but I'm going to invoke rule 1 and besides, I like it and it was 100 pounds off.
John
John
Posted
Full Member
I think construction of the underframe is now done:
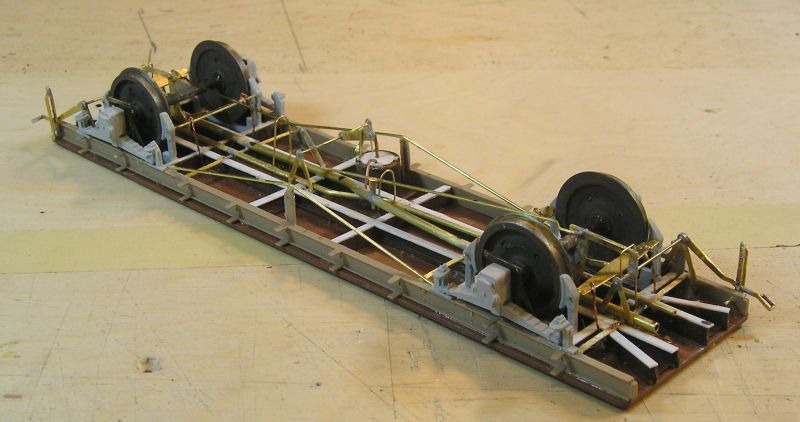
Things added since yesterday:
- safety chains on the brake yokes
- safety loops on the outer manual brake actuators
- trusses
- brake handle s and guides
- spring and axleboxes.

Lovely side view showing all the busyness, just what I like. :pathead
Yes it STILL runs.
Last night I began to turn my thoughts to the body. I reviewed my window bars against the photos and realized I was the victim of an optical illusion. The verticals should be behind the window frame and not visible. I therefore refined what I had by repositioning my verticals 1mm to the side.
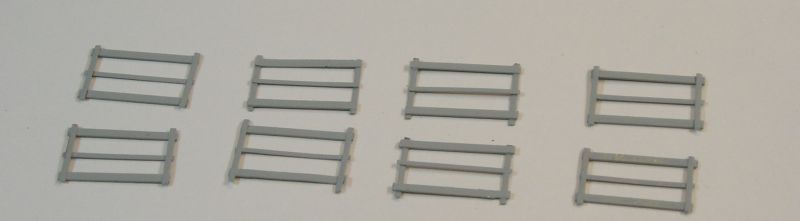
I also cleaned them up ready to install. I think I'll leave the light grey primer as the final colour.
John
John
Posted
Full Member
The other dramatic moment was that as I rummaged in the box for the roof vents, I couldn't find them. I can't say whether they were missing from the kit or whether I lost them. Anyway, I attacked my now bulging spares box and came up with some.
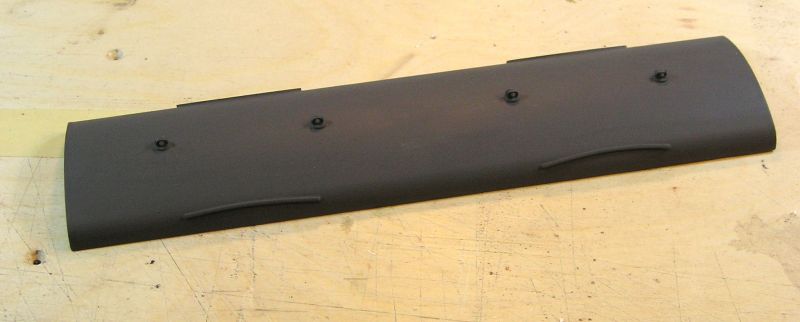
I used UP Dark Grey (it was handy) on top of grey primer. I don't get bent out of shape trying to use the official BR colour. Whatever colour the roof was when outshopped it would quickly get filthy.
I've also done some work on the sides and ends:
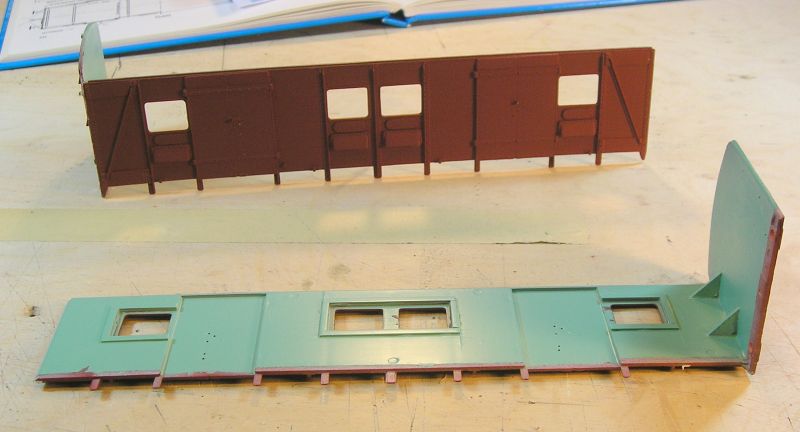
Outside is currently in red oxide primer. I was advised by an RMWeb member that the insides of these were painted a pale green after consultations with union. I have no idea whether the green I used is correct. I was in the hardware store buying wood to complete my layout boards and bought a can of Krylon Catalina Mist. It quite a pleasing colour.
I hope to tack one side to the underframe (still in paint) and to make sure things fit. Fingers crossed.
John
John
Posted
Full Member
Already the casting definition is much improved.
John
John
Posted

Full Member
Regards Rob
Posted
Full Member
John
John
Posted
Full Member

I'm really quite pleased with this. I used Humbrol acrylic brush painted. A surprisingly good finish and yet to be varnished.
There was some concern expressed by other builders of this kit that there would be gaps and poor fit. I did take care to offer up the sides to the chassis and fettled areas where I thought there would conflict. In the end I got a good fit.
I also added weight using G0G guidelines on 1g/mm of length, or about 225 gms.
The question now is whether the ends should be crimson or black.
John
John
Posted

Inactive Member
Max
Port Elderley
Port Elderley
Posted
Full Member

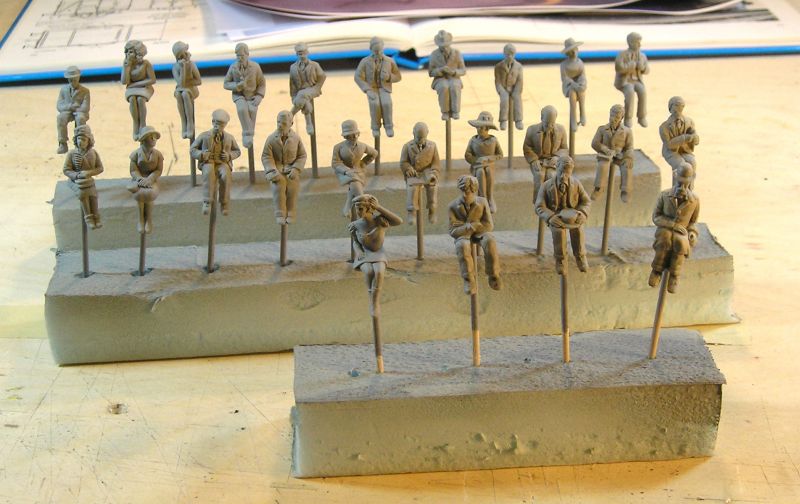
From normal viewing distances and certainly a coach they look OK I think. My biggest problem was getting the faces to look credible. I did try to detail eyeballs but these are just too small for that. They say you're supposed to mix your own flesh tone and I reviewed an article on painting 7mm figures in MRJ 230. However I use acrylics which behave differently from enamels. I used Tamiya Flesh.
After trying to do faces several times I finally scraped the paint off so as to reveal the detail. Finally I hit on the solution which was to use heavily thinned paint on the faces so as not to obscure the detail. (If you're using enamels, one method is to paint the figures black and dry brush colour on. This way you've already got the shadows.)
I finished the faces by applying a thin wash to highlight the shadow line detail - not ideal but the faces shouldn't have a flat texture.
The trick with the bodies is to paint outwards. For example for shirts you paint white on the area without even trying to stay in lines. When dry, you can use a 000 brush to paint on the tie. You then paint the suit away from the shirt area.
I dredged up all sorts of colours from my paint stash. Primary colours but also tangerine, purple, maroon, catwhisker yellow, railroad tie brown, earth, dirt and so on. Anything goes really I think.
When done, I used the Tamiya Panel Lining wash to highlight the shadows.
I sprayed the figures with matt clear coat although the lights still make things look shiny.
Glad that's done. Phew!
John
 Last edit: by Brossard
John
Posted

Full Member
Posted

Full Member
Looking very good.
Nigel
©Nigel C. Phillips
Posted
Inactive Member
Max
Port Elderley
Port Elderley
Posted
Full Member
John
John
Posted
Legacy Member
Here's an example
Allan

Posted
Inactive Member
Is there a good supplier in the UK?
Also, are they plastic? I like to drill one leg and glue a Peco track pin into the hole. I find the pewter ones really difficult to drill, so I've stuck with Bachmann; but they don't have much of a range.
Max
Port Elderley
Port Elderley
Posted
Full Member
John
John
Posted
Legacy Member
Allan
 OO ScaleN ScaleG ScaleZ ScaleHO ScaleSlot Cars & Râ„C

 ON THIS SITE
Home Page
Products
Latest News
Bargains
Downloads
Events
Careers & Jobs
Carriage Services
About Us
Contact Us
Pay Us A Visit
Meet The Staff
Links
Preiser Figures, Model Railways & more
ON THIS SITE
Home Page
Products
Latest News
Bargains
Downloads
Events
Careers & Jobs
Carriage Services
About Us
Contact Us
Pay Us A Visit
Meet The Staff
Links
Preiser Figures, Model Railways & more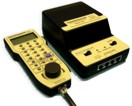


The worlds top manufacturer of miniature model figures, family-outfit Preiser are based near the German city of Nürnburg. They manufacture in all major scales, including G Gauge (1:22.5 scale), O Gauge (1:43), HO Gauge (1:76), N Gauge (1:160) and Z Gauge (1:220).
In addition they also manufacture figures in a variety of other scales for such interests as Military and Architectural modelling.
Preiser offer the most comprehensive range of model figures around. Whichever scale you model, you will find that Preiser offer a varied selection of figures to liven up your layout. All painted figures are detailed by hand and offer exceptional quality at a reasonable price.
You will also find that all types of scene are catered for and there are even ‘Adam & Eve’ Combination Figure Kits available in many scales to allow you to create your own figures.
 The HO range features two main series, the Exclusive Figure Series and the Standard Figure Series.
These cover the full range of scenes that you could wish to recreate, even including some Military and Period.
An unpainted selection including combination kits are also available. A selection of HO Vehicles are also available, as well as Animal figures, both domestic animals, wild animals and some exotic species.
 In N Gauge, a similar selection of figures can be found, and again in Z Gauge.
The G Scale selection caters for railway and many other modelling scenes, and the huge ‘Elastolin’ variety offers both painted and unpainted military figures from around the world and a number of different historical periods, including the Wild West, Prussia and WWII. As in HO Gauge, there is also a large selection of animal figures, including many exotic animals that you might find at the Zoo or circus.
 Preiser figures are also ideally suited to architectural models, in scales as small as 1:500, and so can be used for professional dioramas as well.
Finally, Preiser also manufacturer a range of accessories in most scales, and many of the figure packs also contain appropriate accessories.
CLICK HERE to view an article on Preiser OO Scale Figures.
CLICK HERE to view the 2017 Preiser New Items.
Popular Preiser Products

 Preiser 74000 - 1:100 / Scales(PR74000)Passers-By StandingOnly £14.75
 Preiser 93058(PR93058)Preiser New Items Leaflet 2016This item is FREE
 Preiser 14168 - HO Scale(PR14168)Chickens (Hens And Cocks)Only £8.25
 Preiser 10313 - HO Scale(PR10313)Skiers Downhill (6)Only £13.25
 Preiser 14155 - HO Scale(PR14155)Cows - Brown & White or Black & White (5)Only £8.25
 Preiser 14014 - HO Scale(PR14014)Steam Loco Crews (6)Only £8.25
 Preiser 10371 - HO Scale(PR10371)British Police in Shirt Sleeves (6)Only £16.00
 Preiser 28086 - HO Scale(PR28086)Camera ManOnly £4.25
 Preiser 93057(PR93057)Preiser 1:87 Standard Series BrochureThis item is FREE
 Preiser 14006 - HO Scale(PR14006)Teenage Girls (6)Only £8.25
Posted
Legacy Member
You'll find that most of the OO figures are repeated again in 7mm.
Also you'll get to see much more if you visit the Gaugemaster Site.
Allan
Posted
Inactive Member
I'll have a good look later.
Cheers
Max
Port Elderley
Port Elderley
1 guest and 0 members have just viewed this.