Johns 7mm Wagon Workbench
Posted

Full Member
John
John

Posted
Full Member
Since my era is ~1962, I left the model white.

Things to note are the 4 shoe Morton brake gear and instanter couplings. Note also the reinforcing bar between the axle boxes. White is an annoying colour and there are mucky fingermarks from handling. The van will be weathered so I'm not too bothered.
Even though the plastic was white, once the body was built and on the underframe it was sprayed with light grey primer. This was followed by Testors flat white.
Next I sprayed it with gloss varnish to form a base for the transfers. Transfers are from Fox and went on without drama. Once the transfers had dried (overnight), I finished with Testors matte varnish.
John
 Last edit: by Brossard
John
Posted

Full Member
All is not lost because I have few engineers wagons in the stash which will need my Oxford Blue paint but I will need to repaint the container to suit my plan for it.
Regards Rob
Posted
Full Member
I'm working on a Slaters Conflat A at the moment along with two containers. I painted one maroon and the other bauxite. My reasoning is that 1962 seems to be something of a transition point for liveries.
John
John
Posted
Full Member
1937 seems to have been a similar point in time for the grouping liveries.My reasoning is that 1962 seems to be something of a transition point for liveries.
Sadly I don't even have that excuse. I have only ever seen LNER containers in blue so hadn't realised that they had been bauxite originally and hadn't researched them at all.
At least it has been pointed out before I got to the point of fastening onto the OCT which I suspect would have been a pain to undo. - You live and learn as they say.
Regards Rob
Posted
Full Member
Anyway, every day should teach us something.
John
John
Posted
Full Member
First, the interior:
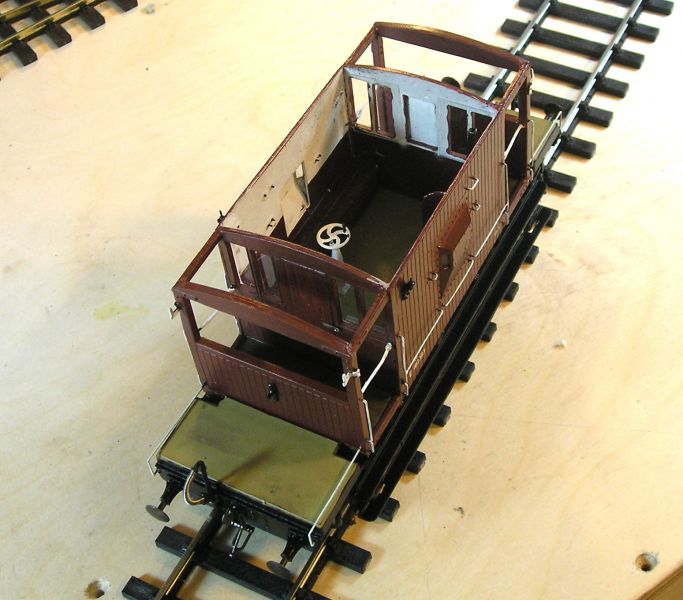
Brake standard and you can make out the stovepipe.
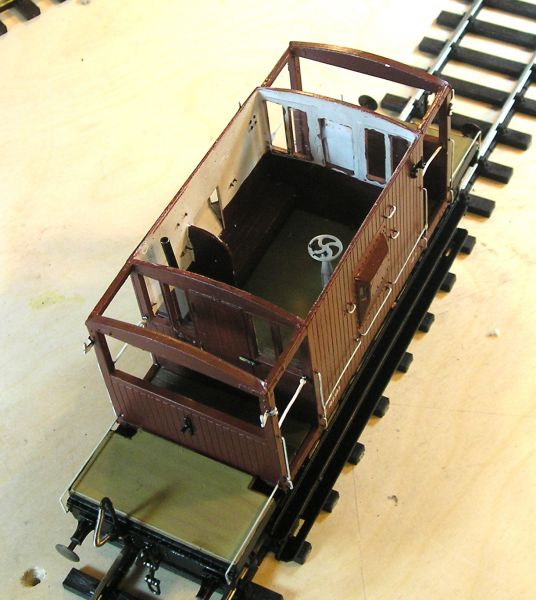
From the other side. None of this can be seen easily with the roof on. It may help others who are building this in other scales.
A view underneath:

Note the safety loops around the brake yokes. I've mentioned this before, not only don't kit makers include the parts but they completely ignore them and don't even mention them in the instructions…strange.
Finally, the van itself:
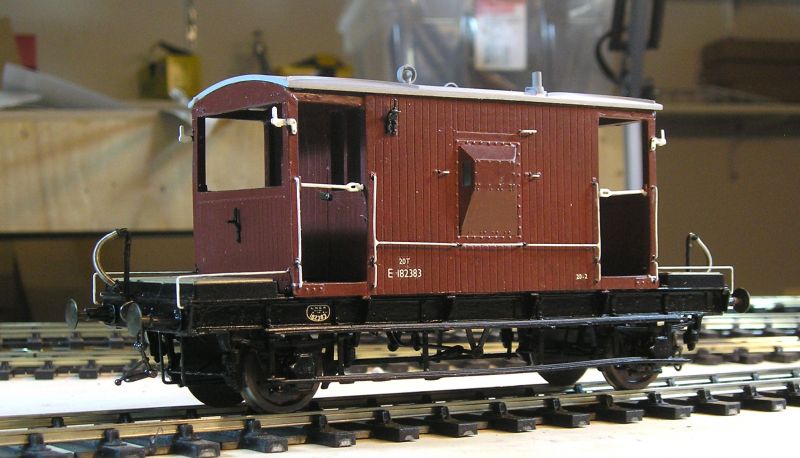
Looking pretty smart I think in ex works condition. Handrails are 0.45mm NS wire. I carefully fitted these to their location. The tee rail is made by but soldering wire. I used a plastic spacer which didn't show any melting at all. The result of obeying a cardinal rule of soldering: get in and get out quick sharp.
The shaped wire was then chemically blackened and fitted. The rails were secured with CA. After that I brush painted them white.
I used the same process for the corner lamp brackets.
As usual, the coupling is screw link from Dapol.
The model is based on a picture of E19244.
To finish, I sprayed the van all over with gloss varnish. The helps to seat the transfers. Transfers were applied using microset. When hard another coat of varnish to seal. I won't you with the booboos and other slipups. :oops:
Yes, I know, the bottom step is crooked - didn't notice that until I saw the photo - :roll:
John
John
Posted
Full Member
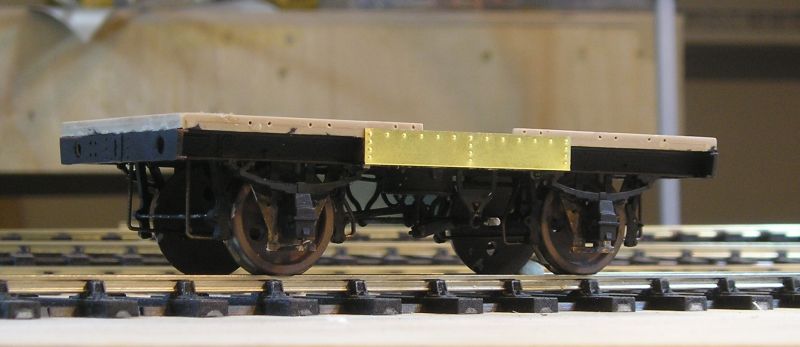
A lot of busy looking gubbins under the wagon. The wagon itself is simple enough. There's an etched brass template provided to drill those holes which will take the hold down loops. The toolbox is an etched plate, bent to suit. Rivets were pushed out with a scriber.
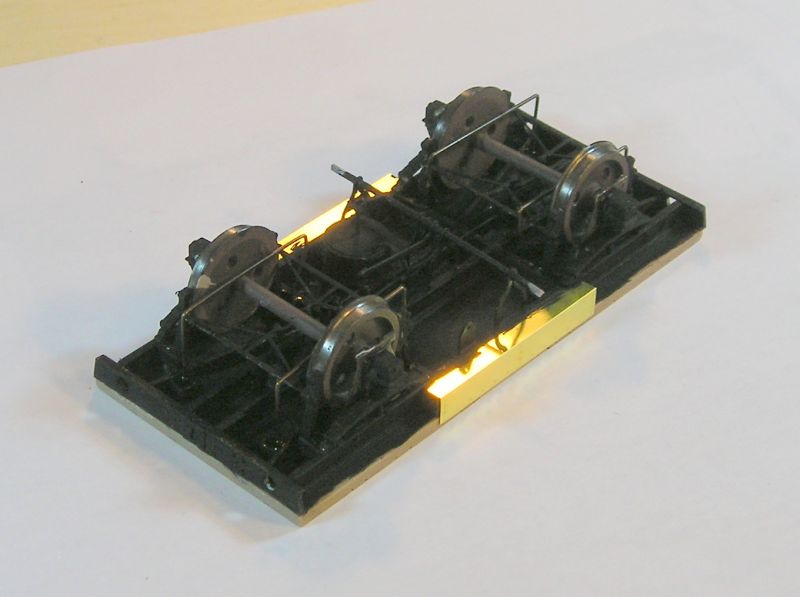
Brake gear was pretty complicated and this took the bulk of build effort. Most of it is etched brass. Again my homemade safety loops can be seen.
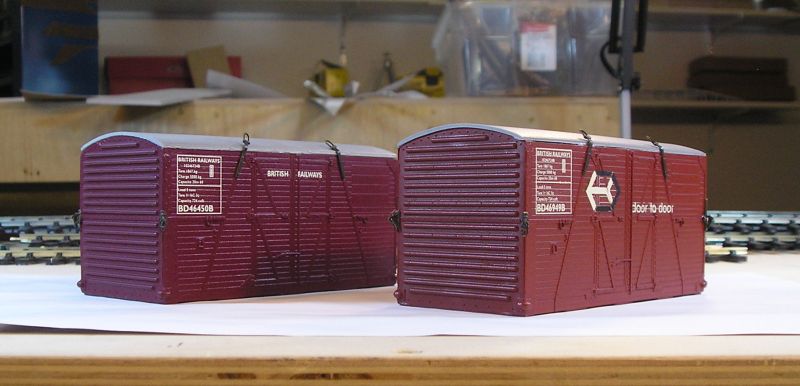
To complement this wagon I have two containers:
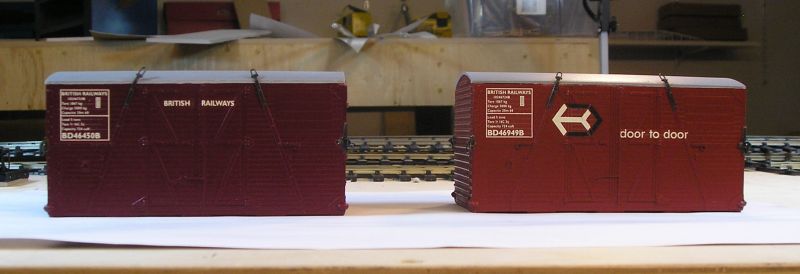
The one on the left is in 1950s maroon livery. On the right is the later, 1960s, bauxite livery.
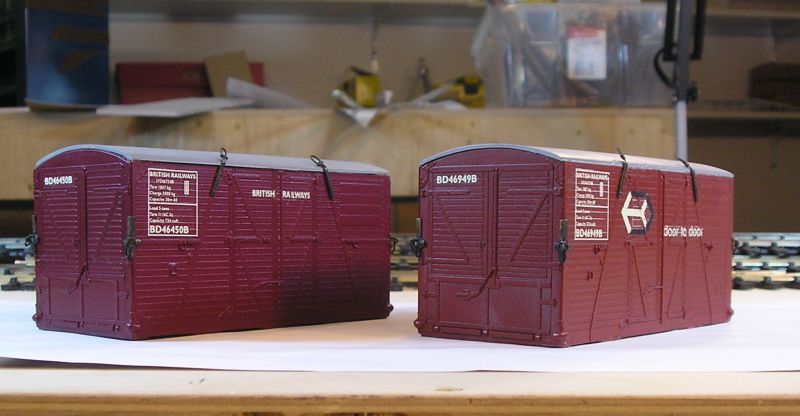
The corner brackets and roof brackets are brass castings. There's a fiddly link that is inserted into the bracket.
Transfers are from Fox. The corner data doesn't have a border in the pictures I've found. I toyed with the idea of trimming but in the end left it. I did scrap a couple of transfers, they are very fragile.
John
Last edit: by Brossard
John
Posted

Inactive Member
Max
Port Elderley
Port Elderley
Posted
Full Member
I can only agree with Max, Superb stuff both of them.Excellent work, John. :thumbs
Regards Rob
Posted
Legacy Member
I've said it before and I'll say it again. Absolutely top class kit building.
Magnificent.
Allan.
Posted
Full Member
Did you ever get a wagon kit Allan?
John
John
Posted
Legacy Member
BTW John. What are 'safety loops' and what do they do ?
Allan
Last edit: by allan downes
Posted
Full Member
Safety loops are pieces of bent iron positioned so that if part of the brake gear becomes undone or breaks they will catch the parts before they hit the track. Without these, the train could well derail if broken parts get tangled up.
Four shoe brakes also had them in the form of (usually) vertical strapping around the pull rods.
John
John
Posted
Full Member

Usual methods. Note the red standpipe to denote vacuum fitted (white for through piped).
John
John
Posted
Full Member

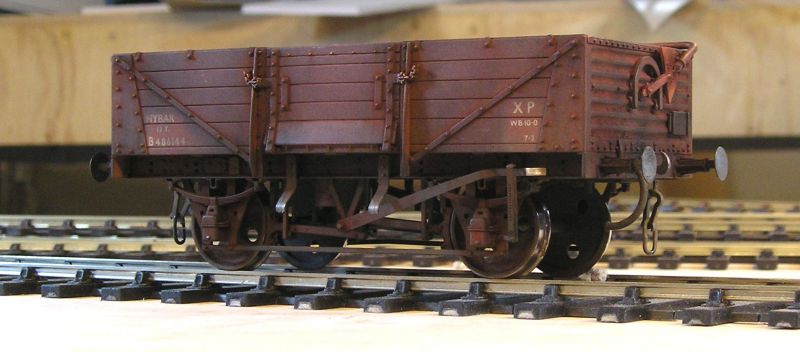
Pictures show the van to be grimy but not utterly filthy so I hope I've captured that.
John
John
Posted
Inactive Member
Max
Port Elderley
Port Elderley
Posted
Full Member
Regards Rob
Posted
Full Member
You are right Rob, BR had a system as you say. I think it might be more correct to say that brake vans that could work fitted trains were painted bauxite. This would include through piped vans.
I know LMS didn't distinguish, they simply changed their goods livery to bauxite in 1936. Starting about 1940, NPCS vehicles also started to be painted bauxite (they called it "lake" which was the undercoat) instead of maroon - a wartime austerity measure.
John
John
Posted
Full Member

Couplings can be a bit of a trial, the links keep getting tangled. I actually installed a Slaters set on this.

Trying to replicate the look of well used bare wood. The wagon started with a cream floor and sides. I airbrushed a light coat of concrete (kind of a dark cream) first. I then airbrushed some dirt and then some black. Not too much.
I then brushed on and rubbed in dirt and black on individual planks to try to show the different shades.
John
Last edit: by Brossard
John
1 guest and 0 members have just viewed this.