Johns 7mm Wagon Workbench
Posted

Full Member
What a small world, we lived in Stanley 15 years ago - we moved in in 1999.
Regards Rob

Posted

Full Member
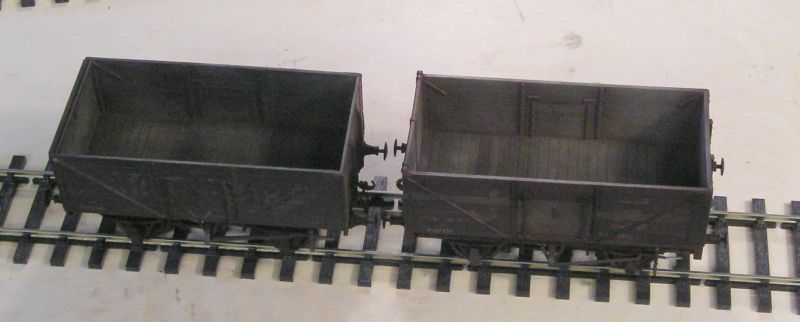
Over the last several days I've been working on getting my PO wagons into their "end of life" condition not quite "condemned".
Here we go:
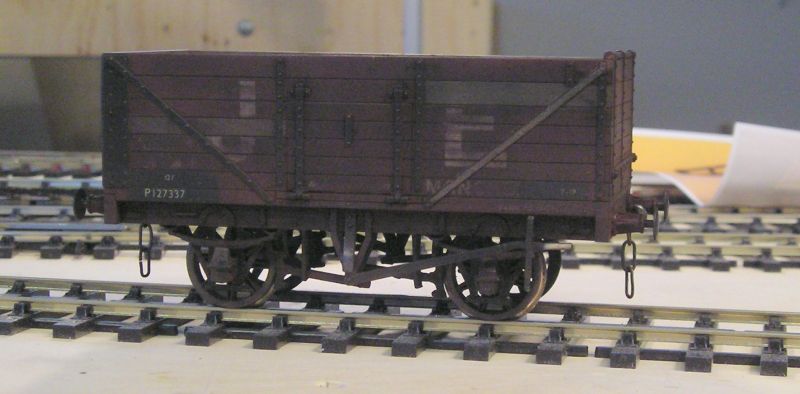
Note the replaced planks and drop door. This wagon doesn't have bottom doors.

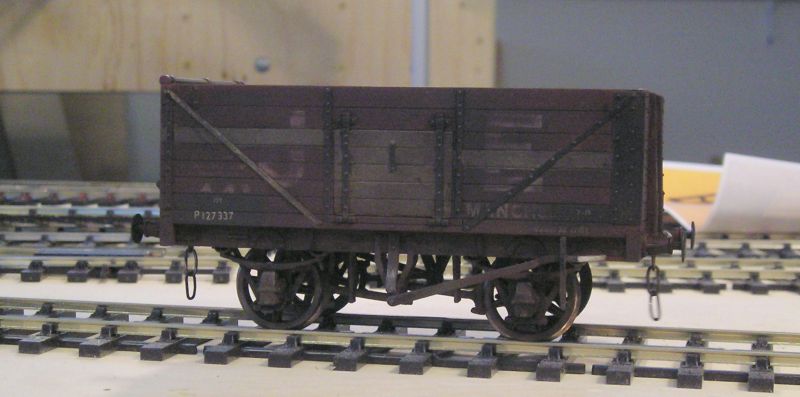
More replacement planks.
The process is a lengthy one and quite exhausting.
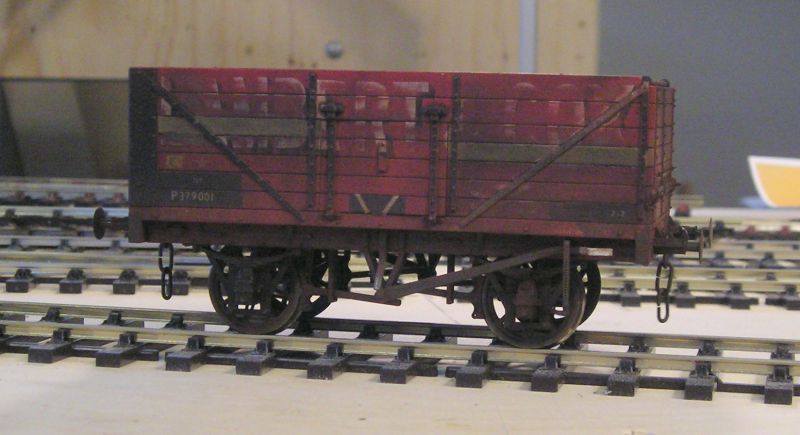
First, I used a fiberglass pen to fade the lettering and body colour. Next I masked the bodies and sprayed black patches for the number, bottom door indicator and tare. For the Parkside Charlesworth wagon this was a mistake because, to my horror, when I removed the masking tape, much of the lettering and paint came with it - a poor do.
I used aged concrete for the natural wood planks.
If anyone s moved to take this job on, get yourself some black patch transfers - far easier.
In preparation for transfers, I sprayed a coat of gloss varnish on the bodies.
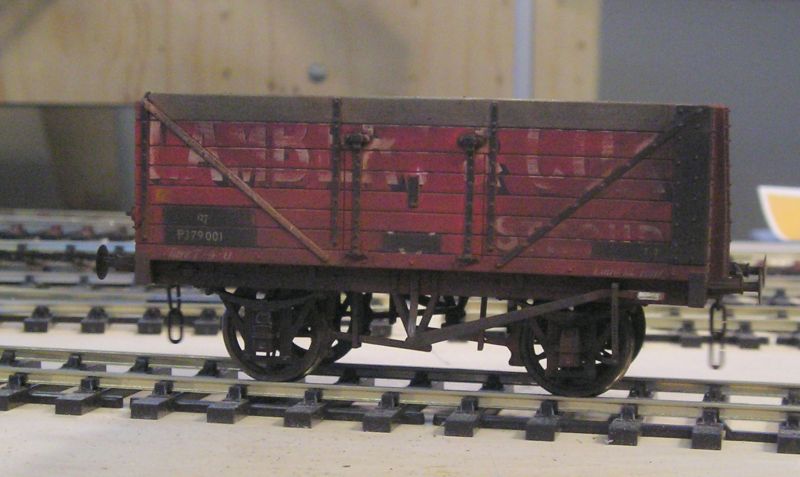
Next I applied P numbers, vee and Tare using Fox transfers.
The white stripe denoting end door was very difficult and I eventually gave up trying to get the transfer to work. I painted it instead which involved a massive amount of masking tape. I did have some success with a paint pen, but mine is old and blobby.
After all this was dry, I sprayed on some flat varnish.
The fun stuff next. Using my airbrush I sprayed on a light coat of dirt. I covered the underneath and solebars and a short way up the body. This was followed by a light coat of black in the same place. This really does tend to bring out detail.
With the paint dry, I moved on to powders.
I started with rust, coating the metal parts, W irons, springs, iron fittings on solebar, buffers, strapping and rubbing it down with an old brush (don't use a good one, this really wrecks brushes). Next I applied burnt umber powder (dirt) to tone down the rust. Finally I used black powder to bring everything together.
I used a fiber pen to bring out bare metal on the buffer heads. I used a silver pencil to highlight the door banger end which would have been bare metal.
I didn't neglect the interior. I started by using my airbrush to spray aged concrete on the bottom and sides. I then used pretty much the same procedure as described above to try to represent a natural wood but abused interior.
John
 Last edit: by Brossard
John
Posted
Full Member
Whose make is the aged concrete paint colour? It sounds like a useful colour to have on hand.
Regards Rob
Posted
Full Member
John
John
Posted
Full Member
I like the idea of it being acrylic, a shame it's discontinued.
I use mostly Vallejo these days - not only because it's good paint, but more because I can buy it local to me.
Regards Rob
Posted
Full Member
John
John
Posted
Full Member
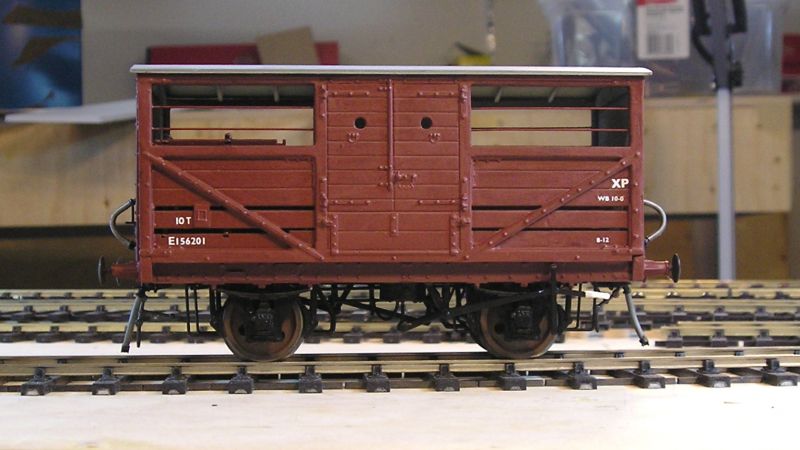
Ex LNER Cattle wagon from Parkside. I repainted this with Lifecolour BR Bauxite. Transfers are included in Parkside kits, from Model Master.
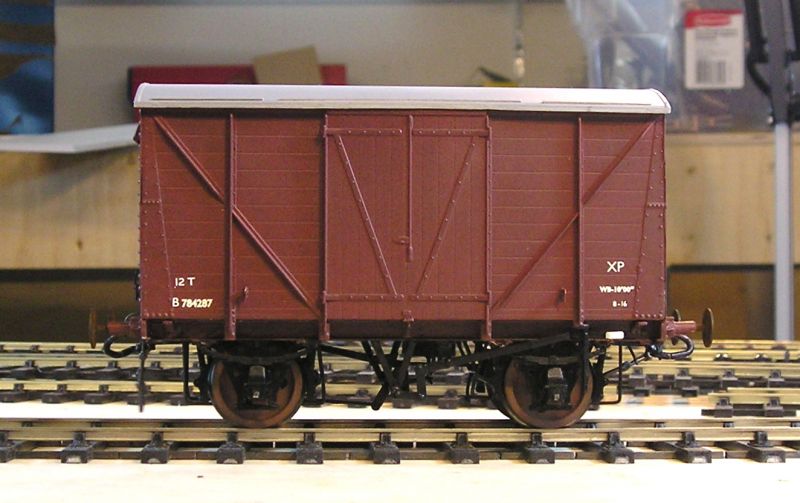
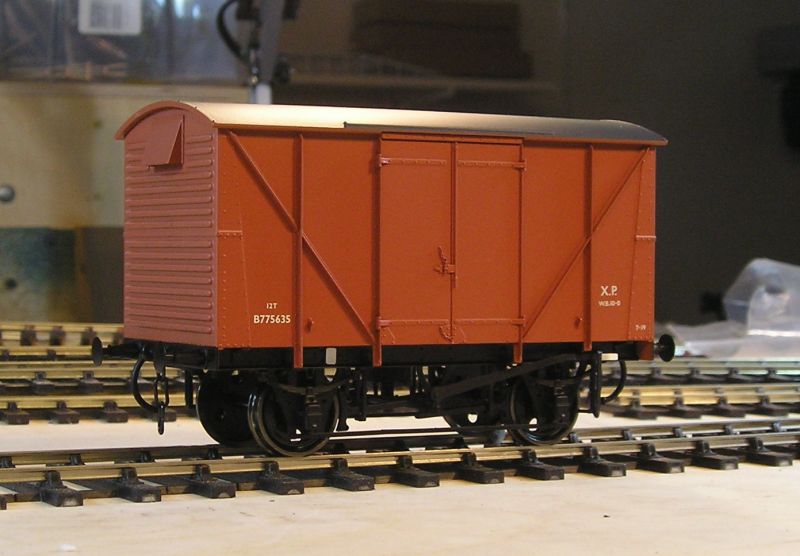
BR Std van from Slaters. Transfers are NOT included in every kit. These are from Fox.
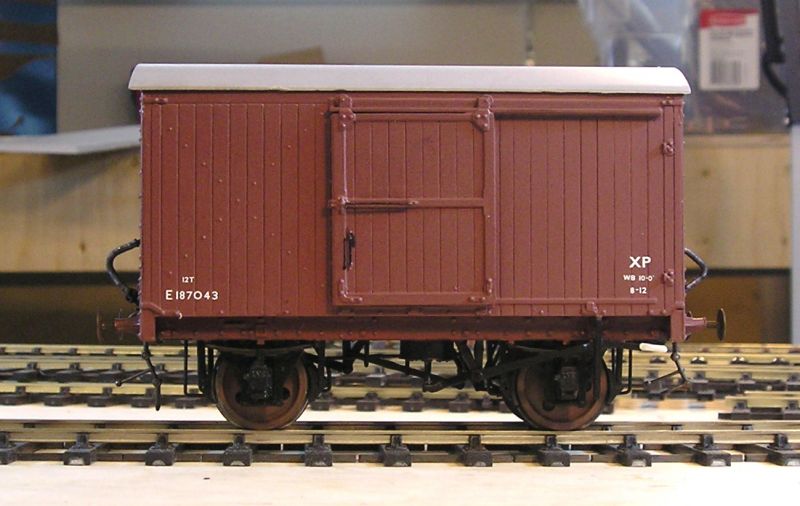
Ex LNER goods van from Parkside.
I am VERY happy with these. They are ready for weathering.
John
John
Posted

Inactive Member
Did you get your loin girder from MicroMark?

Max
Port Elderley
Port Elderley
Posted
Full Member
Adding transfers to Parkside wagons is one of this weekends dubious pleasures in the Pulham household.
Regards Rob
Posted
Full Member
John
John
Posted
Full Member
Dapol BR standard van. Compare to the BR van above. As someone said, the only standard thing about these is that are not standard. This example has plywood sides and 4 shoe vacuum brakes. It is VERY good. My only niggle is that there should be an instanter link on the couplings. I'll add these to my Slaters shopping list.
Someone mentioned that these fitted vehicles should have a lamp bracket - I think have some of these spare so I'll be fitting these.

BR Hybar open wagon. Again fitted with 4 shoe AVB. I managed to scrounge a pair of instanter links from another kit and you can see these. The niggle (there always is isn't there?) is that the sides are slightly bowed. This seems to be a chronic condition with RTR open wagons. I'm very pleased all the same.
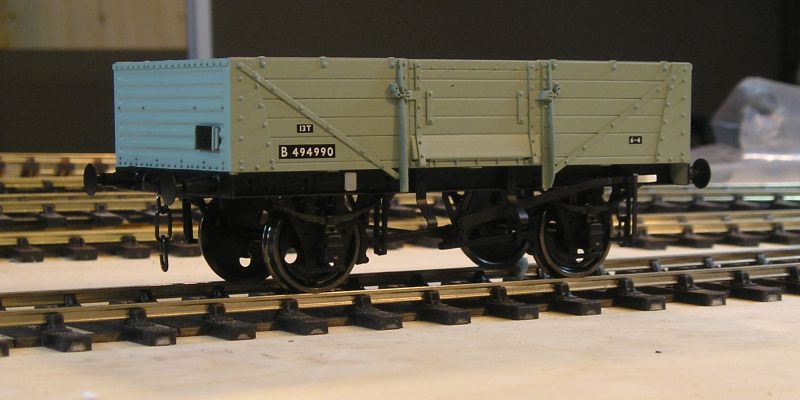
Unfitted BR open wagon. As most people will know, BR painted unfitted stock grey and fitted stock bauxite. Slightly bowed in sides alas. 3 link couplings are correct for this vehicle.
The white patch on the solebar will be a waybill card inserted into a spring clip.
Happy days. :chicken
John
Last edit: by Brossard
John
Posted
Full Member
The upper arms that connect to the outer end are very fragile - they are safe in the box.
As is my wont, the axleboxes are sprung.
The doors are supplied as 4 panes but indications are that most of these had solid planked doors - you can just see my replacement in 0.020" plastic card. This was scribed to represent planks.
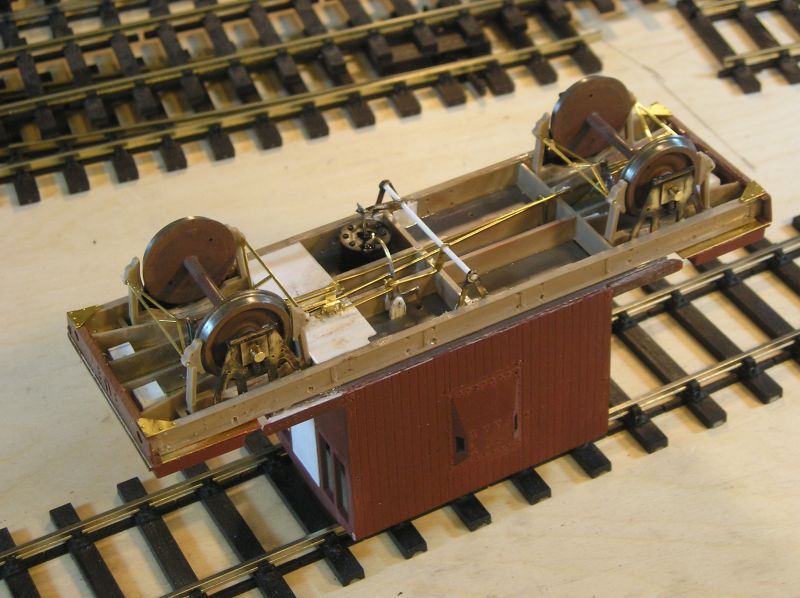
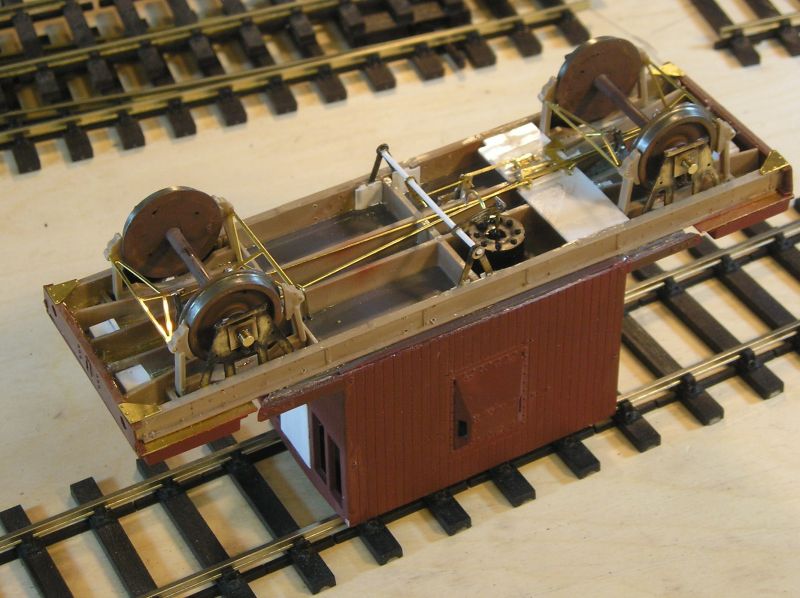
I started by removing the moulded trusses under the solebars, fitted vans don't appear to have had these.
I then made some vee hangers from brass strip and washers. I also made the the actuator arms from strip brass and a bit of wire.
The vacuum cylinder is a Parkside spare. The tee lifter is brass wire soldered together. I soldered/glued a piece of wire for the vac. pipe connection.
I added a vacuum pipe which is the angled wire.
The cross rod is 2mm plastic.
The kit includes some very nice brass etches for the brake hangers above the axles. There is also an etch representing the brake actuation mechanism, the end of which aligns with a hole in the floor where the manual brake screw comes out. (I have an interior brake standard). I added a lever adjacent to the manual lever that I connected to the vac. brake lever. This is bit terra incognita but I reckon that there was likely to be a clutch arrangement to permit automatic and manual braking. I added some plastic vee brackets to support the brake lever fulcrum.
Finally I added the connections to the brake hangers under the axles.
John
John
Posted
Full Member
I may plagiarise these shots when I get to mine (its a Connoisseur rather than Slaters) mines a BR van that I plan to backdate to an LNER version. I just need to confirm that mines would have been fitted too at the time.
Regards Rob
Posted
Full Member
John
John
Posted
Legacy Member
Superb workmanship you guys. Master craftsmen both.
Allan
Last edit: by allan downes
Posted
Full Member
John
John
Posted
Legacy Member
Allan
Posted
Full Member
http://www.parksidedundas.co.uk/acatalog/PARKSIDE_DUNDAS_ROLLING_STOCK_KITS.html
Lets hope 0 gauge becomes a pandemic.
John
John
Posted
Legacy Member
Went to your link and reckon I'm gonna have a go then blame you when it goes all pear shaped !
Allan.
Posted
Inactive Member
Max
Port Elderley
Port Elderley
1 guest and 0 members have just viewed this.