Johns 7mm Wagon Workbench
Posted

Full Member
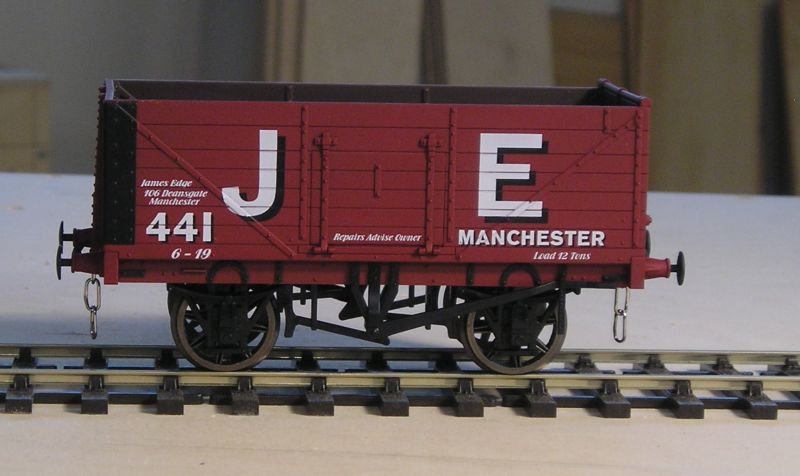
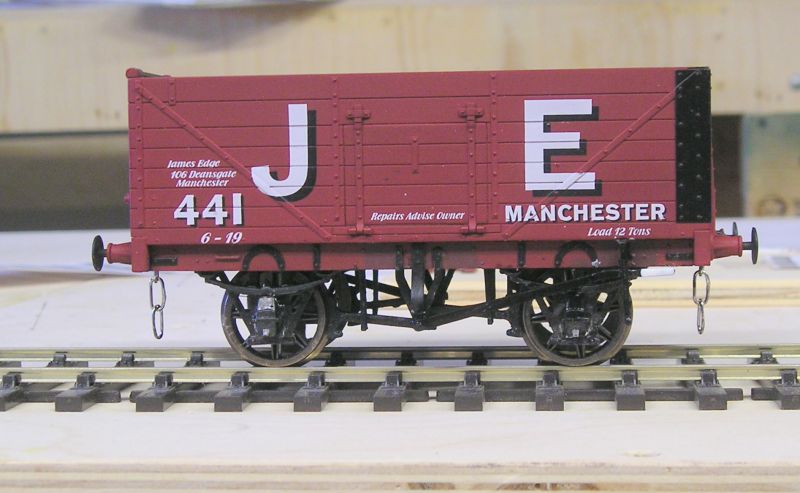
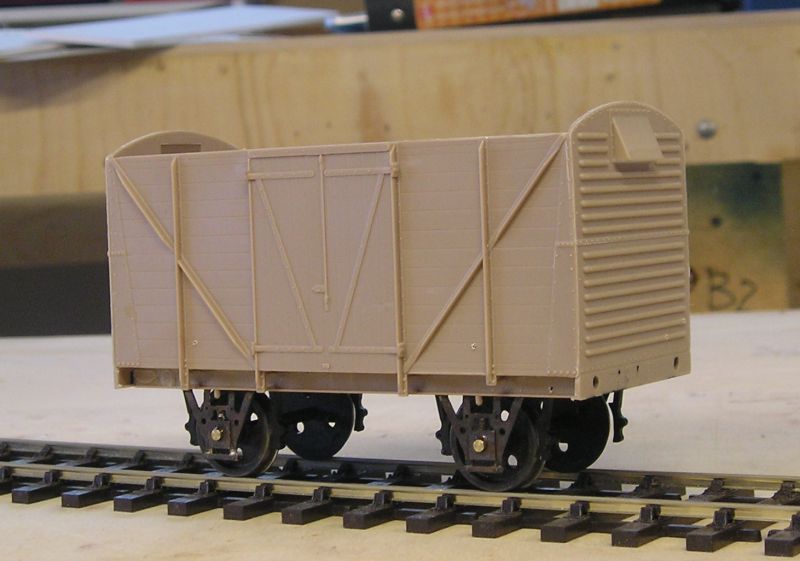
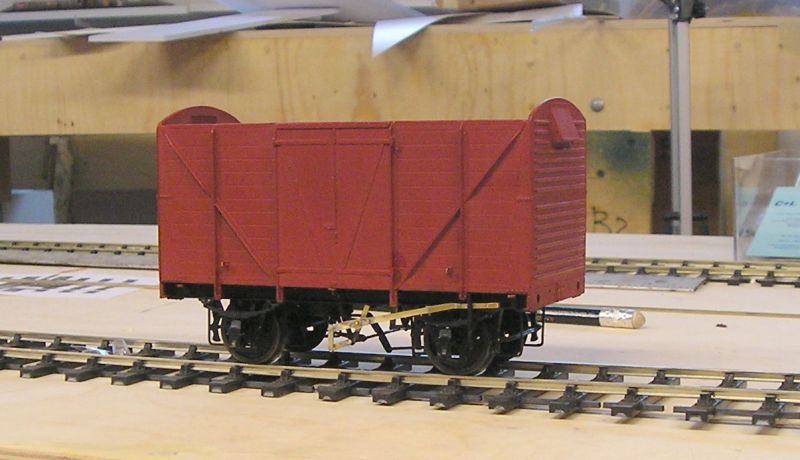
Really quite good to my thinking, above the sole bars anyway. I don't like that the brakes are mile away from the wheels and the brake gear seems a bit wimbly.
Side doors really do open and the fit is very good - you can't easily see the join can you?
Buffers and couplings are sprung.
I've ordered some Bill Bedford kits from Eileen's Emporium - sprung W irons and brake gear. When fitted this wagon will look super.
John
John

Posted
Full Member
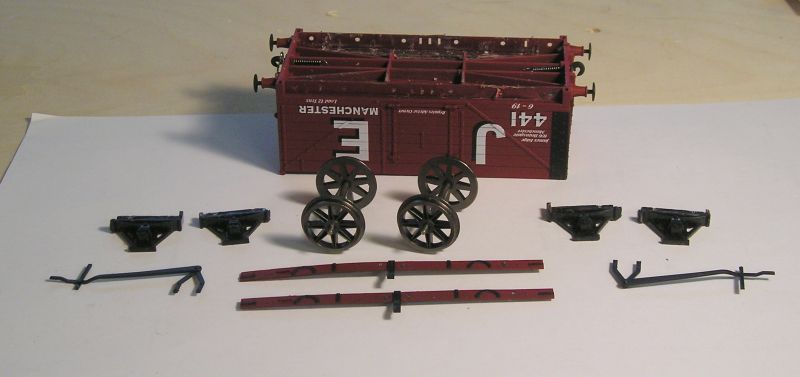
The underside of the wagon body looks a proper mess but it'll tidy up as we proceed. Note the solebar overlays.

The two Bill Bedford kits required for the upgrade. At top are the sprung W irons - I've discussed these before.
At bottom is the brake gear fret.
The model W irons look quite thick - I might just chop them up for the springs and axle boxes.
John
John
Posted
Full Member
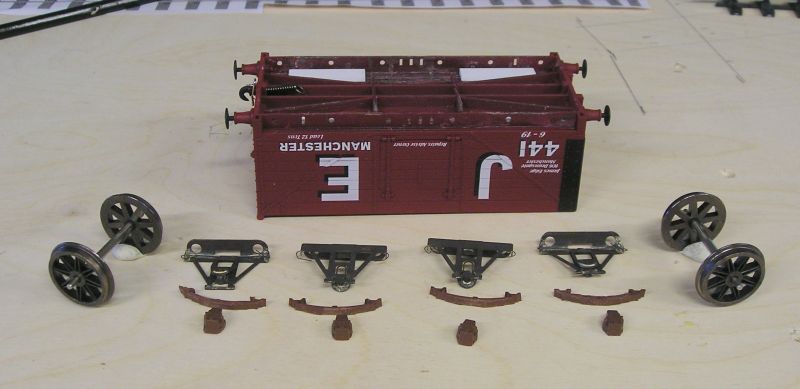
I assembled the Bill Bedford W irons and blackened them.
The white strips on the floor of the wagon are 0.060" plastic strip which should bring the W irons to the correct height (it did on my previous two wagons).
In looking through a Slater's kit for a standard BR van, I found that there was a sprue for manual brakes and one for clasp brakes (no yokes etc. but I can make these) so I robbed the W irons and chopped them up for the springs and axle boxes.
I discovered why the wheels have so much side to side slop, the axles are 2mm shorter than Slater's wheels. Must think about that, the slop really is unacceptable to me.
John
John
Posted
Full Member

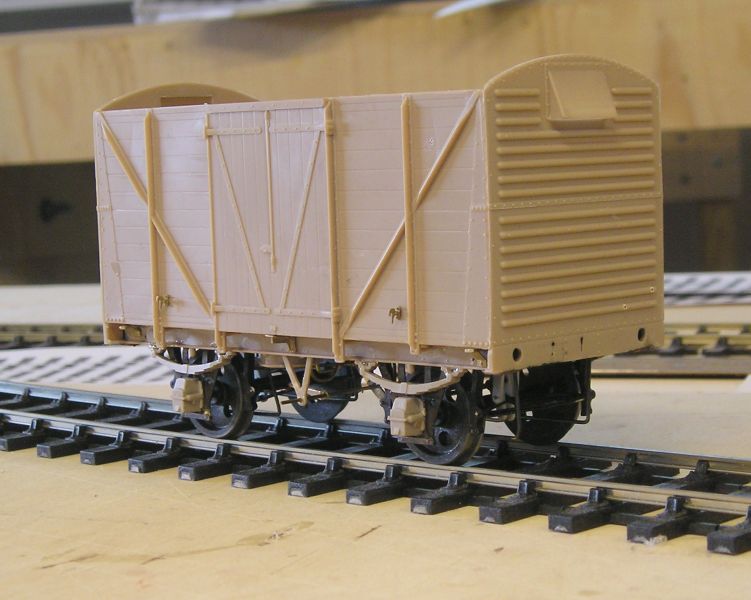
Fortunately I had my Parkside wagon to compare to. You can see I packed the rear of the solebars to push the W irons inwards. The axles engage the bearings now. I still have to install the brake lever, but I think I'll paint first.
John
John
Posted
Full Member
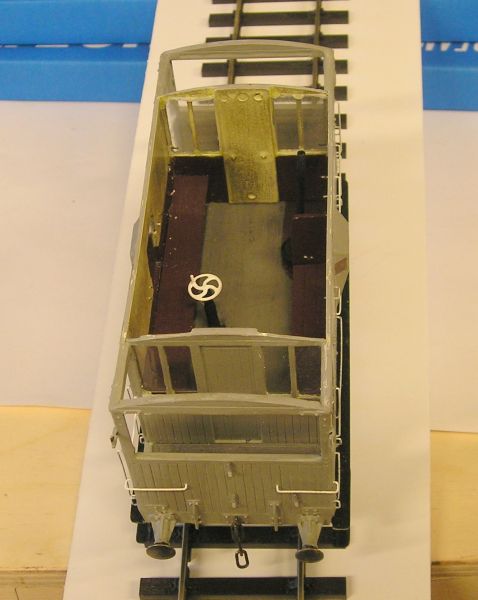
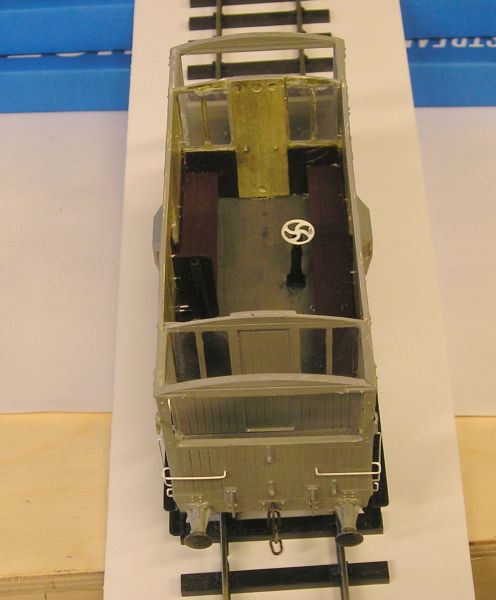
These shots illustrate the completed interior, although my friend complained that there was no bucket or brush. :roll:
It's difficult to see, but there is a stove.
I can finally stick the roof on, after which no-one will be able to see all this - tccch!
John
John
Posted
Full Member
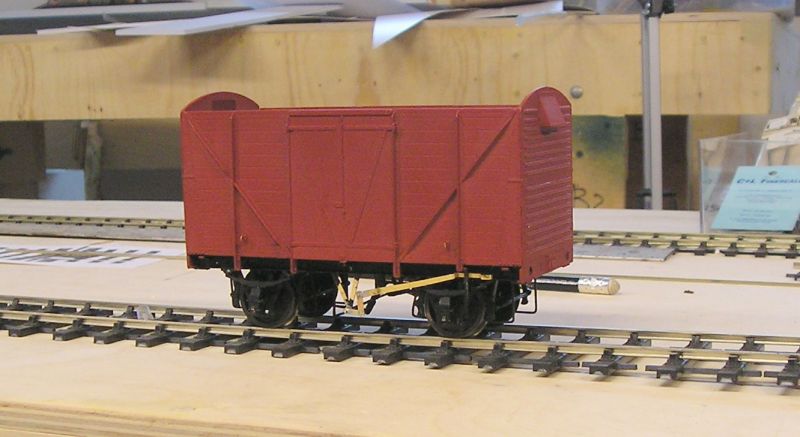
Main improvements are that the brakes are properly close to the wheels, there is no ridiculous side play and wheels are sprung. I also replaced the ring retainer for the coupling spring with a split pin.
Eventually this wagon will be depicted in "end of life" condition as most were in 1962.
I don't think I'll buy another RTR PO wagon from Dapol. Lionheart PO wagons look to be a lot better. Anyway, I've enough wagon kits to keep me busy for some time.
John
John
Posted

Inactive Member
Are the chains the right scale? I'm always over scale with chains. :roll:
Max
Port Elderley
Port Elderley
Posted
Full Member
John
John
Posted
Full Member

I think I can call construction complete. I will be weathering this at some point.
John
John
Posted

Legacy Member
:thumbs ;-) :cool:
Owen
web-cam 2.2.74.174:8081
if the lights are off no cam
if the lights are off no cam
Posted
Full Member
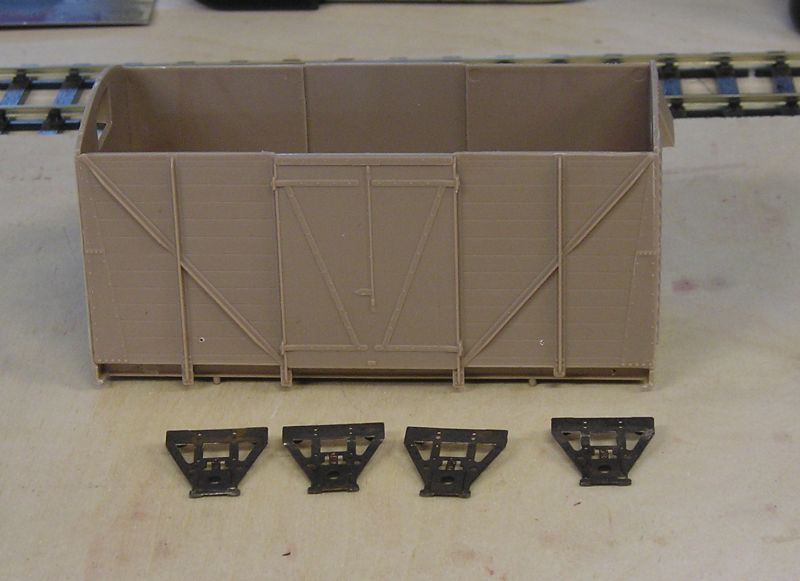
The kit comes provisioned for the 4 brake version but does include a fret with clasp brakes and axle guards.
Being me, I opted to use Slaters sprung W irons and made these up:

All really self explanatory. Whenever you're dealing with small springs things do get fiddly. To Slaters credit there are a load of spare springs in the packet. :Happy
The half etches were initially a mystery to me and I only just twigged that the W irons are cranked slightly outwards using the half etches as bend guides. :roll:
So, on to the van. The instructions don't have much text and there isn't a step by step guide. I suppose there's an assumption that the builder has some experience and some familiarity with the prototype.
I found a lot of great photos of this van here: Paul Bartlett's Photographs | Britain's Railway Wagons & other rolling stock :doublethumb
Therefore I just put the van together, floor, solebars, sides and ends - not rocket science:
I blackened the W irons.
Underneath:
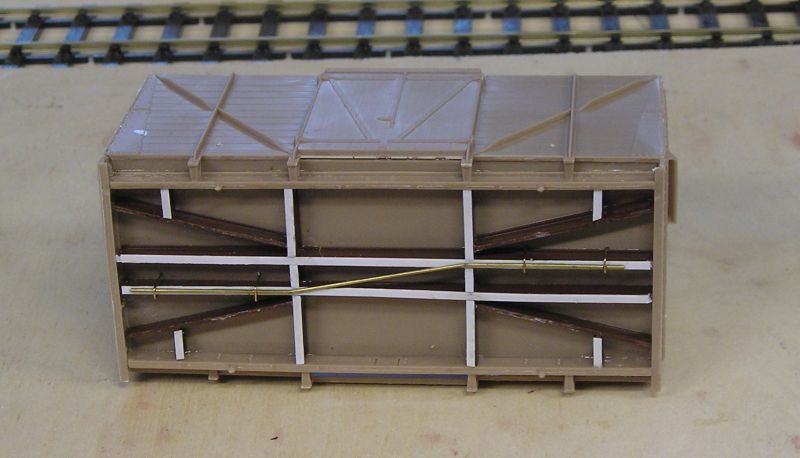
The floor ribs are stuck on and embellished with plastic strip to make them channel. The brass wire is the vacuum pipe. I made holding brackets from wire and secured everything with CA.
John
John
Posted
Inactive Member
Max
Port Elderley
Port Elderley
Posted
Full Member
Wheels and clasp brakes installed. You can see the coil springs above the axle boxes. Very smooth running.
Fast forward a few days and the wagon is nearly finished:
I have the axleboxes and springs on. Brake gear is also installed - what a faff! There are lost wax door catches and brackets on the solebar. Still have the brake levers to do.
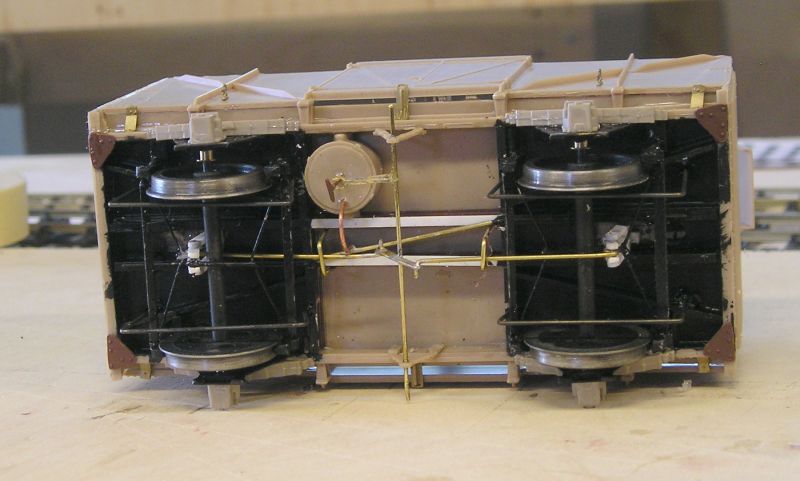
Here's a view of the underframe showing brake gear. It took a bit of brain power to figure out but I think it makes mechanical sense. The white bits are handmade with plastic strip, copied from a Parkside kit with a similar arrangement. There's a pipe connected the vacuum cylinder to the vac pipe.
Note also the safety loops around the pull rods and yokes.
I am waiting for Oleo buffers so that will take a week or so.
John
 Last edit: by Brossard
John
Posted
Full Member
I spent the last while figuring out how to represent the prototype and here's what I came up with:
You can see that each side is quite different. The side opposite the vac cylinder at top, has an additional hanger for the brake lever to pivot on. Brakes are actuated by the brackets connected to the lever and brake rod.
On the vac cylinder side, The V hanger has a hole midway up to act as brake lever pivot. The brake lever is extended and connected to brackets.
This arrangement means that the direction of pull for manual braking is correct.
You'll also notice that the body has been primed and the underframe painted black.
John
John
Posted
Full Member

I got the buffers from Invertrain, they are made by Haywood Models.
The vacuum pipe is lost wax and is inserted into a hole under the buffer beam. Note to wagon kit builders and bashers, vac pipes go UNDER the buffer beam.
The hose is a fine wound metal, don't know what it is, I wanted to blacken it but my solutions won't touch it.
The connector is also lost wax.
There's a bracket with a connector on the buffer beam just peeping out behind the LH buffer. The vacuum hose would get connected to this to maintain vacuum if the van was at the end of a train.
Lastly, there is a lamp bracket, again for use if the van is the last vehicle in a train.
Still to fit is the screw link coupling after paint.
I think we're done and painting is next.
John
John
Posted
Full Member
With respect to the vacuum pipe, have you thought about using a black permanent marker?My Oleo buffers arrived yesterday so I spent some time detailing the van ends:
I got the buffers from Invertrain, they are made by Haywood Models.
The vacuum pipe is lost wax and is inserted into a hole under the buffer beam. Note to wagon kit builders and bashers, vac pipes go UNDER the buffer beam.
The hose is a fine wound metal, don't know what it is, I wanted to blacken it but my solutions won't touch it.
The connector is also lost wax.
There's a bracket with a connector on the buffer beam just peeping out behind the LH buffer. The vacuum hose would get connected to this to maintain vacuum if the van was at the end of a train.
Lastly, there is a lamp bracket, again for use if the van is the last vehicle in a train.
Still to fit is the screw link coupling after paint.
I think we're done and painting is next.
John
Looking good so far!
Jeff
Posted
Inactive Member
Nice detail, John. :thumbs
Max
Port Elderley
Port Elderley
Posted
Full Member
I think the hose connector might join to an adjacent wagon hose and stay by spring force - we'll see. There are also tiny magnets that could be glued to the connector.
I really like that you get so much more detail in this scale Max.
John
Last edit: by Brossard
John
Posted

Full Member
Nigel
©Nigel C. Phillips
Posted
Full Member
John
John
1 guest and 0 members have just viewed this.