Brendan's Workbench.
Posted

Full Member
Cheers
Andy
Andy

Posted

Full Member

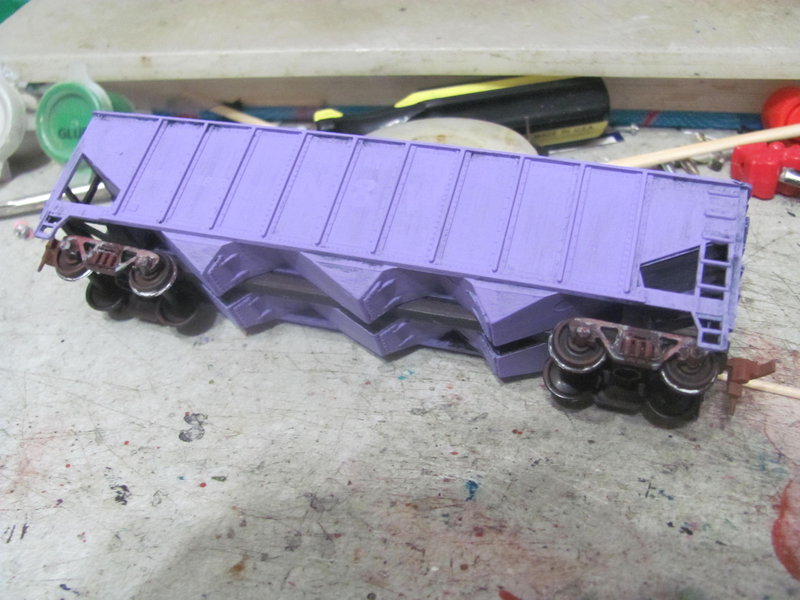
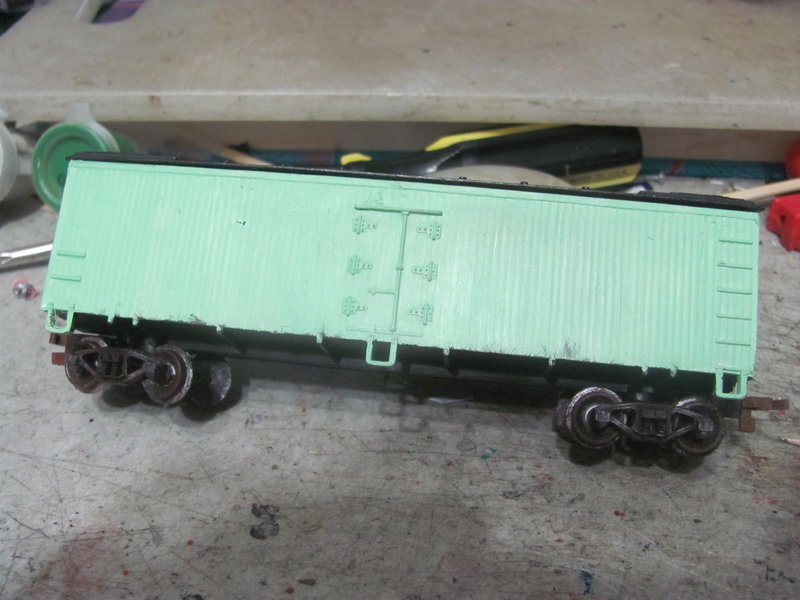
I have also been painting this hopper and this reefer up in new colors, and painting and weathering the wheels and trucks.
 Last edit: by ZeldaTheSwordsman

Posted
Full Member
Posted

Full Member
I like the pick-up arrangement. You may want to check the current draw of that motor and get it insulated from the frame if you ever contemplate going DCC.
Nigel
©Nigel C. Phillips
Posted
Full Member
Working on getting it repainted into my chosen color scheme. The cab isn't pictured because I haven't started on painting it yet.
Posted
Full Member

Work in progress modification of Bachmann's Bertie the bus to have an interior and proper windows
Posted
Full Member

Test fit of the work-in-progress scratchbuilt pilot. Some bending to correct for, but the base does fit and line up properly.
Posted
Full Member

Work has begun on scratchbuilding the tender.
Posted
Full Member
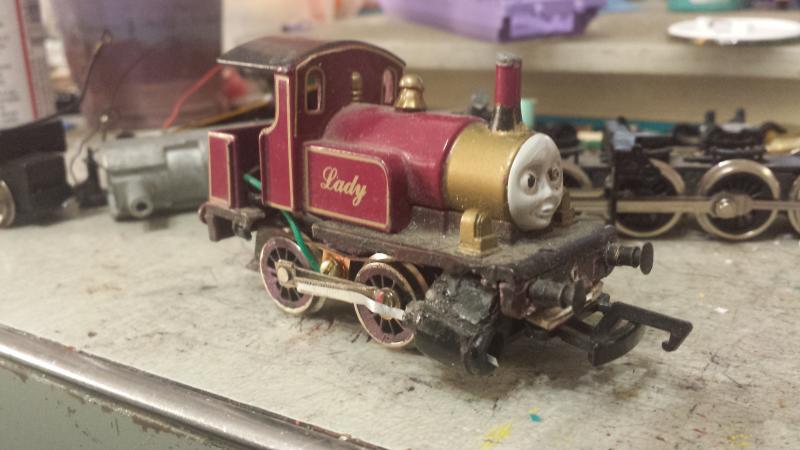
In 2008 I began an effort to build an operating model of Lady from Thomas and the Magic Railroad, using the Ertl toy model and the chassis from a Life-Like B&O class C-16 (an 0-4-0T commonly known as a "Docksider"). Progress has been slow, due to the work mostly being on-and-off (even after I got a motor that would actually fit inside Lady's shell in 2010). By September of 2014 I had gotten her to this state. She ran, but there was still a lot of work to do as far as appearance and body fit went.
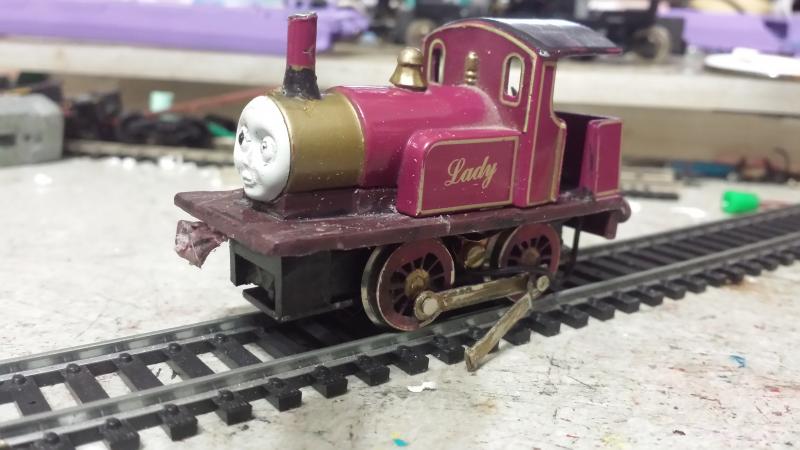
I have gotten back to working on her more properly today. Shell and footplate have been trimmed and filed in places, and the fit is now correct at last. The original cylinders have been sawn off to allow for easy fitting of accurate ones. And the temporary placeholder strips glued on to keep the connecting rods from dragging (I cut off the part of them that went into the cylinders, since it just had cheesy-looking pseudo-valve gear) have been removed, since I'm now ready to make proper Allen valve gear for her.
Posted
Full Member
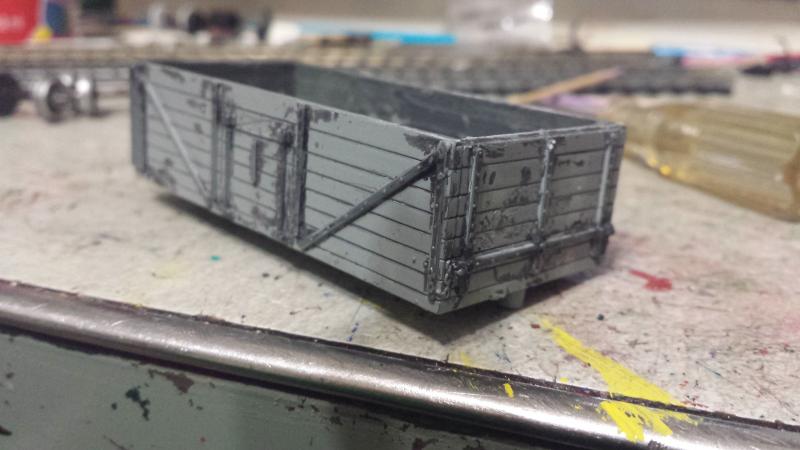
As promised in another thread, here's the progress on a do-over of weathering this wagon. Making inroads on getting the paint stripped off.
Posted
Full Member

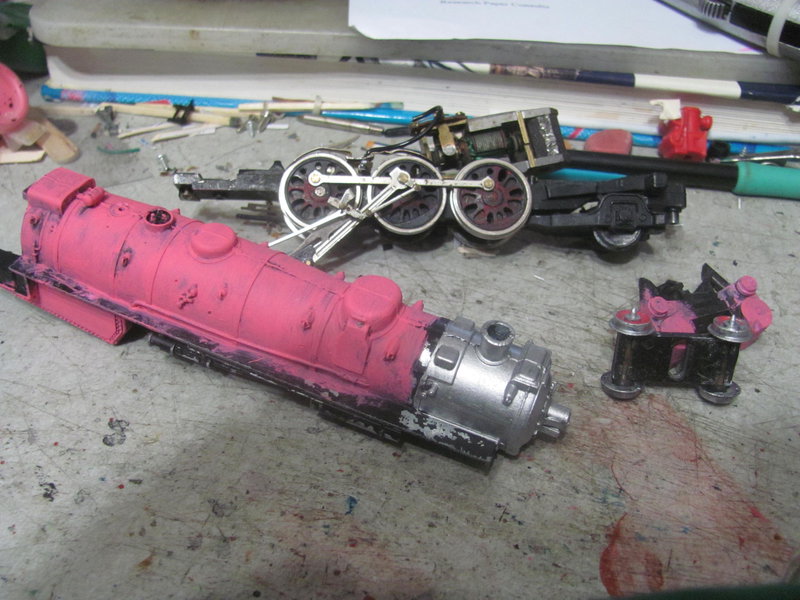
Apologies for the upside-down photo, or perhaps it is the gallery's coding that should be apologizing.At any rate, another project has arrived. It is a kit of a Union Pacific Big Boy. The kit was designed as a static display model, but I am going to turn it into a powered, operating model. It will be painted pink with red wheels as the Mantua Pacific is.
Though I despair of anyone here seeing the result…
Posted
Full Member
Looks good to me - the locomotive is right way up - you must be standing on your head.
You're a brave man for tackling this project - double everything. What's the plan re motor(s) and mechanisms?
Nigel
©Nigel C. Phillips
Posted
Full Member
When I bought the Big Boy kit I also bought a pair of U-jointed long shafts with worm gears. If I attach one of those to the other end of the motor shaft, that should let me use the single motor to power both sets of drivers.
I have assorted spare gears, some of which ought to be suitable for fitting to an axle on either set of drivers.
And I have even thought of a couple of ways to make metal flange/tread pieces that I can fit onto the drive wheels, following a bit of filing to ensure the diameter will be correct afterwards:
1. We have a number of spare brass grommets, and if some of those should prove to be of the right diameter, they would simply need to be cut and filed down to fit fully.
2. Making rings out of scrap brass strip and soldering them to washers.
Back-contacting pickup wipers will be made using brass paper fasteners.
Posted
Full Member
Shades of Heath Robinson - I look forward to updates. Is this one of those nice Revell kits?
Nigel
©Nigel C. Phillips
Posted
Full Member
Posted
Full Member

Here's another project in progress: A sand house. It's being built to plans from "The Boys' Book of Model Railroading", although with the height at the peak being 22 scale feet I have to wonder if the dimensions in the book plans were written down correctly..
Posted

Legacy Member
:thumbs;-):cool:
Owen
Last edit: by Silver Fox
web-cam 2.2.74.174:8081
if the lights are off no cam
if the lights are off no cam
Posted
Full Member
Posted
Legacy Member

:thumbs;-):cool:
Owen
web-cam 2.2.74.174:8081
if the lights are off no cam
if the lights are off no cam
Posted
Full Member
Great Northern sand drying houses were around 15-17 feet high, so the plan you have is quite tall. There would have been a coal-fired dryer inside, plus a dry sand reservoir and air pumps to deliver the sand. Wet sand was normally stored in a connecting low shed with a long opening track side, level with the floor of a boxcar - made shoveling the sand out easier. Lots of variants, sand was often loaded directly into the sand drying house, coal was stored either with the wet sand or in a separate connecting shed.
Are you going to have some sand towers? Great modeling cameo.
Nigel
©Nigel C. Phillips
1 guest and 0 members have just viewed this.