Brendan's Workbench.
Posted

Full Member
Alright, I'll upload redacted versions in their place ASAPHi Brendan,
Nice coaches, your practice has certainly paid off.
Could you please remove the photos containing the offensive ‘Death to …’ slogans from our peaceful and friendly model railway forum? You have made it clear that this is not a joke, but your personal protest against Deviant Art, so you should give them the your feedback, not us.
Many thanks and regards,
Bill
Edit: And thank you for the kind words
 Last edit: by ZeldaTheSwordsman


Posted
Full Member
I took another stab at my quasi imitation Greenwich couplers. Was very careful in cutting open the loop.
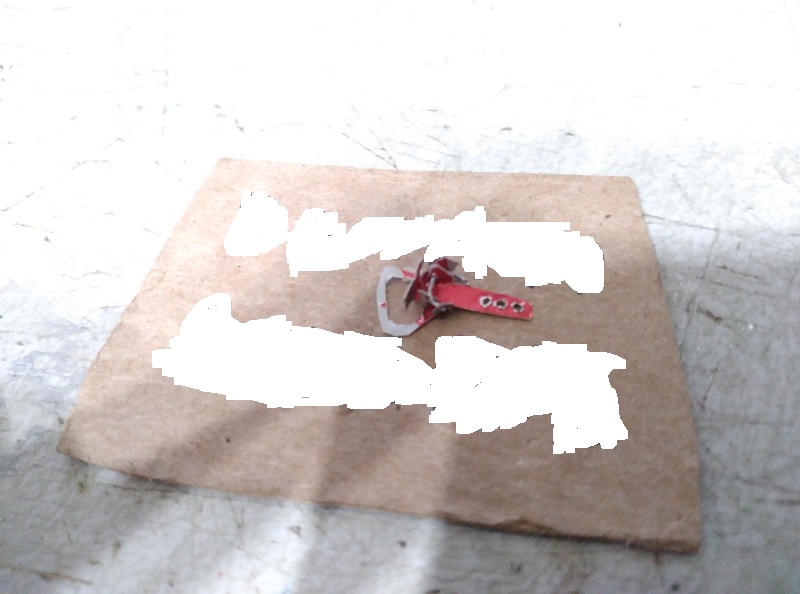
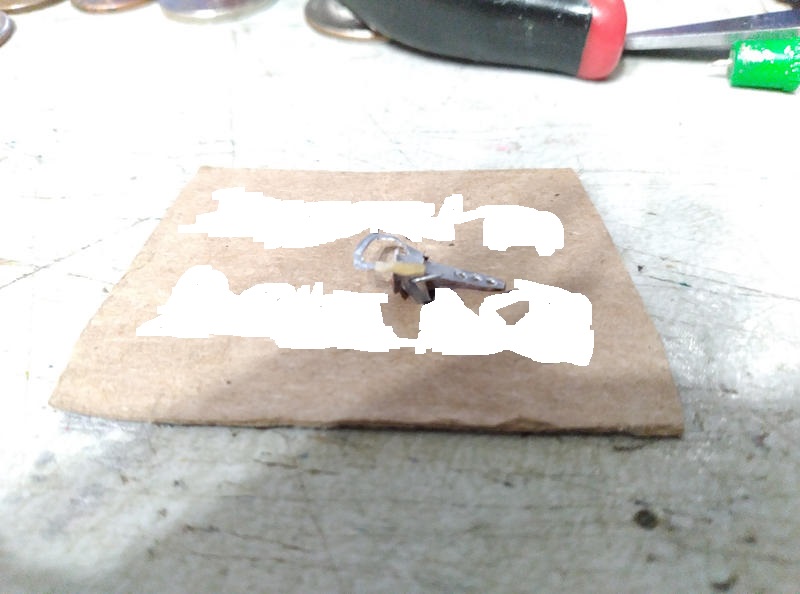
Managed to get one made up and seeming to work. Tried soda can aluminum again instead of brass, didn't want to waste my brass supply if I couldn't get this to work.
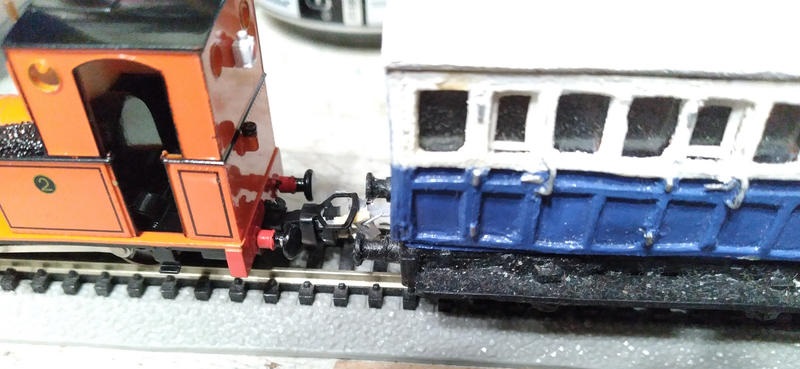
Got it mounted to one of the Skarloey Railway coaches. Had to L-bend the fret to get it at the correct height.
And then, I bunged together the N-gauge oval to test it out with. And lo and behold, it works! Now I just need to do up 9 more!
Posted
Full Member
Posted

Full Member
Best,
Bill
At 6'4'', Bill is a tall chap, then again, when horizontal he is rather long and people often used to trip over him! . . . and so a nickname was born :)
Posted
Full Member
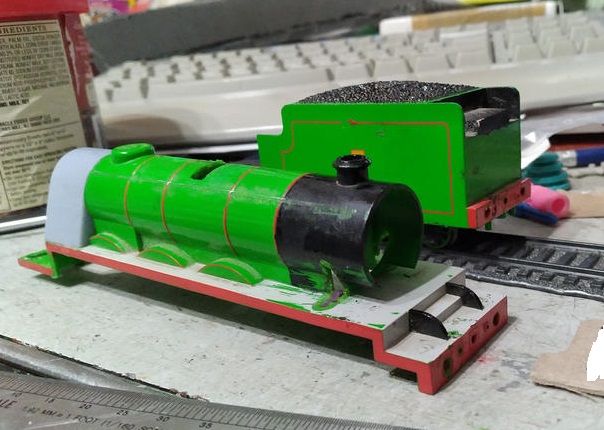
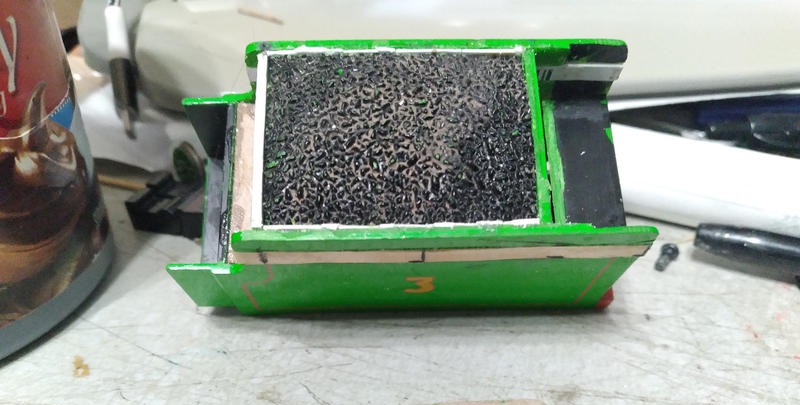
Finally getting on with this build. This is a freelanced long-haul tender for that Bachmann 2-10-4 I bought in 2019.
Posted

Full Member
Hi,Haven't made too much further progress on the milk van and Skarloey Railway coaches. However, I do have something to report.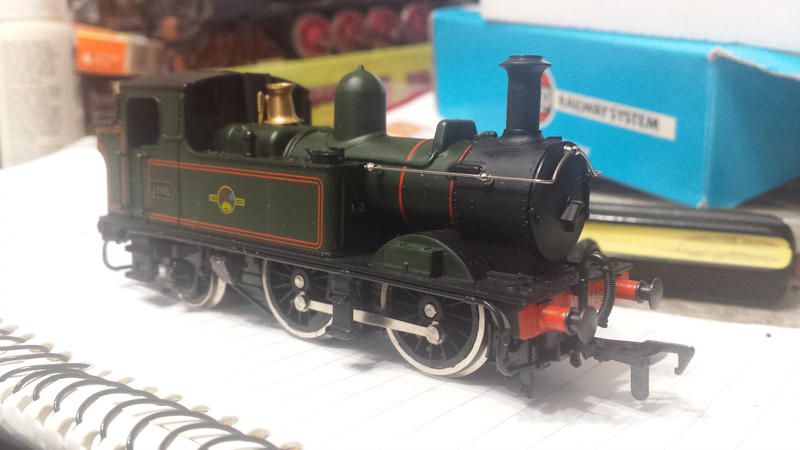
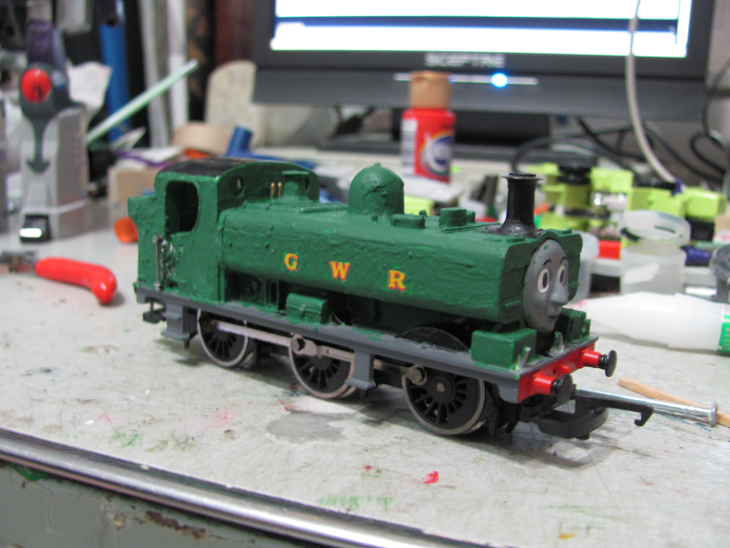
An Airfix 14xx, which shall become my model of Oliver. I will strip off the BR lining and emblems, and the numbering, and give it GWR shirtbutton emblems and renumber it to 1436 with transfers and plates from Fox. I also want to add auto-gear to it. Where all sells auto-gear detailing parts?
The only auto-gear detailing I know of is sold by Dart Castings as part of a comprehensive Autocoach detailing kit (GBP25). I decided that their useful guide to the kit (on line) and various bits you can buy from Dart could be bashed into some form of auto-gear for my Autocoach detailing (as I have two to do but not 50GBP to spend on the job!).
This link shows the gear installation on an autocoach.
https://www.world-of-railways.co.uk/techniques/how-to-detail-an-autocoach/
If you google for images they're easy enough to find showing auto-gear on Class 48xx or Class 64xx locos, I have a few but cannot post here for (C) reasons.
Colin
Posted
Full Member
[user=1916]ZeldaTheSwordsman[/user] wrote:Hi,Haven't made too much further progress on the milk van and Skarloey Railway coaches. However, I do have something to report.
An Airfix 14xx, which shall become my model of Oliver. I will strip off the BR lining and emblems, and the numbering, and give it GWR shirtbutton emblems and renumber it to 1436 with transfers and plates from Fox. I also want to add auto-gear to it. Where all sells auto-gear detailing parts?
The only auto-gear detailing I know of is sold by Dart Castings as part of a comprehensive Autocoach detailing kit (GBP25). I decided that their useful guide to the kit (on line) and various bits you can buy from Dart could be bashed into some form of auto-gear for my Autocoach detailing (as I have two to do but not 50GBP to spend on the job!).
This link shows the gear installation on an autocoach.
https://www.world-of-railways.co.uk/techniques/how-to-detail-an-autocoach/
If you google for images they're easy enough to find showing auto-gear on Class 48xx or Class 64xx locos, I have a few but cannot post here for (C) reasons.
Colin
Colin, thank you for the tip. Nigel (BCDR) already supplied me with a couple parts that would work for the loco, but it's good to have a name of the maker. I'd accrued a number of reference pics already, but the more the merrier.
Posted
Full Member
Finally getting back to this project to do it right, with a firebox a friend 3D-printed for me.
Last edit: by ZeldaTheSwordsman
Posted
Full Member
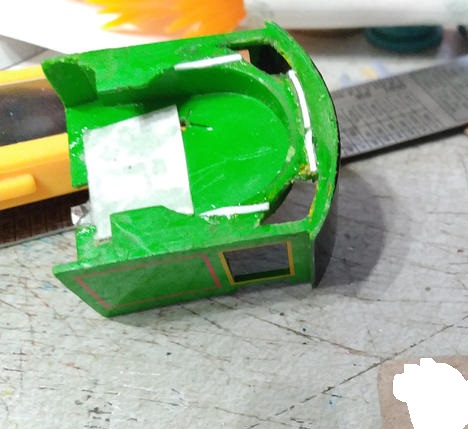
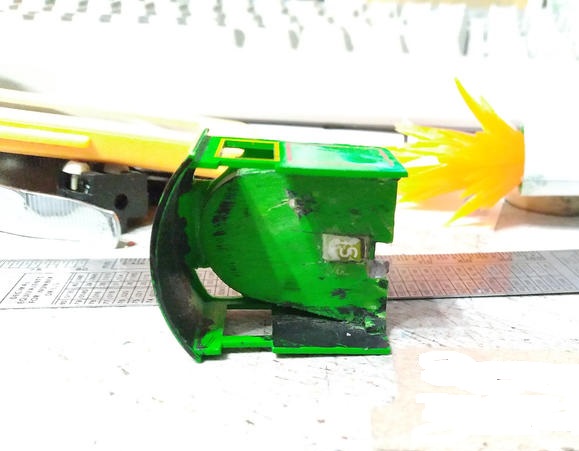
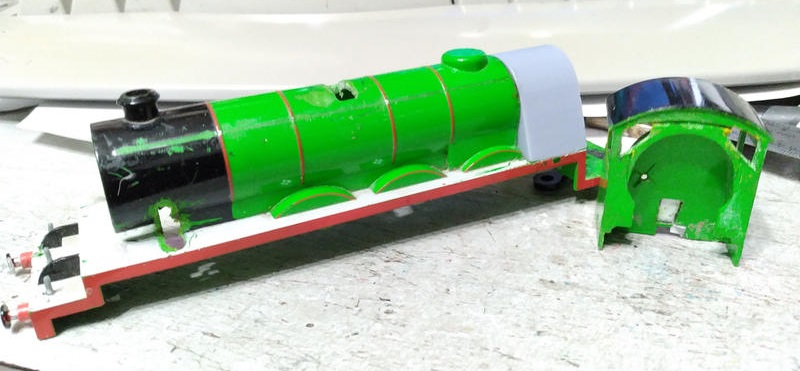
With the cab, I evened out the window cutouts, filled in the gaps where the hidden edge of the original Belpaire firebox meshed, and filled in the awful poorly-done firehole cutout I made during my original attempt at backhead detailing.
I actually cut the windows too low by mistake, so I had to fill the bottoms back in a bit.
After that was done, I prepared the body and tender for further work by removing the buffers and other such extremities.
I filled in the gaps on Henry's body with Sugru, which seems to be working well enough.
And then, work began on the tender.

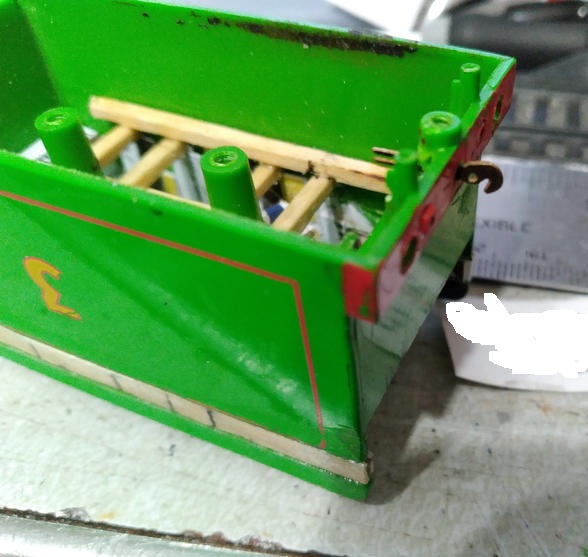
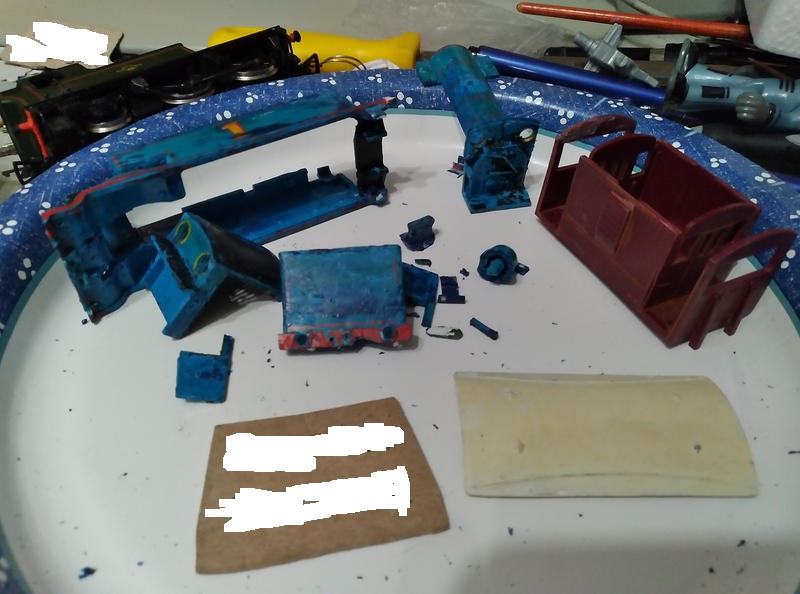
Cut the top off in preparation for raising the tender to the correct height (the Bachmann model is too short vertically compared to TV). Also remove the wheels in preparation for giving the tender a bath in PineSol to remove the lousy initial paintjob I did on the gray part.
I then cut the coal load out, and sawed the screwposts (which were only attached to the top) off so that I could attach them to the sidewalls instead.
This was done via bits of matchstick and plenty of CA glue.
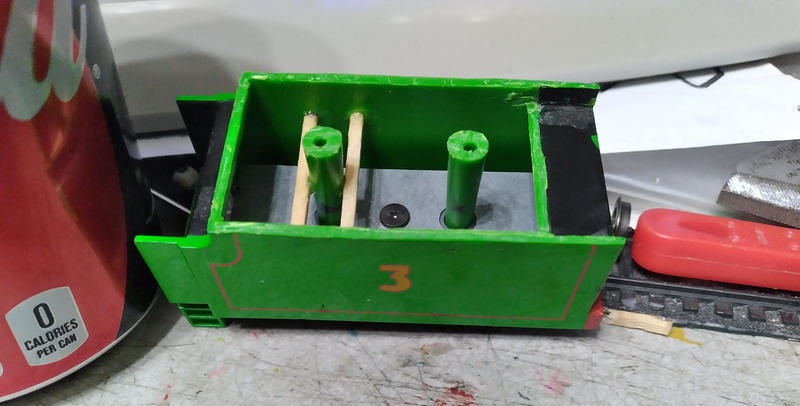
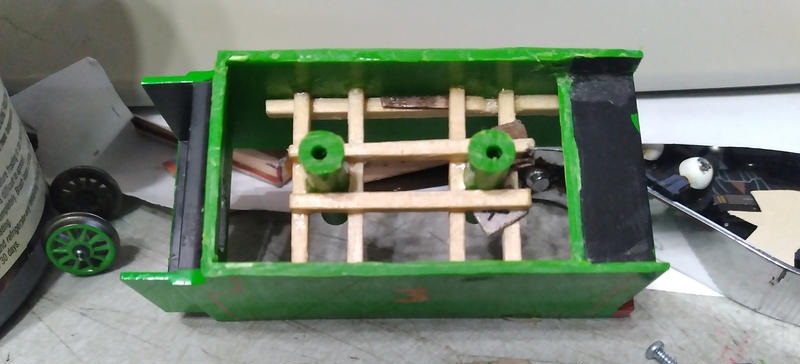
Got the sidewall height extensions added (they still need some smoothing, though), moved the back wall of the tender's coal bunker forward to better match the show, and redid the front wall to be less toylike. I cut and filed the coal load to fit, and installed wooden pegs into the screwpost remanants to let it peg lightly into the tops of the screwposts.
Like so.
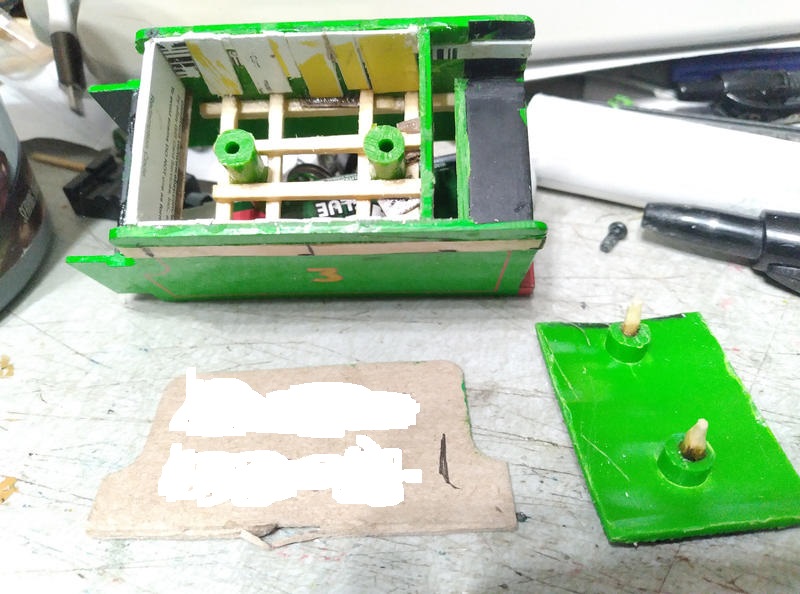
Next up is the upper back area of the tender.
Posted
Full Member

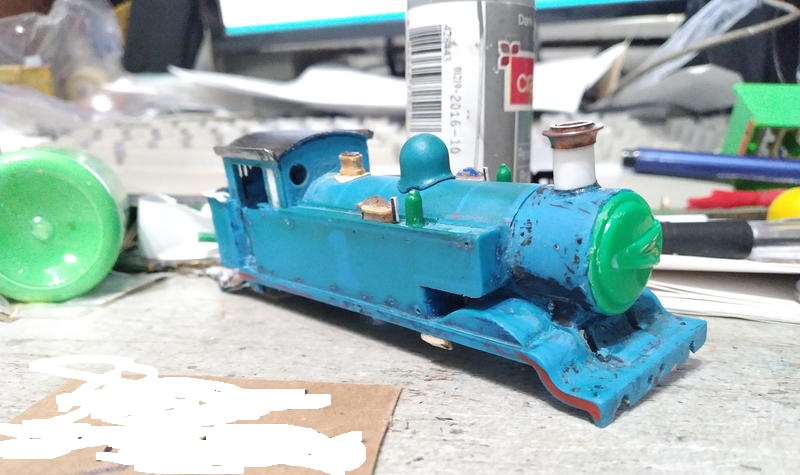
Cut away a small part of the coupler screwpost on the tender to clear a path for installing a Smith's 3-link coupling; how much I'll actually use it for coupling is uncertain, but it'll look worlds better than the stock plastic coupling hook.

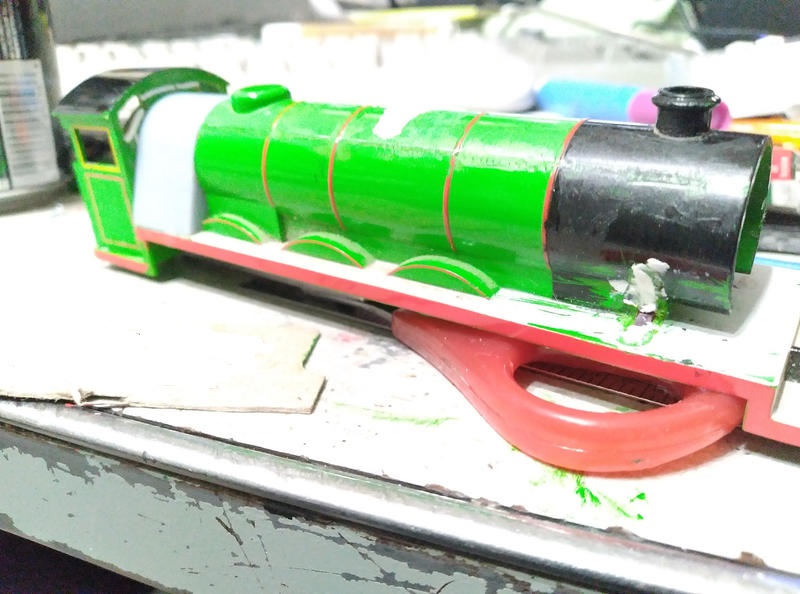
Also have some progress to report on the body. I did a lot of sanding, and have also reworked the boiler band spacing (the stock spacing is based on Henry's Thomas and the Magic Railroad-appearance, where due to carelessness in replacing the bands after his model was repainted for the movie two of them were erroneously shifted forward; this was never fixed). Now I need to work on the splashers…
Posted
Full Member
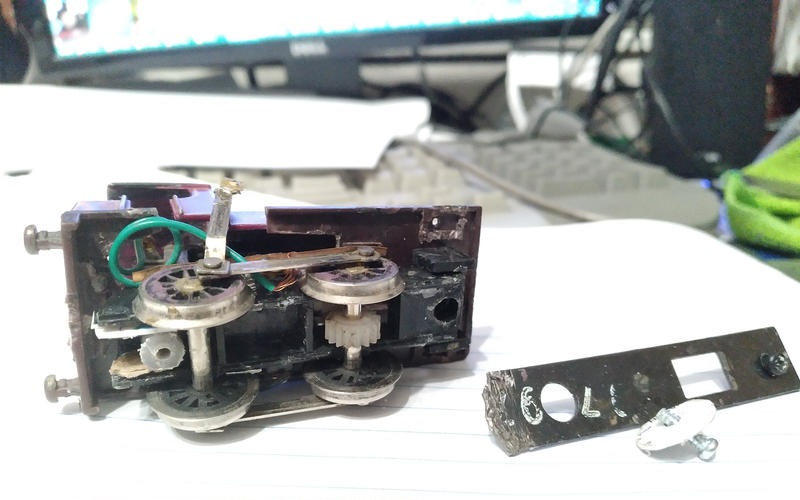
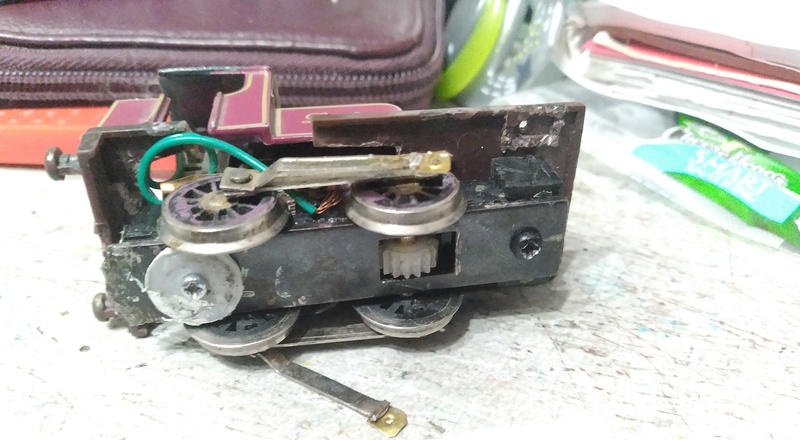
I extracted the remains of the broken screw and managed to find a replacement, and I added a new screwpost to the chassis to properly secure the bottom plate (previously held on by a lot of glue).
I also discovered that I'm going to have to add some shims on top of the core of the steam chest to elevate the front of her running plate to the correct height.
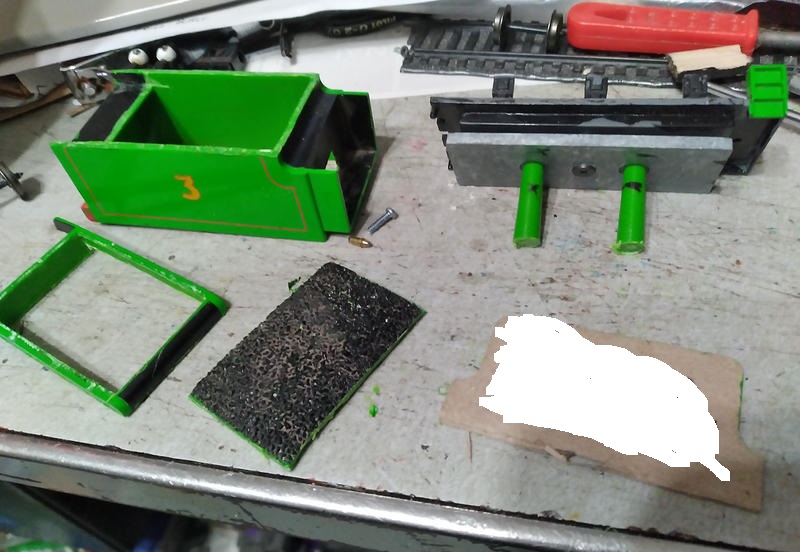
By the way, that Tri-Ang brakevan is on the projects list too. Going to receive a bath in PineSol to remove the current paintjob, and get repainted into NWR gray. Also going to receive glazing, an interior, a proper smoke jack, and homemade S&W-type couplings.
Posted
Full Member
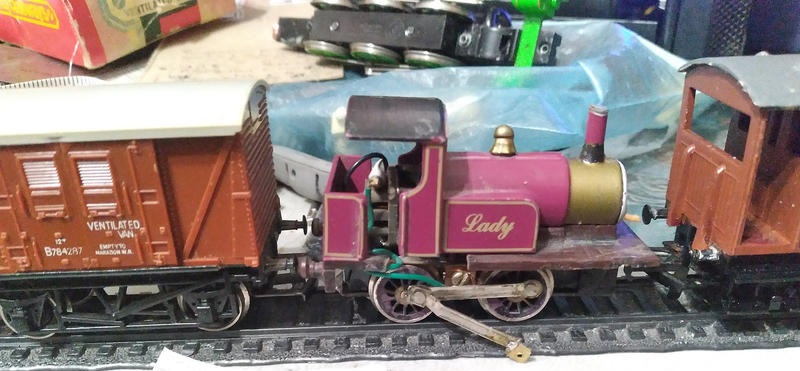
Realized I'd been remiss and never posted the completed (mostly) Skarloey Railway vintage train. Allow me to correct that.

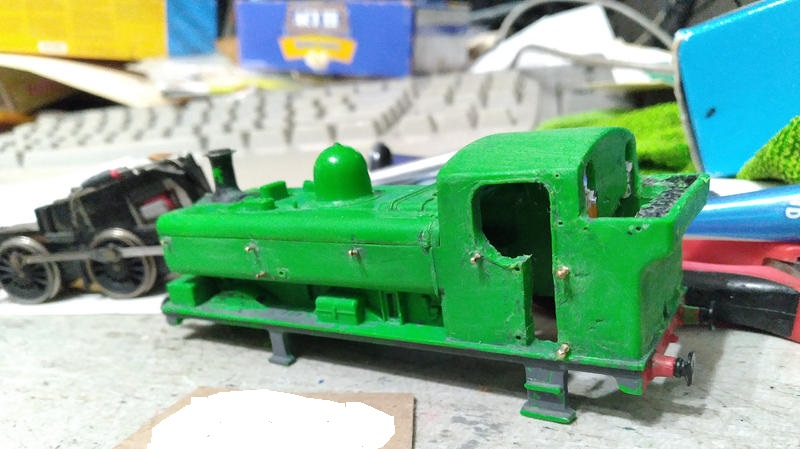
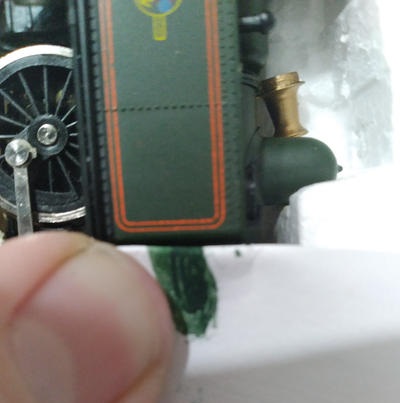
Progress update on Henry's tender chassis. Unfortunately I can't really do too much more with Henry until I get some filler putty (using the Sugru is a waste because I only need a small portion and once you open the pouch everything in it is going to dry out whether used or not) and a decently-matching green.
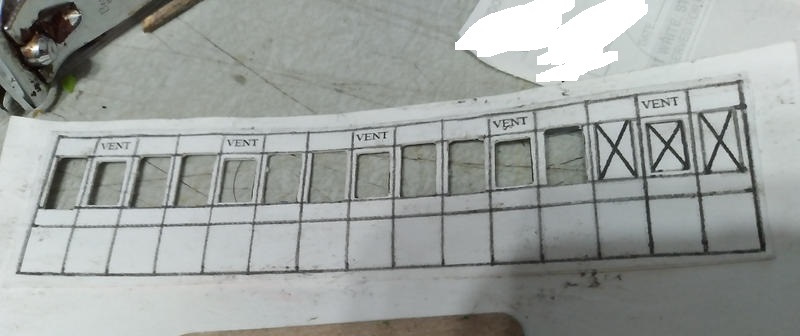
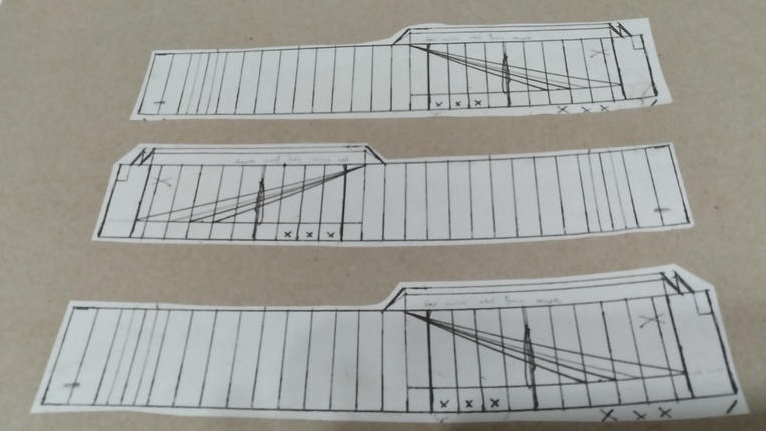
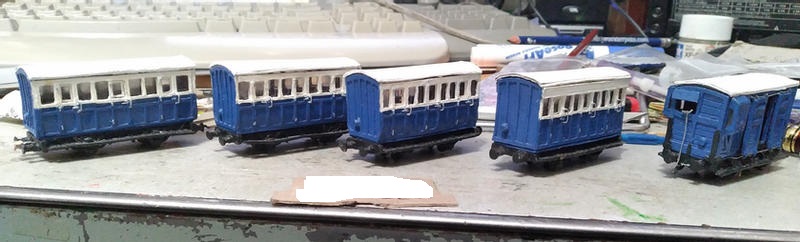
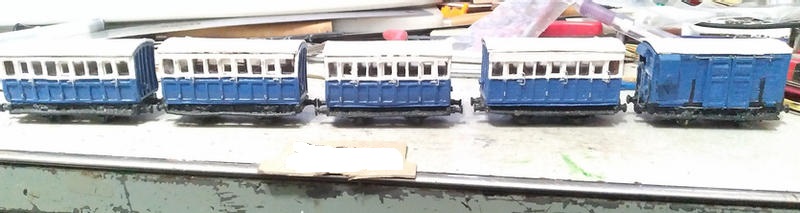
I finally got around to starting on my models of what are known as the Old Coaches (a trio of coaches similar to Holden 4-wheelers, only seen in the first season).
And now… Now for something that requires context.
Years ago, I made a failed project of upcycling my Hornby Duck and trying to paint him GWR green. This involved an abortive attempt to add rivets around the cab, bad lamp irons, an incompetent paintjob with rubbish paint (PSA: don't use Americana acrylic on plastic, folks!) that wasn't even a dark enough green, half-baked inexpert attempts to shave and filed down the inaccurate back slope of the cab, a dodgy effort to make the rear lamp irons and tool hooks, a clumsy attempt at the rear window grilles, adding Fox Transfers "5741" plates (that I unfortunately manage to lose
 ) and at some point along the way adding real handrails in place of the molded ones (the only thing that turned out anything resembling decent).
The rubbish paintjob looked like this:

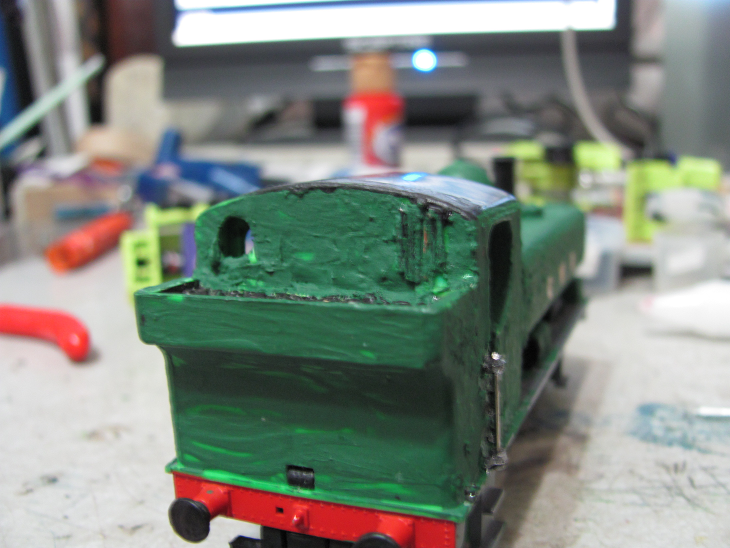
Blarghle.
After belatedly realizing just how trashy it was, I scraped a bunch of the paint off. But there was only so much I could remove without wrecking the remaining molded detail, so (based on a tutorial I read on a forum) I attempted to clean the remainder off by soaking him in dot-3 brake fluid for a couple days and then scrubbing with a deprecated toothbrush, but it had limited effect; inadequate vigor on my part may be to blame.
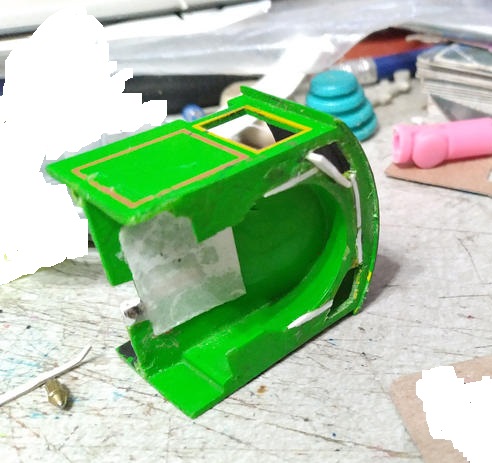
Duck languished in this semi-stripped state for years. But the other day, I finally came back to him. I plucked the naff front lamp irons, scraped off the clumsy rear irons and hooks (and the worst of the glue spots), evened up the cab doorway cutouts (one still needs some filler though), removed the bunker grabs (to get them out of the way) and cut out part of the molded coal load so I could properly file down the back of the cab. Due to the cutting angle on where the coal met the cab and my earlier clumsy attempts to shave down, the rear windows were wrecked. So I cut the bottom out and filled in with bits of plasticard. On Friday, I vigorously scrubbed with rubbing alcohol on a toothbrush to at long last remove the remnants of the lousy paintjob and drilled the rear windows back open.
Voila!
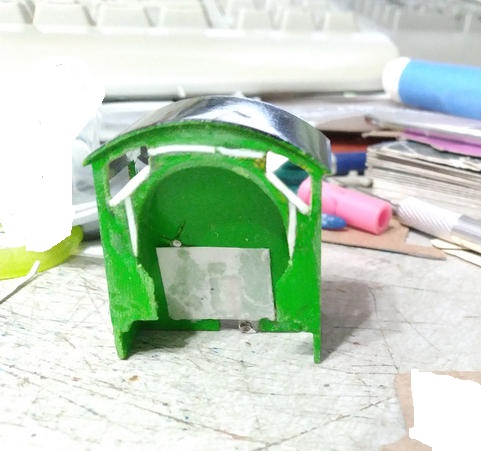
I've got some damaged molded detailing to repair, and I also plan to add some more details: The cab roof gutters and hatch, the hatch between the rear windows, the rear window grilles if I can do them better, better attempts at the rear lamp irons and tool hooks, spectacle frames, better lamp irons, and the whistle shield. Then I can sand him up, and paint him a better dark green (and do it right this time). I'll match it to the green of my Airfix 14xx, and that'll be close enough for me.
I'll eventually need to source replacement whistle chimes (lost his and they're not quite a match anyway) and 5741 plates, and get "GWR" transfers and running plate number transfers. But that will have to wait for after the pandemic (well, the transfers I might be able to manage myself if I get inkjet decal paper). Still, at least his body will look a lot better than it did.
I also plan to build up a cab interior insert for him.
Posted

Site staff
Been there, done rhat

Cheers
Matt
Wasnie me, a big boy did it and ran away
"Why did you volunteer ? I didn't Sir, the other three stepped backwards"
"Why did you volunteer ? I didn't Sir, the other three stepped backwards"
Posted
Full Member
I've had reasonable results stripping a bad paint job off a loco using Dettol ( possibly branded Lysol where you are ? Or try Pinesol). You soak it in a bath of Dettol for 1 to 2 days, using a toothbrush or old nail washing brush to regularly scrub it over with the same liquid its in. If you use water it DOES seam to just make a stringy mess. Just be aware it CAN effect the plastic on some makes, but then again so does brake fluid or T cut so I wouldn't try it on something too precious. And be warned if its something like a kit that has been glued it CAN leave you with a kit of parts !
Been there, done rhat
Cheers
Matt
Well, I didn't know about the PineSol method at the time, didn't learn about that until 4 years ago. I do know it now, though (see a recent post where I said "that Tri-Ang brakevan is on the projects list too. Going to receive a bath in PineSol"; the van has been having that bath for the past few days, along with my Hornby Thomas).
I was reluctant to try it to finish the job on Duck, though, because it can corrode some metals and I didn't want to remove all the handrail stanchions and the chimney cap. Rubbing alcohol on a toothbrush worked well enough.
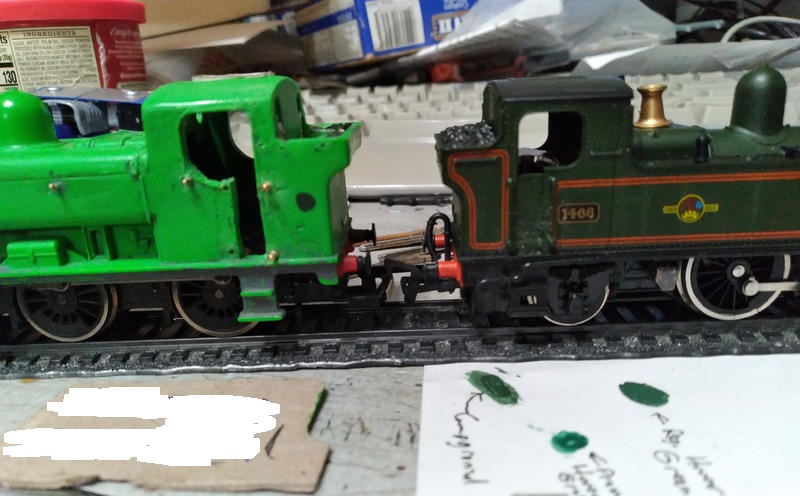
Does the paint on the card look like a decent match for the 14xx?
Posted
Full Member
And I may have to try rubbing alcohol on a toothbrush on Thomas. The PineSol stripped the brakevan quite nicely, but not Thomas… It seems to have some definite limits when it comes to stuff like Tamiya acrylic gone rubbery (what Thomas was painted with). A good portion of the clear patches you can see here are actually from me resorting to scraping. Sigh…
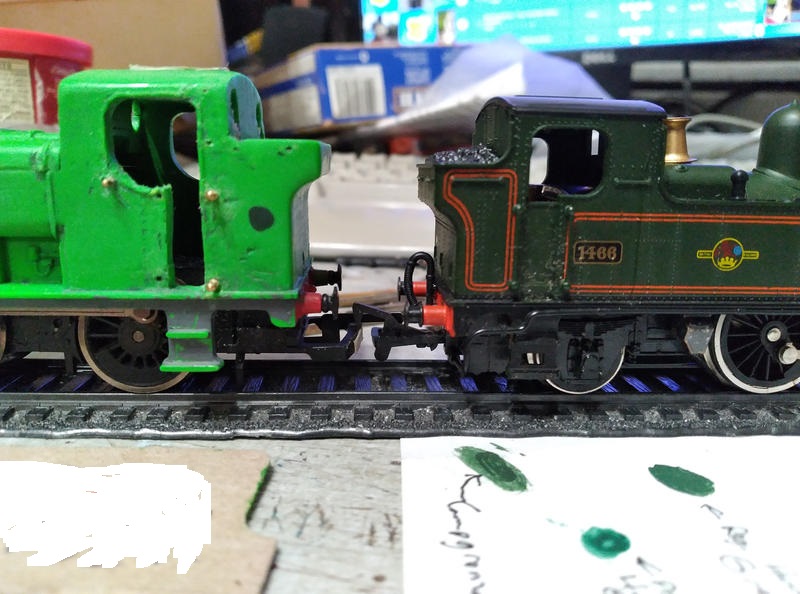
Also, have some hopefully-better color comparison pics for that paint.
Posted
Full Member

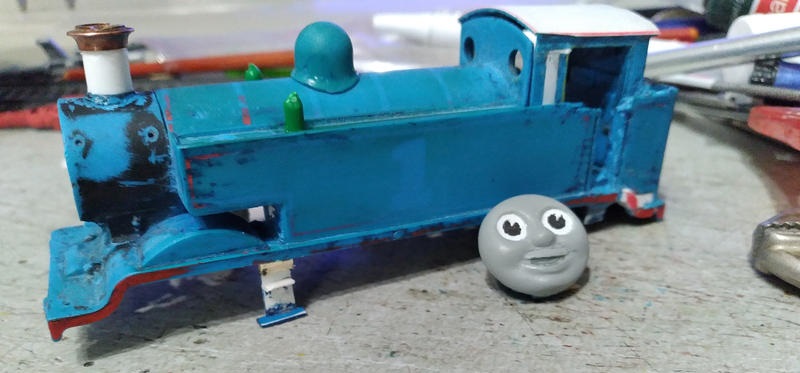
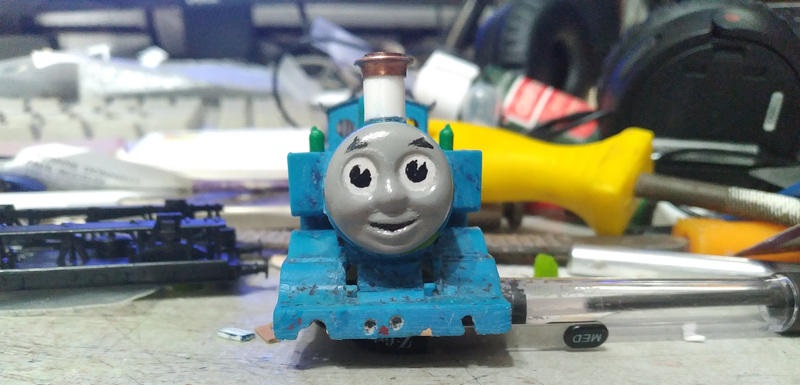
Here he is with almost all the remaining bad paint scraped and sanded away, clearing the decks for reconstruction and repainting. Apologies for how cursed the face looks.
Anyway, as part of reconstruction I had to sacrifice the additional cab lookouts he had versus a real E2. The frames broke years back when I cut the cab doors open (because I was going too hard too fast), and never wanted to stay glued. So I gave up and filled them in.
I also started to reconstruct the rear running plate downsweep and accompanying bunker dip. I had modified it to be straight at the back (like Thomas' customary appearance and even the Reverend's E2-based Thomas model). But more clumsy cutting work had broken the bunker off and the glue joints were frail; I had to revert in order to restore structural strength. If I ever get another Hornby Thomas shell, I can try for straight-at-the-rear again, but…
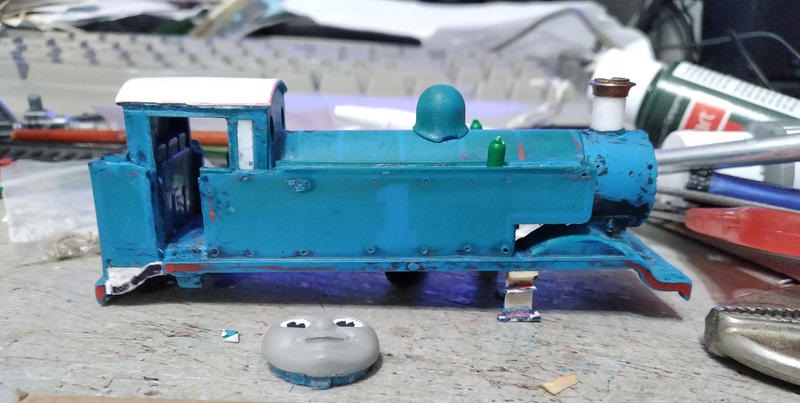
* Got the reconstruction of the rear running plate downsweep mostly done (Even found an original piece of the left-hand one in one of my scraps bins). The reconstructed dip on the right-hand side had to be made thicker by one layer of plastic and further reinforced by a bit of matchstick glued under the rear half of the cab floor.
* Got the face mostly painted back up
* Reinforced the cab roof with cardstock.
* Reattached the scratchbuilt forward steps and reinforced the joint with bits of angle block cut from a matchstick
* Used bits of sprue to make the protrusions atop the tanks forward of where the water filler caps would go (Are these part of the water injection system?)
* Cut away the plastic between the splashers and the inside lower leading edges of the water tanks to give daylight under the boiler
* Built up a new funnel, the cap for which came courtesy of our own BCDR.
Next up would be the cab gutters and hopefully the water filler caps, followed by.. probably reconstructing the coal rails.
Posted
Site staff
At the time I'm sure you were quite happy with the results, but the more you do, the more you hone your skills and realise you can do even better ! Well done young Sir :thumbs I'm enjoying seeing where your modelling mayhem takes you next ! :hmm
Keep up the good work and may the Mayhem And madness continue :cool wink
Cheers
Matt
Wasnie me, a big boy did it and ran away
"Why did you volunteer ? I didn't Sir, the other three stepped backwards"
"Why did you volunteer ? I didn't Sir, the other three stepped backwards"
Posted
Full Member
It's good to see you re visiting some of your earlier projects, and using your improving skills to re work them !
At the time I'm sure you were quite happy with the results, but the more you do, the more you hone your skills and realise you can do even better ! Well done young Sir :thumbs I'm enjoying seeing where your modelling mayhem takes you next ! :hmm
Keep up the good work and may the Mayhem And madness continue :cool wink
Cheers
Matt
Eh, I was temporarily happy with Henry early on, and I initially blindly defended the horrible job on Duck (got outraged at criticism of it even :oops:
 )… But that's about it. I was NOT happy with how I left Thomas, with the blue Tamiya having gone on very rubbery and too thick…
Ugh…
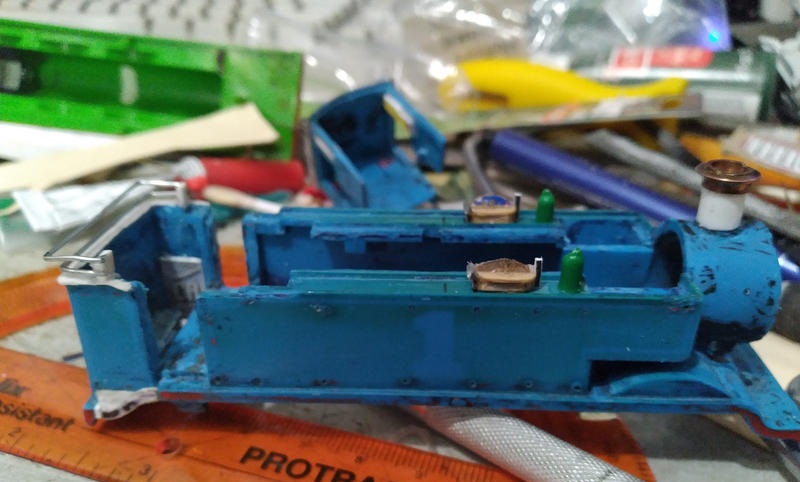
Anyway, more progress on Thomas.
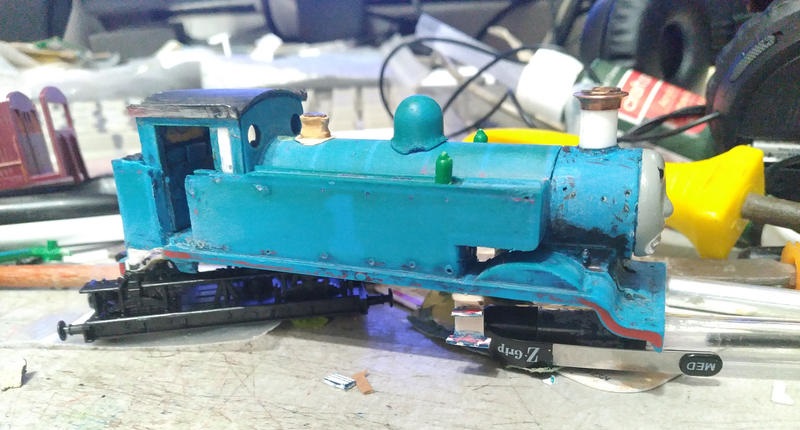
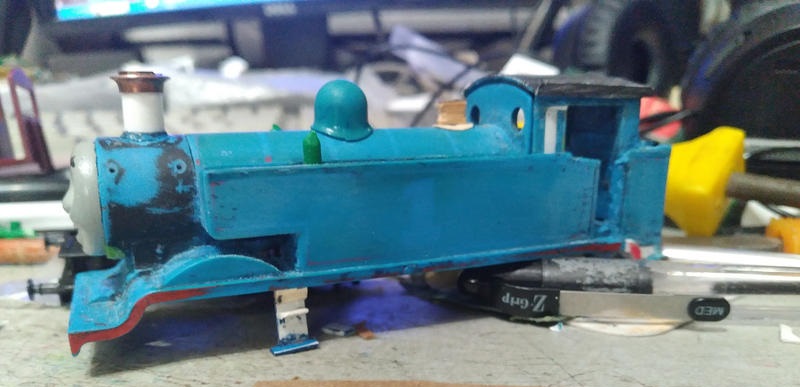
Whittled a new safety valve, finished repainting the face, and got the smokebox fixed so it can actually hold the face again. Wasn't able to fill the front bufferbeam, probably going to have to build up a new one and graft it on.

Got filler putty and a possibly-screen-matching green paint, so I'm back to making progress on Henry's tender body.

And now for a concept I've been playing with and could use feedback on: An extended bunker for Thomas.
Last edit: by ZeldaTheSwordsman
Posted
Inactive Member
You must have been very gentle with 'Henry's tender body'

Cheers
Evan
Posted
Full Member
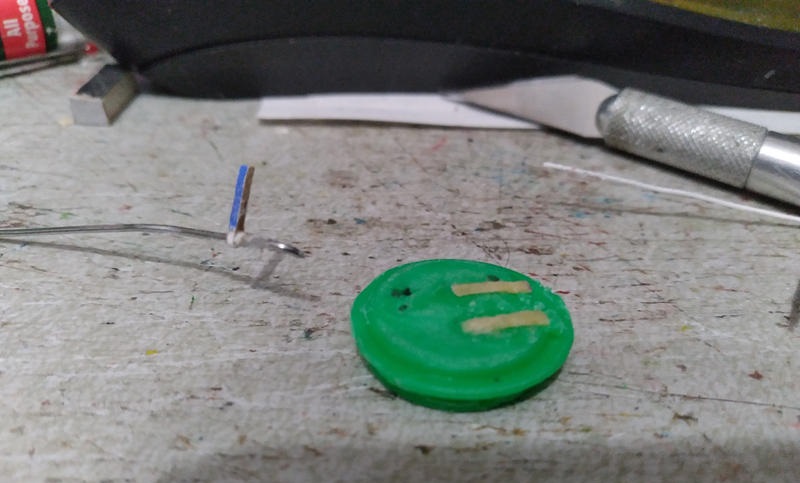

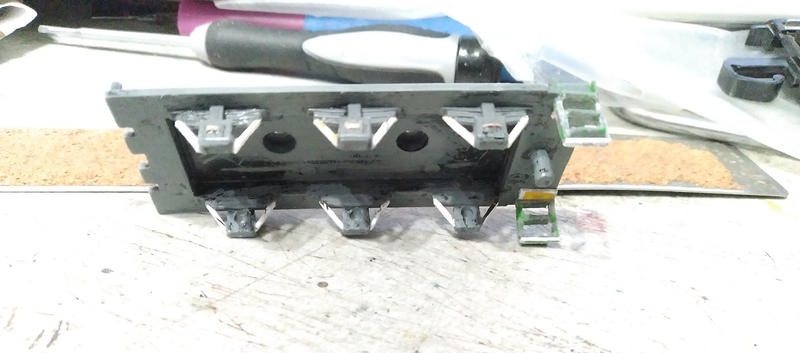
One thing I've been working on is a smokebox door, made from the cap of a storage tube (which I think once held test strips for my parents' hot tub but not sure).


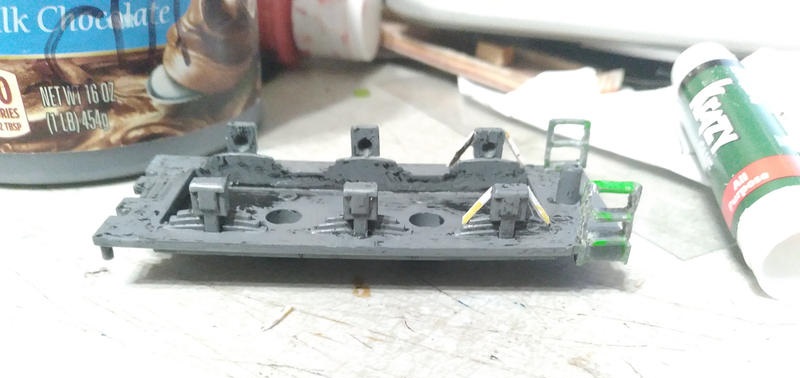
The other area of focus has been the coal rails, which I've finally got done.
1 guest and 0 members have just viewed this.