Birkenhead Woodside
Posted
Guest user
A layout in progress, slow progress...
Marty beat me to it :thumbs I've got one of these aluminium folding steps you can adjust to various positions. I was going to suggest one of these so you could put it in place to bridge right over the layout and oot the veluxcheers
Matt
Posted
Full Member
I had tried the aluminium steps idea - we've got a couple of them, different sizes, but the geometry of the loft and the layout - the fiddle yard is under the junction board, and extends further back to the loft wall so I can't "bridge" the layout with a ladder. I think Marty is suggesting just a plain copy of the extended Woodside level which I could use for access to the roof…. anyway I think I know what I'm doing now (as much as I ever do).
Perhaps I should just say that there wasn't a great deal of thought involved with this layout - basically I arrived home after the HA, all stented up, with the words of the Staff Nurse ringing in my ears - you should have more "me time" (at the time we were both busy teaching Welsh learners, organising stuff for Welsh learners and writing a column in our local rag) - so I thought right, back to model railways and up to the loft, Margaret wanted to change the garden, perfect. I decided on Birkenhead, spent a lot of time at 6C in my trainspotting days, and got on with it. I just had a rough idea of where things would be - and after kitting out the loft, started building baseboards. The fact that it seems to work, and allows me to run the timetable, is pure good luck….. I didn't actually look at the timetable… until after I'd laid the track….honest! I changed the platform layout at Hooton from an island platform with a passing loop, and added a third platform on the loop… just because it looked better… turns out that was one of the main reasons why the whole thing works.
As I've said before I don't do planning… just do it, if it doesn't work, change it 'til it does……. works for me!…. often takes quite a while mind……
Keith
Do I have a plan? Na, if I did I'd spend most of my time trying to remember where I put it.

Posted
Guest user
cheers
Matt
Posted
Full Member
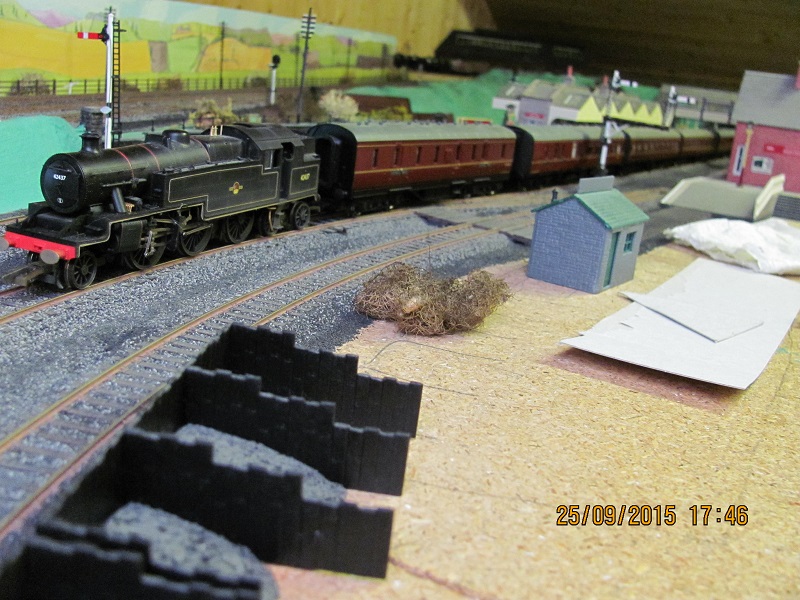
Right after much thought, I'm starting on the two tunnel solution.
I've decided to be a bit braver this time, rather than posting something when the job was well on the way to completion, as I did with the Goods Shed, this time it is as it happens, or not, as the case may be. Depending on how it goes, and how much time I'm allowed in the loft (always a lot of debate about that!), I'll hope to post progress weekly. If things go badly wrong mind, things will go very quiet. I'm hoping to have the basic scenic board finished in about six weeks, the Marty additional board will need more stocks of 2x1 and floorboards.
I've used the Peco tunnel mouth already on the layout, so I'm using them again… now that I've found the box they were in…. no plans and no system either when it comes to storage for all the stuff, which will be useful sometime, I buy.
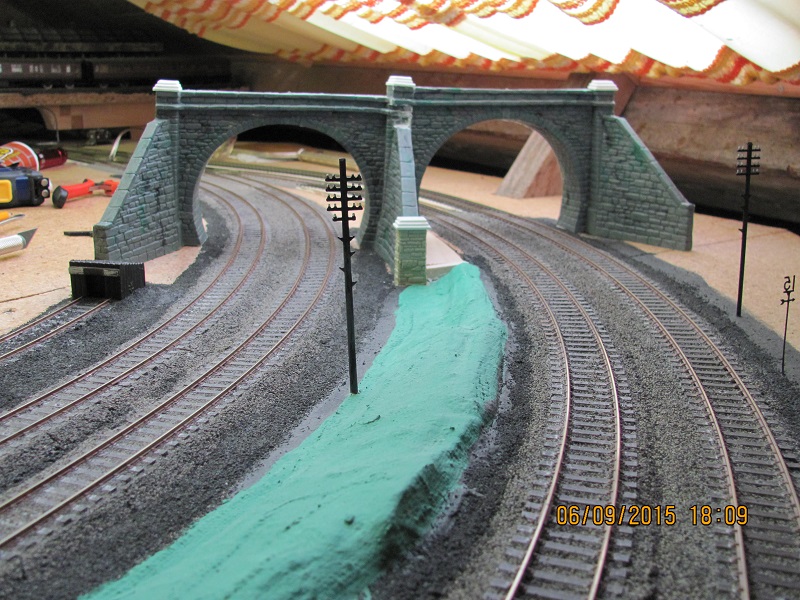
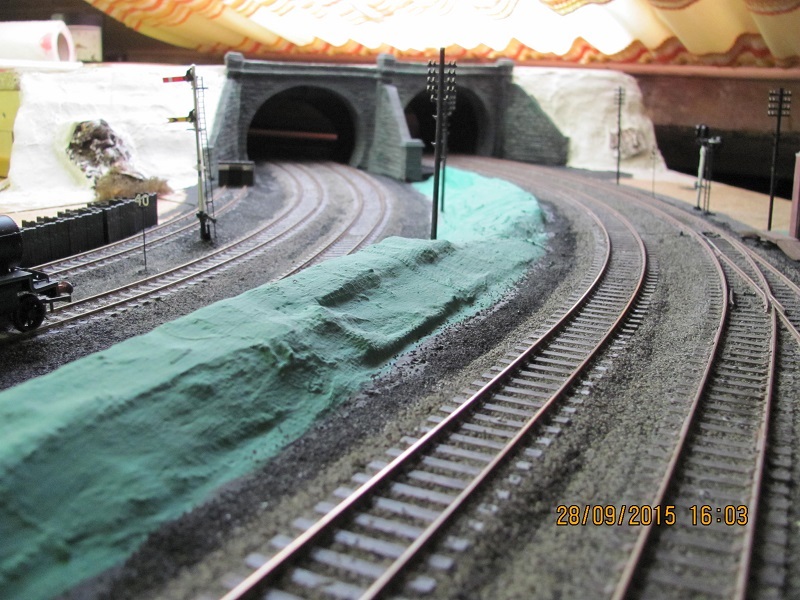
So the Hooton tunnel mouth will be roughly in this position :
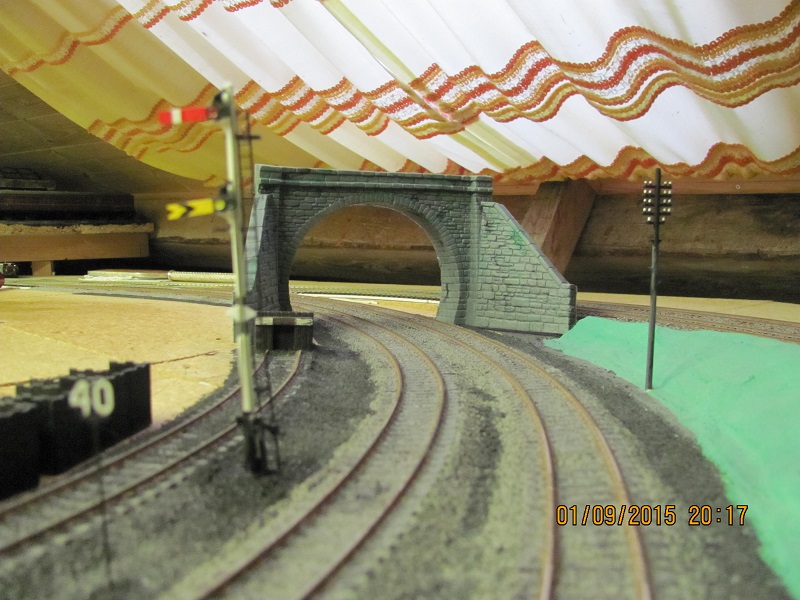
or from closer in
The adjacent tunnel mouth for the Birkenhead line will be attached to this - but there is a height difference of about 1/2 inch here, the Hooton line is on a gradual incline, the Birkenhead on a decline. I've a bit of work to do to get this one in place….

I can see my favourite wills Panels coming to my rescue again. I'm off for a ponder…
Just as a postscript, on the various gradients, only the top section (Woodside Station, 6C, yard and Goods Shed, Oil depot), Hooton Station and the Fiddle Yard are on the level - even the storage loops under Woodside are on a slight gradient. The height difference between the fiddle yard and Woodside is 8.25" - and to make that climb "reasonable" for the majority of locos, the run up is one long gradual climb apart from a short decent into Hooton Station. There are a few locos which still struggle, the Bachmann Jubilee has a problem with just three bachmann Mk 1s - the Bachmann Fairburn tank - no trouble with five or six…. all very puzzling - one day I'm going to try adding some lead to the Jubilee.
Keith
Do I have a plan? Na, if I did I'd spend most of my time trying to remember where I put it.
Posted

Inactive Member
Max
Port Elderley
Port Elderley
Posted
Full Member
Glad you say that, and thanks - my first aim with this layout is that the track looks the part, for me it is the most important aspect of a layout… then follows all the track "furniture" including signals which work, and within the restrictions of OO are right. I must admit that ballasting is not my favourite pastime… and I've been putting off ballasting the pointwork in the marshalling yard until I'm in the mood, one day though it will get finished…. likewise the signalling of Woodside Station. I have ordered a colour light signal with shunt signal and platform display (theatre box - I'm getting the jargon) from Absolute Aspects for the approach to Woodside, there isn't really room for a proper gantry - although one day I may well have a go at building one. At the moment running through the timetable to see if I can manage it with the track/space I have is my main priority, and excuse for not doing other things. However having gone into print with these tunnel mouths, I must get on with them - it will make a big difference to the "look" of the layout - and I've had an idea… so I'm off upstairs to see if it is a good idea….
… incidentally, how do I put a photo with my name/location info on posts? - not decided on which photo yet, but when I do I need to know what to do.
Keith
Do I have a plan? Na, if I did I'd spend most of my time trying to remember where I put it.
Posted
Inactive Member
Use the buttons at the top, viz:-
My Account > Avatar - for your photo
My Account > Profile ↓ Signature - at the bottom
Max
Port Elderley
Port Elderley
Posted
Full Member
Thanks again for the info - as soon as I've decided which photo I now know what to do.
No progress today - shopping (at least it is only once a week), but yesterday's idea wasn't bad at all, after some modification, and I may well have the tunnel mouths ready to fix tomorrow…
Keith
Do I have a plan? Na, if I did I'd spend most of my time trying to remember where I put it.
Posted
Full Member
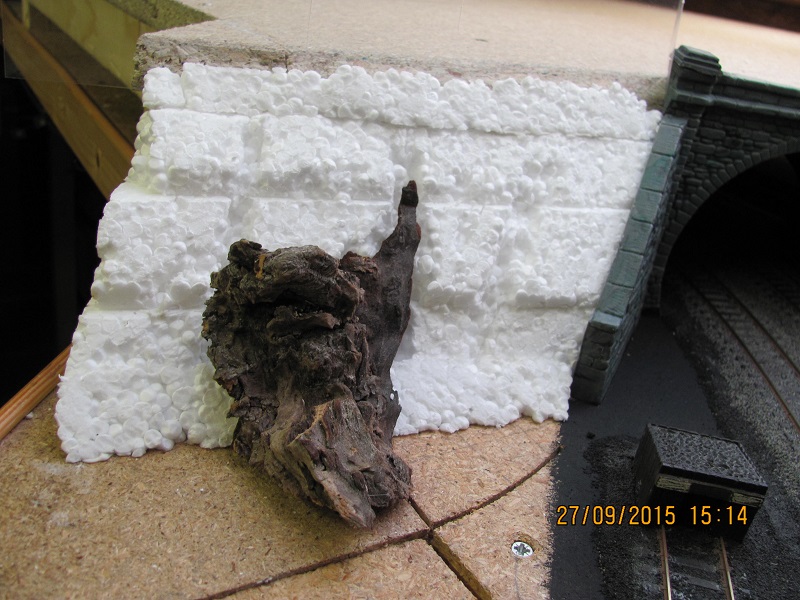
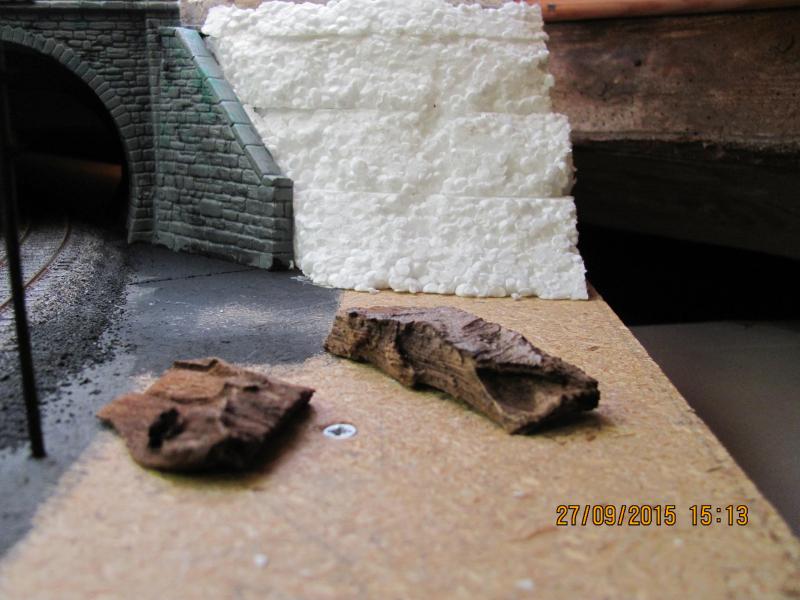
I decided that getting the two tunnel mouths together would need a fair bit of cutting, began by attacking the back of the join between the arch and the retaining wall with a knife to "straighten up" the side wall.
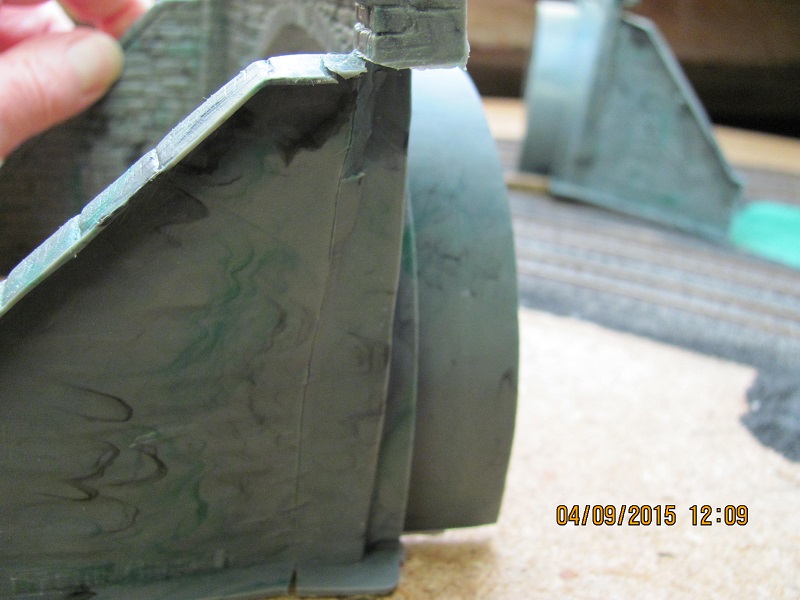
I then reoved the capping stone from the other tunnel, cut that join the same and made a cutout in the top wall so that the two tunnels would sit together…. the idea being that the trimmed retaining wall would then sit under the capping of the first tunnel mouth…. this is getting very complicated wordwise, hopefully the photos will clarify
… with the height difference between the two tracks, the far tunnels sits on top of the other tunnel…. not sure of the plastic used for these tunnel mouths, some sort of polythene… or other "-ene" but gluing is not easy, and really they need to be attached to the baseboard. (the other Peco tunnel mouth is held in place by the plaster scenery surrounding it). I'm sure somebody will know exactly what plastic is used.
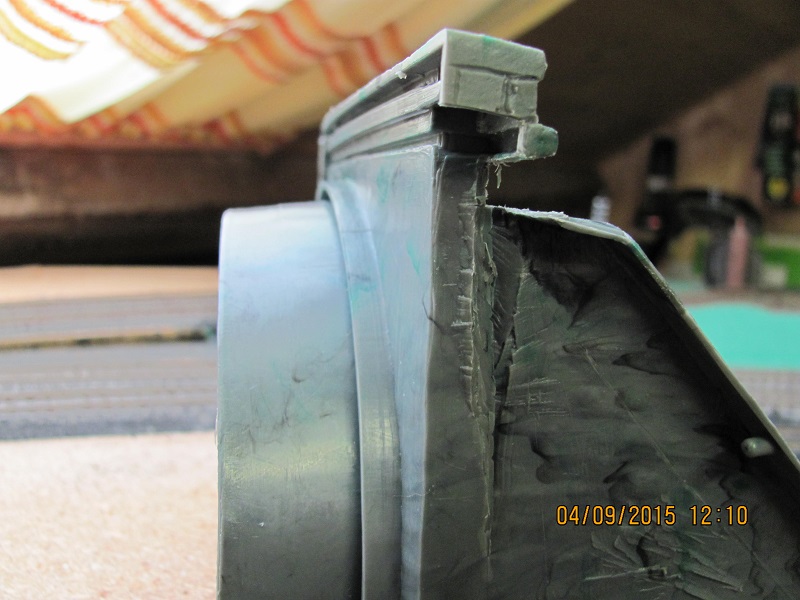
So I used a bolt to hold the two tunnel mouths together and more bolts to hold them to the baseboard


I have used sme Hard as Nails type glue at the join as well as the bolt - I tend to use that like sticky filler. With the two bolted together and the trimmed wall fitting snugly (sort of) under the other wall the whole thing can be attached to the baseboard with more bolts.

… that wayward centre wall was covered by some offcuts of Wills stone wall, capped by Plasticard, and the bolthead was also covered by plasticard, and then matching bits for each side.
The whole thing will eventually get the weathering treatment, but for now some dark grey paint on the new bits will have to do.

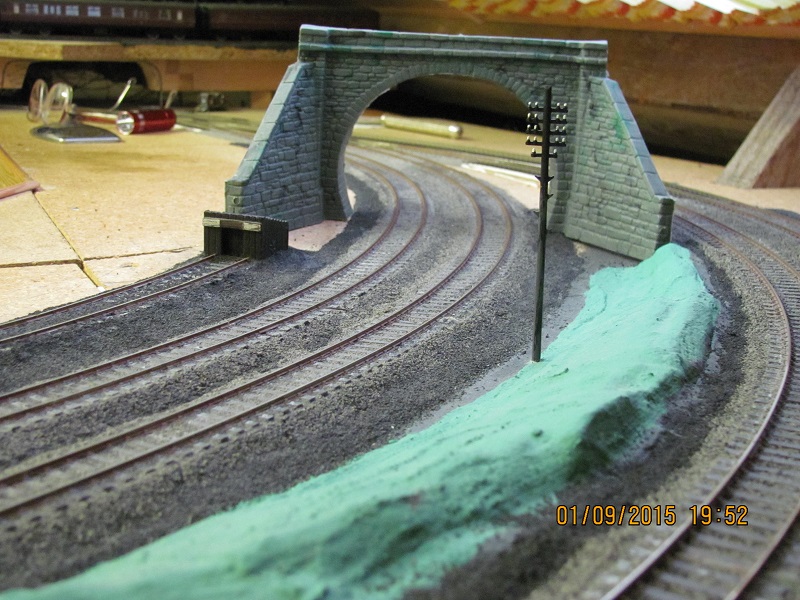
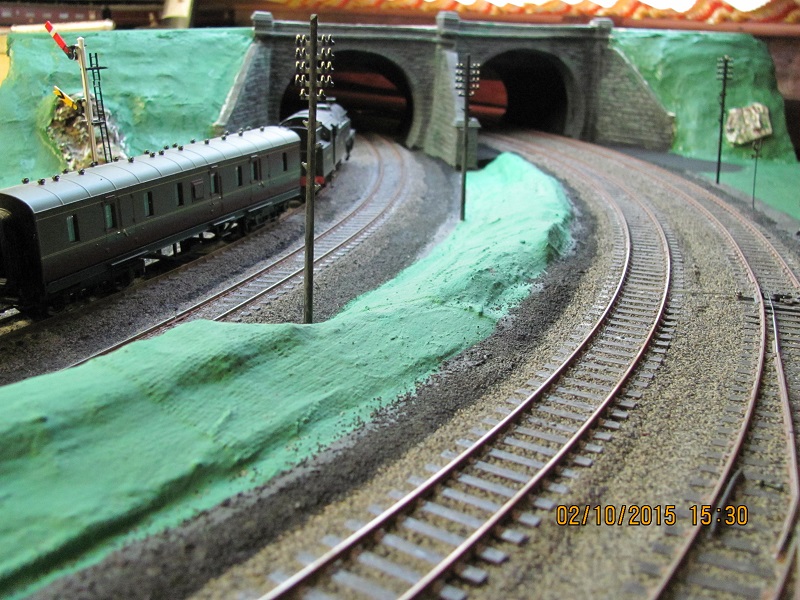
… you can see how the centre walls fit together in this view.
So now some more O level woodwork, to make the frame - 2x1 as usual, with 2x2 (very tiny) legs, all screwed together…
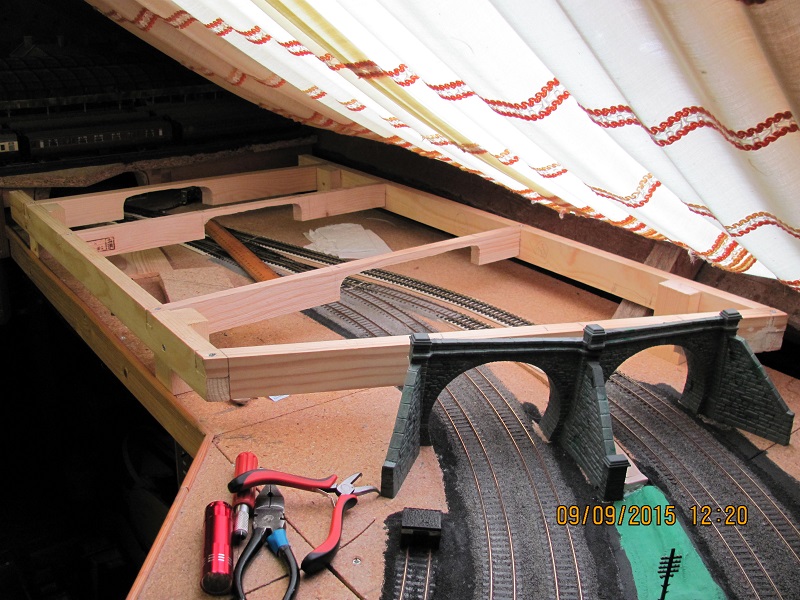
… and yes, I did forget the cutouts over the tracks when I first checked it for fit…. the middle spars are actually not quite 2x1… some odd timber I had in the shed. Then the baseboard, again building the thing out of girders, chipboard floorboard.
from track level it looks OK… can't believe I managed to do all this… and that signal is still fully operational!

and a side view shows the gradients involved
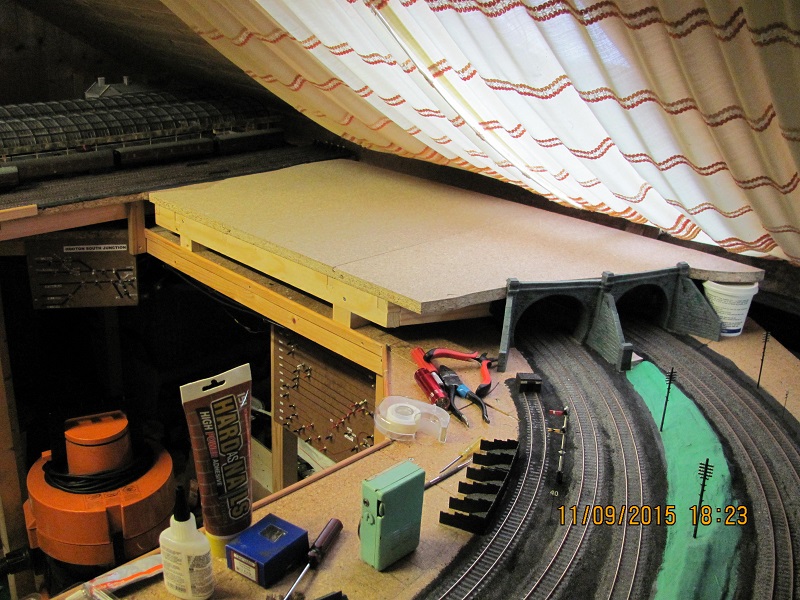
So now It is time to get out the polysytrene offcuts, old newspapers, and plaster bandage so that the sides of the tunnel mouths are finished off - I'll put some plastic film against the egde of the baseboard so that it remains unattached, so I can remove it when necessary.
On the topic of moving it… it it surprisingly… perhaps that should be unsurprisingly given the construction, heavy - and now I'm thinking of putting all the scenic detail on a thin sheet of ply.. so I just have to remove that when I need to get at the roof. I may have to do something with those curtains too, although that isn't my department, I'll have to check.
But I do think the layout looks better now, it was bothering me that soon after leaving Woodside all trains dive under… Woodside, at least now they disappear a bit before Woodside.
For now I'm going to try to finish this timetable.. it is 10.40pm on the layout so with everything shutting down by 1.00am I should have that done by Christmas (note no year specified)…. there again if I just finish off the sides of the tunnels it will look a lot better…….
Keith
Incidentally you may notice that transistor radio in one of the pictures… dates from around 1960… I was listening to Wales v Israel on it… still works!
Do I have a plan? Na, if I did I'd spend most of my time trying to remember where I put it.
Posted
Inactive Member
Does the cover lift off for maintenance?
Max
Port Elderley
Port Elderley
Posted
Full Member
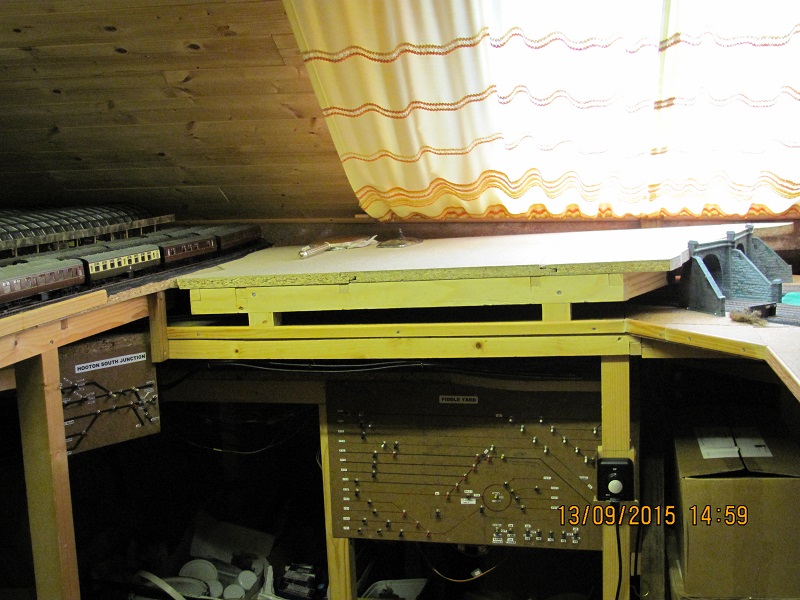
Yes, despite it being heavy, or very heavy, the new board can be removed.
Access is always a problem for layouts on several levels… must admit I haven't given it much thought - but the vast majority of the point motors are mounted under the baseboards… and with a couple of exceptions without another board below. I can get at most parts of the track…. but you can guarantee that the first point that fails will one which I can't easily get at. My insurance policy is that all sections are individually supported… and so I can in theory drop any board to gain access. In theory…..
Keith
Do I have a plan? Na, if I did I'd spend most of my time trying to remember where I put it.
Posted
Full Member
On the other scenic section, between the main line and the fiddle yard approach, I used polystyrene spars with with newspaper, so I thought I'd do the same again…. but with the limited space for the embankments, this was a non starter

… the bark will be used. Also I extended the top board, by adding a small traingular piece, so it matched the main board below, which would make things easier. So it was back to the standard method of layers of polystyrene. As I had to have the top board removable I fixed some clear film between the polystyrene and the top board, so that when the plastering started I would be left with a clean edge.

…the polystyrene will be finished off later. Just before I started this, the last train to arrive in Hooton was the 10.42pm to Chester… and here it waits…. and waits… amongst the mess.
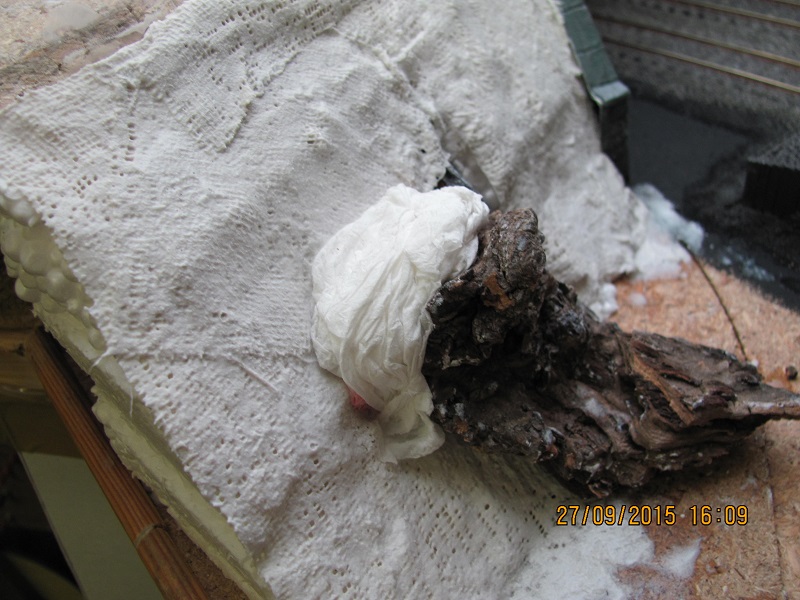
With the polystyrene roughened and the bark in place, it is time for the plaster bandage…
likewise the other side
Working with the plaster bandage is usually easy with two hands, but the location of the right hand embankment, under the roof, and a bit of a stretch, I had to do it one handed….not easy at all, the air was blue…
A bit of extra padding for the LHS to make the outcrop, after the first layer of bandage…
Then more bandage to finish it off, only one piece of barl used on the rhs.
and the signal still survives!
Finally, for now, my usual green undercoat treatment, for the plaster… I've also painted the bare baseboard next to the tunnels, which makes the whole thing look a bit more finished, even if it isn't.

…and finally the 10.42 can get away….and the signal survived.
I'll add tunnel nameboards, move a couple of telegraph poles and add a couple more… there's a signal box to go on the far right…. when I've built it (Ratio kit)…. but for now, it looks so much better than it did and so, as ever, that'll do.
Keith
Do I have a plan? Na, if I did I'd spend most of my time trying to remember where I put it.
Posted

Full Member
What's next?
cheers
Marty
Posted
Full Member
I'll settle with Hooton… but I may just try to get through to 1.00am with the timetable first… after all I did start this full run through, with freight, way back in December…er, 2013! - but I have done other stuff on the layout as well…. at least I've proved I can replicate the timetable, which is something of a surprise.
Not enough hours in the day… at least not enough allowed hours in the loft!
Cheers
Keith
…what you you do next?… apart from my second step for getting at the velux, I haven't forgotten that…
Do I have a plan? Na, if I did I'd spend most of my time trying to remember where I put it.
Posted
Full Member
Sounds like you have more than enough to keep you occupied. If it was me I would complete that second landing stage before the design of it goes out of your head.
Cheers
Marty
Posted
Full Member
Hwyl
Keith
Do I have a plan? Na, if I did I'd spend most of my time trying to remember where I put it.
Posted
Full Member
Here are a few of them, more in the gallery…. first Hooton from the South. Note the first room on the left has a brighter light than the others - it is supposed to be the staff/porters' room, that traditionally had a fluorescent tube, so I've wired that gow bulb direct to the 12v supply, the other interior lights are in series in groups of three or two (island, footbridge and main building) which gives a yellower light.
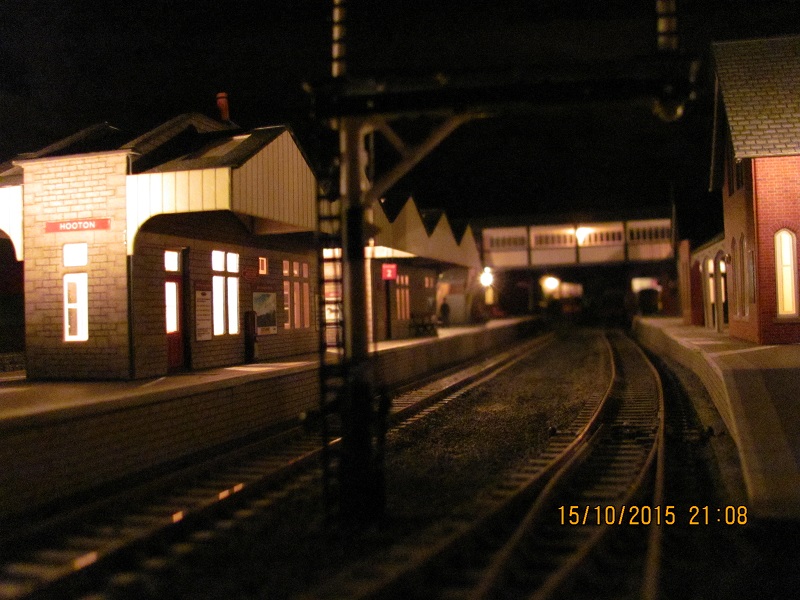
now the north end, handy there's enough light to see the signal!
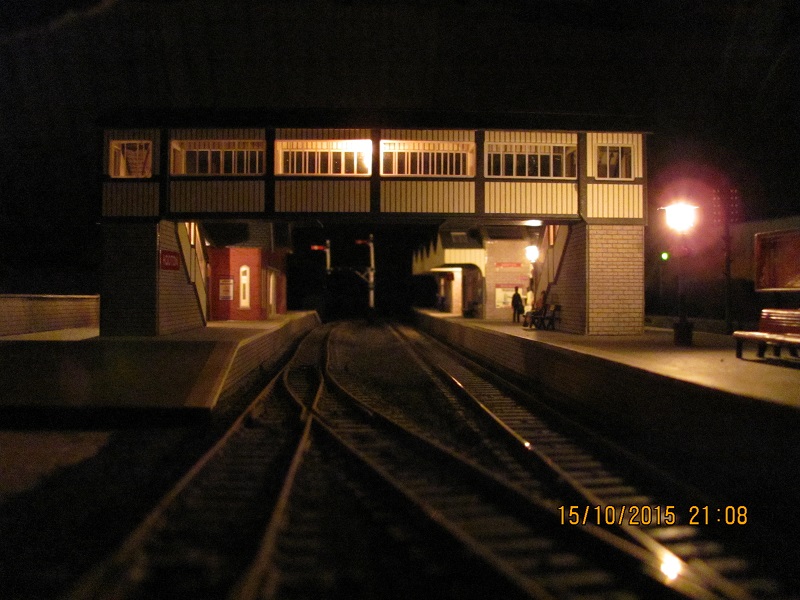
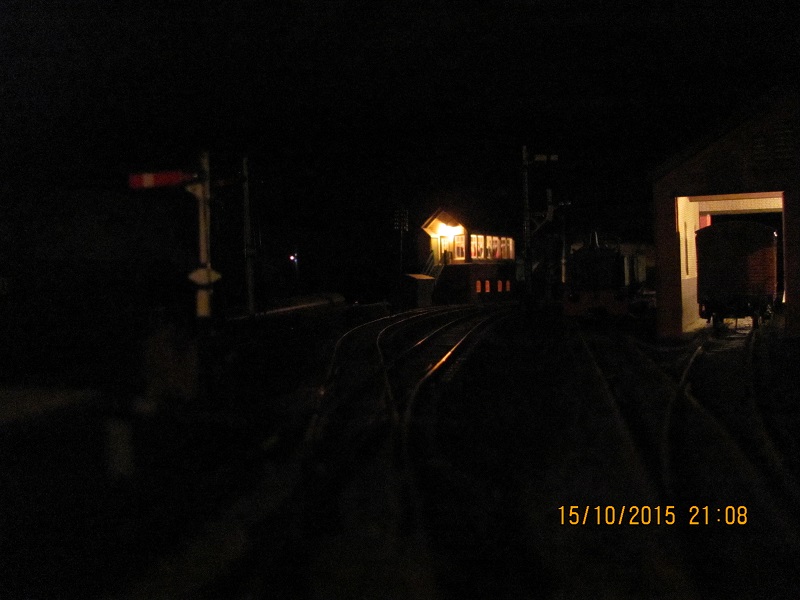
and finally the signal box and the goods shed in the gloom beyond the station. Obviously as it is late the signalman is doing a quick bit of maintenance downstairs.
… I think a yard lamp outside the goods shed is called for…
Finally an action shot, as a class 5 rumbles through with a heavy freight bound for the midlands.
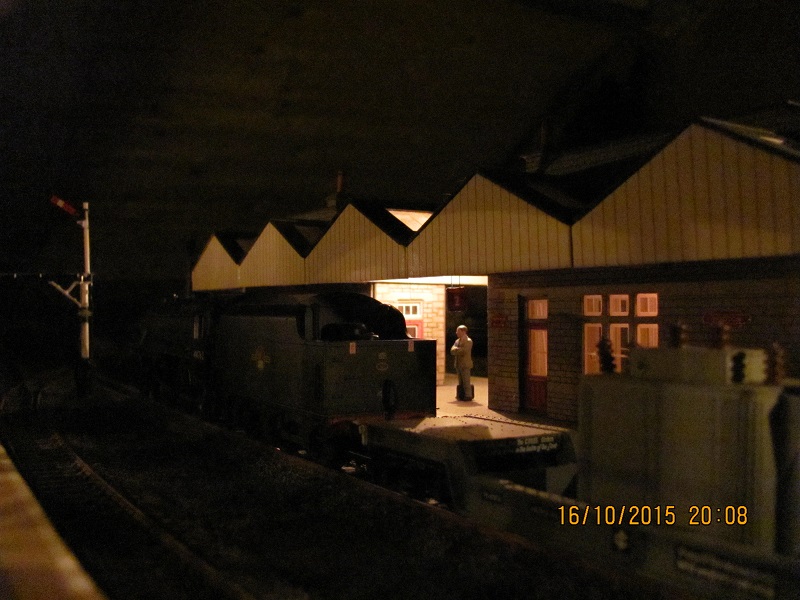
The idea with all the lighting on the layout is to allow it to be operated "at night"…. which is fine, except I've not yet illuminated the control panels… another job to add to the list.
Doesn't look too bad this, may leave the weathering of the buildngs for now and just get the boards around the station finished… fencing, bits of greenery etc. That would give me a section of the layout between the four tunnels at Hooton and the main line approach to Birkenhead looking something like finished… if I get on with the static grass and shrubbery as well. Never used static grass before, I'm from the flock era, any tips on making a success, at least not a mess, of it?
Keith
Do I have a plan? Na, if I did I'd spend most of my time trying to remember where I put it.
Posted
Full Member
All you need is a gow bulb, some sleeving and a small piece of hardboard or similar :

…this is a 6V bulb, the white sleeve was already fitted, the black sleeving is just taken from some old 2.5mm tc&e mains cable. Drill three 2mm holes in the hardboard, one for the wires, two for fixing. Cut the sleeving to the required height of the bulb plus the thickness of the baseboard and assemble :

Drill a hole in the baseboard just big enough to allow the bulb and sleeving to pass through, 4mm in this case, and then push the bulb/sleeve through the hole

Finally fix the hardboard to the underside of the baseboard

..and that's it. I've put three of these 6v lights in series to a 12v supply, don't want it too bright.

I did tell the camera to focus on the light, I couldn't really see anything, but you get the idea. I tend to wire up lights like this with connectors, then replacement when required only takes a couple of minutes.
Like I say I'm sure this isn't new, but just in case you're looking to illuminate some low level boards, this is an easy way to do it.
Finally I took this picture of my workbench, otherwise known as the floor, immediately after I'd finished… I was working in the clear space top left…. planning just never enters my head…
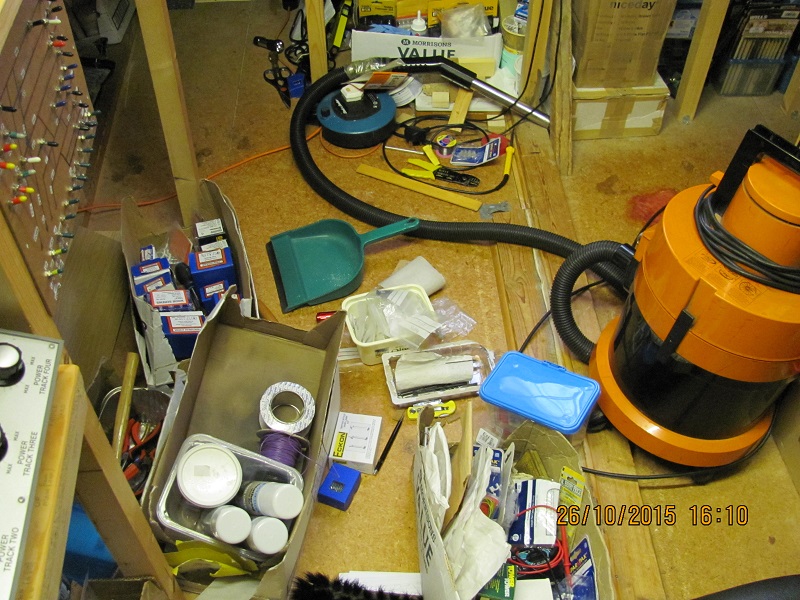
Dear oh dear!… too old to change now though…
Keith
Do I have a plan? Na, if I did I'd spend most of my time trying to remember where I put it.
Posted

Legacy Member
Have to agree with a point you made early in the thread that there is never enough time to do everything when you've retired… I seem to want about 36 hours a day. My good lady tells me that it is nothing to do with not having enough hours in a day its more about how much we can get done in an hour that matters - some strange logic in there somewhere - I think, but I still don't have enough of whatever it is I'm short of.
I've been confined to garden and house type jobs since April with the promise that I will be allowed to return to my 'man cave' in the loft come the end of Summer/beginning of Winter, well I reckon that's just about now, so my summer plans for a revamped control box were started today.
Suppose I really ought to start a layout thread of my own….MMmm… I'll give it a bit of thought in my spare time.. if ever I get any…..
 Last edit: by 16A
Mike
Praise is an excellent fillip for waning ambition.
Praise is an excellent fillip for waning ambition.
Posted
Full Member
Many thanks for the positive comments….. you seem to have the same problem many of us have….during the summer, so I'm reliably informed, the railway is a winter thing… lots more pressing jobs to do outside in the nice weather. Which is fine, until the nice weather is over, winter is on its way…. and suddenly there's a list of indoor jobs to do… sometimes get the feeling I'm being conned!
Busy day yesterday, our septic tank was kind of "cooked" as they say, fortunately Barry the tankman came to the rescue and emptied it… turns out the last visit was over ten years back (the lack of planning extends to septic tank emptying it would appear). Anyway I have a new system now… we will ring Barry to empty the tank when there's a General Election year… my thinking is replacing one lot of old effluent with a new lot of effluent. Sounds better with the four letter word beginning with "s", but I'm too respectable for that.
News of a special in Birkenhead next week, our part-time neighbours are up next week (they're renovating a house down the road) and Paul, another enthusiast - isn't that handy - has just taken delivery of his P2… so the clocks at Woodside are being rapidly turned back!
Notice there's a new thread started… must take a look, still getting used to the forum, when I have time…, think I should be more involved.
Keith
Do I have a plan? Na, if I did I'd spend most of my time trying to remember where I put it.
1 guest and 0 members have just viewed this.