New Life For Old Wagons
Posted

Inactive Member
Weathering basic plastic no frills old Hornby wagons
OK Andy,Give me a couple of days……it`s late here now and tomorrow is tied up all day.
:cheers Gormo
"Anyone who claims to have never made a mistake, never made anything!!"
https://sites.google.com/site/greatchesterfordmodelrailway/home
https://sites.google.com/site/greatchesterfordmodelrailway/home

Posted
Inactive Member
As per a request from Andy re more detail on making a buffer from a flat head nail.
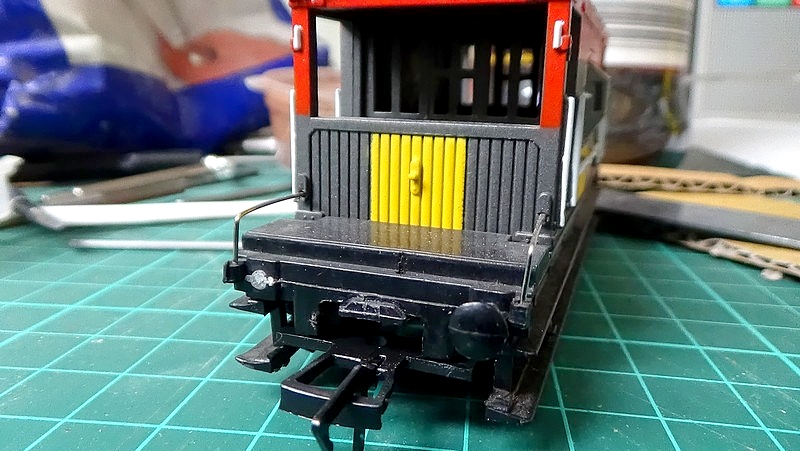
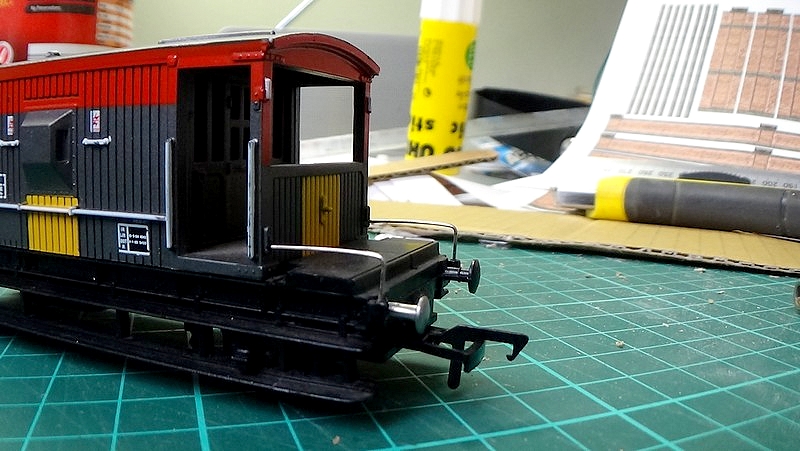
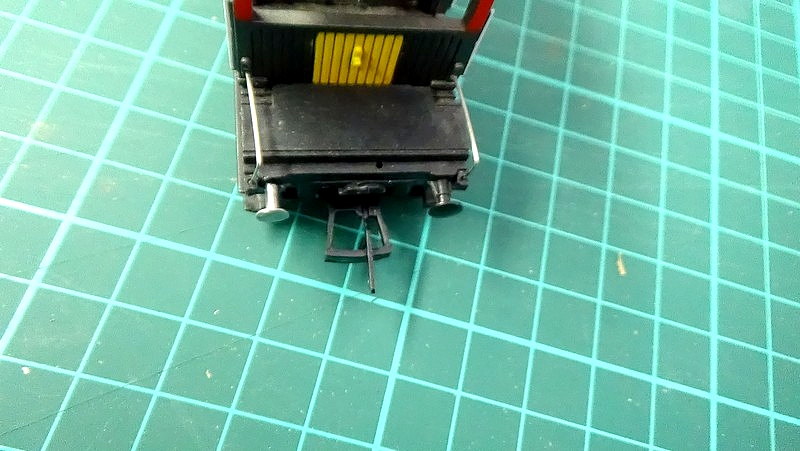
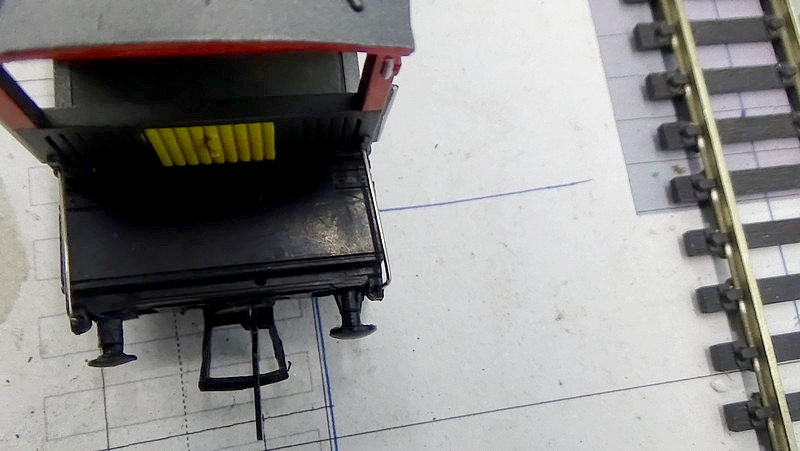
Well the only rolling stock I have at the moment that needs a new buffer is this brake van below. I got it cheap as is and it was intended to be a project of some sort…???
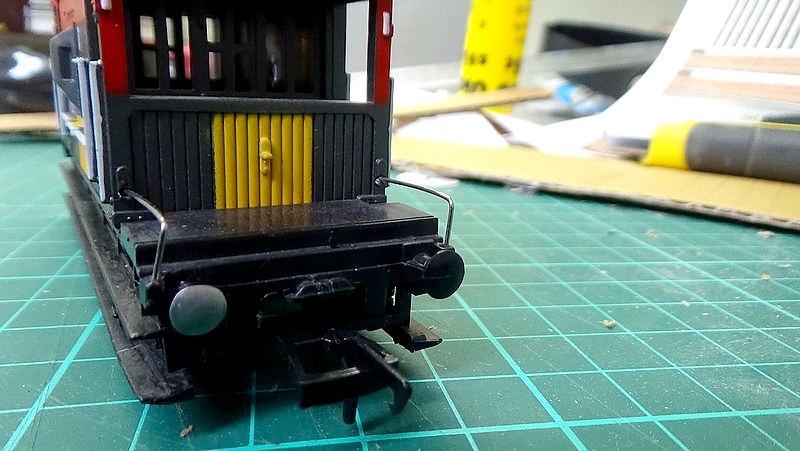
As you can see…it needs a buffer.
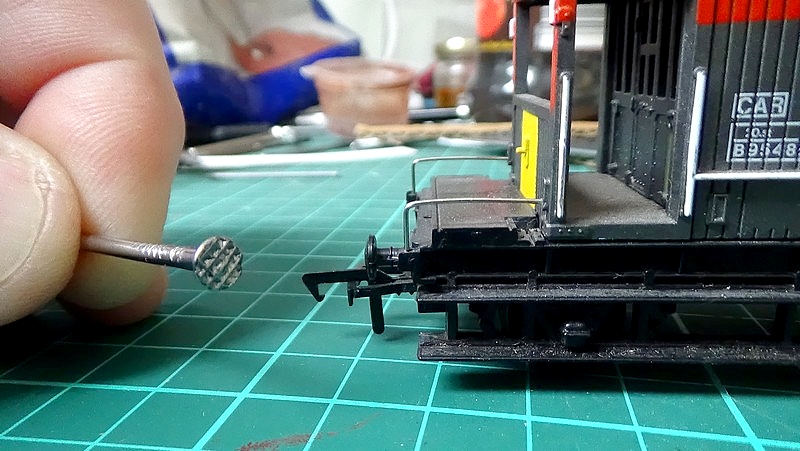
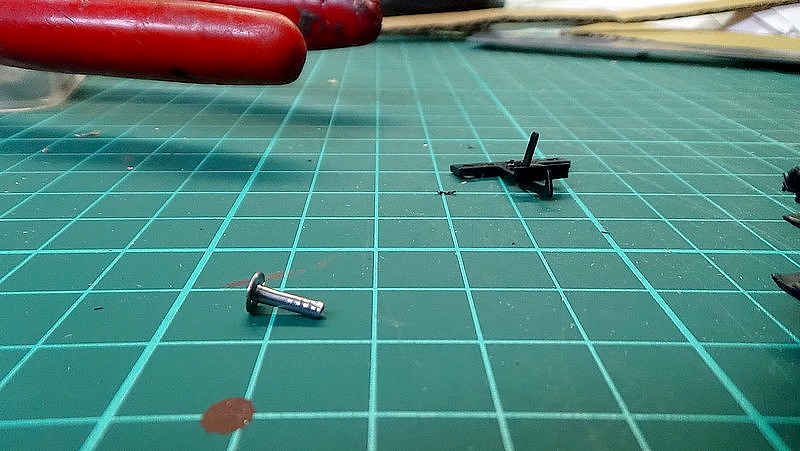
The first step is to find a flat head nail with the appropriate size head or as near as possible.
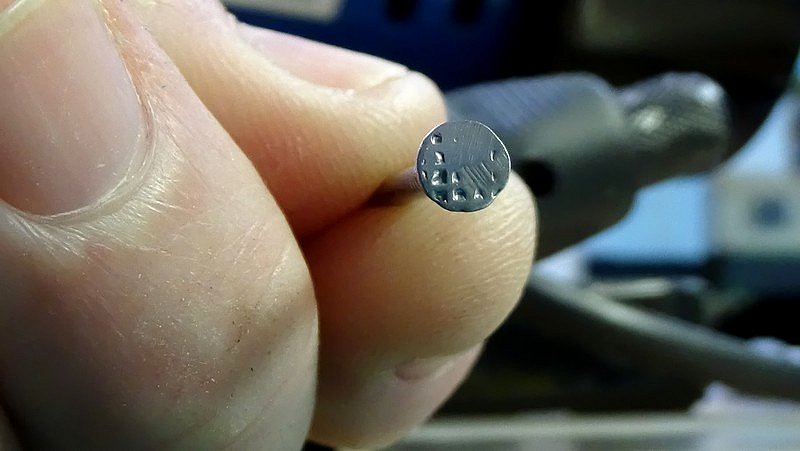
The next step is to prepare the head to accept solder. The head has to be filed or grinded by what ever method you have available. If you use a file it`s best to clamp the nail into a vice. If using power equipment, make sure you read and understand all the safety requirements and use safety glasses.

What you need to achieve is a clean, flat surface that will be a good key for the solder.
The next stage is to let your soldering iron heat up completely. You can`t attempt this with a luke warm iron. The nail needs to be pre-heated before bringing solder to it…..more of that below.
Now you need to be able to secure the nail in an upright position either in a vice or clamp of some description. I use some helping hands which in turn are secured in a portable vice. Doesn`t matter what you use as long as the nail is held securely.
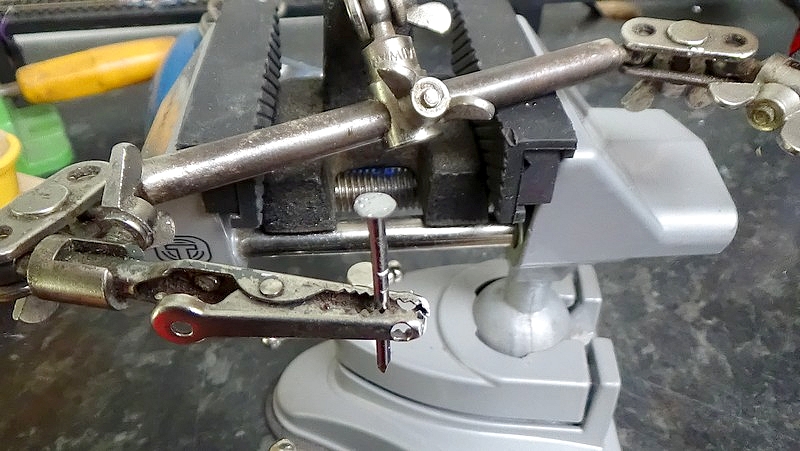
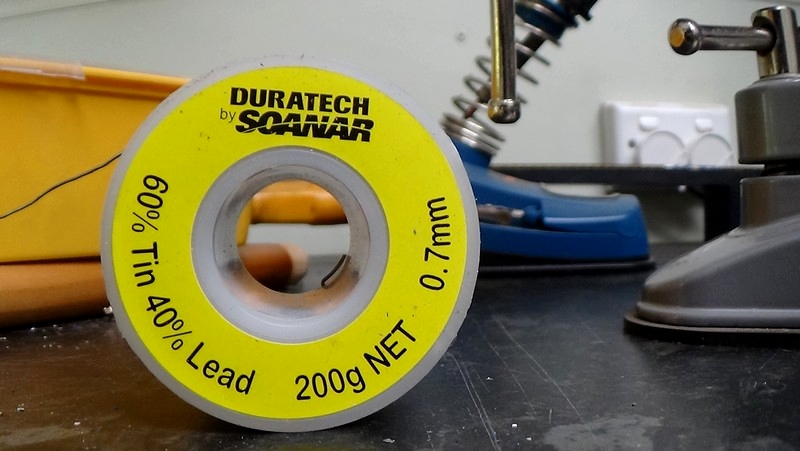
I have an old 40 Watt soldering iron and I use 60/40 tin/lead solder.
Now the method is shown in a video below. I basically heat the nail head for about ten seconds and then I bring the solder to the nail as you will see below.
https://www.youtube.com/watch?v=TDMZUeuy1T8
http://www.youtube.com/v/TDMZUeuy1T8?version=3
If you continue adding solder, using the above method, you can finish up with almost a half sphere shape on the nail head. So the trick is to add a small amount to start with, you can always build it up if you need to just by repeating the process. Practice makes perfect and nails are cheap.
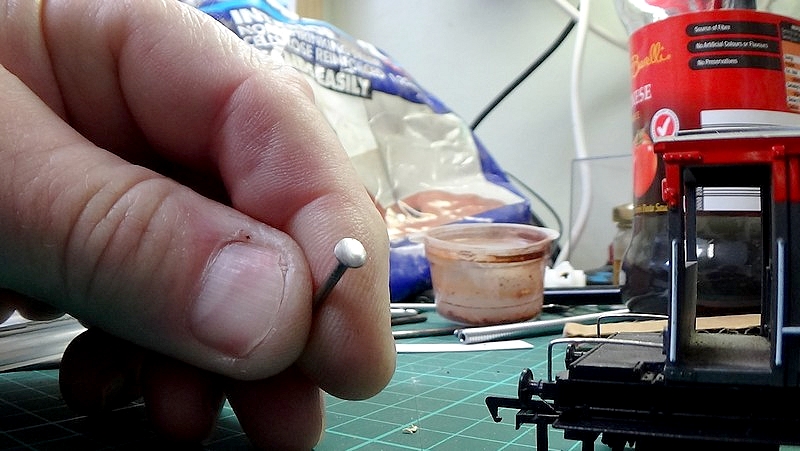
Now I like to clean up the new rounded head with either fine Wet & Dry paper or on my bench grinder which has a buffing attachment. Whatever you have is fine. I imagine steel wool would work? You just need to get the silver shine off the solder and create a good key for painting.
You can see now the head has a dull finish and the profile is pretty good.

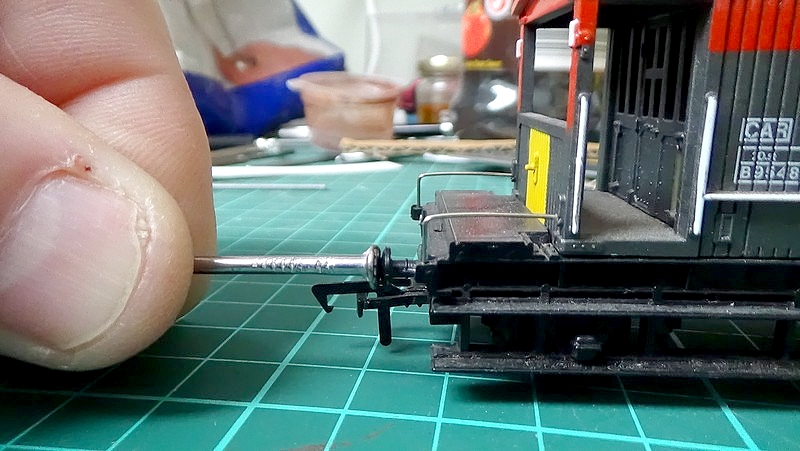
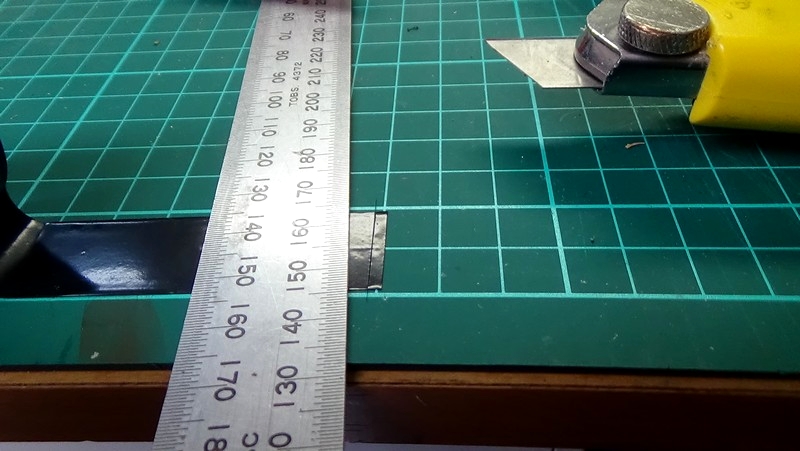
The next stage now is to drill a hole in the buffer beam that will accept the nail shaft. I would suggest testing on some scrap first before actually drilling the wagon, just to make sure all is good.
Then the nail shaft has to be trimmed to suit the site, allowing enough shaft to enter the buffer beam for a snug fit.
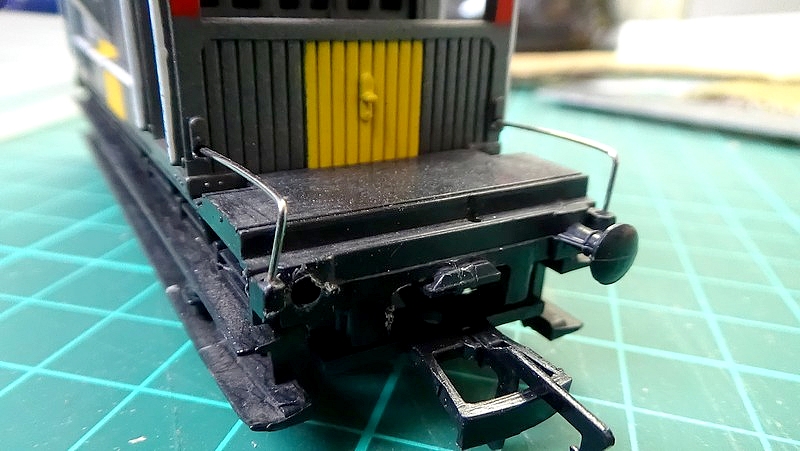
Once you`re happy with the fit and length etc…..Superglue the buffer in place. Check the horizontal and vertical planes for alignment and adjust quickly before the glue sets.
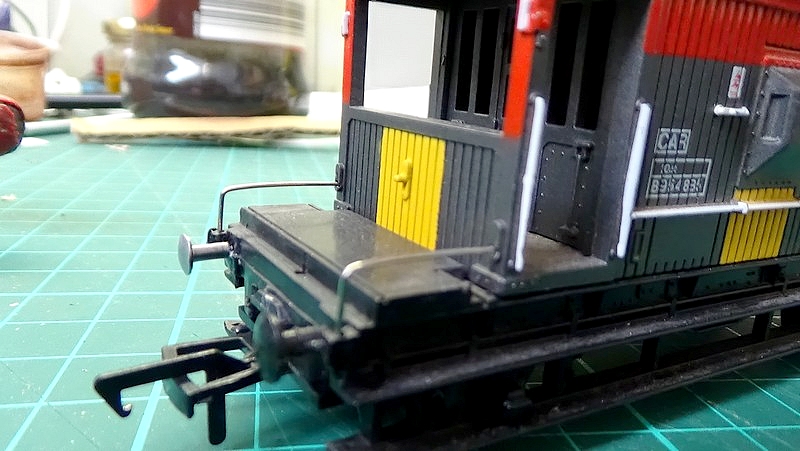
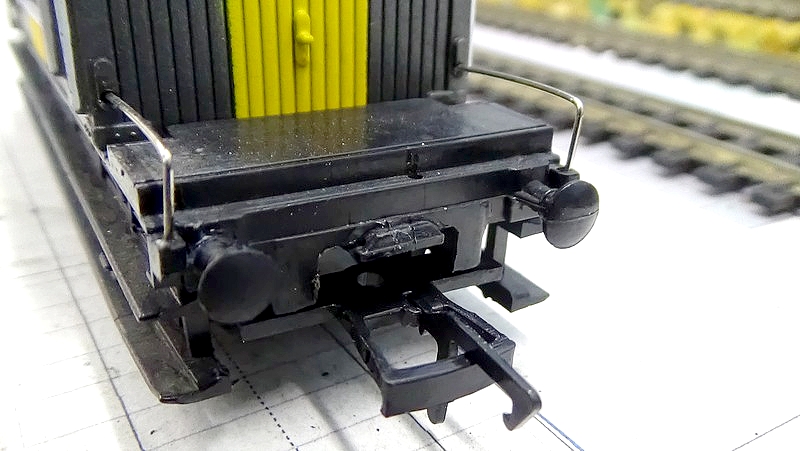
For this repair on this wagon I think the buffer would look better with a collar near the buffer beam.
So I used a thin strip of black electrical tape.
The electrical tape strip was the wrapped around the nail shaft next to the buffer beam and secured with a drop of Superglue just in case.
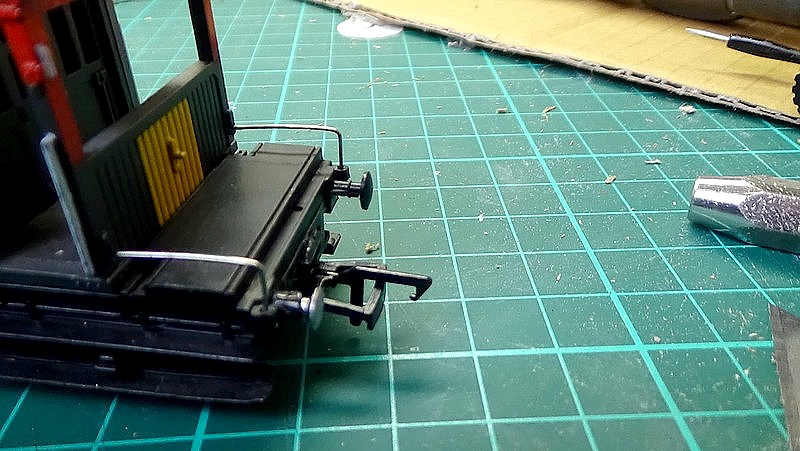
The next step was to use what I call the great equalizer or hider of mistakes…….Matt Black paint!!!
Yes folks….paint the buffer to match it`s neighbours and in effect blend it in.
So here it is using the three foot rule…..it`s the one nearest to us.
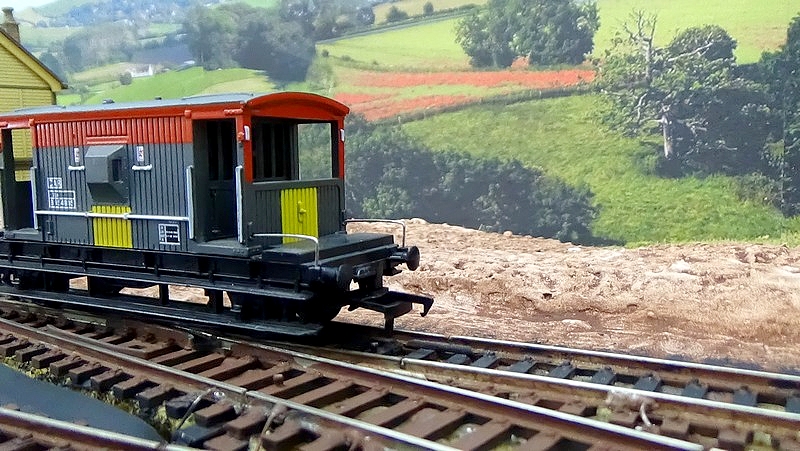
And from above…..you can see it`s not a perfect match….but really that`s my fault. I could have done a better job on the collar.
And to finish off.
So folks…I hope that makes sense.
I am happy to answer any queeries……feel free to fire away!!!
:cheers Gormo
"Anyone who claims to have never made a mistake, never made anything!!"
https://sites.google.com/site/greatchesterfordmodelrailway/home
https://sites.google.com/site/greatchesterfordmodelrailway/home
Posted

Full Member
Great stuff.
:doublethumb
Cheers
Andy
Andy
Posted
Inactive Member
Yes I`m sure the collar could be improved by your suggestion. The buffer I repaired on Smokey Joe however had the collar left intact, so it was just a matter of drilling out the collar to receive the nail.
I guess each repair will be slightly different. I agree with your idea of creating at least two buffers at one end…..it would be more consistent.
Mind you, once these repairs are painted up, they are very hard to pick. Macro photography shows all the flaws unfortunately, however if we use the three foot rule the repairs look fine..

:cheers Gormo
"Anyone who claims to have never made a mistake, never made anything!!"
https://sites.google.com/site/greatchesterfordmodelrailway/home
https://sites.google.com/site/greatchesterfordmodelrailway/home
Posted
Guest user
A good solution to a common breakage. I think I could even follow that. As you say, the three foot rule would be good enough for me as well. Anybody that lowers their head for closer inspection gets slapped around the napper with a bit of flexi track.;-)
Cheers
Toto
Posted
Inactive Member
G`day Toto…….I think that is a good way to deal with prying eyes…..I`ll keep that in mind.
:cheers Gormo
"Anyone who claims to have never made a mistake, never made anything!!"
https://sites.google.com/site/greatchesterfordmodelrailway/home
https://sites.google.com/site/greatchesterfordmodelrailway/home
Posted
Inactive Member
:cheers Gormo
"Anyone who claims to have never made a mistake, never made anything!!"
https://sites.google.com/site/greatchesterfordmodelrailway/home
https://sites.google.com/site/greatchesterfordmodelrailway/home
Posted

Site staff
Regards
Alan
Born beside the mighty GWR.
Alan
Born beside the mighty GWR.
Posted
Full Member
Thank's for showing us
REgards…Alan
Posted
Inactive Member
I agree….do the two of them.
Normally I would take a more thorough approach, however I don`t have a lot of love for this wagon, and it really was a quick fix just for the purpose of the demo….so there you are.??…that`s my story and I`m sticking to it.!!!
It shows the possibilities though if more time and care is taken.:hmm
:cheers Gormo
"Anyone who claims to have never made a mistake, never made anything!!"
https://sites.google.com/site/greatchesterfordmodelrailway/home
https://sites.google.com/site/greatchesterfordmodelrailway/home
1 guest and 0 members have just viewed this.