New Life For Old Wagons
Posted

Inactive Member
Weathering basic plastic no frills old Hornby wagons
Great tips Nigel.Your methods must achieve an extremely high level of realism.
:cheers Gormo
"Anyone who claims to have never made a mistake, never made anything!!"
https://sites.google.com/site/greatchesterfordmodelrailway/home
https://sites.google.com/site/greatchesterfordmodelrailway/home

Posted

Full Member
Thanks, but I'm an average modeler. I belong to the 3 foot society (as in "if it looks good from 3 feet I'ts good enough for me…", which corresponds to about 75 yards in 12" to the foot). I try and keep my weathering minimalistic (hence the choice of weathering powders as the medium), and check photo's before starting. Heavy weathering, rust, limescale, etc. was not the norm except for some very specific periods (late WW-1, WW-2, 1945-post nationalization, steam/diesel transition). Some examples I have show a rake of dumb-buffered pre-RCH mineral wagons at an iron ore mine in 1908 where the name of the owner is barely discernible through the coat of dust, and an assortment of PO mineral wagons in the early 1930's at the same location that are spotlessly clean or that have just a fine coat of track dust. Exactly the opposite of what would be expected. Labor was cheap pre-WW-1, economically impossible for most of the 1930's.
One thing to keep in mind was that PO wagons were requisitioned by the government during WW-2, bought at a fixed price and never returned to their owners. The MOT dictated the building of steel sided 16 ton wagons during the war (some 50,000 wagons according to the online cyclopedia). Running wooden RCH PO wagons in a 1950's freight would be anachronistic if adhering to the prototype. A coat of grey paint and a P (wood) or B (steel) number was the norm. Very few PO wagons were built post-1945 and even less post 1948. Another point is that steel sided mineral wagons were being built in the 1930's, including some 20 ton, 8 wheel (2 trucks) models.
Heavily weathered, rusty, lime-scale caked steam engines were found during the last years of the steam/diesel transition (1958-1962), as maintenance/cleaning was banned by management. Many pictures of clean and shiny engines from this period are misleading. Enthusiasts would descend on an engine shed at night, clean an engine (paraffin and rags), and then take photo's of the engine heading a train the next day. Old "Big-4" passenger and freight cars were also neglected and dirty as new BR stock arrived. There is a marvelous photo on FlickR of an ex-GWR Toad on the Fairford branch (Oxford to Fairford) in the early 1960s that is a real rust bucket.
RCH wooden coal wagons were not robust, and were often at their makers being repaired and repainted. Photo's from the 1930's show relatively clean wagons (even at the colliery) with the odd newly painted and even rarer filthy wagon in a rake. Add the usual mix of 5, 7 or 8 planked wagons and it becomes visually interesting. Really filthy wagons were to be found in industrial yards (collieries, iron and steel works, coke works) for internal working. They were often non-RCH designs that were not allowed outside of the site.
Nigel
 Last edit: by BCDR
©Nigel C. Phillips
Posted
Inactive Member
Your observations regarding detail are tremendous. I`ve been just taking a stab at weathering by comparison.
:hmm more research required me thinks?????
:cheers Gormo
"Anyone who claims to have never made a mistake, never made anything!!"
https://sites.google.com/site/greatchesterfordmodelrailway/home
https://sites.google.com/site/greatchesterfordmodelrailway/home
Posted
Inactive Member
I have recently been converting a crane and details of same can be found here.
http://yourmodelrailway.net/view_topic.php?id=13302&forum_id=150
The crane project actually blew out into a full break down train project and part of that project is converting an old wagon / coach into a Mess van.
I thought it may be better to cover the Mess van project here because it is literally, New Life for an Old Wagon.
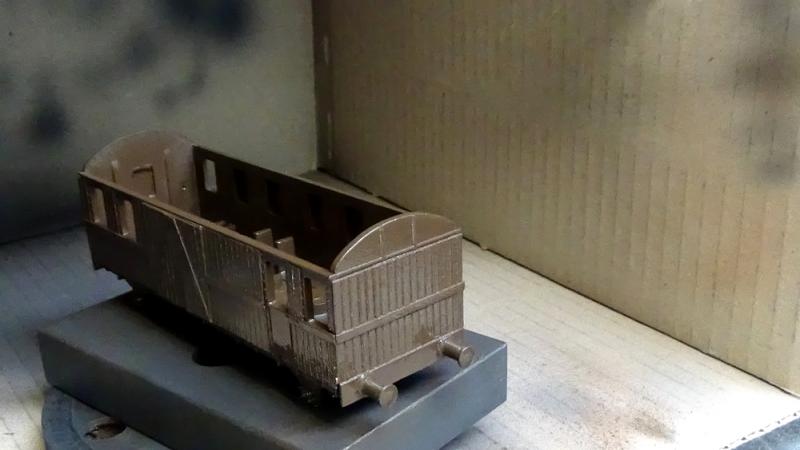
So here we go. The coach in question is this one shown below. An old Piko product that is free running however at the moment, not suitable for a British layout.
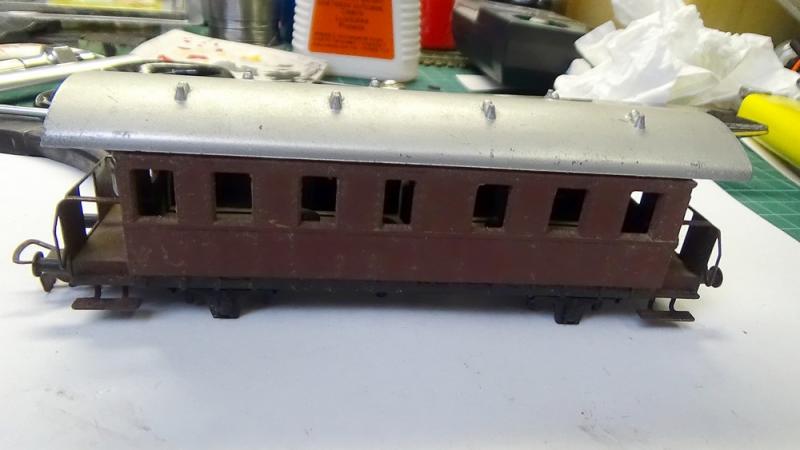
The task at hand requires removal of the end verandahs and steps, trimming the roof to suit the length of the coach, covering up some windows with timber panelling, timber panelling on the ends of the coach,creating side fitted sliding doors, fitting tension lock couplings ….etc. etc….So plenty to do to bring about a transformation.
First stage is to remove the metal ends and steps and save the buffers. There are plastic lugs/ rivets holding them in place.
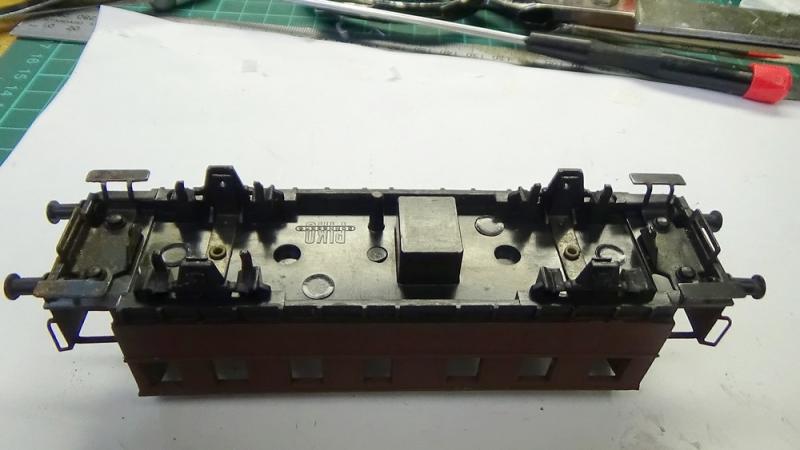
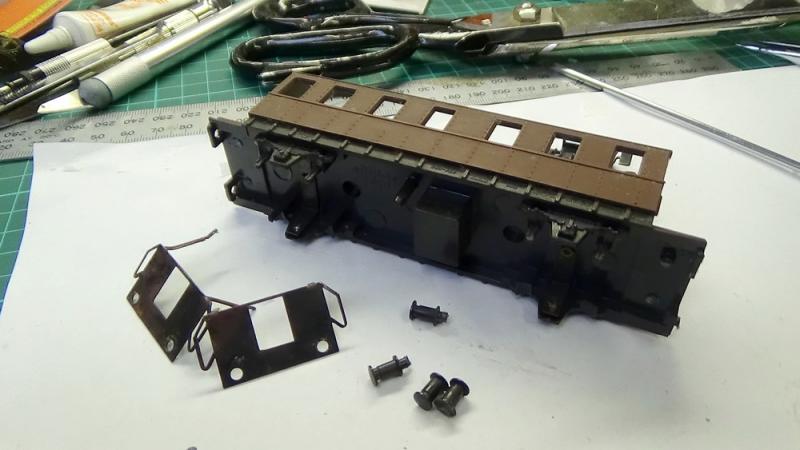
Next stage is to remove the plastic verandahs. I just butt them up to the face of the face plate sander and grind 98% of it away and then go more carefully with hand tools. I also need to work the back ends of the coach to remove any obstacles sticking up. I need a flat surface to stick on my panelling.

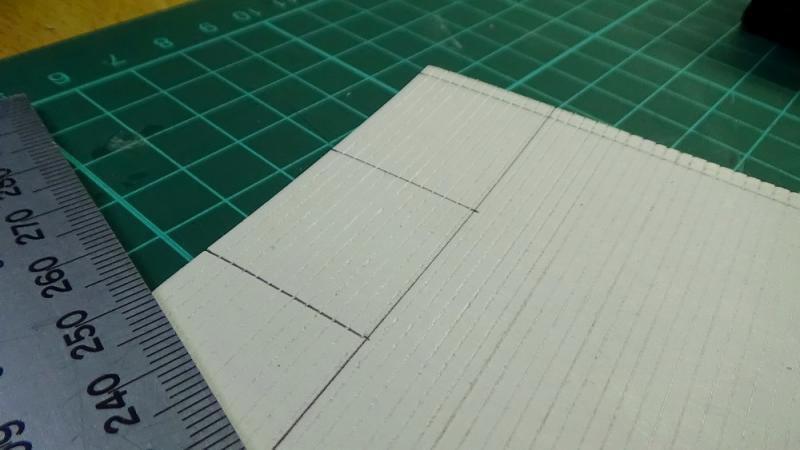
The panelling is made from greeting card, Christmas card actually, and is marked out and scored accordingly to achieve the timber look.
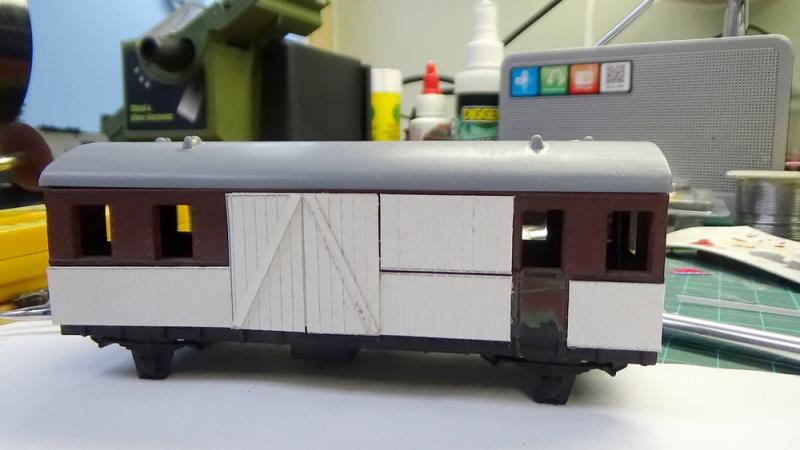
For the panelling to be fitted some of the rivet detail has to be removed to give a flat surface. I`m also relocating doors so here is a rough cut version below.

The roof has been cut down from an identical test coach and some of the roof vents have been removed also. The panels are being cut out an fixed into position. One set of sliding doors with bracing have been fitted.
Now the end panels are fitted
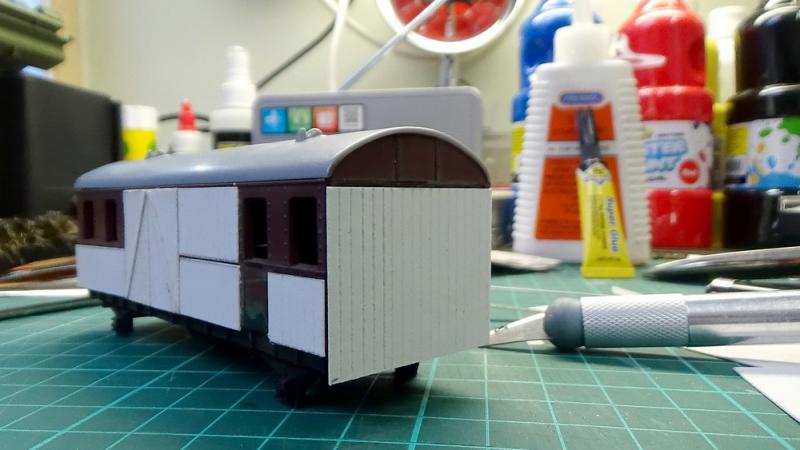

And a small panel next to the window in the door.

So that`s where we are at end of play today. This wagon certainly will have a lot of artistic licence, however from the prototype wagons I`ve seen, they are a mixture of stock that has been turned over to a new role or stock that has been converted for their new role of Mess van. So I`m not too worried about getting it exactly right, just a close resemblance will do. The fun of it is to create something unique with even a fabricated history to go with it.
More as it happens
:cheers Gormo
"Anyone who claims to have never made a mistake, never made anything!!"
https://sites.google.com/site/greatchesterfordmodelrailway/home
https://sites.google.com/site/greatchesterfordmodelrailway/home
Posted
Inactive Member
A little more was completed today. It`s starting to get cold out in the shed. Winter is on it`s way.
Well here`s this afternoon`s offering.
All the panels are on and some additional trim. The wagon has two different side profiles. Here is side A

And here is side B
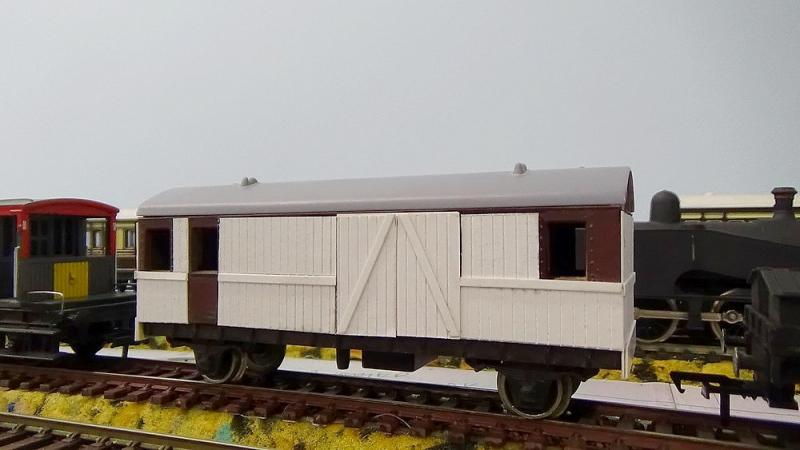
The idea here, as mentioned earlier, is that this is a modified coach turned over to special purpose. So therefore the lack of balance or symmetry.
A piece of card has been added to the bottom of the end walls for buffer mounting. That`s probably the next job.???

Here it is in it`s intended position in the break down train.

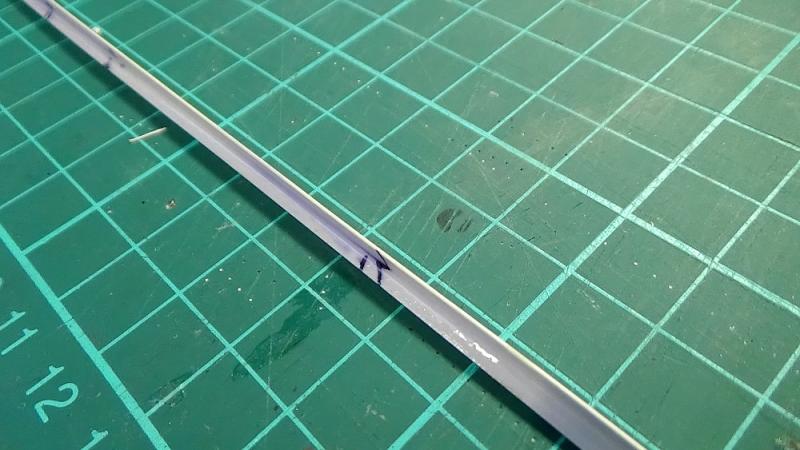
I also want to add what I would call a running board, not sure of the correct term.???? In other words, a full length step like you get on brake vans, mounted at axle height. I need some right angled material for this purpose, so I`ve used a method I discovered by accident some time ago when restoring a broken loco body. The method is to use card or paper, then let Super glue spread over the surface. The card or paper absorbs the Super Glue and then the card or paper dries like plastic.
I`ve tried a length of card, scored down it`s length and bent to shape. It`s drying at the moment, so we`ll see how it goes. You can see below it`s not dry yet.
I know this build looks a bit patchy at the moment, however when the wagon is painted all the one colour, I think it will look OK……probably a little rustic.??
More as it happens.
:cheers Gormo
"Anyone who claims to have never made a mistake, never made anything!!"
https://sites.google.com/site/greatchesterfordmodelrailway/home
https://sites.google.com/site/greatchesterfordmodelrailway/home
Posted
Inactive Member
The Super glue trick with the card to form an angle failed. I think one side ( shiny side ) of the card prevents the glue from penetrating the whole thickness……….result!!!!…..chuck it in the bin!!!
I will visit my local model shop and get some plastic angle.
:cheers Gormo
"Anyone who claims to have never made a mistake, never made anything!!"
https://sites.google.com/site/greatchesterfordmodelrailway/home
https://sites.google.com/site/greatchesterfordmodelrailway/home
Posted
Inactive Member
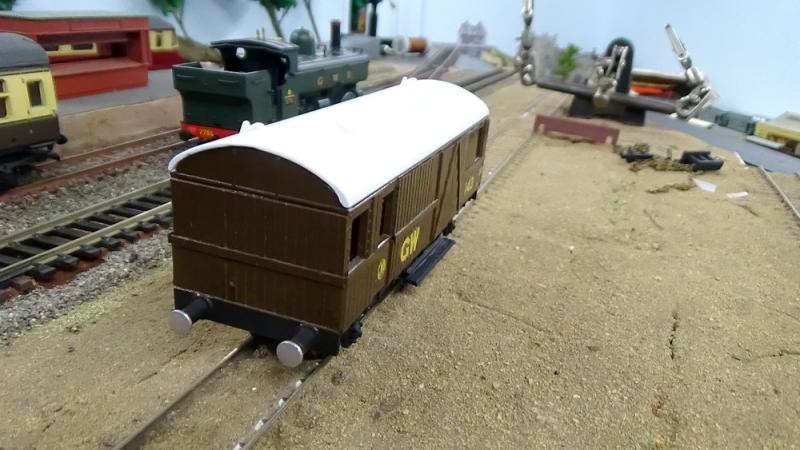
The next stage for the wagon is the spray booth. I`ve gone with GW Brown for this one.
Here are some pics of it still wet…….it`s good to see the end of the White look.
An end
The side with extra windows


And the side with fewer windows.

The under carriage will be painted Black. Handrails have to be made and fitted to the doors. I still have to get my plastic profiles to do the running board as mentioned in a previous post. The roof will be painted White.
Plenty to do, so more updates as it happens.
:cheers Gormo
"Anyone who claims to have never made a mistake, never made anything!!"
https://sites.google.com/site/greatchesterfordmodelrailway/home
https://sites.google.com/site/greatchesterfordmodelrailway/home
Posted
Full Member
REgards…Alan
Posted
Inactive Member
It`s coming along nicely so far……..fingers crossed. It will slowly come to life as the detail goes on.
:cheers Gormo
"Anyone who claims to have never made a mistake, never made anything!!"
https://sites.google.com/site/greatchesterfordmodelrailway/home
https://sites.google.com/site/greatchesterfordmodelrailway/home
Posted
Guest user
Cheers
Matt
Posted
Inactive Member
It`s interesting to see what can be done with one Christmas card…….that`s all that has been used.
Anyway…..here`s some more pics.
The roof has been painted, chassis and buffers as well, steps have been added and also transfers and the glazing has gone back in.
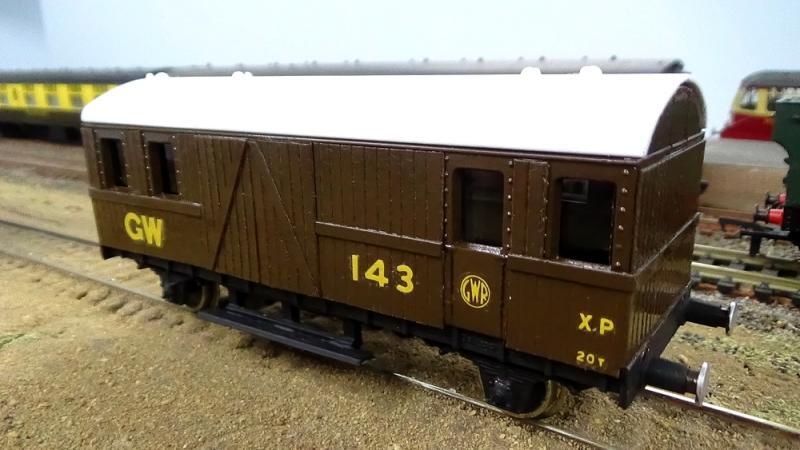
The opposite side
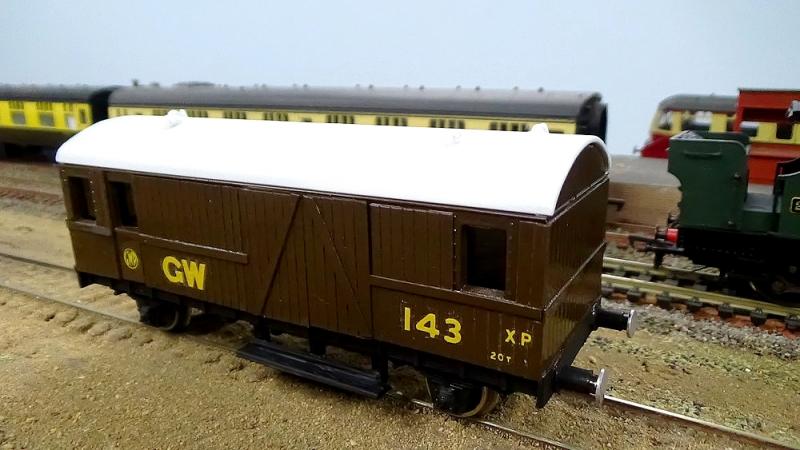
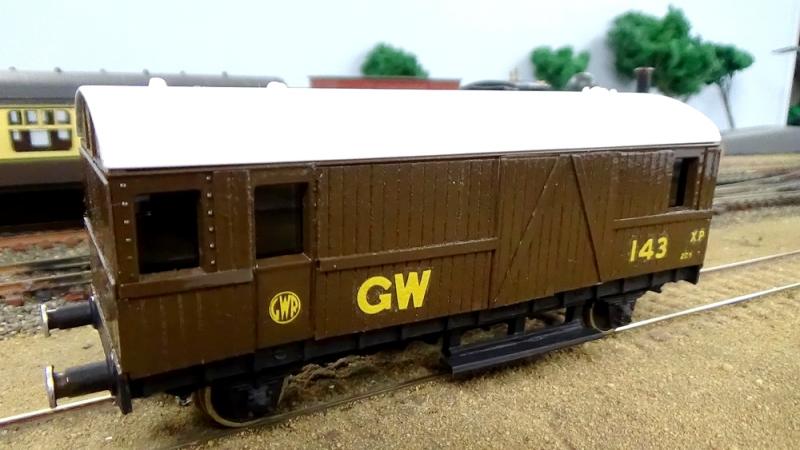
And an end.
Well folks……it just needs couplings added and some hand rails for the doors and of course it`s too clean!!!!……so some weathering to make it look used.
:cheers Gormo
"Anyone who claims to have never made a mistake, never made anything!!"
https://sites.google.com/site/greatchesterfordmodelrailway/home
https://sites.google.com/site/greatchesterfordmodelrailway/home
Posted

Site staff
How did you make the step in the end, did you have to buy plastic angle?
Ed
Posted
Inactive Member
You know me…..too tight to go out and buy something!!

I have some old Tyco incomplete building kits that were given to me by the same person who gave me the crane. They are American farm buildings and some houses. One of them is supposed to be a partially built house with timber framing exposed. I butchered the framing to act as supports for the steps and also there were some other parts resembling planks of wood which became the actual steps.
Once these items are painted to match, the eye is deceived into thinking they are original to the wagon.
( hopefully???? )
:cheers Gormo
"Anyone who claims to have never made a mistake, never made anything!!"
https://sites.google.com/site/greatchesterfordmodelrailway/home
https://sites.google.com/site/greatchesterfordmodelrailway/home
Posted
Site staff
Ed
Posted

Banned
Always nice to have a piece, (in your case, another piece) of rollingstock that is of your own doing, gracing the layout.
Cheers, Gary.
Posted
Full Member
REgards…Alan
Posted

Site staff
Who's he?Thats a very nice job Gorbo
Regards
Alan
Born beside the mighty GWR.
Alan
Born beside the mighty GWR.
Posted
Full Member

REgards…Alan
Posted
Inactive Member
I`ve got my converting eye on some other bits and pieces now, but it`s nothing definite yet. But yes Gary it is nice to have something you`ve created, as you would well know.
Thanks Alan ( Spurno ) No.1 Spell Checker:pathead…..that incident reminds me of my school days during the late 50`s and early 60`s. The Japanese were starting to release their monster movies, one of which was Gorgo….so my mates at school gave me a new nickname…..Gorgo.!!!
These days though, all we have to do is hit the wrong key on the keyboard, for some interesting combinations.
:cheers Gormo
Last edit: by gormo
"Anyone who claims to have never made a mistake, never made anything!!"
https://sites.google.com/site/greatchesterfordmodelrailway/home
https://sites.google.com/site/greatchesterfordmodelrailway/home
Posted
Guest user
1 guest and 0 members have just viewed this.